Have you ever wished you could control your lights from two different spots in a room? Adding a second light switch can make your daily routine easier and more convenient.
Whether it’s for a hallway, staircase, or large living area, having that extra switch can save you time and effort. You’ll discover simple, step-by-step instructions to help you add a second light switch safely and effectively. By the end, you’ll have the confidence to upgrade your home lighting without needing to call a professional.
Let’s get started and make your space work better for you!
Tools And Materials Needed
Adding a second light switch needs some tools and materials. Having the right items makes the job easier and safer. This section covers what you need to prepare before starting.
Basic Tools Checklist
You need a few basic tools for this task. A screwdriver set is essential for removing and installing switches. A voltage tester helps check if wires have power. Wire strippers cut and strip electrical wires neatly. A drill may be needed for new holes or mounting boxes. Pliers help bend and hold wires firmly. Tape measure ensures correct placement of the new switch. A flashlight is handy when working in dark areas.
Types Of Light Switches
Choose the right type of switch for your setup. A single-pole switch controls one light from one place. A three-way switch allows control from two locations. For adding a second switch, use a three-way switch. Know the difference to pick the correct one. This choice affects wiring and functionality.
Safety Gear Essentials
Safety gear protects you during electrical work. Insulated gloves prevent electric shocks. Safety goggles shield your eyes from debris. Wear long sleeves to avoid scratches. Use a dust mask if drilling into walls. Always turn off power at the circuit breaker before starting. Safety first keeps accidents away.

Credit: diy.stackexchange.com
Preparing For Installation
Preparing for installation is a key step before adding a second light switch. Careful preparation ensures safety and smooth work. Proper planning helps avoid mistakes and saves time.
Turning Off Power Safely
Start by turning off the power to the light switch circuit. Find the correct breaker in your electrical panel. Switch it off to cut the electricity. Use a voltage tester to double-check power is off. This step protects you from electric shock.
Locating Existing Wiring
Next, locate the wiring connected to the current light switch. Remove the switch cover plate gently. Look inside the switch box for wires. Identify the live, neutral, and ground wires. Mark the wires to avoid confusion later. Knowing wiring layout helps with a clean installation.
Planning Switch Placement
Choose the spot for the second switch carefully. It should be easy to reach and near the light it controls. Measure the height to match the first switch for a uniform look. Check for wall studs or obstacles behind the wall. Plan wiring paths to avoid drilling into pipes or cables.
Wiring Basics For Two Switches
Adding a second light switch lets you control one light from two places. This setup is common in hallways and large rooms. Understanding the wiring basics helps you install the switch safely and correctly.
Wiring two switches involves working with different wires and circuit types. Knowing how to identify wires and test for power is essential. This section explains the key steps to prepare for wiring two switches.
Understanding Circuit Types
There are two main circuit types for switches: single-pole and three-way. Single-pole controls one light from one place. Three-way lets you control one light from two switches. For a second switch, you need a three-way circuit. It uses special wiring to connect both switches to the light.
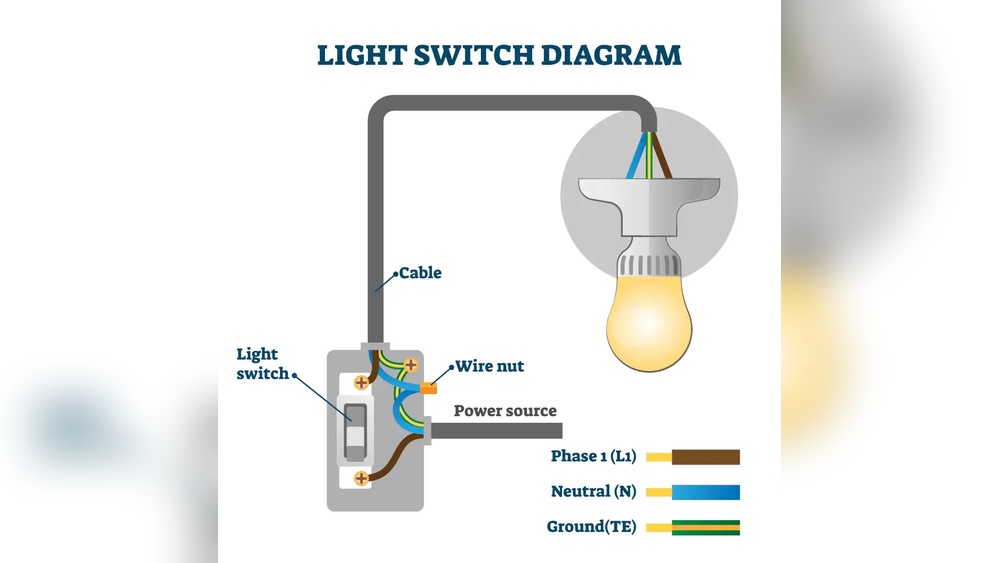
Identifying Wires
Wires come in different colors for a reason. Black or red wires are usually hot wires carrying electricity. White wires are neutral and complete the circuit. Green or bare wires are ground wires for safety. Identifying these wires helps you connect the switches properly. Mixing wires can cause short circuits or shocks.
Using A Voltage Tester
A voltage tester checks if wires have electricity. Before touching any wire, use the tester to be sure it is off. This prevents electric shocks and accidents. Touch the tester tip to each wire. If the tester lights up or beeps, the wire is live. Turn off the power at the breaker box before starting your work.

Credit: www.finehomebuilding.com
Step-by-step Installation
Adding a second light switch can improve your home’s lighting control. The process requires careful work but follows clear steps. This guide breaks down each part for easy understanding.
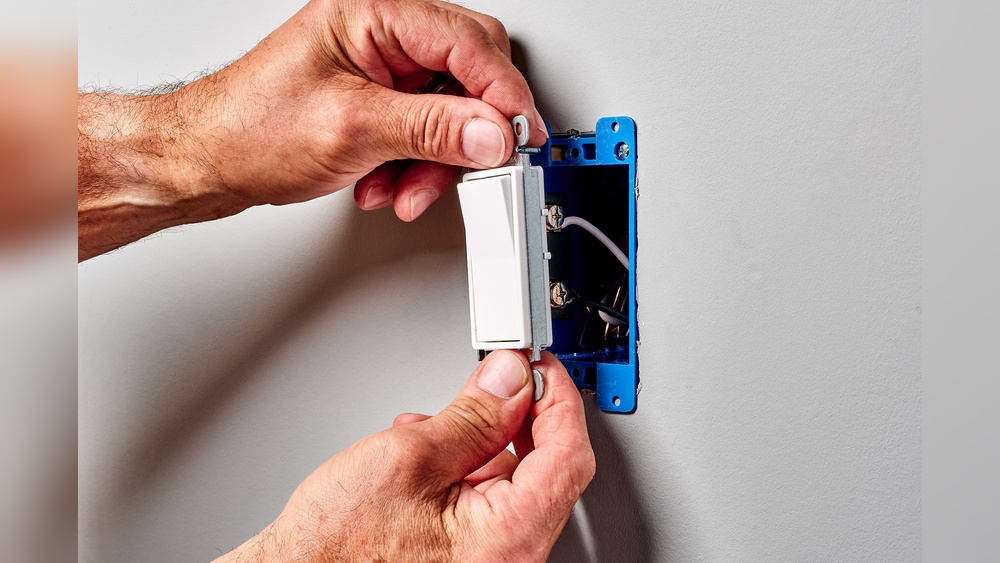
Removing The Old Switch
Start by turning off the power at the breaker. Use a voltage tester to confirm no electricity flows to the switch. Remove the switch cover plate with a screwdriver. Unscrew the old switch from the electrical box. Carefully pull out the switch to expose the wires. Note the wire positions for easier reconnection later.
Connecting The New Switch
Identify the common and traveler wires on your new switch. Attach the wires to the correct terminals. Usually, the common wire connects to the black screw. Traveler wires go to the brass screws. Tighten the screws firmly but avoid over-tightening. Double-check all connections to ensure safety and function.
Securing Wires And Switches
Push the wires gently back into the electrical box. Align the switch with the screw holes. Secure the switch with screws until it fits snugly. Attach the cover plate over the switch. Restore power from the breaker and test the new switch. Confirm both switches control the light as expected.
Testing The New Switch
Testing the new switch is an important step after installation. It ensures the switch works safely and controls the light as expected. This process includes restoring power, checking the switch’s function, and fixing common issues. Follow these steps to confirm your new switch operates correctly.
Restoring Power
Turn the circuit breaker back on to restore power. Make sure the power is on before testing the switch. Use a voltage tester to confirm electricity flows to the switch. Never touch wires if the power is still off. Safety first.
Checking Switch Functionality
Flip the new switch to see if the light turns on and off. Test the switch several times to confirm it responds properly. Check the original switch too, if it controls the same light. Both switches should work independently and together.
Troubleshooting Common Issues
If the light does not respond, check the wiring connections again. Loose wires often cause problems. Tighten any loose screws and make sure wires are secure. Confirm the switch model matches your wiring setup. Replace the switch if it seems faulty. Test the circuit breaker for faults if problems continue.

Credit: www.youtube.com
Tips For A Professional Finish
Finishing your project with care gives a neat and lasting look. Small details make a big difference. Follow these tips to keep your new light switch looking professional and working safely.
Mounting Switch Plates
Choose switch plates that fit well and match your room style. Align the plate with the switch carefully. Tighten screws just enough to hold the plate firmly. Avoid over-tightening. It can crack the plate or damage the wall. Clean the plate and surrounding area to remove dust or fingerprints.
Labeling Switches
Label switches to avoid confusion later. Use simple words or symbols. A small label under or next to the switch works well. Make sure the label is easy to read and does not cover the switch. This helps everyone in the home know which switch controls what.
Maintaining Safety Post-installation
Check all connections are tight and secure. Test the switch to see if it works correctly. Use a voltage tester to confirm no power leaks. Replace any damaged parts immediately. Keep the area around the switch dry and clean. This helps prevent accidents and keeps your home safe.
Frequently Asked Questions
How Do I Wire A Second Light Switch?
To wire a second light switch, first turn off the power. Connect the new switch to the existing switch using a three-wire cable. Ensure the traveler wires are properly connected. Finally, secure all connections and test the switches before restoring power.
What Tools Are Needed To Add A Second Switch?
You need a screwdriver, wire stripper, voltage tester, electrical tape, and a three-wire cable. A drill may be necessary for new holes. Always use insulated tools for safety while working with electrical wiring.
Can I Add A Second Switch Without Rewiring?
You can add a second switch using wireless or smart switch kits. These devices communicate without additional wiring. This option is easier and safer but may require a compatible hub or app.
Is It Safe To Add A Second Light Switch Myself?
Adding a second switch is safe if you follow electrical codes and turn off the power. Use proper tools and check connections carefully. When unsure, consult a licensed electrician to avoid hazards.
Conclusion
Adding a second light switch can improve convenience in your home. It allows you to control lights from two places. The process is simple if you follow safety steps. Always turn off power before starting any work. Use the right tools and check wiring carefully.
This small upgrade can make your space more functional. Take your time and double-check connections for safety. Enjoy better control over your lighting after installation. This project is doable for most with basic skills.