Are you struggling to hang something sturdy on your wall without worrying it will fall? Knowing how to put an anchor screw into the wall is a simple skill that can save you time and frustration.
Whether you want to hang a heavy picture, a shelf, or a mirror, using the right anchor screw makes all the difference. In this guide, you’ll learn exactly what tools you need and the easy steps to get it done right the first time.
Keep reading, and you’ll feel confident tackling your wall projects like a pro.
:max_bytes(150000):strip_icc()/how-to-use-and-discard-anchor-screws-1822671-Final-ec8091ccf65241b1b1f888549f25003a.jpg)
Credit: www.thespruce.com
Choosing The Right Anchor Screw
Choosing the right anchor screw is key to a strong hold. Using the wrong type can cause damage or weak support. This guide helps you pick the best anchor screw for your wall and project. Understanding the types and matching them to your wall material makes installation easier and safer.
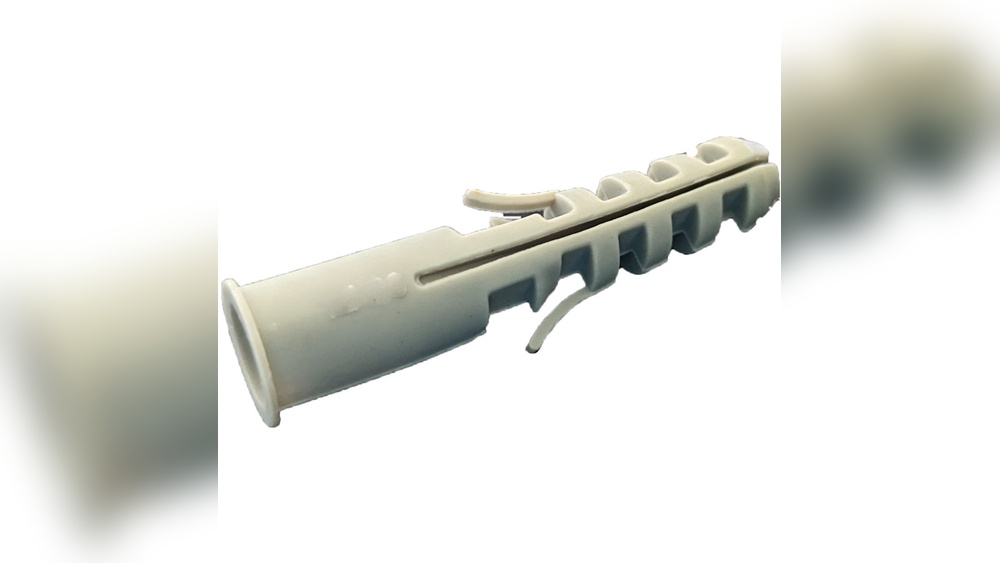
Types Of Anchor Screws
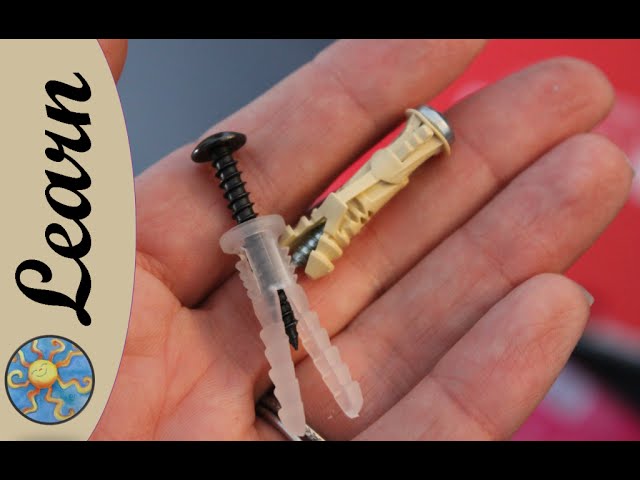
Anchor screws come in many types. Plastic expansion anchors expand as the screw goes in. They fit light loads and drywall. Metal anchors offer stronger support for heavy items. Sleeve anchors work well in brick or concrete. Toggle bolts open behind the wall for extra grip. Each type fits different needs and weight limits.
Matching Anchors To Wall Materials
Walls vary, so anchors must match. Drywall needs plastic or toggle anchors. Concrete and brick require sleeve or metal anchors. Wood walls often use wood screws without anchors. Using the right anchor stops cracks and holds weight safely. Check the wall type before buying anchors and screws.
Credit: www.youtube.com
Tools And Materials Needed
Before you start putting an anchor screw into the wall, gather the right tools and materials. Having everything ready makes the job smoother and safer. It also helps you avoid mistakes that can damage your walls.
Essential Tools
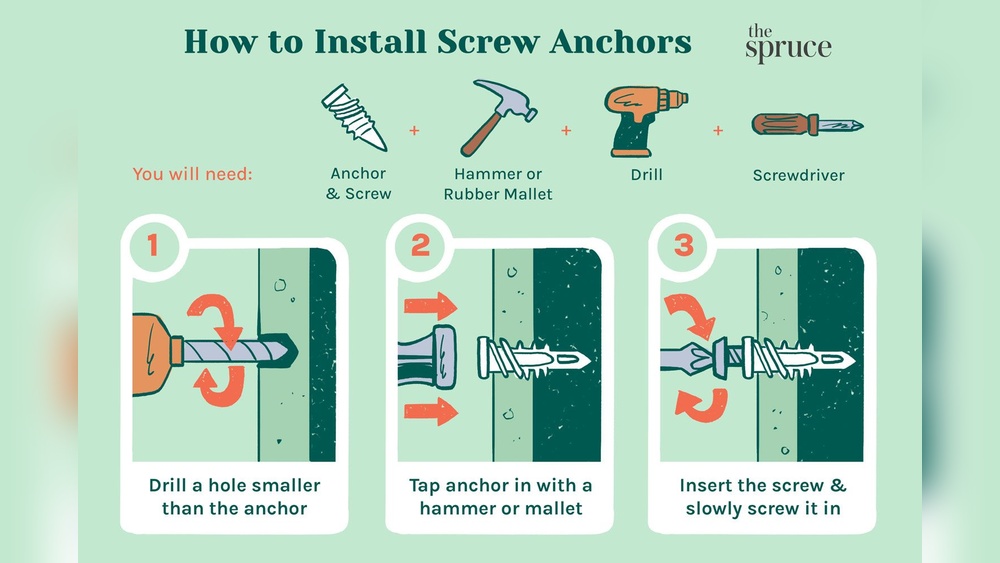
First, you need a drill with the right drill bit. The bit size should match the anchor screw size. A screwdriver is important to tighten the screw securely. A hammer can help to gently tap the anchor into the hole. A measuring tape or ruler helps to mark the exact spot on the wall. A pencil is useful for marking points before drilling.
Safety Gear
Wear safety goggles to protect your eyes from dust and debris. Gloves keep your hands safe from sharp tools and rough surfaces. Use a dust mask if drilling creates a lot of dust. Proper safety gear reduces the risk of injury during the task.
Preparing The Wall
Preparing the wall is the first step to putting an anchor screw. This step ensures a strong hold and prevents damage. Take time to do it right. It makes the rest of the process easier and safer.
Careful preparation helps the anchor screw stay secure. It also keeps your wall clean and neat. Follow the simple steps below for the best results.
Locating The Spot
Choose the exact spot where the anchor screw will go. Check the wall for studs, pipes, or wires. Use a stud finder or tap the wall to listen for a solid sound. Avoid areas with electrical wiring or plumbing. This prevents accidents and damage.
Pick a spot that can hold the weight of the item. A strong place makes the anchor screw work better. Mark the chosen area lightly with a pencil.
Marking The Drill Point
Mark the point where you will drill. Use a pencil to make a small dot on the wall. Make sure the mark is clear and easy to see. Double-check the spot before drilling. Measure twice to avoid mistakes. A precise mark guides the drill and keeps the hole straight.
Keep the mark small. A big mark can cause confusion or mistakes. Use a level tool to keep the mark aligned if needed. This helps keep your anchor screw straight and secure.
Drilling The Hole
Drilling the hole is a key step for installing an anchor screw. It helps hold the anchor tight in the wall. Getting this step right makes sure the anchor supports weight well. Start by picking the right tools and using the best methods for drilling.
Selecting The Drill Bit
Choose a drill bit that matches the anchor size. The hole must be just big enough for the anchor to fit snugly. Use a masonry bit for brick or concrete walls. For drywall, a standard bit works fine. Check the anchor package for the exact drill bit size. Using the wrong bit size can cause a loose or tight fit.
Drilling Techniques
Mark the spot where you want the anchor. Hold the drill steady and start drilling slowly. Keep the drill straight to avoid a crooked hole. Drill to the depth recommended on the anchor package. Pull the drill out occasionally to clear dust. This keeps the hole clean and easy to fill. Stop drilling once you reach the right depth.
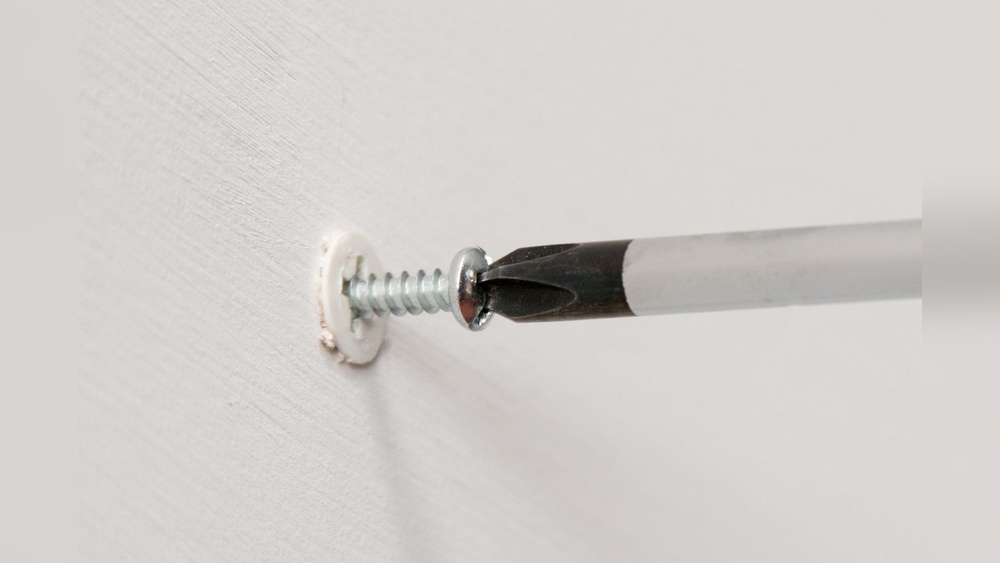
Inserting The Anchor Screw
Inserting the anchor screw into the wall is a key step for strong support. The anchor holds the screw tightly. This keeps shelves, pictures, and other items secure. Doing this right prevents damage and keeps things safe.
Positioning The Anchor
Find the exact spot where the anchor will go. Mark it clearly with a pencil. Use a level to keep things straight. Check the wall type to choose the right anchor size. Position the anchor carefully before drilling.
Securing The Anchor In Place
Drill a hole slightly smaller than the anchor size. Push the anchor into the hole gently. Use a hammer to tap it in if needed. Make sure the anchor sits flush with the wall. This keeps the anchor steady and ready for the screw.
Finishing Up
Finishing up the installation of an anchor screw is key to ensuring your item stays secure. After placing the anchor and screw in the wall, some checks and tips help keep things stable and safe. This final step is important for long-lasting results.
Testing Stability
Test the stability by gently pulling or pushing the attached item. If it feels loose, tighten the screw a little more. Avoid over-tightening, which can damage the anchor or wall. A solid hold means the anchor screw is set correctly.
Tips For Heavy Loads
For heavy items, use larger or multiple anchors. Spread the weight evenly across several anchors. Choose anchors made for the wall type and load size. Always check the weight limit on the anchor package. Secure heavy objects carefully to prevent accidents.

Credit: www.picturehangsolutions.com
Frequently Asked Questions
What Tools Do I Need To Install An Anchor Screw?
You need a drill, appropriate drill bit, anchor screws, and a screwdriver. A hammer might be useful for some anchors. Always wear safety glasses and choose tools that match your wall type and anchor size.
How Do I Choose The Right Anchor Screw For My Wall?
Select anchor screws based on wall material and the weight you need to support. Drywall requires plastic anchors, while masonry needs metal or heavy-duty anchors. Check packaging for weight limits and wall compatibility.
Can I Reuse An Anchor Screw After Removal?
Reusing anchor screws is not recommended. Removing an anchor can damage its grip and weaken holding strength. Always use a new anchor screw for secure and safe installation.
How Deep Should I Drill For An Anchor Screw?
Drill a hole slightly longer than the anchor length. This ensures the anchor fits fully and grips the wall securely. Measure your anchor and mark the drill bit for accurate depth.
Conclusion
Putting an anchor screw into the wall is simple with the right steps. First, choose the correct anchor for your wall type. Next, drill a hole that fits the anchor size. Then, insert the anchor firmly into the hole. Finally, screw in the anchor screw until it feels tight.
This method keeps things secure and steady. Practice a few times to get comfortable. You can hang shelves, pictures, or hooks safely. Easy and effective—anyone can do it.