Are you ready to add a new wall outlet but don’t know where to start? Hooking up a wall outlet might seem tricky, but with the right steps, you can do it safely and confidently.
Imagine having an extra power source exactly where you need it, without calling a professional. In this guide, you’ll learn simple, clear instructions that anyone can follow. Keep reading, and you’ll soon have the skills to handle your own outlet installation—saving time, money, and hassle.
Let’s get started!
Tools And Materials Needed
Setting up a wall outlet needs the right tools and materials. Having these ready makes the job safer and faster. This section lists what you need before starting.
Essential Tools
- Screwdriver (flathead and Phillips) for screws
- Wire stripper to remove insulation
- Voltage tester to check power
- Needle-nose pliers for bending wires
- Utility knife for cutting cables
- Electrical tape to secure connections
Required Materials
- Wall outlet receptacle matching your needs
- Electrical box to hold the outlet
- Electrical wire of correct gauge
- Wire nuts to connect wires safely
- Outlet cover plate for finishing
Safety Gear
- Insulated gloves to prevent shocks
- Safety goggles to protect eyes
- Rubber-soled shoes for grounding
- Flashlight or headlamp for visibility
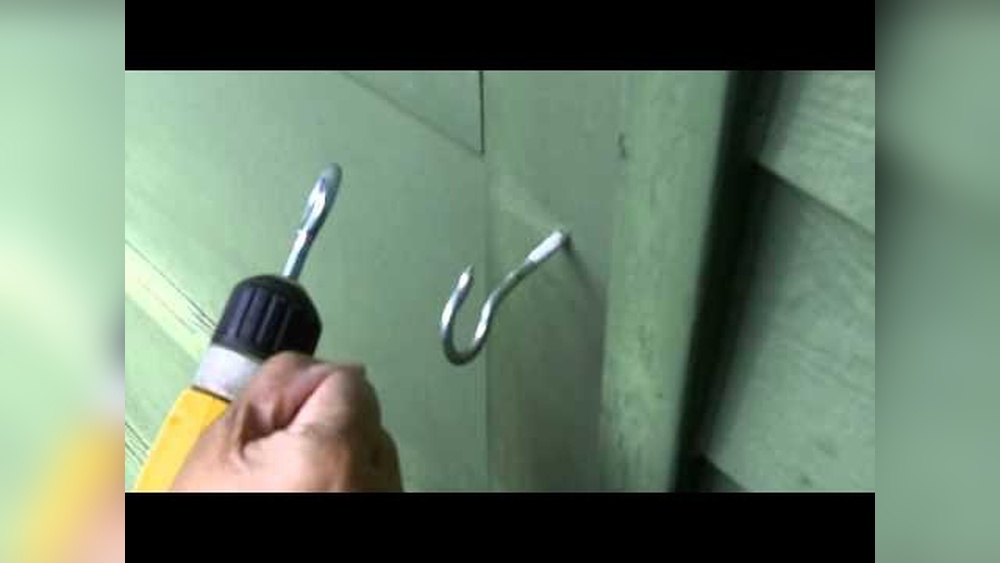
Credit: www.familyhandyman.com
Preparing The Work Area
Preparing the work area is the first step to hook up a wall outlet safely. A clean and safe space helps prevent accidents and makes the job easier. Follow these steps to get ready before you start wiring.
Turning Off Power
Always turn off the power at the circuit breaker. This stops electricity from flowing to the outlet. Use the breaker panel to switch off the correct circuit. Double-check that the power is off before touching any wires.
Clearing The Workspace
Remove any objects near the outlet area. Clear dust, tools, and loose items. A tidy space gives you room to work and reduces risks. Good lighting helps you see wires and connections clearly.
Testing For Live Wires
Use a voltage tester to check for live wires. Test each wire separately to confirm no electricity flows. This step ensures your safety and prevents shocks. If the tester shows power, do not touch the wires.
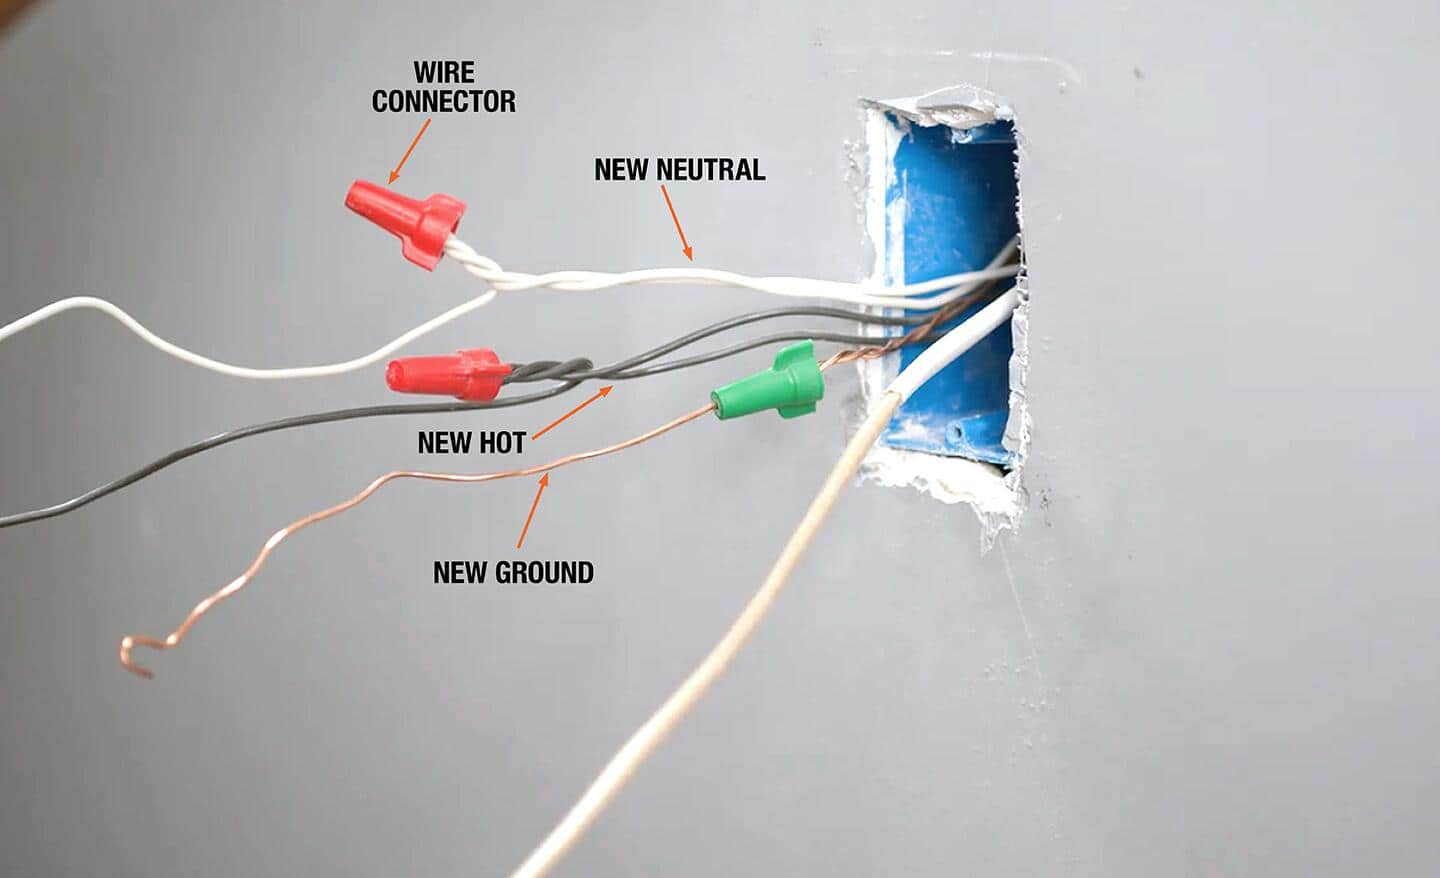
Wiring Basics
Wiring a wall outlet starts with understanding the basics of electrical wiring. This knowledge helps keep your work safe and effective. The key parts to focus on are the types of wires, their colors, and the circuit breaker. Each part plays a crucial role in how electricity flows through your home. Knowing these basics will make the process clear and simple.
Identifying Wire Types
There are three main wire types in a wall outlet: hot, neutral, and ground. The hot wire carries electricity to the outlet. The neutral wire returns electricity to the panel. The ground wire protects you from shocks by directing electricity away if there is a fault. Each wire looks different and has a special job. Recognizing these wires is the first step in wiring an outlet.
Color Codes And Functions
Wire colors show their purpose. Black or red wires are hot. White wires are neutral. Green or bare wires are ground. This color coding helps you connect wires correctly. Matching colors to their function stops mistakes. It keeps your outlet working well and safely. Always check wire colors before starting your work.
Understanding Circuit Breakers
The circuit breaker controls power to the outlet. It stops electricity if there is a problem. This prevents fires and shocks. Each breaker handles a certain amount of power. Knowing which breaker controls your outlet is important. Turn off the breaker before wiring to avoid accidents. Always test that the power is off before you begin.
Removing The Old Outlet
Removing the old outlet is the first step in installing a new wall outlet. It helps you work safely and prepares the space for the new installation. This process requires care and attention to detail.
Start by turning off the power to the outlet. Safety is very important. Next, remove the faceplate and disconnect the wires. Finally, check the wiring for any damage before adding the new outlet.
Unscrewing The Faceplate
Use a screwdriver to remove the screws holding the faceplate. Keep the screws in a safe place for later use. Gently pull the faceplate away from the wall. Be careful not to damage the wall or the outlet.
Detaching Wires Safely
Make sure the power is off at the breaker box. Test the outlet with a voltage tester to confirm no electricity flows. Loosen the screws holding the wires in place. Carefully pull the wires from the outlet terminals.
Inspecting Existing Wiring
Check the wires for any signs of damage or wear. Look for frayed insulation or exposed copper. If the wiring looks damaged, consider calling an electrician. Good wiring ensures a safe and reliable new outlet.
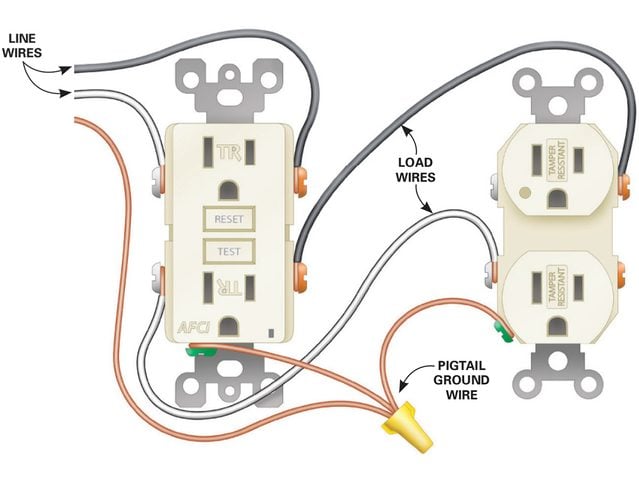
Connecting The New Outlet
Connecting the new outlet is a key step in installing a wall outlet safely. This part requires care and attention to avoid mistakes. Proper connections ensure the outlet works well and prevents electrical hazards.
Stripping Wire Ends
Start by stripping about half an inch of insulation from each wire. Use a wire stripper for a clean cut. Avoid damaging the copper wire inside. Exposed wires should be neat and ready for connection.
Attaching Wires To Terminals
Identify the correct terminals on the outlet. Usually, brass screws for hot wires and silver screws for neutral wires. Wrap the wire ends clockwise around the terminal screws. Tighten the screws firmly to hold the wires in place. Ground wires connect to the green screw.
Securing The Outlet
Push the wires gently back into the outlet box. Align the outlet with the box and screw it in. Make sure the outlet is straight and tight. Avoid over-tightening to prevent damage. The outlet is now ready for the cover plate and final testing.

Credit: www.youtube.com
Final Checks And Testing
After connecting your wall outlet, the final checks and testing ensure safety and proper function. Take time to verify each step carefully. This prevents accidents and electrical faults.
Check your work before restoring power. This is a critical stage in the installation.
Restoring Power
Turn the main circuit breaker back on. This sends electricity to the outlet. Watch for any sparks or unusual sounds. If something feels wrong, turn off the power immediately.
Keep children and pets away during this step. Safety first.
Using A Voltage Tester
Use a voltage tester to check if the outlet works. Place the tester probes into the outlet slots. A light or sound means power is present. No signal means no power or a wiring error.
Test both slots and the ground hole. This confirms the outlet is wired correctly and safe.
Troubleshooting Common Issues
No power? Double-check the breaker and wiring connections. Loose wires cause many problems. Tighten all screws and make sure wires fit securely.
If the tester shows reversed polarity, swap the hot and neutral wires. If the ground hole is dead, ensure the ground wire connects properly.
Test again after every fix. Patience helps avoid damage and keeps you safe.
Safety Tips And Best Practices
Working with electricity can be dangerous. Following safety tips helps prevent accidents and injuries. Use smart habits and respect the power you handle. This section covers key safety tips and best practices for hooking up a wall outlet safely.
Avoiding Electrical Hazards
Always turn off the main power before starting work. Use a voltage tester to confirm no electricity flows. Avoid touching wires with wet hands or metal tools. Keep the workspace dry and clean to reduce risks. Never overload the outlet or circuit. Use wires rated for the correct voltage and current.
Proper Tool Usage
Choose insulated tools made for electrical tasks. Use wire strippers to remove insulation without damaging wires. Avoid using pliers or knives to strip wires. Tighten screws firmly but do not overtighten them. Use a voltage tester to check connections after wiring. Keep tools in good condition and store them safely.
When To Call A Professional
Call an electrician if unsure about any step. Complex wiring or old electrical systems need expert care. If the breaker trips repeatedly, seek professional help. Avoid risks with unfamiliar wiring codes or setups. Hiring a professional saves time and prevents costly mistakes.
Credit: www.homedepot.com
Frequently Asked Questions
How Do I Safely Hook Up A Wall Outlet?
Turn off power at the breaker before starting. Use a voltage tester to confirm no current. Follow wiring instructions carefully. Connect wires to correct terminals: black to brass, white to silver, ground to green. Secure outlet in the box and restore power.
What Tools Are Needed To Hook Up A Wall Outlet?
You need a screwdriver, wire stripper, voltage tester, and needle-nose pliers. A flashlight helps in dark spaces. Always use insulated tools for safety. Having electrical tape and wire nuts is useful for securing connections.
Can I Hook Up A Wall Outlet Myself?
Yes, if you follow safety guidelines and local codes. Turn off power and test wires. Use proper tools and materials. If unsure, consult a licensed electrician to avoid hazards and ensure compliance with electrical standards.
How Do I Identify The Wires For Outlet Hookup?
Typically, black is hot, white is neutral, and green or bare is ground. Use a voltage tester to confirm. Always double-check wire functions before connecting to avoid incorrect wiring and potential hazards.
Conclusion
Hooking up a wall outlet is simpler than it seems. Follow each step with care and patience. Always turn off power before starting any work. Use the right tools and double-check your connections. Safety comes first to avoid accidents or damage.
With practice, you can do this confidently at home. Remember, take your time and stay focused. This skill can save money and give you peace of mind. Keep learning and improving with every project you try.