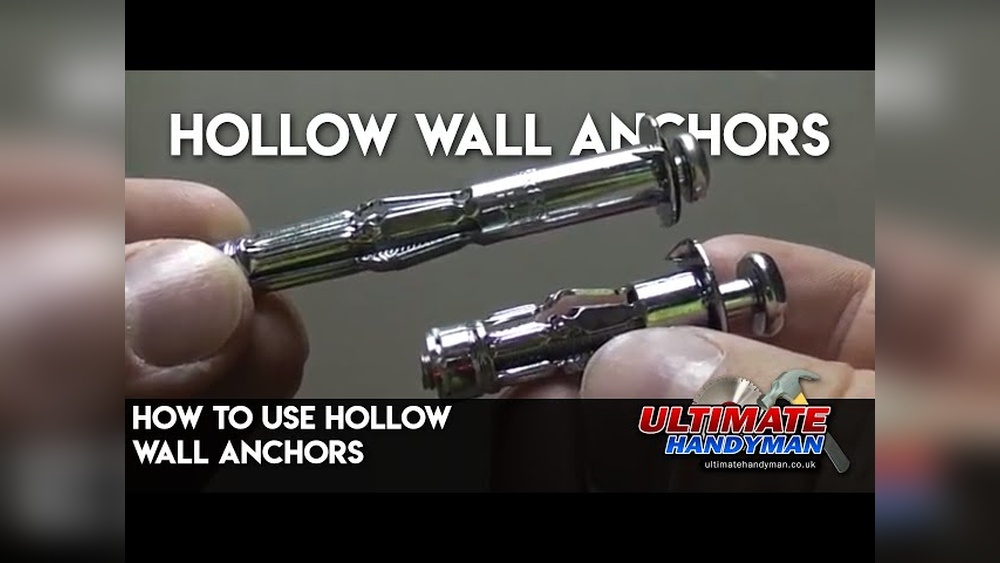
Are you tired of struggling to hang shelves, pictures, or fixtures on hollow walls? Using hollow wall anchors can be your simple solution—but only if you know how to use them right.
You’ll discover easy, step-by-step tips that make installing these anchors quick and secure. Whether you’re a beginner or just need a refresher, you’ll learn exactly what to do to keep your items firmly in place without damage or frustration. Keep reading to master hollow wall anchors and make your next project a success!

Credit: www.lowes.com
Types Of Hollow Wall Anchors
Hollow wall anchors are essential for mounting objects on drywall or hollow walls. They provide strong support where screws alone cannot hold well. Different types of hollow wall anchors suit different tasks. Knowing their types helps choose the right one for your project.
Each type works differently and fits specific needs. Some are easy to install, while others hold heavier loads. This guide explains four common types of hollow wall anchors.
Plastic Expansion Anchors
Plastic expansion anchors are simple and affordable. They expand inside the wall when you insert a screw. These anchors work well for light items like picture frames or small shelves. They need a pre-drilled hole and are best for low-weight loads.
Toggle Bolts
Toggle bolts have wings that open inside the wall. The wings spread out to hold heavy objects securely. These anchors are great for hanging cabinets, mirrors, or heavy shelves. They require a larger hole but offer strong support.
Molly Bolts
Molly bolts are metal anchors that expand behind the wall. They provide a firm grip and do not damage the drywall easily. Molly bolts suit medium to heavy loads like towel racks or TV mounts. Installation needs a drilled hole and a screwdriver.
Self-drilling Anchors
Self-drilling anchors do not need a pre-drilled hole. They screw directly into the drywall with a screwdriver or drill. These anchors hold light to medium weight objects. They are fast to install and work well for shelves and hooks.
Choosing The Right Anchor
Choosing the right hollow wall anchor is key to a strong hold. The wrong anchor can cause damage or fail to support your item. Several factors affect your choice. Focus on weight capacity, wall type, and anchor size. These points guide you to the perfect anchor for your project.
Weight Capacity Considerations
Check the weight of the item you want to hang. Each anchor has a limit on how much weight it can hold. Choose an anchor with a higher weight capacity than your item. This ensures safety and avoids accidents. Never guess the weight. Use a scale or check product details.
Wall Material Compatibility
Know your wall type before buying anchors. Hollow wall anchors work best with drywall or plasterboard. Some anchors suit metal or wood studs better. Using the wrong anchor for your wall type weakens the hold. Identify your wall by tapping or drilling a small hole. Match anchor type to wall material for best results.
Anchor Size Selection
Select the right anchor size for your project. Anchors come in different lengths and diameters. Bigger anchors hold more weight but need more space. Small anchors fit tight spots but hold less weight. Measure the wall thickness and item size. Pick an anchor size that fits well and supports your item safely.
Tools Needed
Using hollow wall anchors requires a few basic tools. These tools help you install the anchors safely and correctly. Having the right equipment makes the job easier and the result stronger. Let’s look at the main tools you need.
Drill And Drill Bits
A drill is essential to make holes in the wall. Choose drill bits that match the anchor size. The hole must be the right size for a secure fit. A drill makes this quick and precise.
Screwdriver
A screwdriver helps to tighten the anchor screw. Use the right type of screwdriver for the screws you have. This tool ensures the anchor stays firmly in place.
Measuring Tape
Measure the wall space carefully before drilling. Measuring tape helps you mark the exact spot. Accurate measurement avoids mistakes and keeps things level.
Level
A level checks if your marks and anchors are straight. This tool ensures your installation looks neat and professional. It prevents items from hanging crookedly on the wall.
Preparing The Wall
Preparing the wall is the first step when using hollow wall anchors. It ensures a secure and stable hold for your items. Taking time to prepare the wall correctly helps avoid problems later.
Marking The Spot
Start by marking the exact spot where you want the anchor. Use a pencil for a clear, visible mark. Measure twice to make sure the spot is right. A small, precise mark helps guide your drilling.
Drilling The Hole
Choose a drill bit that matches the size of the anchor. Drill straight into the wall at the marked spot. Drill slowly to avoid cracking or damaging the wall. The hole should be deep enough for the anchor to fit fully.
Cleaning The Hole
Remove dust and debris from the hole before inserting the anchor. Use a small brush or blow air inside the hole. A clean hole allows the anchor to grip better. This step improves the strength of the hold.
Installing Different Anchors
Installing hollow wall anchors can be simple with the right tools and steps. Different anchors serve different purposes. Choosing the right one depends on the weight of the item and wall type. Each anchor type has a unique installation method.
Installing Plastic Expansion Anchors
Drill a hole slightly smaller than the anchor. Push the plastic anchor into the hole until flush. Tap gently with a hammer if needed. Insert the screw into the anchor. Tighten the screw slowly to expand the anchor. The anchor grips the wall securely.
Installing Toggle Bolts
Drill a hole big enough for the toggle. Thread the screw through the item to hang. Attach the toggle wings to the screw. Squeeze the wings and push through the hole. The wings open behind the wall. Pull the screw to tighten the toggle against the wall.
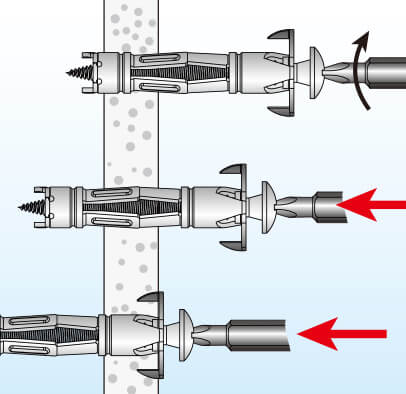
Installing Molly Bolts
Drill a hole matching the molly bolt size. Insert the molly bolt into the hole. Tap lightly to set it in place. Tighten the screw to expand the sleeve behind the wall. Remove the screw, hang the item, and reinsert the screw. Tighten to secure the item firmly.
Installing Self-drilling Anchors
Mark the spot on the wall. Place the anchor tip on the mark. Use a screwdriver to turn the anchor clockwise. The anchor drills itself into the drywall. Stop when the anchor is flush with the wall. Insert the screw and tighten it to hold the item.
Securing Fixtures
Securing fixtures with hollow wall anchors is simple and effective. These anchors hold items firmly on drywall or hollow walls. The key is to follow clear steps for a safe and strong hold. This section guides you through aligning the fixture, inserting screws, and tightening for a firm grip.
Aligning The Fixture
Place the fixture against the wall at the desired spot. Make sure the holes in the fixture match the anchor positions. Use a level to keep the fixture straight. Mark the anchor holes on the wall with a pencil.
Inserting Screws
Insert screws through the fixture holes. Start by hand-tightening the screws into the hollow wall anchors. Do not force the screws too hard at first. This ensures the anchors expand correctly behind the wall.
Tightening For Firm Hold
Use a screwdriver to tighten the screws fully. Tighten slowly to avoid damaging the wall. The anchors will spread inside the wall cavity. This creates a strong grip that holds the fixture securely in place.
Tips For Strong Support
Using hollow wall anchors correctly ensures strong and safe support for your items. Proper techniques help prevent damage and increase the anchor’s hold. Follow these simple tips to get the best results and keep your mounted objects secure.
Avoiding Over-tightening
Do not tighten the anchor too much. Over-tightening can damage the wall or the anchor itself. Tighten slowly and stop when you feel resistance. This keeps the anchor firm without causing cracks or breaks.
Checking Anchor Stability
After installation, gently test the anchor’s hold. Give a small tug on the mounted item. It should feel solid and not move. If it shifts, remove and reinstall the anchor in a better spot.
Regular Maintenance
Check your anchors regularly for looseness or damage. Walls can shift and affect anchor strength over time. Tighten or replace anchors as needed to keep support strong and safe.
Credit: www.jcyscrews.com
Common Mistakes To Avoid
Using hollow wall anchors can be tricky. Many people make simple mistakes that cause poor results. Avoid these errors to get strong, secure mounts every time.
Wrong Anchor Type
Pick the right anchor for your wall. Some anchors work only on drywall, not on plaster or hollow blocks. Using the wrong type can cause the anchor to fail.
Check the package to match the anchor with your wall. The right choice holds better and lasts longer.
Incorrect Hole Size
Drill the correct hole size. Too big a hole makes the anchor loose and weak. Too small can break the anchor or wall.
Use the drill bit size recommended on the anchor package. Measure twice to avoid mistakes.
Ignoring Wall Material
Know your wall material before starting. Hollow wall anchors work differently in drywall, plaster, or hollow concrete blocks.
Some walls need special anchors or extra support. Ignoring this can damage walls or cause falls.

Credit: www.youtube.com
Frequently Asked Questions
What Are Hollow Wall Anchors Used For?
Hollow wall anchors secure objects to drywall or hollow walls. They provide strong support without needing studs. These anchors prevent damage and improve stability for hanging items.
How Do I Install Hollow Wall Anchors Correctly?
First, drill a hole matching the anchor size. Insert the anchor fully into the wall. Tighten the screw to expand the anchor inside the wall. Ensure the anchor is flush and secure.
Can Hollow Wall Anchors Hold Heavy Objects?
Yes, but weight capacity varies by anchor type. Always check manufacturer specifications. For heavy items, use anchors designed for higher loads or consider wall studs.
What Tools Are Needed For Hollow Wall Anchors?
You need a drill, drill bit, screwdriver, and the correct size hollow wall anchors. A level can help for precise placement. These tools ensure a proper and secure installation.
Conclusion
Using hollow wall anchors helps hang items securely on drywall or hollow walls. Choose the right anchor size for your project. Drill a proper hole, insert the anchor carefully, and tighten the screw. This method prevents damage and ensures stability.
Practice on a scrap wall if unsure. With patience and care, you can hang shelves, pictures, or mirrors safely. Hollow wall anchors are simple tools that make home projects easier and safer. Give it a try to improve your DIY skills step by step.

