Have you ever tried to remove nail anchors from your wall, only to end up with a bigger mess? If you want to take down those stubborn anchors without damaging your walls, you’re in the right place.
This guide will show you simple, effective ways to get those anchors out quickly and safely. Keep reading, and you’ll learn how to make your walls look as good as new—no stress, no hassle.
Types Of Nail Anchors
Nail anchors come in different types. Each type serves a specific purpose. Knowing these types helps in removing them safely. Here are the common nail anchors you might find in walls.
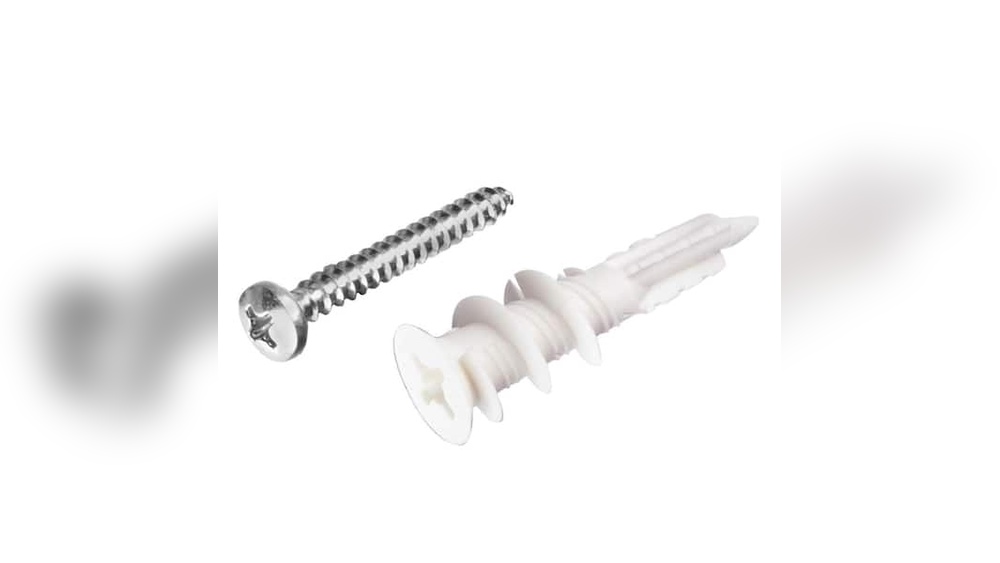
Plastic Expansion Anchors
Plastic expansion anchors are the most common. They are small and made of plastic. These anchors expand when a screw goes in. This expansion holds the anchor tight in the wall. They work well in drywall and plaster.
Molly Bolts
Molly bolts are metal anchors. They have a sleeve that expands behind the wall. This creates a strong hold in hollow walls. Molly bolts are good for heavy items. They need a drilled hole to fit in.
Toggle Bolts
Toggle bolts have wings that open inside the wall. These wings hold the anchor firmly in place. They are used for heavy objects on drywall. Toggle bolts require a larger hole to insert. The wings close when inserted and open inside.
Self-drilling Anchors
Self-drilling anchors do not need a pre-drilled hole. They have sharp threads that cut into the wall. These anchors are easy to install in drywall. They provide a strong hold for medium loads. Removal can be tricky due to their design.

Credit: diy.stackexchange.com
Tools Needed For Removal
Removing nail anchors from a wall needs the right tools. These tools make the job easier and prevent damage. Having them ready saves time and frustration. Below are the essential tools for nail anchor removal.
Pliers And Screwdrivers
Pliers help grip and pull out anchors stuck in the wall. Needle-nose pliers work best for small spaces. Screwdrivers assist in loosening anchors by turning screws or prying gently. Flathead screwdrivers can also help lift anchors from the wall surface.
Utility Knife
A utility knife cuts around the anchor cleanly. It removes paint or drywall near the anchor. This tool helps avoid tearing the wall during removal. Sharp blades ensure precise cuts and reduce wall damage.
Drill And Bits
A drill with the right bits can remove stubborn anchors. It works well for anchors that spin or are too tight. Drill slowly to avoid making holes bigger than needed. Use drill bits slightly smaller than the anchor diameter.
Spackling And Sandpaper
After anchor removal, walls often need repair. Spackling fills holes left by anchors. Let it dry fully before sanding. Sandpaper smooths the surface for repainting. Use fine-grit sandpaper for the best finish.
Removing Plastic Expansion Anchors
Plastic expansion anchors hold screws tightly in drywall or plaster. Removing them can be tricky but simple with the right steps. This guide shows easy ways to take out plastic anchors without damaging your wall. Follow these methods to keep your walls smooth and ready for new fixtures.
Pulling Out With Pliers
Grip the anchor firmly with needle-nose pliers. Pull straight out slowly to avoid wall damage. Wiggle gently if it feels stuck. Use steady force, not too much strength. This method works best for anchors that stick out from the wall.
Pushing Through The Wall
If the anchor is flush or flush with the wall, push it inside. Use a screwdriver or a similar tool to press it through. The anchor will fall behind the drywall cavity. This leaves a small hole that is easy to fix later.
Filling And Repairing Holes
Fill holes with wall putty or spackle. Apply with a putty knife and smooth the surface. Let it dry completely before sanding. Sand gently to blend the patch with the wall. Paint over for a clean, finished look.
Handling Molly Bolts
Molly bolts provide strong support in drywall or plaster walls. Removing them requires care to avoid wall damage. This section explains easy steps to handle molly bolts safely. Follow these tips to remove the bolt and fix your wall.
Unscrewing The Bolt
Start by turning the screw counterclockwise. Use a screwdriver that fits well to avoid slipping. Unscrew slowly until the bolt stops moving. Do not force it out yet. The bolt is still held by the sleeve inside the wall.
Collapsing The Sleeve
Push the bolt gently into the wall cavity. This action collapses the metal sleeve behind the wall. Use pliers to pull the collapsed sleeve out if it is loose. If it stays inside, leave it; it will stay hidden behind the wall surface.
Wall Repair Tips
Fill the hole with spackle or wall filler. Smooth the surface with a putty knife. Let it dry fully before sanding the area. Paint over the patch to match your wall color. This restores the wall’s smooth look quickly.
Taking Out Toggle Bolts
Removing toggle bolts from your wall needs care and patience. These anchors hold strongly because of their spring-loaded wings inside the wall cavity. Knowing how to take them out helps avoid wall damage and saves time. Follow these steps for a smooth removal process.
Unscrewing The Bolt Head
Start by turning the bolt head counterclockwise with a screwdriver. Keep turning until the bolt loosens and comes out. Do not pull the bolt out forcefully. Pulling may cause the toggle to fall inside the wall. Turn slowly and steadily for best results.
Dealing With The Toggle
The toggle wings stay inside the wall after removing the bolt. They are hard to reach and can drop into the wall cavity. Use a strong magnet or a hook tool to pull out the toggle. If the toggle falls inside, leave it as it does not harm the wall.
Repairing Larger Holes
Toggle bolts leave bigger holes compared to other anchors. Fill the hole with wall putty or spackle. Smooth it with a putty knife and let it dry completely. Sand the area gently for a smooth finish. Paint over the patch to match the wall color.
:max_bytes(150000):strip_icc()/how-to-remove-drywall-anchors-7562285-02-c01abbfe63374ad3a7bc1e52d0c15bb2.JPG)
Credit: www.thespruce.com
Removing Self-drilling Anchors
Removing self-drilling anchors from a wall can be tricky. These anchors are designed to hold tight without needing a pre-drilled hole. You must be gentle and patient to avoid damaging your wall. Below are simple methods to remove these anchors safely.
Backing Out The Anchor
Start by turning the anchor counterclockwise. Use pliers or a screwdriver for better grip. Slowly back it out without forcing. The anchor should loosen and come out with steady turns. Stop if the wall starts to crack or crumble.
Using A Drill For Stubborn Anchors
Some anchors stick too well to remove by hand. Use a drill with a small bit. Drill into the center of the anchor carefully. This will break it apart inside the wall. Once broken, push the pieces gently into the wall cavity. Avoid drilling too deep to protect the wall.
Patchwork Suggestions
After removing the anchor, the wall will have a hole. Fill it with spackling paste or wall filler. Use a putty knife to smooth the surface. Let it dry fully before sanding it flat. Paint over the patched spot to match the wall color. This hides any damage and restores the wall’s look.
Preventing Wall Damage
Removing nail anchors from walls can be tricky. The key is to protect your wall from damage. Walls can crack, chip, or leave ugly holes if you are not careful. Using the right approach helps keep your walls smooth and clean. This section shares simple ways to prevent wall damage during anchor removal.
Gentle Techniques
Start by pulling gently on the anchor with pliers. Avoid pulling too hard to stop wall cracks. Try pushing the anchor inside the wall if it won’t come out easily. Use slow, steady movements to reduce stress on the wall. Patience is important. Rushing can cause bigger holes or damage.
Using The Right Tools
Choose tools made for anchor removal, like needle-nose pliers or a screwdriver. A putty knife helps to loosen the anchor’s edges. Using sharp or wrong tools can break the wall surface. Always pick tools that fit the size of the anchor. This lowers the chance of scratching or denting the wall.
Avoiding Common Mistakes
Never yank anchors out quickly. This often causes wall cracks or paint peeling. Do not drill around the anchor unless necessary. It can make the hole bigger. Avoid using excessive force. Instead, try to wiggle or twist the anchor gently. These small steps keep your wall safe and looking good.

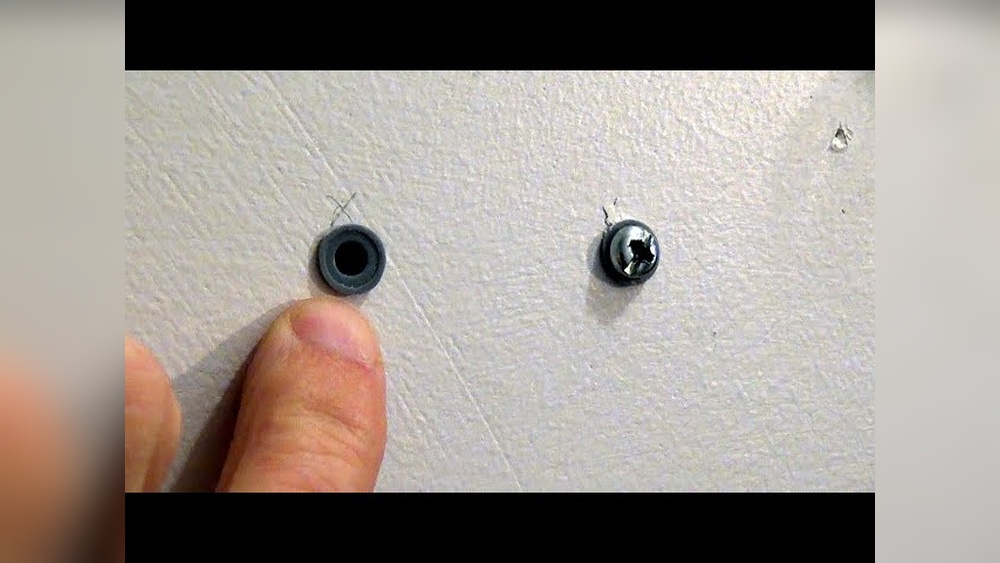
Credit: www.youtube.com
Repairing Wall After Removal
Removing nail anchors leaves small holes or marks on your wall. Repairing these spots helps restore a smooth, clean look. Proper repair improves the wall’s appearance and prepares it for painting. Follow simple steps to fix the wall after anchor removal.
Spackling Small Holes
Use a lightweight spackle to fill the small holes left by anchors. Apply a small amount over the hole using a putty knife. Press gently to fill the hole completely. Remove extra spackle by smoothing the surface. Let it dry for the time stated on the package.
Sanding For Smooth Finish
After the spackle dries, sand the area with fine-grit sandpaper. Sand in a circular motion to blend the patch with the wall. Wipe off dust with a clean, dry cloth. Check that the surface feels smooth and even before painting.
Painting Tips
Choose paint that matches your existing wall color. Use a small brush for precise application over the patched area. Apply thin layers and let each dry before adding another. Blend the edges carefully for a seamless finish. This restores your wall to its original look.
Frequently Asked Questions
How Do You Safely Remove Nail Anchors From Walls?
To remove nail anchors safely, first, pull the anchor out using pliers. If it resists, gently pry it with a flathead screwdriver. Avoid excessive force to prevent wall damage. After removal, fill the hole with spackle and sand smoothly for a clean finish.
Can I Reuse Nail Anchors After Removing Them?
Generally, nail anchors are designed for one-time use. Removing them can damage their structure, reducing holding strength. It’s best to replace anchors with new ones to ensure a secure hold when rehanging items or mounting objects on walls.
What Tools Are Needed To Remove Wall Anchors?
Common tools include pliers, a flathead screwdriver, and a putty knife. Pliers help pull out the anchor. A screwdriver can pry stubborn anchors. Use a putty knife to smooth the wall after filling holes. These tools make removal efficient and minimize wall damage.
How To Fix The Wall After Removing Nail Anchors?
Fill holes with spackling compound or wall filler using a putty knife. Allow it to dry completely, then sand the area smooth. Finally, repaint the patch to match the wall color. This process restores the wall’s surface for a flawless look.
Conclusion
Removing nail anchors from walls can be simple with the right steps. Use basic tools like pliers or a screwdriver to pull them out carefully. Take your time to avoid wall damage. After removal, fill holes with putty or spackle for a smooth finish.
This method saves you from unnecessary repairs later. Practice these tips to keep your walls neat and clean. Now, you can handle nail anchors easily for any home project.