Have you ever wished you could control your lights from two different spots? Maybe you want to turn off the hallway light from both ends or control a room’s main light switch without walking across the room.
Adding a 3-way switch to your existing light setup makes this simple and convenient. In this guide, you’ll learn exactly how to do it step-by-step, even if you’re not an expert. By the end, you’ll have the confidence to upgrade your lighting and make your home more comfortable and functional.
Ready to get started? Let’s dive in!

Credit: www.reddit.com
Tools And Materials Needed
Adding a 3 way switch to an existing light requires specific tools and materials. Having the right items ready makes the job easier and safer. Preparation helps avoid delays and mistakes.
Essential Tools
Start with basic electrical tools. A voltage tester ensures the power is off. Wire strippers help remove insulation cleanly. A screwdriver set fits different screw types. Needle-nose pliers assist in bending wires. A drill may be needed for new holes. Electrical tape secures wire connections. A flashlight or headlamp improves visibility in dark spaces.
Required Materials
You need a 3 way switch designed for this setup. Use electrical wires rated for your home wiring. Wire nuts connect wires safely. Electrical boxes house the switches and wires. Switch plates cover the switches neatly. Make sure all materials meet local electrical codes. Choosing quality materials helps avoid future problems.
Safety Precautions
Working with electrical wiring can be risky. Safety is the most important step before adding a 3 way switch. Taking proper precautions helps prevent shocks and accidents. Follow these safety tips to protect yourself and your home.
Power Shutoff
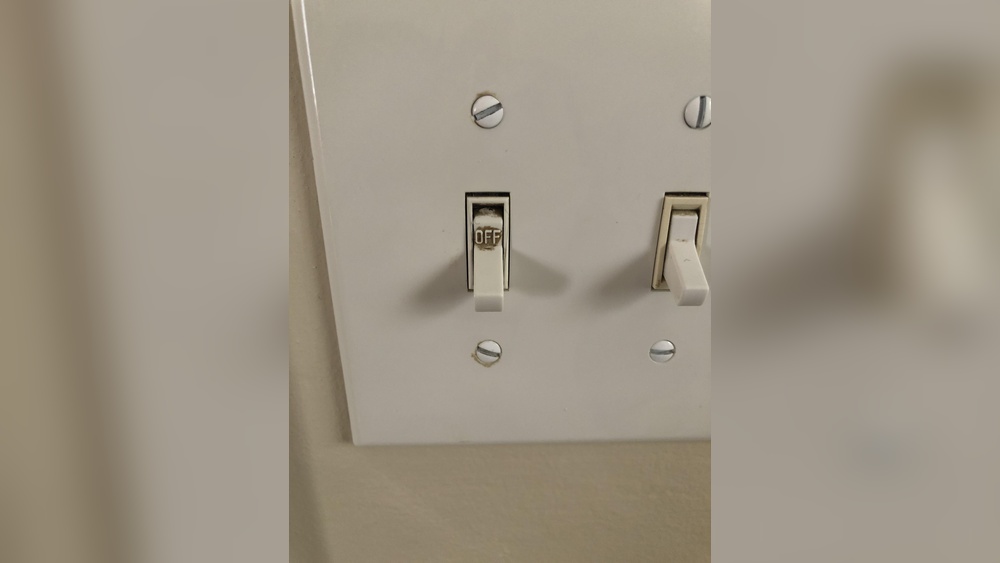
Always turn off the power at the circuit breaker. This stops electricity from flowing to the wires you will touch. Double-check that the light switch does not work before you start. Never assume the power is off without testing.
Using A Voltage Tester
A voltage tester shows if wires are live or safe to handle. Test all wires at the switch box before you touch them. This tool helps avoid electric shock. Use a reliable tester and follow its instructions carefully.
Wearing Protective Gear
Wear rubber-soled shoes and insulated gloves during the work. These protect against electric shock and sharp edges. Avoid loose clothing that might catch on wires or tools. Safety glasses protect your eyes from sparks or debris.
How 3-way Switches Work
Three-way switches control a light from two different places. This setup is common in hallways or large rooms. It lets you turn the light on or off from either switch. Understanding how these switches work helps you add them safely and correctly.
The switches work by sending electricity through different paths. This changes the flow of power to the light. You can think of it as a simple path that can switch between two routes. Each switch flips the path to turn the light on or off.
Basic Wiring Concept
A 3-way switch setup uses two switches and one light. The key parts are called travelers and a common terminal. Travelers are wires that carry electricity between the switches. The common terminal connects to the power source or the light.
When you flip a switch, it changes which traveler wire is connected. This change allows or stops the flow of electricity. The light turns on when the circuit is complete. It turns off when the circuit breaks.
Common Configurations
Most 3-way switch setups have similar wiring patterns. The power source usually comes into one switch box. The light connects at the other switch box or in the middle. Travelers run between the two switches to link them.
In some cases, power goes first to the light fixture. Then, wires run to each switch. This setup needs extra wires called neutral wires. Knowing the layout helps you plan and install the switches properly.
Planning The Installation
Planning the installation of a 3 way switch is crucial for a smooth project. It helps avoid mistakes and saves time. Proper planning ensures the wiring and switch locations work well together. You must understand the current setup and where the new switches will go. This step sets the foundation for a safe and functional lighting system.
Locating Existing Wiring
Start by finding the current wiring in your walls. Turn off the power for safety before checking. Use a voltage tester to confirm wires are not live. Look for the wires connecting your existing switch and light fixture. Note their types and colors. This information helps you know how to connect the new switch. Sketch a simple diagram of the wiring layout. It will guide you during installation and prevent confusion.
Choosing Switch Locations
Pick switch spots that are easy to reach and use. Common places include doorways or near room entrances. Avoid locations where furniture blocks access. Think about how people move in the room. The second switch should be placed where it adds convenience. Measure distances to ensure your wires will reach both switches. Keep switches at a standard height for comfort. Proper placement improves usability and looks neat.
Removing The Existing Switch
Removing the existing switch is the first step to add a 3 way switch. It involves stopping the power and carefully taking out the old switch. This step must be done safely to avoid any accidents. Follow each part closely to prepare for the new switch installation.
Turning Off Power
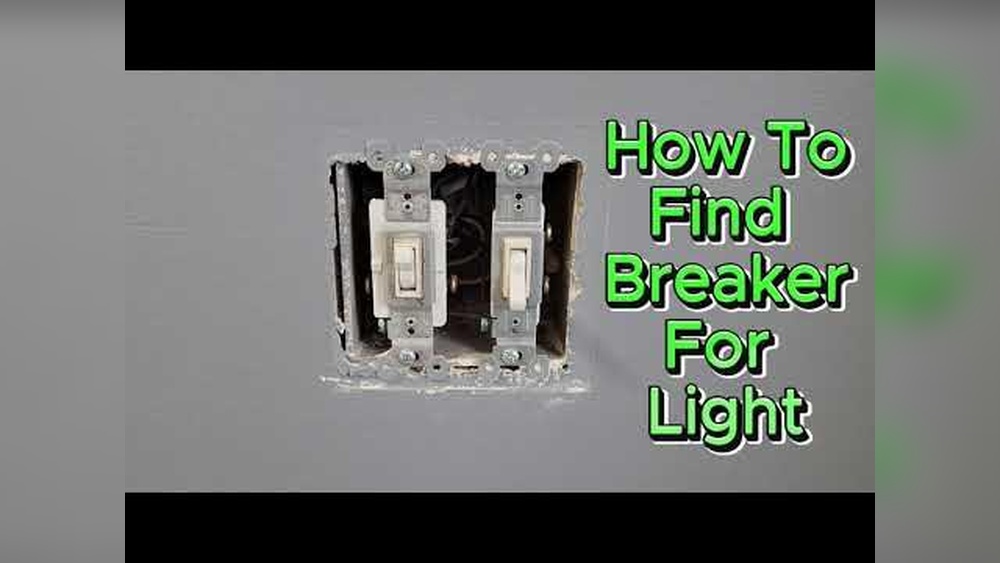
Start by turning off the power at the circuit breaker. This stops electricity from flowing to the switch. Use a voltage tester to confirm the power is off. Never skip this step. Safety comes first when working with electricity.
Taking Out The Old Switch
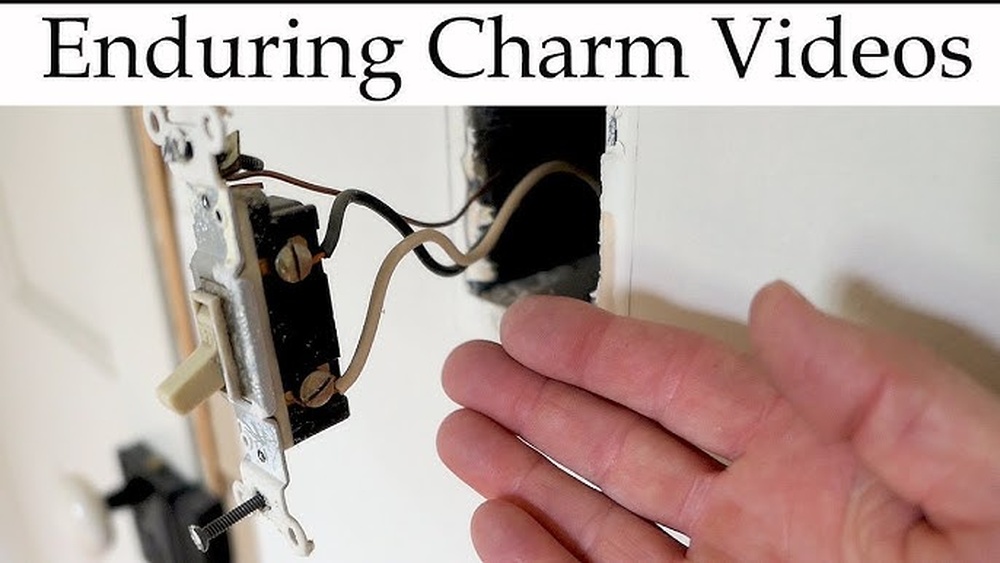
Remove the switch cover plate using a screwdriver. Unscrew the old switch from the electrical box. Gently pull the switch out to see the wires. Take note of how wires are connected for the new switch setup. Disconnect the wires carefully using a screwdriver. Keep the wires separated to avoid confusion later.

Credit: www.finehomebuilding.com
Running New Wiring
Running new wiring is a key step in adding a 3 way switch to your existing light. This process involves carefully routing the cable and connecting it to the power source. Proper wiring ensures your switches work together smoothly. This guide explains how to handle the wiring safely and correctly.
Routing Cable
Start by planning the path for the new cable. Choose a route that avoids pipes and other wires. Use a fish tape to pull the cable through walls or ceilings. Keep the cable neat and secure it with staples every 12 inches. Avoid sharp bends that might damage the wires. Leave enough length at each switch box for easy connections.
Connecting To Power Source
Turn off the power at the circuit breaker before starting. Identify the power source wire that feeds the light. Connect the new cable’s black wire to the power source’s black wire. Join the white wires together, and connect the ground wires to the grounding screw. Use wire nuts to secure all connections tightly. Double-check all connections before restoring power.
Wiring The 3-way Switches
Wiring 3-way switches is a key step in controlling one light from two locations. It may seem tricky, but careful work makes it simple. Understanding the terminals and making correct connections ensures the switch works safely and properly.
Identifying Terminals
Each 3-way switch has three terminals. Two are traveler terminals, usually brass-colored. The third is the common terminal, often darker or black. Identifying these helps to connect wires correctly. The common terminal connects to the power source or light fixture. Traveler terminals connect switches together.
Making Connections
Start by attaching the common wire to the common terminal. Then connect the two traveler wires to the traveler terminals. Make sure all wires are tightly secured under the terminal screws. Use wire nuts to join wires inside the electrical box. Double-check connections before restoring power to avoid problems.
Testing The Setup
Testing the setup is a key step after installing a 3 way switch. It confirms that your wiring is correct and the switches work properly. This step ensures safety and functionality before you finish the job.
Restoring Power
Turn the circuit breaker back on to restore power to the light and switches. Double check that the breaker controls the correct circuit. Be cautious and avoid touching any wires during this step.
Checking Switch Functionality
Test each switch separately. Flip one switch and see if the light turns on or off. Then, flip the second switch to check if it changes the light’s state too. Both switches should control the light independently. If the light does not respond correctly, turn off the power and review your wiring.
Troubleshooting Tips
Adding a 3-way switch to an existing light can be tricky. Troubleshooting helps fix common problems fast. Understanding errors saves time and frustration. This guide covers key tips to solve issues easily.
Common Wiring Mistakes
Wiring errors cause most switch problems. Mixing traveler wires or swapping line and load wires stops the switch from working.
Check wire colors carefully. Use a tester to identify hot, neutral, and ground wires correctly. Tighten all wire connections securely to avoid loose contacts.
Label wires before disconnecting. This helps reconnect them properly. Avoid crossing traveler wires between switches. Each traveler wire must connect to the same terminal type on both switches.
Fixing Flickering Lights
Flickering often means a loose connection or bad switch. Inspect all wire nuts and terminals for tightness. Replace any damaged wires or terminals.
Try swapping the 3-way switch with a new one. Faulty switches cause flicker and intermittent power. Also, check the bulb. A loose or incompatible bulb can flicker too.
Ensure the switch box has no damaged insulation or exposed wires. These can cause unstable power flow to the light fixture.
Finishing Touches
After wiring your 3-way switch, the finishing touches make your work safe and neat. This step ensures the switches stay in place and look good. It also protects the wiring from dust and damage. Follow these easy steps to secure your switches and install cover plates.
Securing Switches
First, push the switches gently back into the electrical boxes. Make sure no wires get pinched or loose. Use a screwdriver to tighten the screws on the switch. Tight screws keep the switch from moving or falling out. Check that the switch sits flat and straight on the wall. This keeps the switch safe and stable during use.
Installing Cover Plates
Choose cover plates that match your switches and wall color. Place the cover plate over the switch carefully. Align the screw holes on the plate with the switch box. Insert the screws and tighten them just enough to hold the plate firm. Do not overtighten or crack the plate. Cover plates keep dust out and give a clean, finished look. They protect your wiring and make the switch safe to use.

Credit: diy.stackexchange.com
Frequently Asked Questions
What Tools Are Needed To Add A 3 Way Switch?
You need a screwdriver, voltage tester, wire stripper, electrical tape, and wire nuts. Always use insulated tools for safety when working with electricity.
Can I Add A 3 Way Switch To Any Existing Light?
Most existing lights can support a 3 way switch if wiring allows. Check if your current setup includes a neutral wire and compatible wiring paths.
How Do I Identify Traveler Wires In A 3 Way Switch Setup?
Traveler wires connect the two switches and usually have a different color. Use a voltage tester to confirm which wires serve as travelers before installation.
Is It Safe To Install A 3 Way Switch Myself?
Yes, if you follow safety guidelines and turn off power at the breaker. However, consult a professional electrician if unsure or inexperienced with electrical work.
Conclusion
Adding a 3-way switch to your existing light is easier than it seems. Follow each step carefully to stay safe and get good results. Take your time and double-check your work for errors. This upgrade lets you control lights from two places, adding comfort.
With patience and care, you can finish this project yourself. Remember, safety always comes first when working with electricity. Enjoy the convenience of your new lighting setup once done. Simple changes like this can improve your home a lot.