Are your floor joists sagging or showing signs of wear? Knowing how to jack up floor joists and fix joist hangers can save you time, money, and a lot of frustration.
In this guide, you’ll learn simple, step-by-step methods to lift your floor joists safely and secure them properly. Whether you’re a DIY enthusiast or just want to understand the process before calling a pro, this article will give you clear, practical tips you can use right away.
Keep reading to protect your home’s foundation and keep your floors strong and level.

Credit: www.trex.com
Tools And Materials Needed
Knowing the right tools and materials is key for jacking up floor joists and joist hangers safely. These tools help lift and support the joists during repair or replacement. Using proper materials ensures the structure stays strong and stable.
Gather everything before starting. This saves time and avoids interruptions. The tools listed below are common and easy to find at hardware stores.
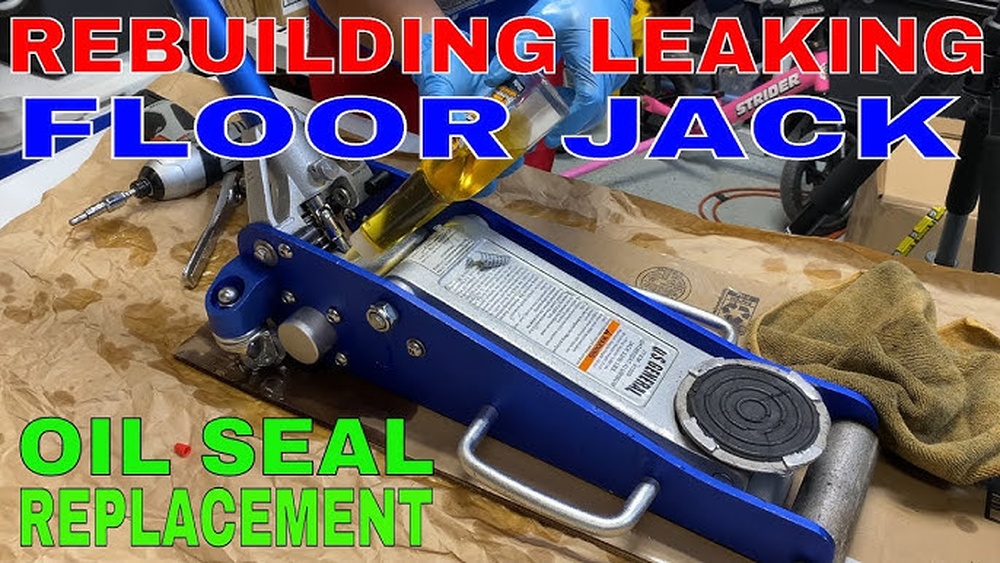
Floor Jack Or Hydraulic Jack
A floor jack lifts the joists gently. Choose one with enough lifting capacity. Hydraulic jacks work smoothly and reduce effort.
Jack Stands Or Temporary Supports
Jack stands hold the joists once lifted. They keep the floor steady and secure. Use strong stands rated for the weight.
Replacement Joist Hangers
New joist hangers replace damaged ones. Pick hangers matching the size of your floor joists. Galvanized steel hangers resist rust and last longer.
Hammer And Nails Or Screws
Use a hammer with nails or a drill with screws to fasten hangers. Screws often provide stronger support. Choose corrosion-resistant fasteners for durability.
Measuring Tape And Level
Measure joist spacing and height accurately. Use a level to keep joists horizontal. Proper alignment prevents future floor problems.
Safety Gear
Wear gloves and safety glasses. Protect yourself from splinters and debris. A dust mask helps if old wood is dusty or moldy.

Credit: www.familyhandyman.com
Safety Precautions
Safety is the top priority when jacking up floor joists and installing joist hangers. Mistakes can cause serious injury or damage. Taking simple safety steps protects you and your home.
Follow safety rules carefully before starting the job. Prepare your workspace and tools. Pay close attention to your body position and movements. Safety precautions reduce risks and ensure a smooth process.
Wear Proper Safety Gear
Always wear safety glasses to protect your eyes. Use gloves to keep your hands safe from splinters and sharp edges. Wear sturdy boots to protect your feet from heavy objects. Use a hard hat if you work under the floor.
Check The Load Capacity
Know the weight your jack can safely lift. Never exceed the maximum load limit. Use the right jack size for the job. Overloading causes jack failure and accidents.
Secure The Work Area
Clear the area of clutter and loose tools. Make sure the floor is dry and stable. Use supports or braces to keep joists steady. Prevent others from entering the workspace during work.
Use Tools Correctly
Read tool instructions before use. Position the jack properly under the joist. Lift slowly and evenly to avoid sudden shifts. Avoid makeshift tools or shortcuts. Proper use prevents accidents and damage.
Preparing The Work Area
Preparing the work area is the first step in safely jacking up floor joists and installing joist hangers. A clean and organized space helps prevent accidents and makes the job easier. It also protects the floor and surrounding structures from damage.
Clear away furniture, rugs, and anything that might get in the way. Remove loose debris and dust to create a safe environment. Make sure the lighting is bright enough to see clearly. Good visibility reduces mistakes and helps spot potential problems.
Clear The Work Space
Remove all items near the joists. Keep tools and materials within reach but out of walkways. This setup avoids tripping and allows smooth movements during the work. A tidy area keeps focus on the task and reduces distractions.
Check For Safety Hazards
Look for electrical wires or plumbing near the joists. Avoid working near these to prevent damage or injury. Wear safety gear like gloves and goggles. Confirm the floor is stable before applying pressure with jacks.
Gather Necessary Tools And Materials
Collect all tools like jacks, joist hangers, screws, and drills beforehand. Having everything ready saves time and avoids interruptions. Use tools that are in good condition to ensure safe operation.
Identifying Floor Joists And Hangers
Identifying floor joists and joist hangers is the first step in any floor repair or installation project. Knowing where these components are helps you work safely and effectively. Floor joists are the horizontal beams that support the floor above. Joist hangers are metal brackets that hold these joists in place.
Finding the joists and hangers can be simple if you know what to look for. This section explains how to spot both easily in your home.
What Are Floor Joists?
Floor joists are long, strong boards. They run parallel under the floor. They carry the weight of the floor and anything on it. Usually, they are made of wood or engineered lumber. Joists often sit on top of a foundation wall or beams.
How To Locate Floor Joists
Look for small gaps between floorboards. These gaps often mark where joists run underneath. Tap the floor and listen for a solid sound. A hollow sound means no joist below. Using a stud finder can also help find joists easily.
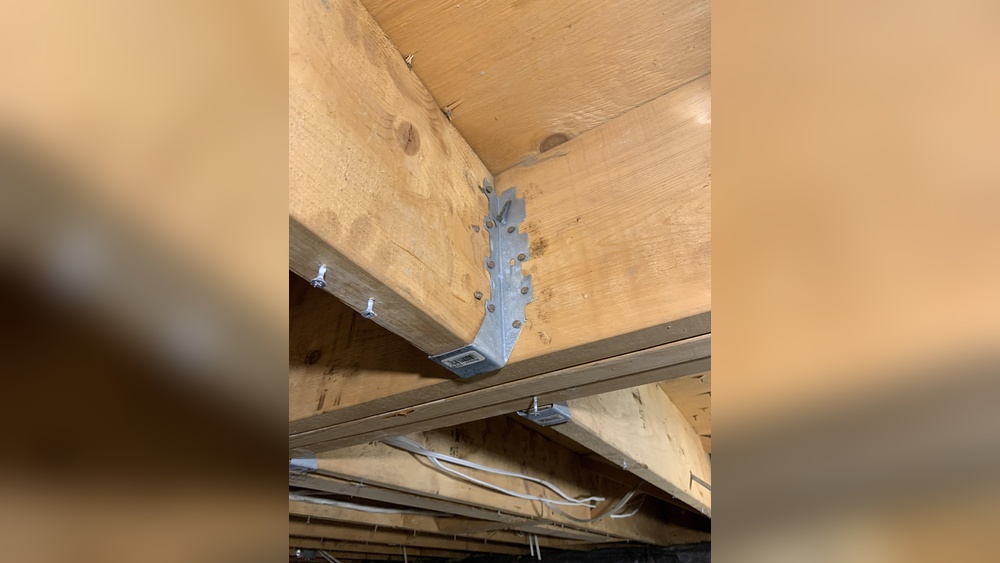
What Are Joist Hangers?
Joist hangers are metal pieces shaped like a “U” or a bracket. They hold the ends of joists firmly in place. These hangers attach to beams or ledger boards. They prevent joists from moving or slipping.
Spotting Joist Hangers
Joist hangers are visible where joists meet beams or walls. Look for metal brackets with nails or screws. They are often galvanized to resist rust. Sometimes, you may need to remove floor covering to see hangers clearly.
Removing Old Joist Hangers
Removing old joist hangers is an important step before jacking up floor joists. Old hangers can weaken the support and cause instability. Clearing them out ensures a safer and stronger repair process.
Take care during removal to avoid damaging the wood or surrounding structures. Proper tools and technique make the job easier and faster.
Gather The Right Tools
Use a pry bar, hammer, and a nail puller. A cordless drill helps remove screws. Safety gloves protect your hands from sharp edges.
Check For Rust And Damage
Old hangers often have rust or wear. Inspect them closely. Rusty hangers are harder to remove but must be replaced for safety.
Remove Nails Or Screws
Start by pulling out nails with a claw hammer or nail puller. For screws, use a drill or screwdriver. Work slowly to avoid splitting the wood.
Loosen The Joist Hanger
Slide a pry bar under the hanger edge. Gently lift it away from the beam or joist. Apply steady pressure to avoid bending the wood.
Clean The Surface
After removing the hanger, clean the wood surface. Remove dirt, rust, and leftover nails. A clean surface helps new hangers fit properly.
Installing New Joist Hangers
Installing new joist hangers is a key step in ensuring a strong floor structure. Joist hangers hold floor joists in place and provide support where beams meet. Proper installation keeps floors level and safe.
This process needs care and attention. Use the right materials and tools. Follow steps carefully for a secure fit that lasts.
Choosing The Right Joist Hanger
Select hangers that match your joist size and type. Check the weight they can hold. Use galvanized hangers for outdoor or damp areas. This prevents rust and damage over time.
Positioning The Hanger Correctly
Place the hanger flush with the beam edge. Align it so the joist fits snugly inside. Keep it straight and level. Incorrect placement weakens the connection and may cause issues later.
Securing The Hanger
Use the right nails or screws made for joist hangers. Drive them fully but avoid bending. Fill all nail holes for strong support. Tight connections stop movement and keep floors firm.
Jacking Up Floor Joists
Jacking up floor joists is a crucial step in fixing sagging floors or replacing damaged beams. The process raises the joists back to their original level, restoring floor stability. It requires careful setup and safety measures to avoid damage or injury. This guide explains how to jack up floor joists step by step.
Setting Up The Jack
First, choose a strong, flat surface under the joist to place the jack. Use a hydraulic jack or a screw jack for better control. Position a sturdy wooden block between the jack and the joist to spread the pressure evenly. Check that the jack stands straight and stable to avoid slipping during lifting.
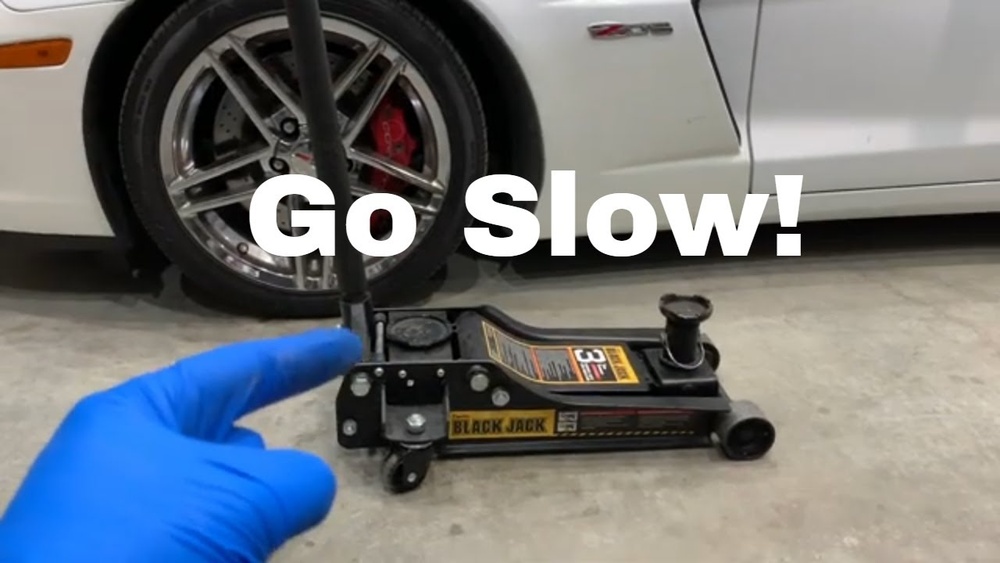
Lifting The Joist Safely
Slowly turn the jack handle to raise the joist. Lift in small increments, watching for any signs of cracking or movement. Stop if the joist resists or the floor above feels unstable. Keep the lifting steady to avoid sudden shifts that could cause damage or injury.
Supporting The Joist
Once the joist reaches the desired height, place solid supports like adjustable jack posts underneath. These supports hold the joist in place while repairs or adjustments are made. Remove the jack carefully after the supports are secure. Double-check that the joist stays level and stable before finishing the work.
Checking For Level And Stability
Checking for level and stability is a key step when jacking up floor joists and joist hangers. This step ensures the floor stays safe and strong after repairs. Without proper leveling, floors can sag or become uneven.
Stability means the joists and hangers hold firmly without wobbling. This helps prevent future damage and keeps the structure sound. Taking time to check these details saves effort and money later.
Using A Level To Check Joist Height
Place a carpenter’s level on the joist surface. See if the bubble sits in the center. If not, adjust the jack to raise or lower the joist.
Check multiple points along the joist for even height. This avoids dips or high spots that cause uneven floors.
Testing Joist Stability
Push gently on the joist after jacking it up. It should not move or shift. If it does, tighten the jack or add support.
Ensure the joist hanger is fully seated and secured with nails or screws. Loose hangers reduce stability.
Rechecking After Adjustments
After making changes, recheck the level and stability. Small shifts can happen when tightening supports.
Repeat the process until the joist is perfectly level and stable. This creates a solid foundation for flooring.
Final Adjustments And Cleanup
After jacking up floor joists and securing joist hangers, final steps are important. These ensure the structure is stable and safe. Proper adjustments and cleanup prepare the area for the next phase of your project.
Take time to check all joists for level and alignment. Small changes now prevent big problems later. Clean the workspace to avoid hazards and keep tools ready.
Checking Joist Level And Alignment
Use a spirit level to check each joist carefully. Make sure joists sit flat and at the correct height. Adjust the jacks slowly to fix any low or high spots. Confirm all joists line up straight along the length. This step keeps your floor strong and even.
Securing Joist Hangers
Inspect joist hangers to ensure they are tight and properly attached. Nails or screws must be firmly in place. Loose hangers can cause creaks or structural issues. Tighten or replace any damaged hardware immediately.
Cleaning The Work Area
Remove debris, old nails, and wood scraps from the floor. Sweep the area to keep it tidy and safe. Organize tools and materials for easy access later. A clean space reduces accidents and speeds up the next steps.
Final Safety Checks
Look over the entire work zone for any hazards. Check that all jacks are removed or properly stored. Confirm no sharp objects or loose boards remain. Safety now protects you and your home in the long run.

Credit: www.youtube.com
Frequently Asked Questions
How Do You Safely Jack Up Floor Joists?
To safely jack up floor joists, use a hydraulic jack and support beams. Remove any load from the joists first. Slowly raise the jack while monitoring the joist for movement. Use temporary supports to hold the joist in place once lifted.
What Tools Are Needed For Jacking Joist Hangers?
Essential tools include a hydraulic jack, adjustable wrench, pry bar, level, and safety gear. These tools help lift, adjust, and secure joist hangers properly. Proper tools ensure safety and accuracy in the jacking process.
When Should You Jack Up Floor Joists?
Jack up floor joists when they sag, rot, or after water damage. It helps restore structural integrity and level floors. Early jacking prevents further damage and maintains home safety.
Can Jacking Floor Joists Fix Uneven Floors?
Yes, jacking floor joists can level uneven floors. It raises sagging joists back to their original position. This method improves floor stability and prevents future sagging.
Conclusion
Jacking up floor joists and installing joist hangers strengthens your floor’s support. It helps fix sagging floors and prevents future damage. Always follow safety steps and use the right tools. Take your time to measure and lift carefully. This task improves home safety and comfort.
With patience, you can do it yourself. Keep checking your work as you go along. A solid floor feels stable and lasts longer. Simple repairs can save money and avoid big problems later. Trust the process and work steadily. Your floor will thank you.