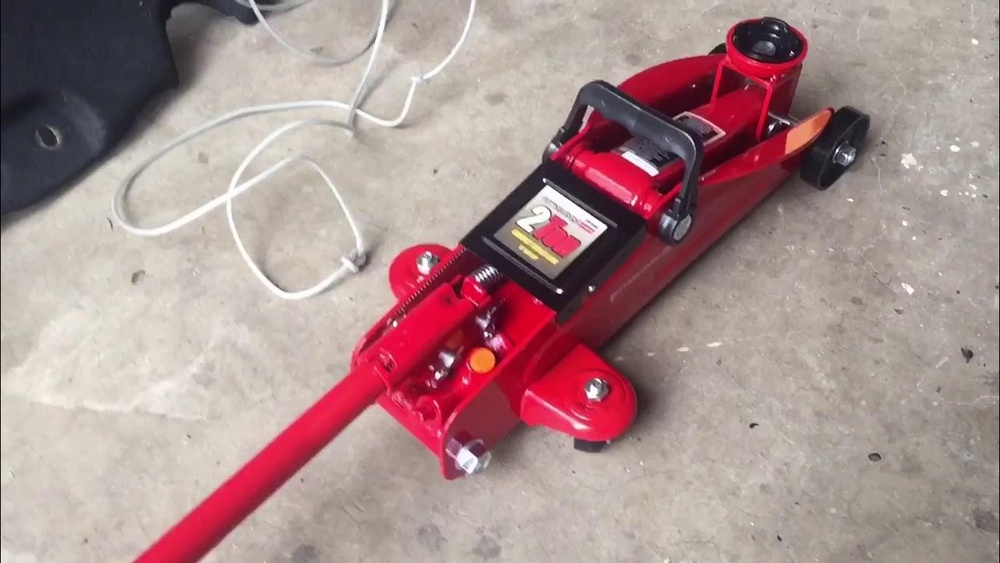
If you own a C Delco floor jack, you know how important it is to keep it in top shape. Over time, wear and tear can make your jack less reliable or even unsafe.
But don’t worry—rebuilding your C Delco floor jack is easier than you might think. In this guide, you’ll discover simple steps to bring your jack back to life, saving you money and giving you confidence every time you lift your vehicle.
Ready to make your floor jack as good as new? Let’s get started!
Tools And Materials Needed
Rebuilding a C Delco floor jack requires the right tools and materials. Having these ready makes the process smoother and faster. It also ensures safety while working.
This section lists all necessary items. Each tool and material plays an important role in the rebuild. Prepare them before starting the project.
Basic Hand Tools
You need a set of wrenches, including open-end and socket types. A flathead and Phillips screwdriver help remove screws. Pliers and adjustable wrenches assist with gripping and turning parts.
Hydraulic Fluid
Use the recommended hydraulic oil for the jack. This fluid helps the jack lift smoothly. Avoid mixing fluids to prevent damage.
Replacement Parts
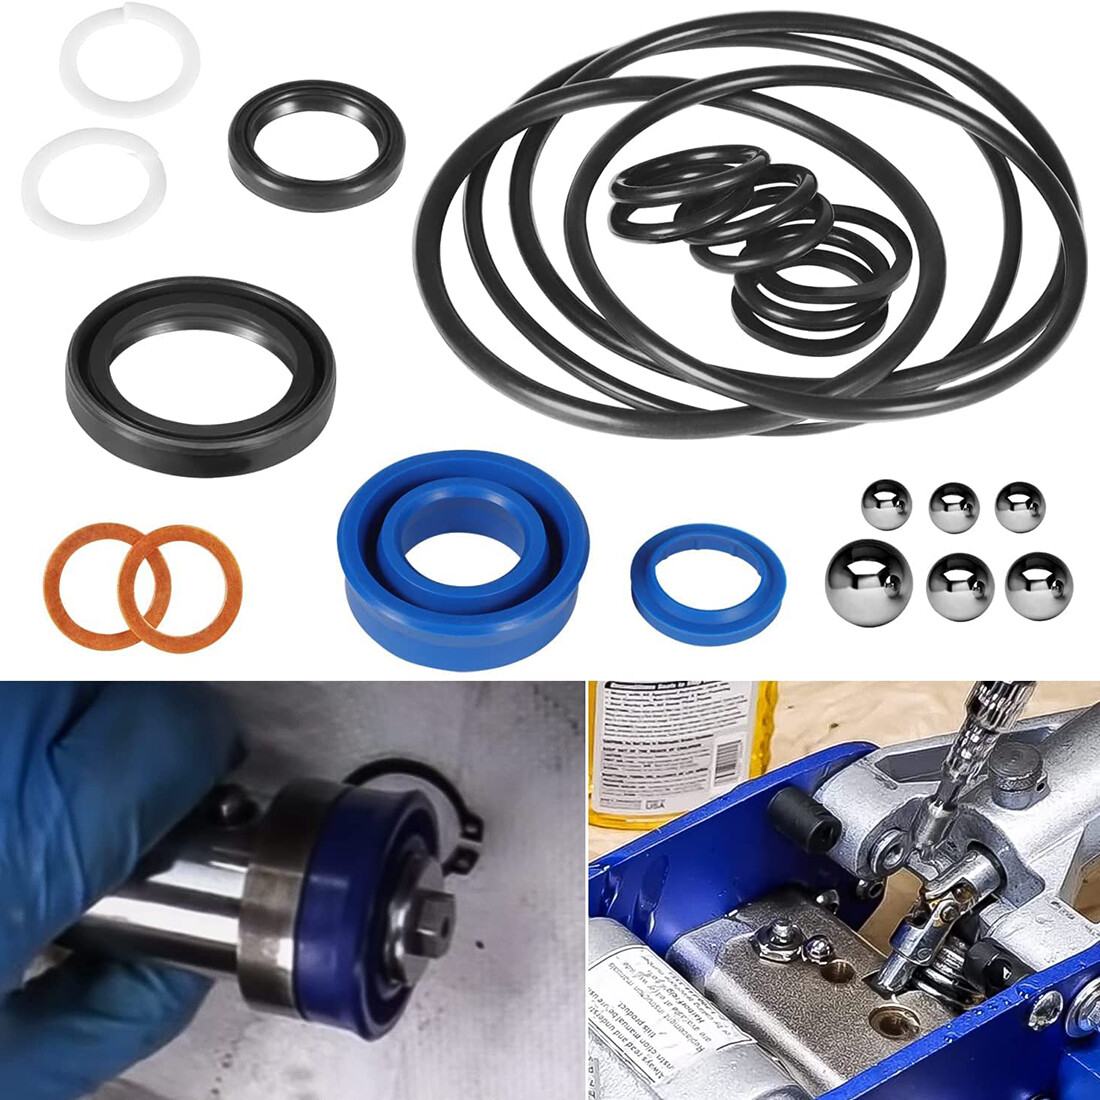
Order seals, O-rings, and gaskets specific to the C Delco model. These parts stop leaks and keep pressure. Inspect old parts and replace any worn ones.
Cleaning Supplies
Have rags, brake cleaner, and a small brush ready. Cleaning removes dirt and old grease. This step helps spot problems and improves performance.
Safety Gear
Wear gloves and safety goggles. Protect your hands and eyes from oil and debris. A clean workspace also helps avoid accidents.
Preparing The Floor Jack
Preparing the floor jack is the first step in rebuilding your A C Delco floor jack. This stage sets the base for a successful repair. Proper preparation helps avoid mistakes and keeps you safe during the process. It also ensures the jack works smoothly after rebuilding.
Focus on safety and cleanliness. These two points are key. Take your time and follow the steps carefully.
Safety Precautions
Wear gloves and safety glasses before starting. The floor jack contains heavy parts and hydraulic fluid. These can cause injury or skin irritation. Make sure the work area is clean and dry. Avoid working near open flames or sparks. Hydraulic fluid is flammable. Keep children and pets away from the work zone. Use proper tools to prevent slips and damage. Always follow the jack’s user manual for safety tips.
Cleaning And Inspection
Start by wiping off dirt and grease from the jack. Use a clean cloth and mild cleaner. Remove any old oil or grime. After cleaning, check for cracks or damage on the frame. Look at the lifting arm and wheels closely. Inspect the hydraulic cylinder for leaks or rust. Check all bolts and nuts for tightness. Replace any worn or broken parts before rebuilding. A thorough inspection helps find problems early and saves time later.
Disassembling The Floor Jack
Disassembling a C Delco floor jack is the first step in rebuilding it. This process helps you inspect each part for wear or damage. Taking the floor jack apart carefully prevents breaking any pieces. Follow clear steps to ensure a smooth disassembly. Understanding these steps makes the rebuild easier and safer.
Removing The Handle
Start by placing the floor jack on a flat surface. Look for the pin or bolt holding the handle. Use a wrench or pliers to remove this pin carefully. Pull the handle out slowly to avoid bending it. Set the handle aside in a safe place for later use.
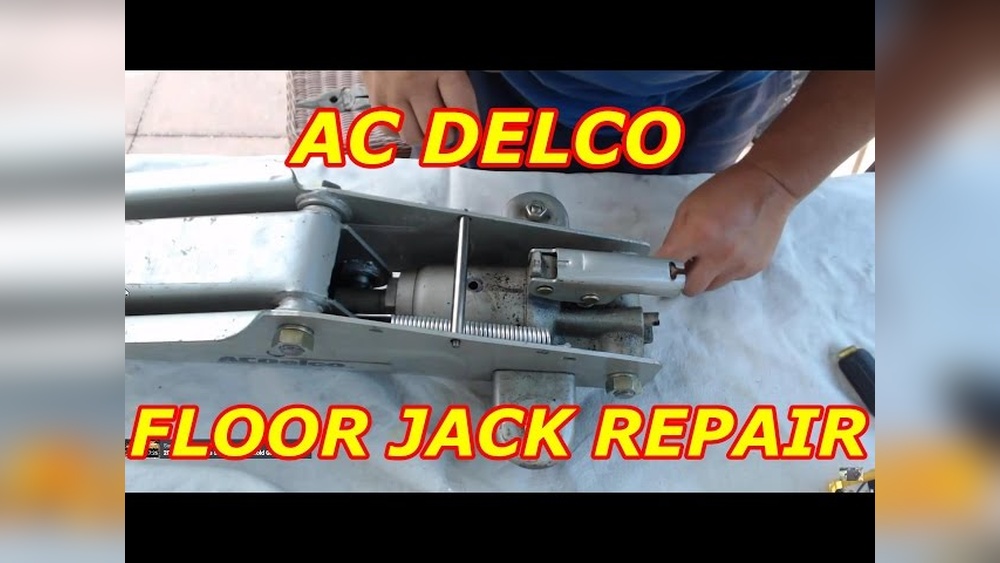
Taking Apart The Hydraulic System
Locate the hydraulic pump and cylinder. Unscrew the release valve using a suitable tool. Drain any hydraulic fluid into a container for proper disposal. Remove the pump assembly by loosening bolts or screws. Take out the piston and seals gently to avoid damage. Keep all parts organized for easy reassembly.
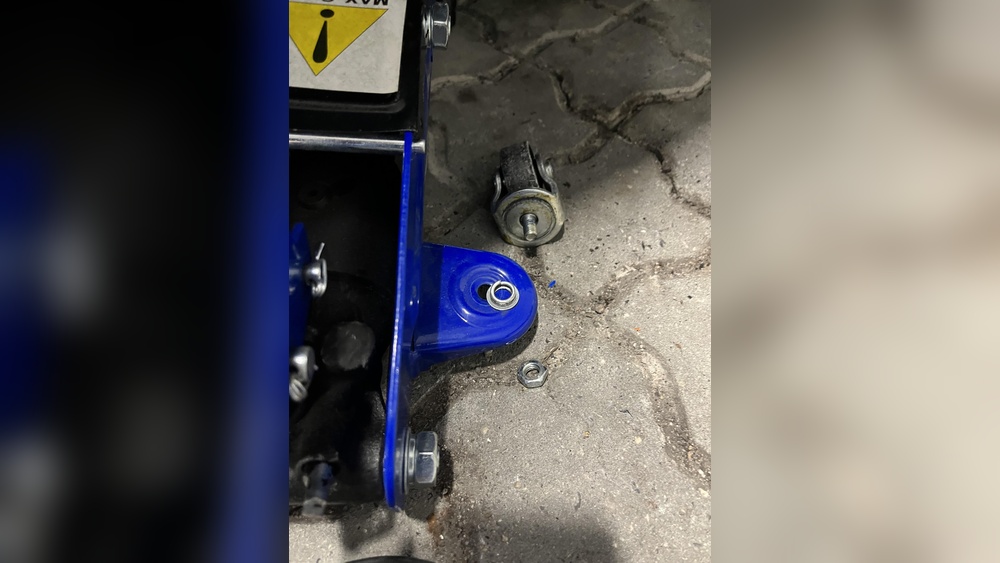
Separating The Frame Components
Identify the bolts connecting the frame sections. Use a socket wrench to remove these bolts one by one. Carefully separate the base from the lifting arm and other parts. Check each piece for rust or cracks before cleaning. Lay all components on a clean surface to keep track.
Inspecting Parts For Wear
Inspecting parts for wear is a key step in rebuilding a C Delco floor jack. It helps find damaged or worn components. Replacing these parts ensures safe and smooth operation. Careful inspection saves time and money later.
Wear can cause leaks, loss of pressure, and poor lifting performance. Each part must be checked closely. Look for cracks, hardening, or flattening. Understanding the condition of parts guides the repair process.
Checking Seals And O-rings
Seals and O-rings keep the hydraulic fluid inside the jack. They prevent leaks and maintain pressure. Check seals for cracks, dryness, or breaks. Old seals become hard and lose flexibility.
O-rings may flatten or tear. Replace all damaged seals and O-rings. Use parts designed for your jack model. New seals ensure the jack holds pressure well.
Assessing Hydraulic Fluid Condition
Hydraulic fluid powers the floor jack’s lifting. Check the fluid’s color and clarity. Dark or dirty fluid needs changing. Fluid with particles can damage the pump and valves.
Use clean, fresh hydraulic fluid recommended by the manufacturer. Proper fluid keeps the system working smoothly. Avoid mixing fluids from different types.
Examining Pistons And Cylinders
Pistons and cylinders create the lifting force. Look for scratches, rust, or dents on these parts. Smooth surfaces are essential for sealing and movement.
Rust or damage causes leaks and poor performance. Clean parts carefully and replace any damaged items. Well-maintained pistons and cylinders improve jack safety and function.
Replacing Worn Components
Replacing worn components is key to restoring your A C Delco floor jack. Over time, parts wear out and cause leaks or poor lifting power. Changing these parts brings back smooth operation and safety. Focus on seals, fluid, and any damaged pieces. This will extend your jack’s life and keep it working well.
Installing New Seals And O-rings
Start by removing old seals and O-rings carefully. These parts stop hydraulic fluid from leaking. Use clean tools to avoid damage. Match new seals to the exact size and type. Gently place each seal in its groove. Proper installation prevents leaks and maintains pressure.
Refilling Hydraulic Fluid
Drain old fluid completely before adding new. Use the hydraulic fluid type recommended by the manufacturer. Pour slowly to avoid air bubbles. Air in the system can reduce lifting strength. Check the fluid level often during filling. Keep the jack upright to ensure proper fluid distribution.
Swapping Out Damaged Parts
Inspect all parts for cracks, rust, or wear. Replace any bent or broken components immediately. Use original or compatible parts for the best fit. Tighten bolts and screws firmly but carefully. Double-check all connections before testing the jack. A fully intact jack works safely and lifts smoothly.
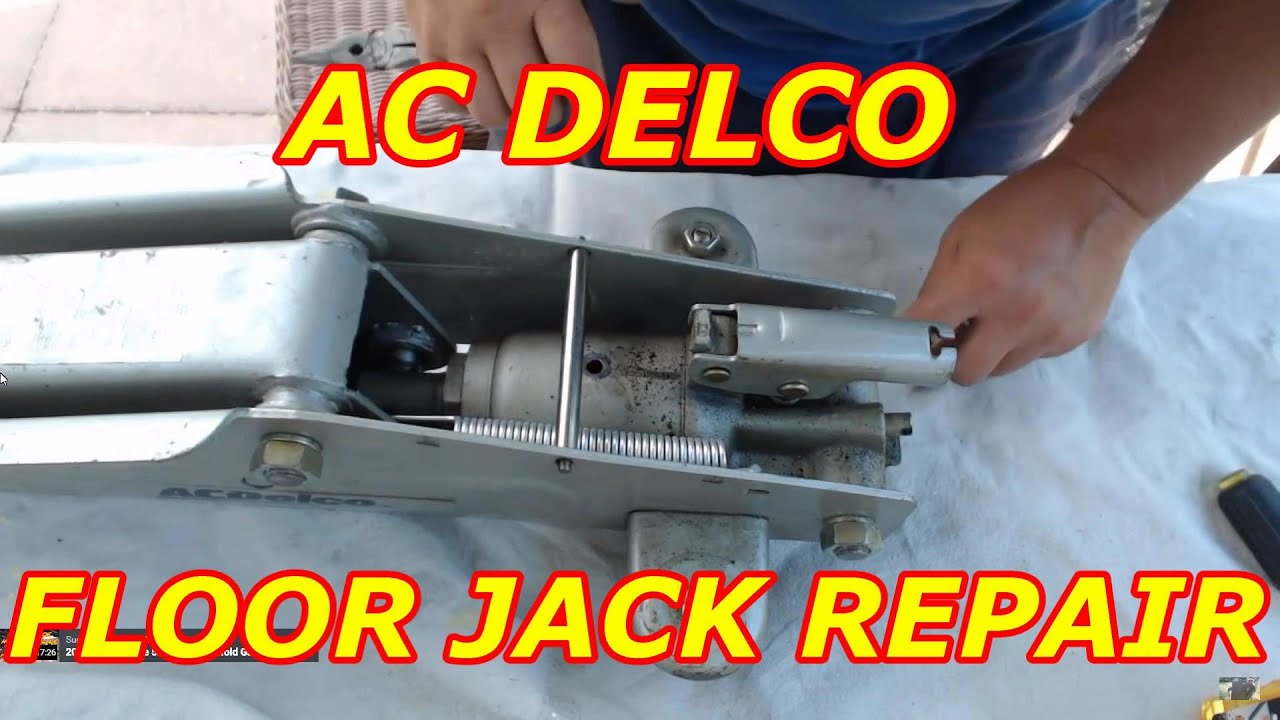
Credit: www.youtube.com
Reassembling The Floor Jack
Reassembling the floor jack is a critical step after cleaning and repairing parts. This stage ensures the jack works safely and smoothly. Take your time and follow each step carefully. Proper assembly helps avoid leaks and mechanical failures. Keep tools and parts organized for an easier process.
Reinstalling The Hydraulic System
Start by placing the hydraulic cylinder back into the frame. Align it carefully with the mounting points. Insert the piston and seals with care to avoid damage. Use new seals if the old ones are worn out. Tighten all bolts evenly to prevent leaks. Check that the hydraulic fluid reservoir is clean before refilling. Refill with the recommended hydraulic oil to the correct level. Test the hydraulic system by pumping the handle slowly. Look for smooth movement and no fluid leaks.
Reattaching The Handle
Slide the handle into its socket on the jack frame. Ensure the handle pivot pin fits tightly. Secure the pin with a clip or bolt as required. Test the handle’s movement to confirm it moves freely. Attach the release valve lever to the handle assembly. This lever controls the jack’s lifting and lowering action. Make sure all connections are firm but not over-tightened. The handle should operate smoothly without sticking.
Securing Frame Components
Inspect all frame parts for damage before final assembly. Reattach side plates and base supports using correct bolts. Tighten bolts in a cross pattern to ensure even pressure. Replace any damaged or missing fasteners for safety. Check that wheels and casters spin freely. Lubricate moving parts lightly for better movement. Confirm the jack sits flat and stable on the ground. Proper frame assembly maintains balance and strength during use.
Testing And Adjustments
Testing and adjustments are key steps after rebuilding your A C Delco floor jack. These steps ensure the jack works safely and smoothly. Proper testing helps find small issues early. Adjustments fix those problems and improve performance. Take your time with this process for the best results.
Checking For Leaks
Look closely around all seals and joints. Any oil spots or wet areas show leaks. Leaks can reduce lifting power and cause damage. Tighten connections or replace faulty seals to stop leaks. Clean the jack before testing again to spot new leaks.
Adjusting Lift Height And Pressure
Check how high the jack lifts with no load. Compare this with the original specs. Adjust the pressure valve to reach the correct lift height. Too low means the jack won’t lift properly. Too high can cause damage or be unsafe. Small turns on the valve make a big difference. Test often during adjustment.
Performing Load Tests
Place a heavy object on the jack to test its strength. Use a weight close to the jack’s limit but stay safe. Pump the handle and watch the jack lift the load. Hold the weight for several minutes to check stability. Lower the load slowly to check smooth operation. If the jack fails, recheck seals and pressure.

Credit: www.amazon.in
Maintenance Tips
Proper maintenance keeps your C Delco floor jack working safely and smoothly. Regular care prevents damage and extends the jack’s life. Follow these tips to maintain your floor jack after rebuilding it.
Regular Cleaning
Clean your floor jack after each use. Remove dirt, dust, and grease from all surfaces. Use a damp cloth to wipe the jack clean. Avoid using harsh chemicals that can harm the paint or metal. Keep the wheels free from debris to ensure smooth movement.
Lubrication Points
Apply lubricant to all moving parts regularly. Focus on the pump piston, wheels, and release valve. Use light machine oil or grease for best results. Lubrication reduces friction and prevents rust. It helps the jack lift and lower smoothly without sticking.
Storage Recommendations
Store your floor jack in a dry, clean place. Keep it away from moisture to prevent rust. Lower the jack completely before storing to relieve pressure. Cover the jack with a cloth or plastic sheet to keep dust off. Proper storage keeps it ready for safe use anytime.
Credit: www.ebay.com
Frequently Asked Questions
How Do I Rebuild A C Delco Floor Jack?
To rebuild a C Delco floor jack, first disassemble it carefully. Clean all parts, replace worn seals, and lubricate moving components. Reassemble the jack and test for proper operation and safety before use.
What Tools Are Needed To Rebuild A Floor Jack?
You will need wrenches, screwdrivers, a hammer, seal kits, and hydraulic fluid. A clean workspace and safety gloves are also essential for efficient rebuilding.
How Often Should I Rebuild My C Delco Floor Jack?
Rebuild your floor jack every 2-3 years or when it leaks or loses pressure. Regular maintenance ensures safety and extends the jack’s lifespan.
Can I Rebuild The Hydraulic System Myself?
Yes, rebuilding the hydraulic system is possible with the right tools and parts. Follow a step-by-step guide and ensure all seals are replaced to prevent leaks.
Conclusion
Rebuilding a C Delco floor jack takes care and patience. Follow each step slowly and check your work. Using the right tools makes the job easier. A well-maintained jack works safely and lasts longer. Keep your floor jack clean and store it properly.
Regular checks help avoid big problems later. You can save money by fixing it yourself. Trust your skills and take your time. Soon, your floor jack will be ready to use again. Simple effort brings great results.