Are you tired of struggling with a faulty two-way light switch? Replacing it might seem tricky, but it’s easier than you think.
Imagine taking control of your home’s lighting with confidence and saving money on an electrician’s visit. In this guide, you’ll discover simple, clear steps to replace your two-way light switch safely and quickly. By the end, you’ll have the skills to fix it yourself and enjoy the satisfaction of a job well done.
Keep reading—you’re just minutes away from mastering this handy home improvement task.
Tools And Materials Needed
Replacing a two-way light switch requires the right tools and materials. Having everything ready makes the job safer and faster. This section lists what you need for a smooth replacement process.
Essential Tools
First, gather the basic tools. A screwdriver set is crucial. Use both flathead and Phillips screwdrivers. A voltage tester is important to check power before starting. Wire strippers help remove insulation from wires safely. Needle-nose pliers are useful for bending and twisting wires. A flashlight or headlamp improves visibility in dark spaces. Electrical tape helps secure wire connections.
Required Materials
Prepare the new two-way switch suitable for your circuit. Use good quality electrical wires matching the existing ones. Wire connectors or wire nuts are needed to join wires securely. A faceplate to cover the switch ensures a clean finish. If the wires are old or damaged, get new wiring for safety. Always choose materials that meet local electrical codes.

Credit: diy.stackexchange.com
Safety Precautions
Replacing a two-way light switch requires careful attention to safety. Electricity can be dangerous. Taking the right precautions protects you from shocks and injuries. Follow these steps to work safely and confidently.
Turning Off Power
Start by turning off the power at the circuit breaker. This stops electricity from flowing to the switch. Never rely only on the wall switch to cut power. Double-check the breaker panel and switch off the correct circuit. Use a label to mark the breaker for future reference. This simple step prevents serious accidents.
Using A Voltage Tester
After turning off the power, test the wires with a voltage tester. This device shows if any electricity is still present. Touch the tester to each wire and terminal. If the tester lights up or beeps, the power is still on. Do not touch the wires until the tester shows zero voltage. This step ensures complete safety before you start work.
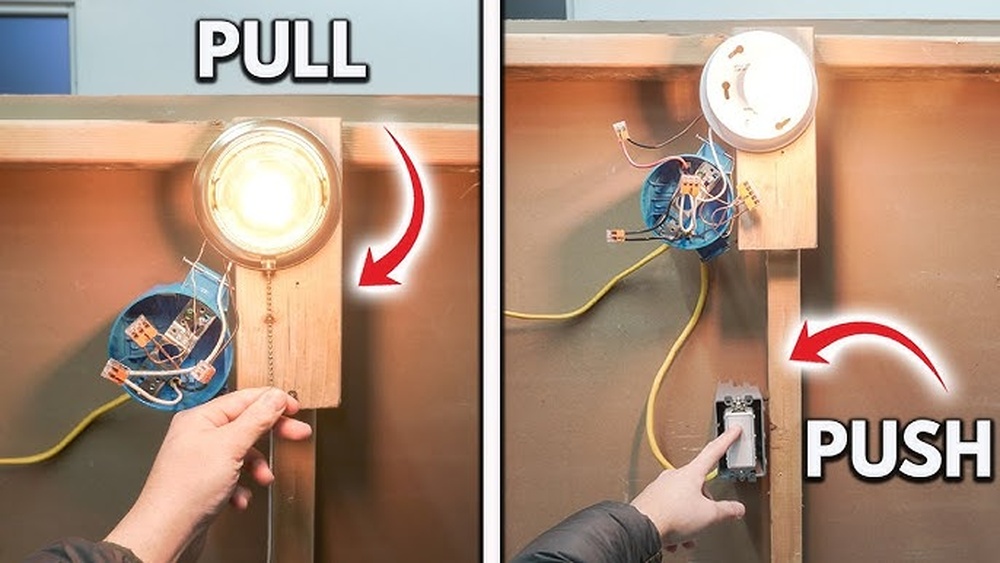
Identifying The Two Way Switch
Identifying the two way switch is the first step in replacing it safely. This switch type controls a light from two locations. It looks similar to a regular switch but works differently. Knowing how to spot it saves time and prevents wiring mistakes.
Recognizing Switch Types
Two way switches usually have two toggle positions. They control one light from two separate spots. Unlike a single switch, they have three terminals on the back. These terminals connect wires to allow control from both switches. The switch face often looks like a normal switch. The key is checking the terminals on the back.
Locating Wiring Connections
Turn off the power before touching wires. Remove the switch cover to see the wiring. Two way switches have three wires connected: one common and two travelers. The common wire is usually darker or marked. The traveler wires connect to the other two terminals. Note the position of each wire before removing the switch. This helps connect the new switch correctly.

Credit: www.youtube.com
Removing The Old Switch
Removing the old two-way light switch is the first step in replacement. This part is simple but requires care. Turning off the power is important to stay safe. Use a voltage tester to check wires before touching anything.
Unscrewing The Switch Plate
Start by locating the screws on the switch plate. Use a screwdriver to remove them. Keep the screws safe for later use. Gently pull the switch plate away from the wall. This exposes the switch and wires behind it.
Disconnecting Wires
Notice how the wires connect to the switch. Use a screwdriver to loosen the terminal screws. Carefully pull the wires free from the old switch. Avoid damaging the wire ends. Note where each wire was connected for easy reinstallation.
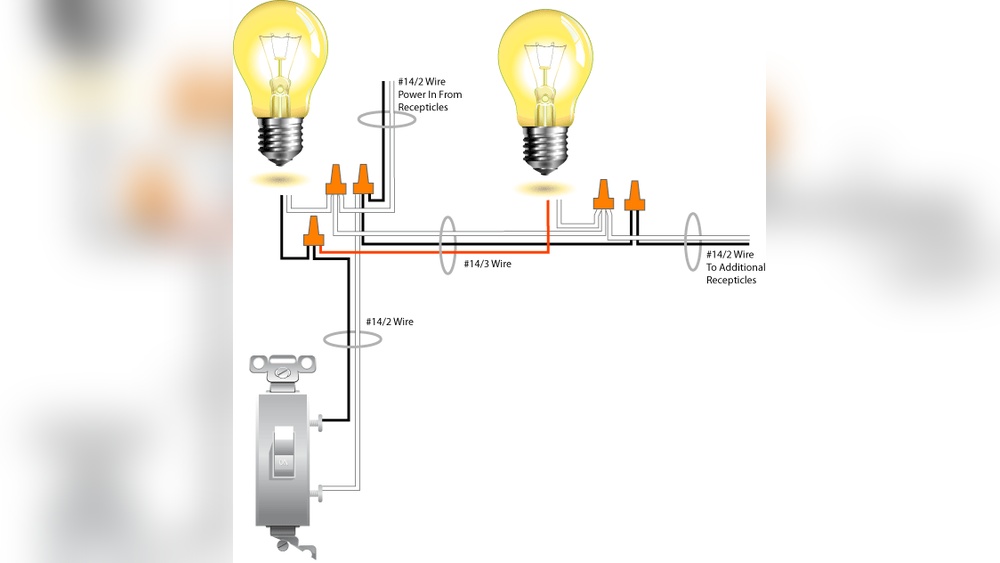
Wiring The New Switch
Wiring the new switch is a crucial step in replacing a two way light switch. It requires careful attention to ensure safety and proper function. The wires must connect correctly to avoid short circuits or malfunction.
Follow the wire colors and positions from the old switch. Take your time to match each wire with the right terminal on the new switch. This step ensures the switch will work as intended.
Matching Wire Connections
Start by identifying the wires from the wall. Usually, two wires control the light from different switches. These are called traveler wires. The third wire is the common wire, which connects to the power source or the light fixture.
Match the common wire to the terminal marked “COM” or “Common” on the new switch. Connect the traveler wires to the other two terminals. Make sure to keep the same wire on the same terminal as before.
Securing The Wires
Once the wires are connected, tighten the screws on each terminal firmly. Loose connections can cause sparks or the switch to fail. Use a screwdriver to ensure all screws are snug.
Tuck the wires neatly into the switch box. Avoid bending or pinching the wires. Secure the switch to the wall box with screws. Finally, attach the switch cover plate to finish the job.

Credit: diy.stackexchange.com
Testing The New Switch
Testing the new switch is a key step after installation. This ensures everything works safely and correctly. Follow these simple steps to check your two-way light switch.
Restoring Power
First, turn the power back on at the circuit breaker. This allows electricity to flow to the switch again. Make sure no tools or loose wires are near the switch before restoring power. Safety is the top priority.
Checking Functionality
Next, test the switch by flipping it on and off. Try both switches controlling the same light. The light should turn on and off smoothly from each switch. If it does, the wiring is correct and the switch works well.
If the light does not respond, double-check the wiring connections. Tighten any loose wires and test again. This step confirms the new switch controls your lights properly and safely.
Troubleshooting Common Issues
Troubleshooting common problems with a two way light switch helps save time and effort. Knowing what causes issues makes repairs easier. Many problems are simple to fix with basic tools.
Check the switch and wiring carefully. Often, the issue lies in loose connections or worn parts. Testing the switch can quickly identify faults. Let’s review some frequent problems and solutions.
Switch Not Working
First, ensure the power is off before touching wires. Use a voltage tester to check power at the switch. If no power, check the circuit breaker or fuse.
Loose wires can stop the switch from working. Tighten all screws and connections firmly. Look for signs of damage or corrosion on wires.
The switch itself might be faulty. Test it with a multimeter to see if it passes current. Replace the switch if it shows no continuity.
Flickering Lights
Flickering often means a loose wire connection. Check all wiring at the switch and light fixture. Secure any loose wires tightly under screws.
Worn or dirty switch contacts can cause flickering. Replacing the switch usually fixes this issue. Avoid cheap switches to prevent early wear.
Sometimes the bulb or fixture causes flickering. Try a new bulb or different fixture to isolate the problem. Use bulbs that match fixture specifications.
Frequently Asked Questions
What Tools Do I Need To Replace A Two Way Light Switch?
You need a screwdriver, voltage tester, wire stripper, and new two way switch. Always turn off power before starting work. Use tools safely and follow instructions carefully for a successful replacement.
How Do I Identify The Common Terminal On A Two Way Switch?
The common terminal is usually marked “COM” or “C” on the switch. It connects to the live wire. Identifying it correctly is crucial to ensure proper wiring and switch function.
Can I Replace A Two Way Switch Without Turning Off Power?
No, always turn off the power at the circuit breaker before replacing the switch. This prevents electrical shock and damage. Safety should be your top priority during electrical work.
How Long Does It Take To Replace A Two Way Light Switch?
Replacing a two way switch typically takes 15 to 30 minutes. Time varies based on experience and wiring complexity. Taking your time ensures accuracy and safety.
Conclusion
Replacing a two way light switch is easier than it seems. Take your time and follow each step carefully. Always turn off the power before starting work. Double-check your connections to avoid problems later. With a bit of patience, you can do this yourself.
Enjoy the satisfaction of fixing your home wiring. Stay safe and use the right tools. Simple tasks like this save money and build confidence. Keep practicing, and electrical work will feel less tricky. You got this!