Are you looking to add a new light switch but don’t want to run a whole new power line? What if you could power your switch right from an existing outlet?
It’s easier than you think, and you don’t need to be an expert electrician to do it. In this guide, you’ll learn step-by-step how to install a light switch using power from your outlet safely and efficiently. Keep reading, and by the end, you’ll have the confidence to upgrade your lighting setup and make your space more convenient and stylish.
Tools And Materials Needed
Installing a light switch that gets power from an outlet needs some tools and materials. Having the right items helps finish the job safely and quickly. This list covers everything needed for this project.
Essential Tools
- Screwdriver set (flathead and Phillips)
- Wire stripper
- Voltage tester
- Needle-nose pliers
- Drill (optional)
- Electrical tape
- Flashlight or work light
Required Materials
- Single-pole light switch
- Electrical box (if needed)
- Wire connectors (wire nuts)
- 14/2 or 12/2 electrical cable
- Switch cover plate
Safety Gear
- Insulated gloves
- Safety goggles
- Non-conductive footwear

Credit: www.do-it-yourself-help.com
Safety Precautions
Working with electricity can be dangerous. Safety is very important when installing a light switch with power from an outlet. Taking the right steps prevents shocks, fires, and injuries. Follow safety rules carefully before starting any work.
Turn Off The Power
Always switch off the power at the breaker box. Check that the power is off using a voltage tester. Never trust the wall switch to cut power alone. This step protects you from electric shock.
Use Proper Tools And Equipment
Use insulated tools designed for electrical work. Avoid using damaged or worn tools. Wear rubber-soled shoes to reduce shock risk. Use a voltage tester to check wires before touching them.
Work In A Dry Environment
Make sure your hands and the work area are dry. Water conducts electricity and increases shock risk. Avoid working in wet or damp conditions. Keep the workspace clean and clear of liquids.
Follow Local Electrical Codes
Check local electrical rules before starting. Codes ensure safe installation and prevent hazards. Use the right wire size and connectors. Follow instructions for grounding and wiring methods.
Wear Safety Gear
Wear safety glasses to protect your eyes. Use gloves made for electrical work. Long sleeves can protect your arms from sparks. Safety gear reduces injury chances during installation.
Identifying Power Source
Identifying the power source is the first step in installing a light switch from an outlet. You must find where the electricity comes from to work safely and correctly. This process involves checking the wiring inside the outlet and confirming the power flow to the switch location. Clear understanding helps avoid mistakes and electrical hazards.
Checking The Outlet Wiring
Start by turning off the power at the circuit breaker. Remove the outlet cover carefully. Look at the wires connected to the outlet terminals. Typically, black or red wires carry power, white wires are neutral, and green or bare wires are ground.
Use a voltage tester to check which wires have electricity. Test both the outlet’s terminals and the wires behind. Make notes on which wires are hot and which are neutral. This step ensures you know the exact wiring setup before proceeding.
Confirming Power Flow
After identifying the wiring, confirm the power flow to the new switch location. Turn the power back on and test the outlet with a voltage tester. Then, check the wires where the switch will connect.
Ensure the power runs from the outlet to the switch and back to the light fixture. This flow is essential for the switch to work properly. Without confirming power flow, the switch installation might fail or cause electrical issues.
Turning Off The Power
Turning off the power is the first and most important step before working on any electrical project. It keeps you safe from electric shocks. It also prevents damage to your tools and wiring. Never start without making sure the power is off.
Take your time with this step. Safety is more important than speed. Follow the right process to turn off power from the outlet.
Locate The Correct Circuit Breaker
Find your home’s electrical panel. Look for the circuit breaker that controls the outlet you want. The breakers usually have labels. If not, test each one carefully. Turning off the wrong breaker can be confusing but stay patient.
Switch Off The Power
Flip the circuit breaker to the OFF position. This stops the electricity flow to the outlet. Do not rely on just turning off the switch on the outlet itself. The breaker must be off to work safely on wiring.
Verify Power Is Off
Use a voltage tester or multimeter. Check the outlet to confirm no electricity is flowing. Test all wires inside the outlet box too. Never touch wires without testing. Safety depends on making sure power is really off.
Removing The Outlet Cover
Removing the outlet cover is the first step in installing a light switch with power from an outlet. This step allows you to access the wiring behind the outlet safely. You must be careful and follow safety rules to avoid electric shock.
Before starting, turn off the power at the circuit breaker. Test the outlet with a voltage tester to make sure the power is off. Safety is important.
Gather The Right Tools
Use a flathead or Phillips screwdriver to remove the outlet cover screws. Have a voltage tester ready. A flashlight can help if the area is dark.
Remove The Outlet Cover Screws
Locate the screws holding the outlet cover in place. Unscrew them carefully. Keep the screws safe for later use.
Take Off The Outlet Cover
Gently pull the outlet cover away from the wall. Do not force it. Check for any wires attached to the cover before pulling too hard.
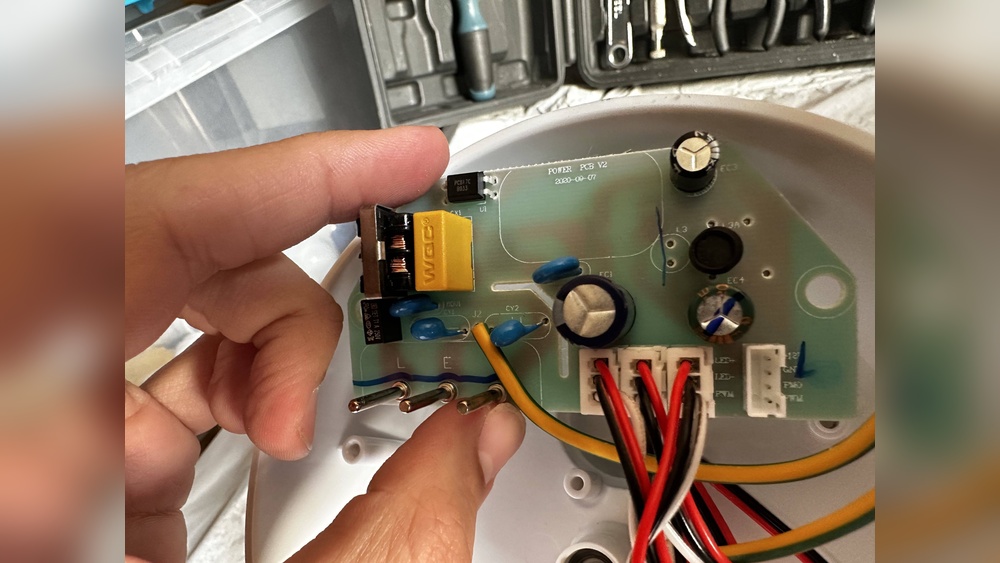
Inspect The Outlet Box
Look inside the outlet box for wires and connections. Ensure the power is off by testing wires with a voltage tester. Prepare for the next steps.

Credit: www.youtube.com
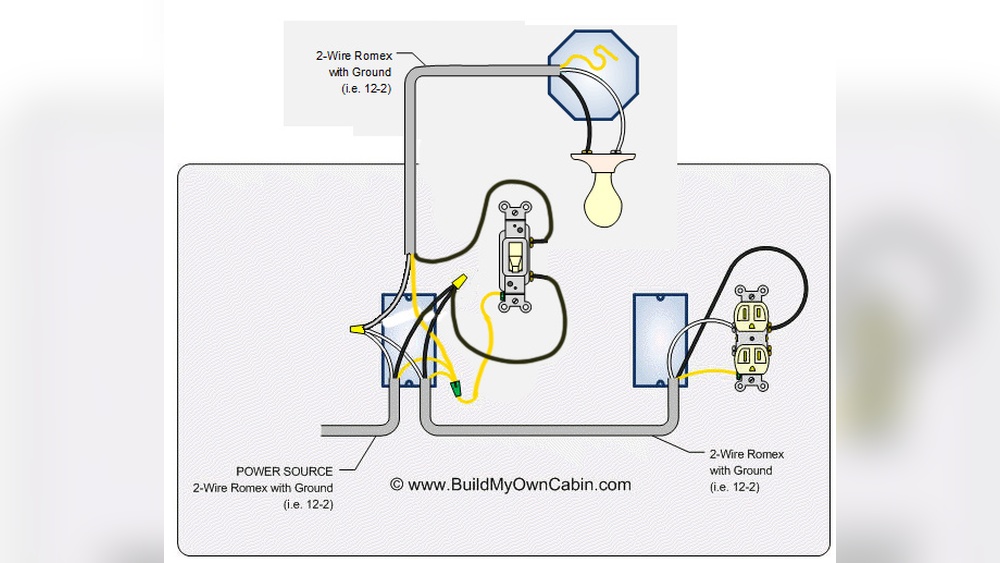
Wiring The Light Switch
Wiring the light switch is a key step in using power from an outlet. This process controls the flow of electricity to your light fixture. It needs care and attention to keep everything safe and working well.
Start by turning off the power at the breaker. This prevents any electrical shocks while working. Use a voltage tester to check the wires before touching them.
Connecting The Hot Wire
The hot wire carries electricity from the outlet to the switch. It is usually black or red. Connect this wire to the switch’s brass or copper terminal. Tighten the screw firmly to hold the wire in place. Do not let any bare wire show outside the terminal.
Connecting The Neutral And Ground Wires
The neutral wire, usually white, completes the electrical circuit. This wire does not connect to the switch but joins other neutral wires in the box. Use a wire nut to twist these wires together securely.
The ground wire is green or bare copper. It adds safety by directing electricity to the ground if a fault occurs. Attach the ground wire to the green screw on the switch. Also, connect it to any ground wires in the box for proper grounding.
Mounting The Switch
Mounting the switch is a key step in installing a light switch with power from an outlet. It involves placing the switch securely in the wall box. Doing this right ensures safety and a neat look.
Before mounting, check that all wires are connected properly. Loose wires can cause problems later. The switch should fit well in the box without forcing it.
Prepare The Wall Box
Clear out any debris inside the wall box. Make sure it is dry and free of dust. Check the size of the box to confirm it fits the switch. Adjust if needed to avoid tight spots.
Connect The Switch Wires
Match the wires from the outlet to the switch terminals. Tighten the screws firmly, but do not over-tighten. This keeps the wires secure and prevents damage. Double-check all connections before proceeding.
Secure The Switch In Place
Push the switch gently into the wall box. Align the screw holes with the box holes. Use the mounting screws to fix the switch firmly. Avoid overtightening to prevent cracking the switch or wall.
Attach The Switch Cover Plate
Place the cover plate over the switch. Line up the screw holes with the switch. Fasten the screws evenly to keep the plate flat. This step gives a clean and finished appearance.
Testing The Installation
Testing the installation is a key step after wiring a light switch from an outlet. It confirms the switch works correctly and safely controls the power. Testing helps catch wiring mistakes early, avoiding hazards or damage.
Follow clear steps to test the switch and outlet before finishing your project. Use basic tools and simple checks to ensure everything functions as expected.
Using A Voltage Tester
First, use a voltage tester to check power at the switch and outlet. Turn the main power back on. Touch the tester probes to the switch terminals. The tester should show voltage on the live wire only.
Next, test the outlet terminals. Confirm the outlet has power. The tester will light up or beep if voltage is present.
Switch Operation Check
Flip the switch on and off several times. Watch the connected light or device. It should turn on when the switch is on and off when the switch is off.
No flickering or delay should occur. If the light stays on or off, recheck the wiring.
Inspect For Safety Issues
Look for any sparks, burning smells, or unusual noises. These signs indicate wiring problems. Turn off the power immediately if you detect any issues.
Make sure the switch plate and outlet cover fit snugly. Loose parts can cause shocks or short circuits.
Troubleshooting Common Issues
Troubleshooting common issues is key when installing a light switch powered from an outlet. Small problems can stop the switch from working. Knowing how to fix these issues saves time and effort.
This section covers easy checks and fixes for frequent problems. Follow these tips to ensure your switch works safely and well.
Check For Loose Connections
Loose wires cause the switch to fail. Turn off power before checking. Tighten all wire nuts and screws. Make sure wires fit snugly in terminals. A firm connection means better electricity flow.
Verify The Outlet Has Power
The switch needs power from the outlet. Test the outlet with a voltage tester. No power means the outlet or circuit has issues. Fix outlet problems before continuing.
Confirm The Switch Is Wired Correctly
Wrong wiring stops the switch from working. Match wires to the switch terminals as shown in instructions. Black wires usually carry power. White wires connect to neutral. Ground wires must be attached securely.
Test The Switch For Faults
Switches can be defective. Use a continuity tester or multimeter to check. Replace the switch if it does not pass the test. A bad switch cannot control the light.
Check For Tripped Circuit Breakers
A tripped breaker cuts power to the outlet and switch. Look at the breaker box. Reset any tripped breakers. Then test the switch again. This step often restores power fast.

Credit: www.youtube.com
Frequently Asked Questions
How Do I Safely Install A Light Switch From An Outlet?
Turn off the power at the circuit breaker first. Use a voltage tester to confirm no power. Connect the switch wires to the outlet’s power source carefully. Follow wiring diagrams and local electrical codes for safety.
Can I Use An Existing Outlet To Power A Light Switch?
Yes, you can tap into an outlet’s power for a switch. Ensure the outlet has constant power and is on the same circuit. Use proper wiring methods to maintain electrical safety and code compliance.
What Tools Are Needed To Install A Switch From An Outlet?
You’ll need a voltage tester, wire stripper, screwdriver, electrical tape, and wire nuts. These tools help you safely connect wires and secure the switch and outlet connections properly.
Is It Necessary To Use A Gfci Outlet When Adding A Switch?
It depends on the location. Bathrooms and kitchens require GFCI protection. If your outlet is in these areas, install a GFCI outlet to power the switch safely and meet code requirements.
Conclusion
Installing a light switch with power from an outlet is simple. Follow the steps carefully to stay safe. Turn off the power before starting any work. Use the right tools and materials for the job. Double-check all connections to avoid problems later.
Taking your time helps prevent mistakes. This project saves money and adds convenience to your home. Enjoy controlling your lights with ease and safety. You can do this with some patience and care.