Is your light switch acting up and leaving you in the dark? You might be wondering if the switch itself is the problem or if something else is going wrong.
Knowing how to test if a light switch is bad can save you time, money, and frustration. You’ll learn simple, clear steps to check your switch safely and effectively. By the end, you’ll feel confident spotting the issue and deciding what to do next.
Keep reading to get your lights back on without any guesswork.

Credit: www.youtube.com
Signs Of A Faulty Light Switch
Knowing the signs of a faulty light switch helps keep your home safe. A bad switch can cause electrical problems. Spotting issues early saves time and money. Watch for unusual behavior in your lights and switch.
Flickering Lights
Lights that flicker on and off can mean a bad switch. This happens when the switch does not make a solid connection. Flickering can also damage your bulbs over time. Check the switch if your lights flicker often.
Switch Feels Hot
A warm or hot switch is a warning sign. Heat shows that electricity is not flowing correctly. Hot switches may cause electrical fires if ignored. Turn off power and test the switch if it feels hot.
Lights Don’t Turn On
Lights that don’t respond may have a switch problem. The switch might be broken inside or have loose wiring. Test the switch with a voltage tester to find the fault. Replace the switch if lights remain off.
Buzzing Or Crackling Sounds
Strange sounds from the switch are a red flag. Buzzing or crackling noises mean poor electrical contact. These sounds can indicate a worn-out switch or loose wires. Stop using the switch and have it checked immediately.
Credit: www.youtube.com
Tools Needed For Testing
Testing a light switch requires the right tools. These tools help check if the switch works well or if it needs replacement. Using proper tools ensures safety and accuracy during testing.
Below are the basic tools needed for testing a light switch. Each tool plays a key role in finding the problem.
Multimeter
A multimeter measures electrical current, voltage, and resistance. It helps check if the switch is sending power properly. This tool shows if the switch has an open or closed circuit. Multimeters are easy to use and give precise results.
Voltage Tester
A voltage tester detects live electricity in wires and switches. It tells if power is flowing through the switch. This tool is simple and quick for basic checks. It helps avoid electric shocks during testing.
Screwdriver
A screwdriver is needed to open the switch plate cover. It allows access to the wires behind the switch. Choose a screwdriver that fits the screws on your switch. Using the right size prevents damage to screws and switch parts.
Safety Gear
Safety gear protects you from electric shocks and injuries. Wear insulated gloves to avoid contact with live wires. Safety goggles protect your eyes from sparks or debris. Always turn off the power at the breaker before testing.
Safety First: Precautions To Take
Testing a light switch involves working with electricity. Taking safety steps is very important. These steps help stop accidents and injuries. Keep safe by following these simple rules before starting.
Turn Off Power
Find the circuit breaker that controls the light switch. Switch it off to cut the power. This stops electricity flow while you work. Never test a switch with power on. It is dangerous and can cause shocks.
Use Insulated Tools
Use tools with insulated handles only. Insulation stops electricity from passing to your hand. This lowers the risk of electric shock. Avoid metal tools without insulation. They can cause serious injury if they touch live wires.
Double Check Power Status
After turning off the power, test to confirm it is off. Use a voltage tester or multimeter on the switch wires. No reading means no electricity. Always test twice to be sure. Do not skip this step.
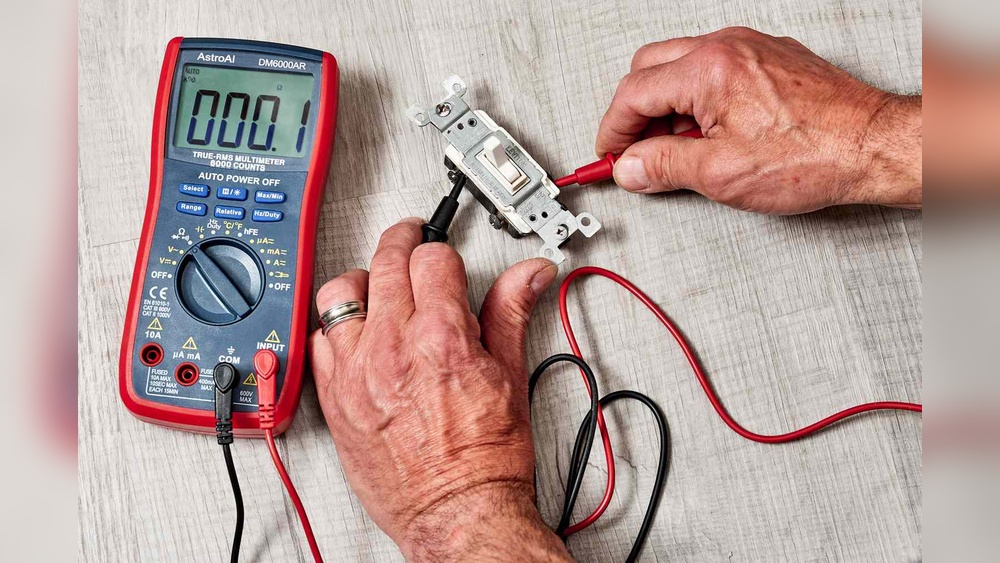
How To Test The Switch With A Multimeter
Testing a light switch with a multimeter helps find out if it works right. This tool checks the flow of electricity inside the switch. You can see if the switch is good or broken. Follow these simple steps to test your switch safely and correctly.
Set Multimeter To Continuity Mode
Turn on your multimeter. Set it to continuity mode. This mode checks if electricity can flow through the switch. Look for a symbol that looks like a sound wave or diode. This setting will beep when the circuit is complete.
Remove Switch Cover
Switch off the power at the circuit breaker first. Use a screwdriver to take off the switch cover. Be careful not to touch wires directly. This gives you access to the switch terminals for testing.
Test Switch Terminals
Place one multimeter probe on one terminal. Put the other probe on the second terminal. Flip the switch on and off. The multimeter should beep when the switch is on. No beep means no continuity and a bad switch.
Interpret Results
A beep means the switch is working and allows current. No beep means the switch is bad or broken. Test a few times to be sure. Replace the switch if it shows no continuity while on.
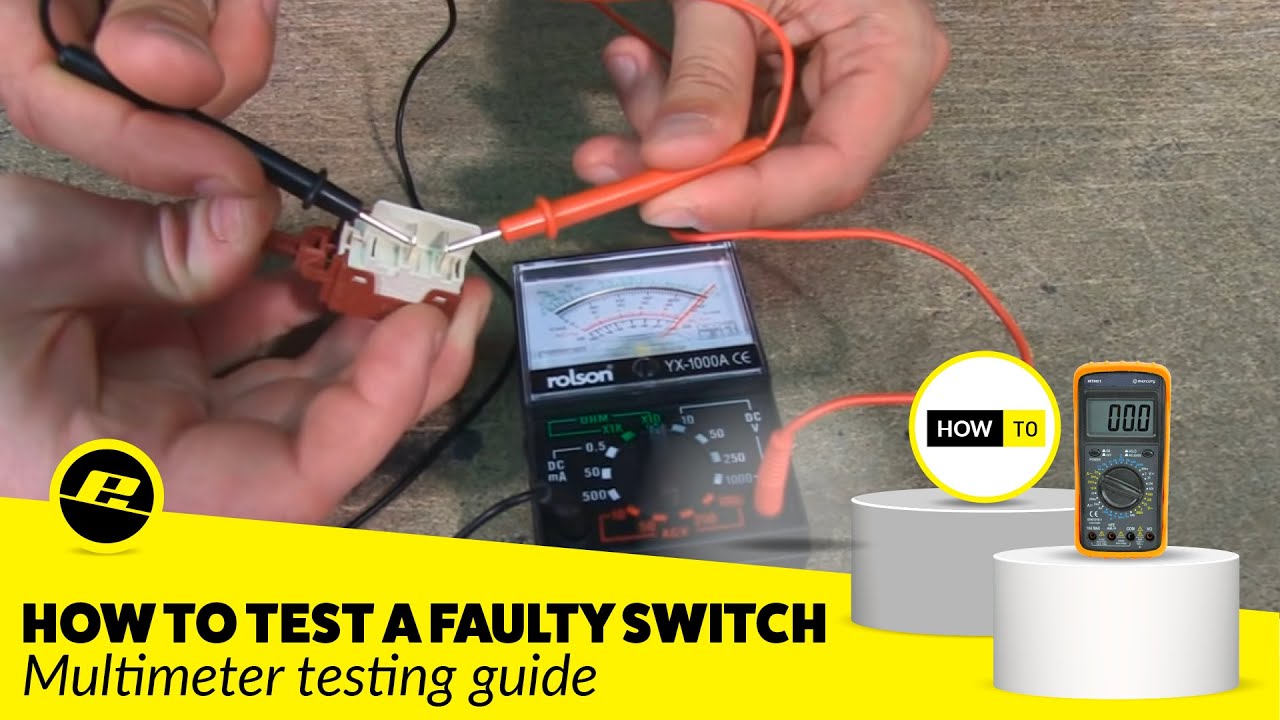
Using A Voltage Tester To Check The Switch
Using a voltage tester to check a light switch is a safe and effective method. This tool helps you see if electricity flows through the switch. You can find out if the switch is working or if it is faulty.
Before starting, make sure the power is off at the circuit breaker. Safety is very important when working with electricity.
Identify Live Wires
Turn the power back on after safety checks. Use the voltage tester to find the live wires. Touch the tester tip to each wire terminal on the switch. The tester will light up or beep if the wire is live. Mark the live wires to avoid confusion.
Test Switch Operation
Flip the switch on and off. Watch the voltage tester while you do this. The tester should show power flowing when the switch is on. It should not show power when the switch is off. This tells if the switch is controlling the current properly.
Confirm Power Flow
Check the voltage at the switch output terminal. This terminal sends power to the light fixture. The voltage tester should detect power only when the switch is on. If power is always on or never on, the switch may be bad. Replace the switch if it does not control power correctly.
Common Switch Problems And Fixes
Light switches can stop working for a few common reasons. Knowing these problems helps you fix the switch yourself. This saves time and money. Understanding common switch issues makes testing easier.
Loose Wiring
Loose wires cause the switch to fail or flicker. Wires can get loose from movement or poor installation. Check the wires behind the switch by turning off the power first. Tighten any loose screws holding the wires. Secure connections improve switch function and safety.
Worn Out Components
Switch parts wear out after long use. The internal mechanism may break or get stuck. A worn switch feels different when toggled. It might not click properly or stay in place. Replace old switches to restore normal operation. New switches work smoothly and safely.
Corrosion And Dirt
Dirt and corrosion build up inside the switch over time. Moisture or dust can cause this problem. Corrosion blocks electrical flow and damages parts. Clean the switch contacts carefully with a dry cloth. Replace the switch if corrosion is severe. Clean switches last longer and work better.
When To Replace The Light Switch
Knowing when to replace a light switch is important for safety and convenience. A bad switch can cause flickering lights or even electrical hazards. Replacing it at the right time keeps your home safe and your lighting working well.
Signs Replacement Is Needed
Look for switches that feel loose or do not click properly. Flickering lights or switches that get warm to touch are warning signs. If the switch sparks or emits a burning smell, replace it immediately. Frequent tripping of circuit breakers may also mean a bad switch.
Choosing The Right Replacement
Select a switch that matches the voltage and amperage of your circuit. Use switches made for your home’s wiring type, such as single-pole or three-way switches. Choose a style and finish that fits your room’s design. Check the switch’s quality for long-lasting use.
Installation Tips
Turn off power at the breaker before starting any work. Use a voltage tester to confirm power is off. Connect wires to the new switch exactly as the old one was wired. Tighten screws firmly but avoid overtightening. Test the new switch before closing the outlet box.
Preventive Tips To Extend Switch Life
Taking care of your light switches helps them last longer and work better. Small steps can stop problems before they start. These tips keep your switches safe and reliable for years.
Avoid Overloading Circuits
Do not plug too many devices into one switch or outlet. Too much power can cause switches to wear out fast. Use separate circuits for heavy appliances to ease the load.
Regular Cleaning
Dust and dirt can cause switches to fail. Clean switches gently with a dry cloth often. Avoid using water or harsh chemicals that can damage parts.
Professional Inspections
Have an electrician check your switches yearly. They find hidden problems before they get worse. Experts ensure your switches are safe and working well.
:max_bytes(150000):strip_icc()/testing-single-pole-switches-1152811-03-8b89394a236d499ebee520df31a0ce27.jpg)
Credit: www.thespruce.com
Frequently Asked Questions
How Can I Tell If A Light Switch Is Faulty?
A faulty light switch may cause flickering, no light, or a burning smell. Test by toggling the switch and observing the light’s response. If the light doesn’t turn on or off properly, or feels warm, the switch is likely bad.
What Tools Do I Need To Test A Light Switch?
You need a voltage tester or multimeter, a screwdriver, and insulated gloves. These tools help safely check for power and continuity in the switch to identify faults without risk.
Is It Safe To Test A Light Switch Myself?
Yes, if you follow safety precautions. Always turn off the circuit breaker before testing. Use insulated tools and avoid contact with wires to prevent electric shock.
Can A Bad Light Switch Cause Electrical Hazards?
Yes, a bad switch can cause sparks, short circuits, or fires. It’s important to identify and replace faulty switches promptly to ensure home safety.
Conclusion
Testing a light switch is simple and safe with the right steps. Use a voltage tester or multimeter to check power flow. Look for signs like flickering lights or no response when switched. Replace the switch if it shows problems.
Regular checks help keep your home safe and lights working well. Don’t ignore small issues; they can become bigger later. Take your time and follow instructions carefully. This way, you can fix or replace switches confidently and avoid electrical troubles.