Have you ever tried to turn on your ceiling fan’s light, only to find the switch isn’t working right? Changing the light switch in your ceiling fan might sound tricky, but it’s easier than you think.
By doing this simple fix yourself, you can save money and get your fan’s light working perfectly again. In this guide, you’ll learn clear, step-by-step instructions that anyone can follow—even if you’re not an expert. Keep reading, and you’ll have your ceiling fan light switch replaced quickly and safely.
Tools And Materials Needed
Changing a light switch in a ceiling fan requires some basic tools and materials. Having the right items makes the task easier and safer. Prepare everything before starting to save time and avoid interruptions.
Gathering the tools and materials first helps you stay organized. It also prevents mistakes and damage to your fan or wiring. Here are the essentials you need for this job.
Safety Gear
Safety gear protects you from electric shocks and injuries. Use insulated gloves and safety goggles. Turn off the power at the breaker box before handling wires.
Screwdrivers
Two types of screwdrivers are needed: flathead and Phillips. These help remove the switch cover and mounting screws. Choose screwdrivers with comfortable grips for better control.
Voltage Tester
A voltage tester checks if the power is off. This tool ensures no electricity flows to the switch. It is a small but very important device for safety.
New Light Switch
Pick the correct replacement switch for your ceiling fan. Match the type and rating of the old switch. This guarantees proper function and safety.
Wire Strippers And Cutters
Wire strippers remove insulation from wires cleanly. Wire cutters trim wires to the right length. Both tools help prepare wires for connection.
Electrical Tape
Electrical tape insulates wire connections. It prevents short circuits and keeps wires secure. Use good-quality tape designed for electrical use.
Wire Nuts
Wire nuts connect and protect wire ends. Twist wires together and cover with wire nuts. This ensures a strong and safe connection.

Credit: www.youtube.com
Safety Precautions
Safety is the most important step before changing a light switch in a ceiling fan. Electrical work can be risky without the right precautions. Taking safety measures protects you from shocks and accidents.
Follow these safety tips carefully. They help you work with confidence and avoid injuries.
Turn Off Power At The Circuit Breaker
Never rely on just the wall switch. Always switch off the power at the circuit breaker. This cuts electricity to the fan and switch. Use a tester to confirm no power is flowing.
Use Insulated Tools
Choose tools with insulated handles. They reduce the chance of electric shock. Avoid metal tools without insulation while working on wiring.
Wear Safety Gear
Wear rubber-soled shoes for better grip. Use safety glasses to protect your eyes from dust or sparks. Gloves add extra protection when handling wires.
Work In A Dry Area
Ensure the workspace is dry. Water increases the risk of electric shock. Avoid working in damp or wet conditions.
Follow Manufacturer’s Instructions
Read the ceiling fan and switch manuals carefully. Follow the steps exactly. Incorrect installation can cause damage or danger.
Turn Off Power
Turning off the power is the first and most important step before changing a light switch in a ceiling fan. It keeps you safe from electric shocks. Never skip this step. Safety must come first.
Electricity flows constantly in your home. Even when a switch looks off, power may still be live. This can cause serious injury. Always make sure the power is completely off before starting any work.
Locate The Circuit Breaker
Find the main circuit breaker box in your home. It is usually in the basement, garage, or utility room. Look for the breaker that controls power to the ceiling fan area. This box controls electricity flow to different parts of your house.
Switch Off The Correct Breaker
Flip the breaker switch to the “off” position. This stops electricity from reaching the ceiling fan. Check for labels on the breakers. If labels are missing, turn off the main breaker to cut power to the entire house.
Confirm Power Is Off
Use a non-contact voltage tester or a simple light bulb tester. Check the ceiling fan switch and wires. If the tester shows no power, it is safe to proceed. Never touch wires before confirming power is off.
Inform Others In The Household
Tell family members or roommates about the power shutdown. This prevents anyone from turning the breaker back on by mistake. Put a note on the breaker box for safety. Clear communication avoids accidents.
Remove Existing Light Switch
Before installing a new light switch for your ceiling fan, you must remove the old one. This step helps prevent electrical issues and makes the replacement smooth. Follow these simple steps carefully to take out the existing switch safely.
Turn off the power at the circuit breaker. This stops electricity from flowing to the switch. Safety first.
Access The Switch Box
Locate the switch box on the wall controlling your ceiling fan light. Remove the switch plate by unscrewing the screws with a screwdriver. Gently pull the switch out from the wall. The wires will still be connected inside the box. Be careful not to damage them.
Disconnect Wiring
Check that the power is off using a voltage tester. Unscrew the wire nuts or loosen the terminal screws holding the wires. Carefully separate the wires from the old switch. Keep track of each wire’s position for easier installation later. Do not let wires touch each other. Cover exposed wires with electrical tape if needed.
Choose The Right Replacement Switch
Choosing the right replacement switch is key for a safe and smooth ceiling fan repair. The switch controls the fan and light functions. Picking the wrong switch can cause problems or damage the fan. This section explains how to find the correct switch for your ceiling fan.
Check The Fan’s Model Number
Locate the model number on the fan’s label. It is usually on the motor housing or inside the light kit. Use this number to find the exact switch designed for your fan. This ensures compatibility and proper function.
Match The Switch Type
Ceiling fans use different switch types. Some have toggle switches, others use rotary or slide switches. Look at your old switch and find one with the same style. The new switch must fit the fan’s control system.
Consider The Number Of Switches
Some ceiling fans have one switch for both fan and light. Others have two separate switches. Count how many switches your fan needs. Buy a replacement that matches this number to keep all functions working.
Check Electrical Ratings
Look at the voltage and amp ratings on the old switch. The new switch must have the same or higher ratings. This keeps the switch safe and prevents electrical problems.
Buy From Trusted Sources
Purchase switches from reliable stores or official fan manufacturers. Avoid cheap, unbranded switches. Quality parts last longer and ensure your safety during use.

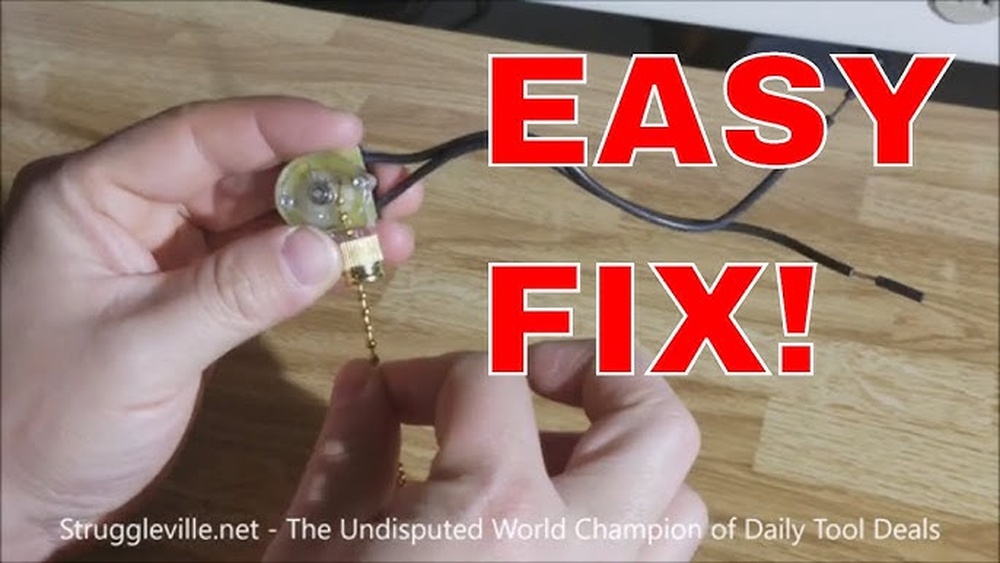
Credit: community.smartthings.com
Install New Light Switch
Installing a new light switch in your ceiling fan is a straightforward process. It ensures your fan’s light works smoothly and safely. This step comes after removing the old switch and preparing the wires.
Take your time to handle the wires carefully. Proper connection is important for the switch to function correctly.
Connect Wires To New Switch
Start by identifying the wires. Usually, there are three: live, neutral, and ground. Match each wire to the correct terminal on the new switch. The live wire connects to the brass or copper screw. The neutral wire attaches to the silver screw. The ground wire must connect to the green screw or grounding point.
Use a screwdriver to tighten the screws. Make sure the wires are secure and do not slip out. Loose wires can cause the switch to fail or create a hazard.
Secure The Switch In Place
After connecting the wires, gently push them back into the electrical box. Align the switch with the screw holes on the box. Use screws to fasten the switch securely. It should sit flush against the wall or ceiling plate.
Check the switch for any movement. It should feel solid and not wiggle. A secure switch prevents damage and keeps everything safe.
Test The New Switch
Testing the new switch in your ceiling fan is an important step. It ensures the switch works correctly and safely. This step helps avoid any electrical issues later. Take your time to check everything before finishing the installation.
Turn On Power And Check Function
First, restore the power at the circuit breaker. Then, use the new switch to turn the fan and light on and off. Make sure both the fan and light respond smoothly. Check for any flickering or unusual sounds from the fan.
Observe The Switch Operation
Pay attention to how the switch feels when you flip it. It should move easily without sticking. The switch should click softly and stay in place. A loose or stiff switch may need adjustment or replacement.
Test The Fan Speed Settings
Change the fan speed using the new switch. Test all speed options from low to high. Each speed should work without interruption or noise. Confirm the fan changes speed smoothly with the switch.
Check For Safety And Stability
Look for any sparks or unusual heat near the switch. The switch and wiring should stay cool and stable. If you notice any issues, turn off the power immediately. Reinspect the wiring and connections before trying again.

Credit: diy.stackexchange.com
Troubleshooting Common Issues
Troubleshooting common issues is key when changing a light switch in a ceiling fan. Problems may stop the fan or light from working correctly. Finding the cause early saves time and effort. This guide covers typical problems and fixes.
Check For Loose Connections
Loose wires cause many light switch problems. Turn off power before checking connections. Make sure all wires are tight in the switch terminals. Look for wires that slipped out or are not secure. Tighten screws to hold wires firmly in place.
Test The Switch With A Multimeter
A multimeter helps find faulty switches. Set it to measure continuity or resistance. Remove the switch from the wall. Touch the multimeter probes to the switch terminals. No continuity means the switch is bad and needs replacement.
Inspect The Circuit Breaker
Check the circuit breaker if the fan or light won’t work. Sometimes the breaker trips and cuts power. Reset the breaker by flipping it off and on. If it trips again, there may be a wiring issue or overload.
Examine The Fan’s Wiring
Wrong wiring can stop the light switch from working. Look inside the fan canopy for loose or crossed wires. Compare the wiring to the fan manual. Correct any mistakes by matching wire colors properly. Ensure all wire nuts are tight and secure.
Frequently Asked Questions
How Do I Safely Turn Off Power To A Ceiling Fan Switch?
To safely turn off power, locate your home’s circuit breaker panel. Switch off the breaker controlling the ceiling fan. Use a voltage tester to confirm no electricity flows to the switch before starting any work. Safety first is essential when handling electrical components.
What Tools Are Needed To Change A Ceiling Fan Light Switch?
You will need a screwdriver, wire stripper, voltage tester, and replacement switch. A ladder may be required for ceiling access. These tools help you safely remove the old switch and install the new one efficiently.
Can I Replace The Ceiling Fan Switch Without Removing The Fan?
Yes, you can usually replace the switch without removing the entire fan. Turn off power, remove the switch cover, and access wiring inside the fan housing. This saves time and effort during the replacement process.
How Do I Identify The Correct Wires For The Light Switch?
Identify wires by color: typically black or red for the switch leg, white for neutral, and green or bare for ground. Use a voltage tester to confirm live wires. Correct identification prevents wiring errors and ensures safety.
Conclusion
Changing a light switch in a ceiling fan is simple and safe. Turn off the power first to avoid shocks. Follow steps carefully and use the right tools. Take your time and double-check connections before finishing. This small fix can improve your fan’s function.
You don’t need to call a pro for this job. Now, enjoy better control of your ceiling fan light. Small projects like this build your confidence with home repairs. Give it a try and see how easy it can be!