Are you looking to replace a light switch with an outlet but don’t know where to start? You’re in the right place.
Changing a switch to an outlet might seem tricky, but with the right steps, you can do it safely and quickly. Imagine having an extra power source exactly where you need it—no more hunting for extension cords or unplugging appliances.
In this guide, you’ll find simple instructions and expert tips that make the process clear and manageable. Keep reading, and you’ll gain the confidence to handle this upgrade yourself.
Tools And Materials Needed
Replacing a light switch with an outlet requires the right tools and materials. Having everything ready makes the job easier and safer. This section lists what you need before starting the project.
Essential Tools
- Screwdriver (flathead and Phillips)
- Voltage tester
- Wire stripper
- Needle-nose pliers
- Electrical tape
- Flashlight or work light
- Level (to align the outlet)
Required Materials
- New electrical outlet (receptacle)
- Outlet cover plate
- Wire connectors (wire nuts)
- Electrical box (if the existing one is damaged)
- Replacement electrical wires (if needed)
Safety Precautions
Safety is the top priority when replacing a light switch with an outlet. Electricity can cause serious injuries or damage if handled carelessly. Taking simple safety steps keeps you protected throughout the project.
Turning Off Power
Start by switching off the power at the main circuit breaker. This stops electricity from flowing to the switch you want to replace. Never rely only on the wall switch to cut power. Confirm the power is off before touching any wires.
Label the breaker to avoid accidental switching on. Use a helper to test if the light or switch no longer works. Safety begins with no live electricity in your work area.
Using A Voltage Tester
Always use a voltage tester to check for live wires. This device tells you if any wires still carry current. Touch the tester to each wire in the box after turning off the power.
If the tester lights up or beeps, electricity is still present. Do not touch any wires until all are confirmed dead. Using a voltage tester adds a crucial layer of safety before starting work.
Removing The Light Switch
Removing the light switch is the first step in replacing it with an outlet. This process involves careful handling of electrical parts to ensure safety. Taking your time and following the right steps will make the job easier and safer.
Unscrewing The Switch Plate
Start by turning off the power at the circuit breaker. This prevents electric shock. Use a screwdriver to remove the screws on the switch plate. Keep the screws in a safe place. Gently pull the plate away from the wall. The switch and wires will now be visible.
Disconnecting Wires
Use a voltage tester to double-check the power is off. Loosen the screws holding the wires on the switch. Carefully pull the wires away from the switch. Note how the wires are connected for the new outlet. Tuck the wires back into the electrical box to keep them safe.
Credit: www.oneprojectcloser.com
Preparing For The Outlet Installation
Preparing for the outlet installation is a key step to ensure safety and success. Take time to gather tools and understand the wiring setup. This preparation helps avoid mistakes and makes the process smoother.
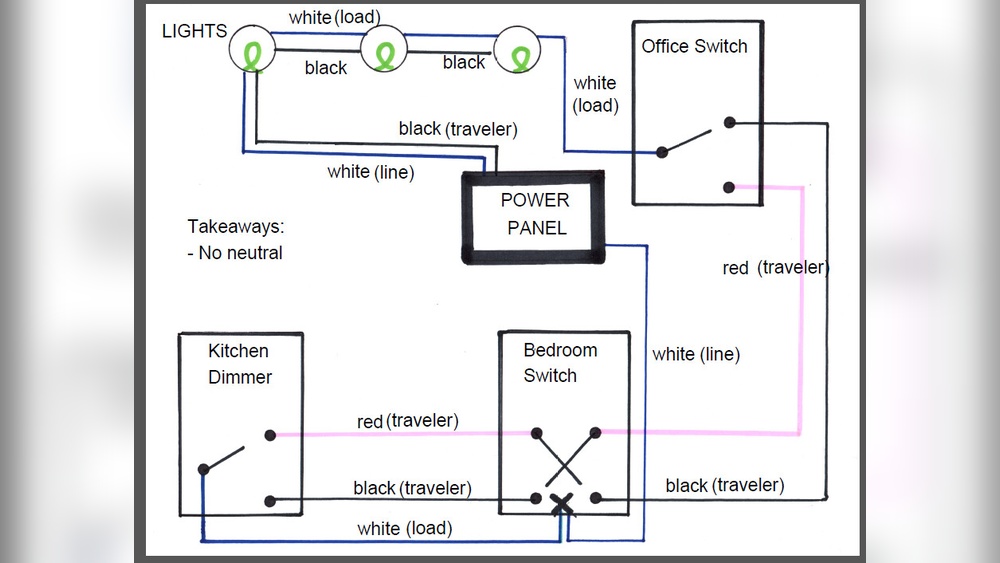
Inspecting The Wiring
Start by turning off the power at the breaker box. Use a voltage tester to confirm no electricity flows to the switch. Remove the switch cover and check the wiring inside.
Look for any damaged or loose wires. Note the color and position of each wire. This information is important for connecting the new outlet correctly. If wires look old or unsafe, consider calling an electrician.
Choosing The Right Outlet
Select an outlet that fits your needs and matches the wiring type. Standard outlets work for most homes. GFCI outlets are required in wet areas like kitchens or bathrooms.
Check the outlet’s voltage and amperage ratings. They must match your home’s electrical system. Picking the correct outlet ensures safety and proper function after installation.
Wiring The New Outlet
Start by turning off the power to the switch. Carefully remove the old switch and connect wires to the new outlet. Secure the outlet in the wall box and restore power to test.
Wiring the new outlet is a key step in this project. It ensures the outlet works safely and properly. Take time to follow each step carefully. Use tools like a screwdriver and wire stripper for best results.
Before starting, turn off power at the circuit breaker. Test the wires with a voltage tester to confirm power is off. Safety first.
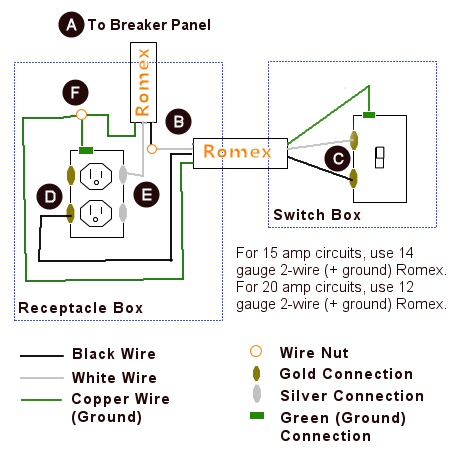
Connecting Hot, Neutral, And Ground Wires
Identify the hot wire, usually black or red. Connect it to the brass-colored screw on the outlet. This wire carries the electricity.
Find the neutral wire, often white. Attach it to the silver-colored screw. This wire completes the electrical circuit.
Locate the ground wire, usually green or bare copper. Connect it to the green grounding screw. This wire helps prevent electrical shocks.
Make sure each wire is wrapped tightly around its screw. No loose connections. Tighten screws firmly but do not strip the wire.
Securing The Outlet
Carefully fold the wires back into the electrical box. Arrange them so they do not pinch or bend sharply.
Fasten the outlet to the box using mounting screws. Check that the outlet is straight and flush with the wall.
Attach the outlet cover plate. This protects the wiring and gives a clean look.
Turn the power back on at the breaker. Test the outlet with a plug tester to confirm correct wiring.

Credit: diy.stackexchange.com
Finishing Up
Finishing up your project is an important step. It ensures safety and a neat look. After wiring the outlet, take time to complete the process carefully. Proper finishing makes the outlet ready to use and safe for your home.
Attaching The Outlet Cover
Start by placing the outlet cover over the outlet. Align the screw holes of the cover and the outlet. Use a screwdriver to tighten the screws gently. Do not overtighten to avoid cracking the cover. A snug fit keeps the cover secure and tidy.
Restoring Power And Testing
Turn the power back on at the circuit breaker. Use a voltage tester to check the outlet for power. Plug in a small device or lamp to test the outlet’s function. Confirm the outlet works properly and safely. If it does not work, turn off power and check connections again.
Troubleshooting Tips
Replacing a light switch with an outlet can be simple. But sometimes, problems happen. This section helps you fix common issues. It also guides you on when to seek expert help. Understanding these tips saves time and ensures safety.
Common Issues
The outlet does not work after installation. Check if the power is off before starting. Loose wires cause many problems. Make sure all wires connect tightly to the outlet terminals. Sometimes, the circuit breaker trips. Reset it and test the outlet again.
The outlet feels warm or sparks. This means a poor connection or wrong wiring. Turn off the power immediately. Do not use the outlet until fixed. The outlet might have no ground wire. This reduces safety. Use a tester to check grounding.
When To Call A Professional
Electric work can be risky. Call an electrician if you see sparks or burning smells. If you cannot find the problem, get expert help. Complex wiring or older homes may need professional care. If unsure about code rules, a pro can ensure safety. Never ignore signs of electrical faults. A professional keeps your home safe and code compliant.

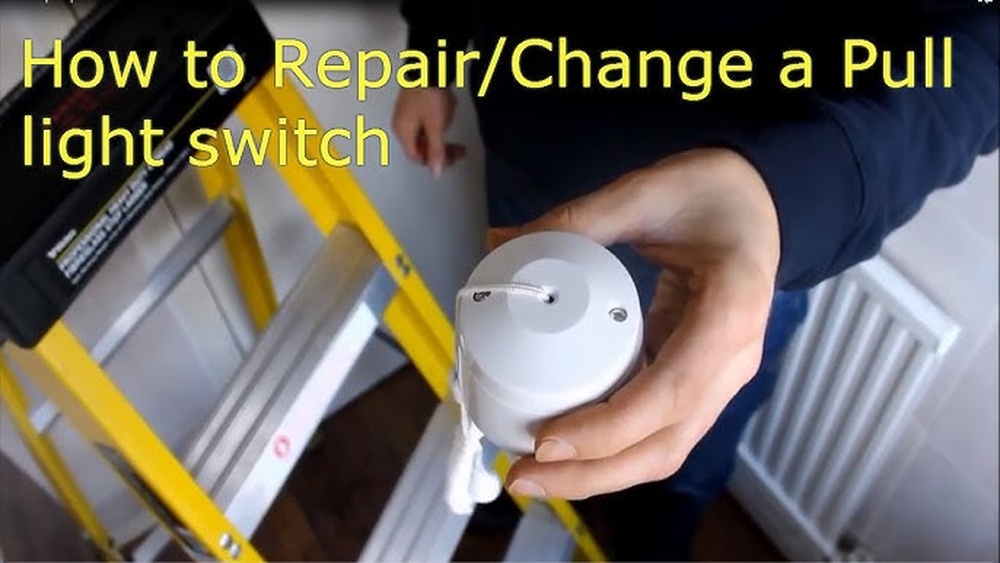
Credit: www.youtube.com
Frequently Asked Questions
How Do I Safely Replace A Light Switch With An Outlet?
Turn off the power at the circuit breaker before starting. Use a voltage tester to confirm no electricity flows. Remove the switch carefully, connect the outlet wires correctly, and secure the outlet. Always follow local electrical codes for safety.
Can I Replace A Single Light Switch With A Gfci Outlet?
Yes, you can replace a single light switch with a GFCI outlet. Ensure the wiring matches the GFCI’s line and load terminals. This upgrade improves safety in areas prone to moisture, like kitchens or bathrooms.
What Tools Are Needed To Replace A Light Switch With An Outlet?
You will need a screwdriver, wire stripper, voltage tester, electrical tape, and the new outlet. These tools help you remove the switch safely, prepare wires, and install the outlet securely.
How Do I Know If My Switch Box Supports An Outlet?
Check if the box has enough space and proper wiring for an outlet. A standard switch box usually fits an outlet, but confirm wire gauge and box size comply with code.
Conclusion
Replacing a light switch with an outlet can improve your room’s function. Follow safety rules and turn off power first. Take your time to connect wires correctly and securely. Test the outlet before finishing the job. This simple change adds convenience without much cost.
You can handle this task with basic tools and care. Enjoy the extra power source for your devices today.