Are you tired of your motion sensor light switch turning on too early or staying on too long? Maybe it doesn’t detect movement when you need it most.
Adjusting your motion sensor light switch can solve these problems and make your home smarter and safer. You’ll learn simple steps to fine-tune your sensor so it works exactly the way you want. Keep reading, and you’ll have full control over your lighting in no time!

Credit: diy.stackexchange.com
Choosing The Right Sensor
Choosing the right motion sensor is key to making your light switch work well. The sensor must fit your needs and the space you want to light. A good sensor saves energy and keeps your area safe. You need to know about different types and where to place them for best results.
Types Of Motion Sensors
There are two main types of motion sensors: infrared and microwave. Infrared sensors detect heat from people or animals. They work best indoors and in warm spaces. Microwave sensors send out radio waves that bounce back when something moves. These sensors cover larger areas and work through walls. Choose infrared for small rooms and microwave for big open spaces.
Sensor Placement Tips
Place the sensor where it can see the whole area clearly. Avoid pointing it at windows or heating vents. These can cause false triggers. Mount the sensor at a height between six and eight feet. This height captures movement well. Test the sensor range by walking through the area. Adjust the angle to cover all spots without missing any.
Initial Setup Preparation
Setting up a motion sensor light switch starts with careful preparation. This step ensures safety and makes the process easier. You need to follow specific actions before adjusting the switch.
Preparation helps avoid accidents and saves time. Two main tasks are important: turning off the power safely and gathering the right tools. These tasks set the stage for a smooth setup.
Turn Off Power Safely
Always switch off the power at the circuit breaker. This stops electricity flow and protects you from shocks. Use a voltage tester to check the wires. Make sure no current runs before touching the switch. Safety first. Never skip this step.
Gather Necessary Tools
Collect all tools before starting. You will need a screwdriver, wire stripper, and voltage tester. Have electrical tape and wire connectors ready. These tools help you work quickly and safely. Keep them nearby to avoid interruptions.
Installing The Motion Sensor Switch
Installing a motion sensor switch is simple and saves energy. This switch turns lights on only when needed. It helps keep your home safe and smart. Follow these steps to install the switch correctly.
Remove Existing Switch
First, turn off the power at the breaker box. Use a screwdriver to remove the switch cover plate. Unscrew the old switch from the wall box. Carefully pull the switch out to see the wires. Note how the wires connect to the switch. Disconnect the wires from the old switch.
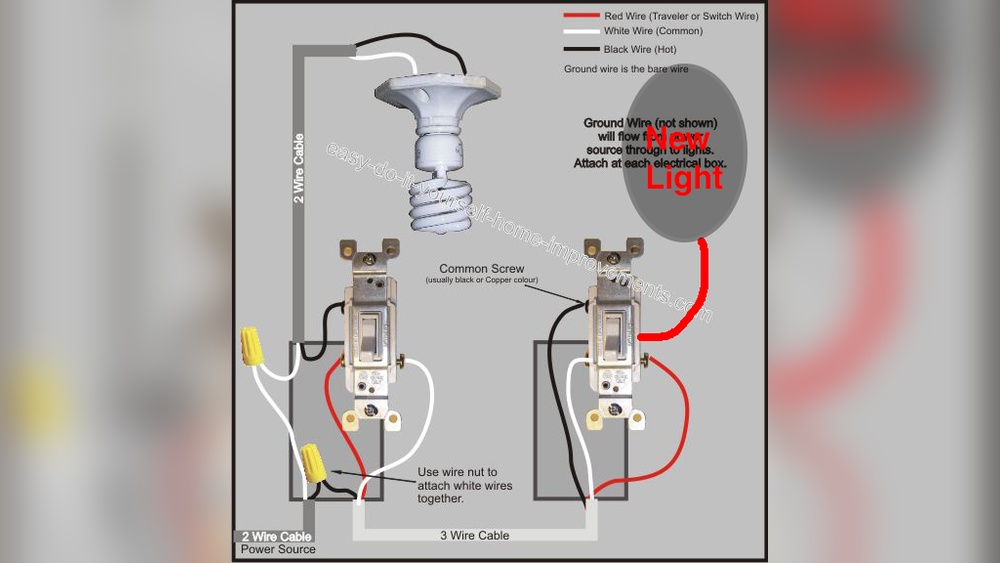
Connect Wiring Correctly
Match the wires from the wall to the new switch terminals. Usually, black wires connect to the switch’s black screws. White wires connect to the silver screws. Green or bare wires go to the ground screw. Use wire nuts if needed. Tighten all connections securely to avoid loose wires.
Secure The Switch
Push the wires back into the wall box gently. Align the switch with the screw holes. Screw the switch firmly into the wall box. Attach the cover plate over the switch. Turn the power back on at the breaker box. Test the motion sensor switch to ensure it works well.

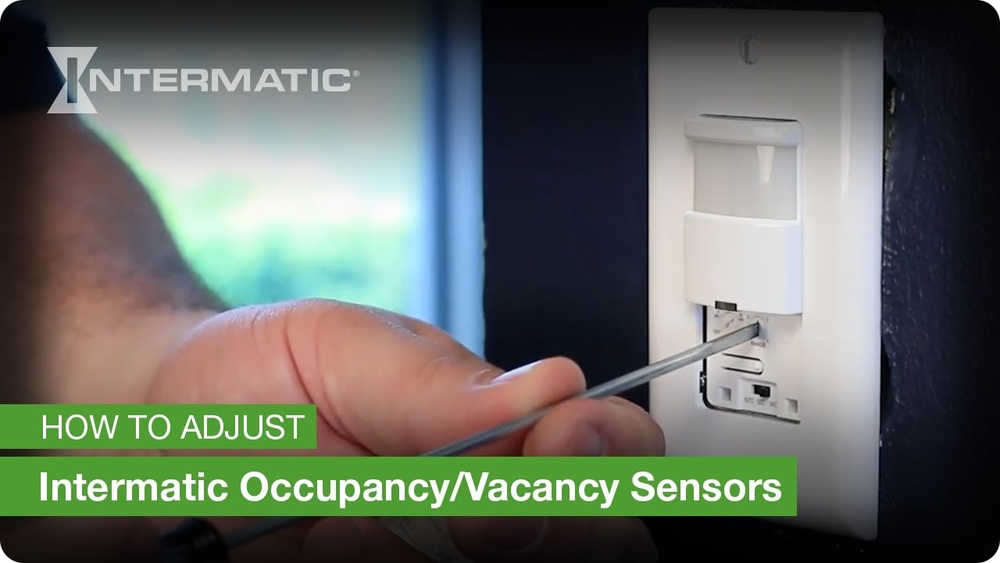
Credit: www.youtube.com
Adjusting Sensitivity Settings
Adjusting the sensitivity settings of a motion sensor light switch helps control how it reacts to movement. Proper sensitivity ensures the light turns on only when needed. This saves energy and avoids false triggers. Sensitivity settings vary by model but usually include a dial or switch. Understanding these controls lets you customize the detection range. This section explains how to find and adjust these settings for better performance.
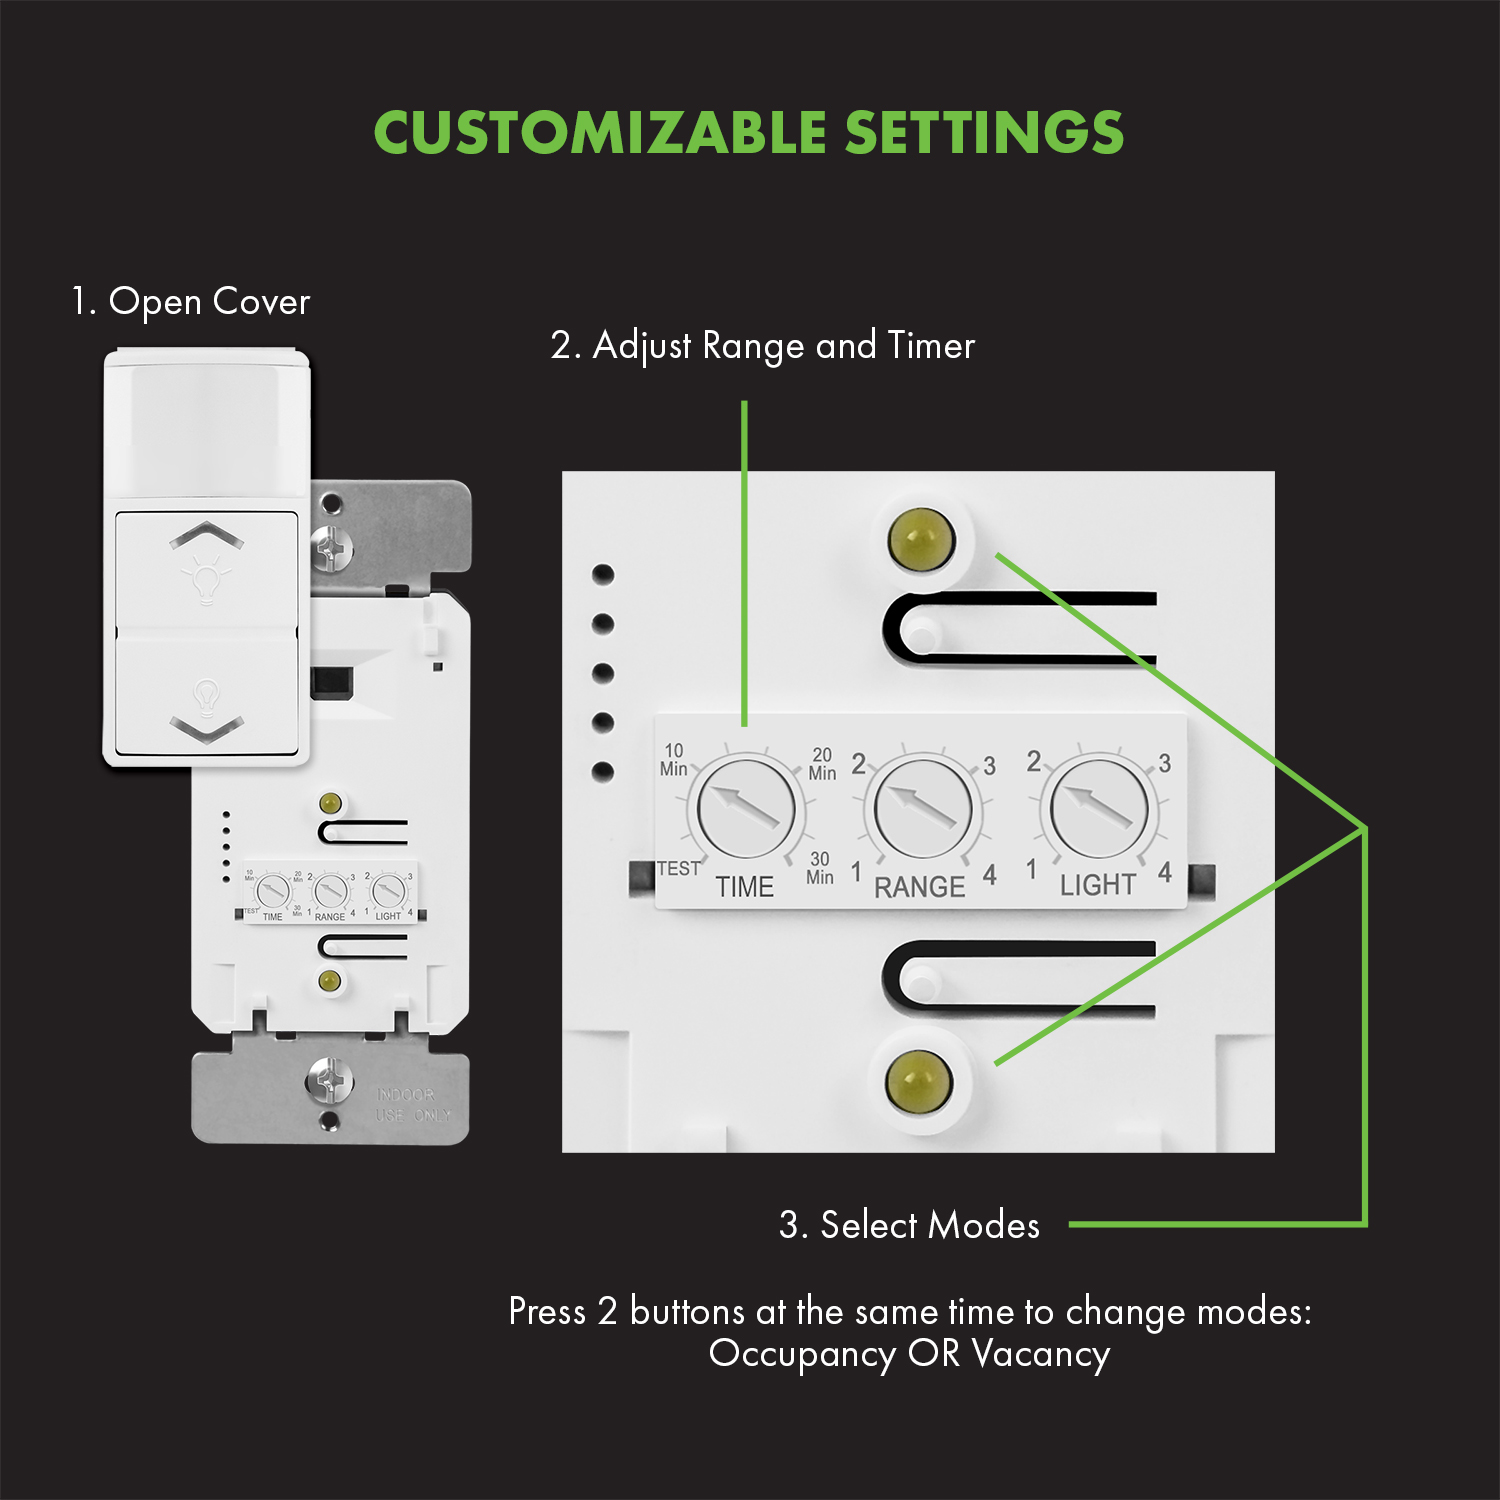
Locating The Sensitivity Dial
The sensitivity dial is often inside the switch cover. Turn off power before opening the switch panel. Look for a small knob labeled “sensitivity” or “range.” It is usually near the sensor or circuit board. Some models have a tiny screwdriver slot instead of a dial. Use the user manual to find the exact location. Handle the dial gently to avoid damage.
Fine-tuning Detection Range
Turn the sensitivity dial slowly to adjust the detection range. Moving it clockwise usually increases sensitivity. This lets the sensor detect smaller or distant movements. Turning it counterclockwise reduces sensitivity. This helps prevent the light from turning on for minor motions like pets or leaves. Test the setting by walking in the sensor’s area. Adjust until the light responds as desired without false triggers.
Setting Time Delay
Setting the time delay on a motion sensor light switch controls how long the light stays on. This feature helps save energy by turning off the light after a set time. Adjusting this setting lets you match the light duration to your needs. Proper time delay avoids the light staying on too long or turning off too soon.
Choosing The Duration
Most motion sensor switches allow you to set the delay from a few seconds to several minutes. Choose a shorter time for places where you move quickly. For rooms where you stay longer, pick a longer delay. Find a balance that fits your daily routines. Some switches have a dial or buttons to set the time easily.
Testing Time Settings
After setting the delay, test the motion sensor light switch. Walk away and check if the light turns off at the right time. Adjust the setting if the light turns off too fast or stays on too long. Repeat the test until the time delay matches your preference. Testing ensures the switch works well for your space.
Credit: topgreener.com
Adjusting Light Level Detection
Adjusting the light level detection on a motion sensor light switch helps control when the light turns on. It stops the light from switching on during the day. This adjustment saves energy and increases the sensor’s efficiency.
Setting the right light level helps the sensor know the difference between day and night. It also avoids turning the light on when it is not needed.
Setting Ambient Light Threshold
The ambient light threshold tells the sensor how bright it should be outside. Adjust the sensor’s dial or button to set this level. Turn the dial toward “darker” to make the light turn on only at night. Turn it toward “lighter” to have the light work during low daylight. Test the setting by covering the sensor and seeing if the light turns on. This step ensures the sensor reacts to the right light level.
Avoiding False Triggers
False triggers happen when the light switches on without motion. Bright street lamps or headlights can cause this. Adjust the sensor away from strong light sources. Lower the sensitivity to reduce false triggers. Clean the sensor lens regularly to keep it clear. These steps help the sensor work correctly and save power.
Testing And Troubleshooting
Testing and troubleshooting a motion sensor light switch ensures it works correctly. It helps find problems and fix them fast. This keeps your space safe and well-lit. Follow simple steps to check and adjust the sensor.
Verifying Sensor Activation
Stand in front of the sensor and move slowly. Watch if the light turns on within seconds. Test from different angles and distances. Make sure nothing blocks the sensor’s view. Check the sensor’s sensitivity settings. Adjust them if the light does not respond well.
Test the light in both daylight and dark conditions. Some sensors work only in low light. Confirm the light stays on for the set time. This helps find if the timer needs adjustment.
Common Issues And Fixes
The light may not turn on. Check if the power is on and the bulb is good. Clean the sensor lens from dust and dirt. Blocked sensors can’t detect motion properly. If the light stays on too long, shorten the timer setting.
The light might flicker or turn off too soon. This can happen if the sensor is too sensitive. Lower the sensitivity or move the sensor away from heat sources. Avoid placing the sensor near vents or windows.
False triggers can annoy you. Change the sensor angle to avoid pets or moving trees. Reset the switch if it acts strangely. Always read the manual for specific fixes.
Frequently Asked Questions
How Do I Change The Sensitivity On A Motion Sensor Light?
To adjust sensitivity, locate the sensor’s dial or switch. Turn it clockwise to increase or counterclockwise to decrease detection range. Test changes by walking in front of the sensor until it triggers at your desired distance.
How Can I Set The Light Timer On A Motion Sensor?
Find the timer dial near the sensor or switch. Rotate it to select how long the light stays on after motion detection. Settings usually range from a few seconds to several minutes for convenience.
What Is The Best Height To Install A Motion Sensor Switch?
Install the sensor switch at about 5 to 6 feet high. This height maximizes motion detection for most people and pets while minimizing false triggers from small animals or objects.
Why Does My Motion Sensor Light Keep Turning Off Too Soon?
If the light turns off quickly, the timer may be set too low. Increase the timer setting to keep the light on longer after detecting motion.
Conclusion
Adjusting a motion sensor light switch is simple and useful. You can change settings like sensitivity and time delay. This helps save energy and keeps your home safe. Try small changes to find what works best. Remember to test the light after each adjustment.
With a little effort, you can make your light switch work just right. Stay patient and enjoy the convenience of automatic lighting.