Is your Craftsman floor jack leaking and causing frustration? You rely on your floor jack to safely lift heavy loads, but a leak can put your work—and your safety—at risk.
Don’t let this problem slow you down or lead to costly repairs. You’ll discover simple, step-by-step ways to fix that leak quickly and get your jack working like new again. Keep reading to learn the easy fixes that save you time, money, and headaches.
Common Causes Of Leaks
Leaking is a common problem with Craftsman floor jacks. It affects their performance and safety. Understanding the causes of leaks helps fix the issue quickly. Many leaks come from parts that wear out or get loose. Checking these parts often can prevent bigger damage.
Worn Seals And O-rings
Seals and O-rings keep the hydraulic fluid inside the jack. Over time, they can wear out or crack. This causes fluid to leak slowly or fast. Dirt and debris also damage these small parts. Replacing worn seals and O-rings often stops leaks completely.
Damaged Hydraulic Cylinder
The hydraulic cylinder moves the jack up and down. Damage to the cylinder wall causes fluid to leak. Scratches, dents, or rust weaken the cylinder. A damaged cylinder lowers the jack’s lifting power. Repair or replace the cylinder to fix leaks.
Loose Fittings And Connections
Fittings and connections join the jack’s parts tightly. Over time, vibrations and use can loosen them. Loose fittings cause oil to drip or spray out. Tightening these connections often stops leaks quickly. Check all fittings for tightness during maintenance.
Tools And Materials Needed
Fixing a leaking Craftsman floor jack requires the right tools and materials. Having everything ready makes the repair easier and faster. This section lists the essential items you need to complete the job safely and effectively.
Essential Repair Tools
A set of wrenches helps to loosen and tighten bolts. A flathead screwdriver is useful for prying seals and parts gently. You will also need pliers to grip and pull small components. A clean cloth or rag is important to wipe off oil and dirt. A small funnel helps refill hydraulic fluid without spills. Lastly, a container to catch leaking oil keeps your workspace clean.
Replacement Parts
Replacement seals and O-rings fix leaks in the hydraulic system. A new hydraulic fluid bottle restores the jack’s lifting power. Some floor jacks require a new pump or release valve, so have these parts on hand. Always buy parts that fit your Craftsman floor jack model. Using the correct parts ensures a proper and long-lasting repair.
Safety Equipment
Wear safety gloves to protect your hands from oil and sharp edges. Safety glasses shield your eyes from splashes and debris. Use a sturdy work surface to keep the jack steady. Keep a fire extinguisher nearby, as hydraulic fluid can be flammable. Good lighting is important to see small parts clearly. Safety helps avoid accidents and makes the job smooth.
Preparing The Floor Jack
Preparing your Craftsman floor jack is the first step in fixing a leak. Proper preparation makes the repair easier and safer. It involves cleaning, positioning, and draining the hydraulic fluid. Each step helps you work efficiently and avoid damage.
Cleaning The Jack
Start by wiping the floor jack clean. Use a cloth to remove dirt, grease, and debris. Clean surfaces help you spot leaks and damaged parts. Avoid using water to prevent rust. A dry cloth or mild cleaner works best.
Positioning For Repair
Place the jack on a flat, stable surface. This keeps it steady during repair. Ensure the jack is fully lowered. Lock the release valve to avoid sudden movement. Good positioning protects you and the jack.
Draining Hydraulic Fluid
Next, drain the old hydraulic fluid. Open the fill plug and the release valve. Allow the fluid to flow into a container. Dispose of the fluid properly. Draining prevents spills and prepares the jack for new oil.

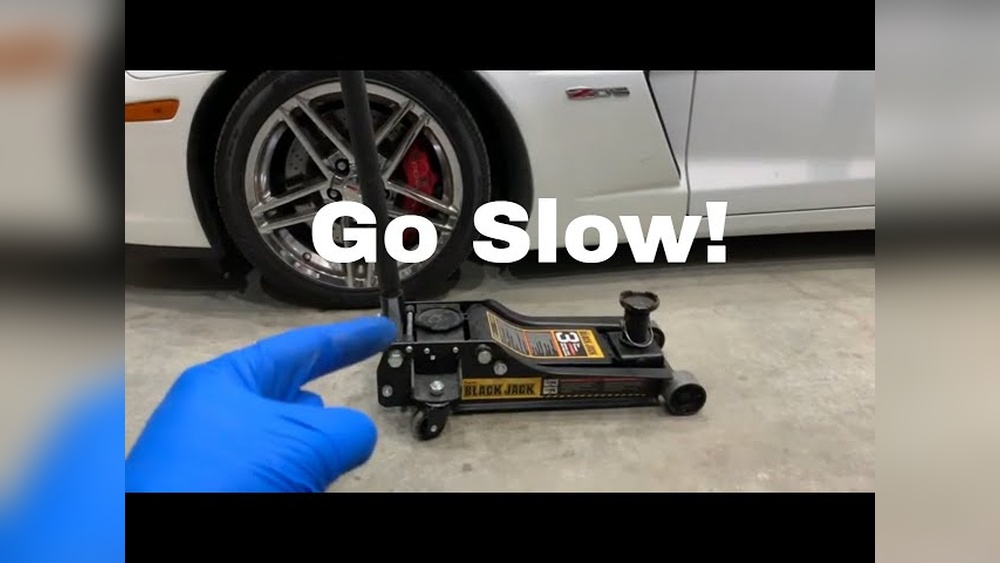
Credit: www.youtube.com
Fixing Worn Seals And O-rings
Fixing worn seals and O-rings is key to stopping leaks in a Craftsman floor jack. These parts keep the hydraulic fluid inside. Over time, they wear out or crack. This causes fluid to leak and the jack to lose pressure. Replacing these seals is a simple way to restore your jack’s strength and safety.
Removing Old Seals
Start by lowering the jack completely. Use a wrench to open the jack’s housing. Carefully pull out the old seals and O-rings. Use a small flat tool to lift them gently. Avoid scratching the metal parts. Dispose of the old seals properly.
Installing New Seals
Clean the seal grooves with a dry cloth. Choose new seals that match the old ones exactly. Lightly oil the new seals with hydraulic fluid. Press them firmly into the grooves. Make sure they sit flat and tight. Do not stretch or twist the seals during installation.
Testing For Leaks
Close the jack’s housing securely. Pump the jack slowly and watch for leaks. Check around the seals carefully. If you see fluid, tighten the housing again. Repeat the test until no leaks appear. Your floor jack should now hold pressure well.
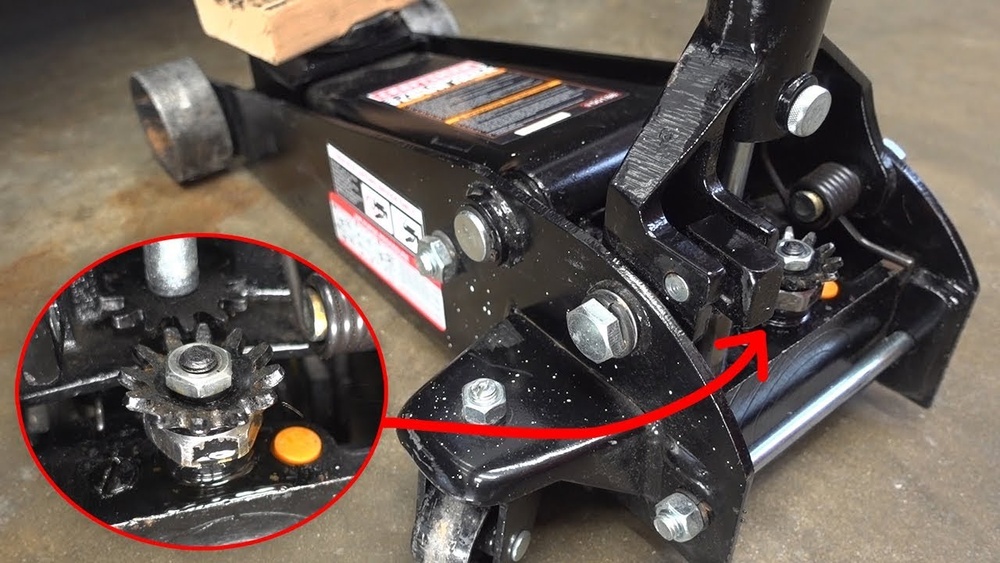
Repairing The Hydraulic Cylinder
Repairing the hydraulic cylinder of a Craftsman floor jack is key to stopping leaks. The cylinder controls the jack’s lifting power using hydraulic fluid. Fixing it involves careful inspection and replacing worn parts. This task helps restore the jack’s strength and safety.
Follow clear steps to repair the cylinder. This keeps the jack working smoothly for a long time.
Inspecting For Damage
Start by cleaning the hydraulic cylinder area. Look closely for cracks, rust, or worn seals. Check the piston rod for scratches or bends. Any damaged parts cause leaks and reduce performance. Note all issues before moving to the next step. Good lighting helps see small problems clearly.
Replacing Cylinder Components
Remove old seals and O-rings carefully. Use a seal kit made for Craftsman jacks. Replace all worn or damaged parts with new ones. Lubricate seals with hydraulic oil to prevent damage. Avoid mixing parts from different models. Proper parts ensure a tight seal and stop leaks.
Reassembling The Jack
Put the hydraulic cylinder back together slowly. Align parts correctly to avoid damage. Tighten bolts and fittings to the right torque. Refill the jack with clean hydraulic fluid. Bleed air from the system for smooth operation. Test the jack by lifting a small load carefully.

Credit: redeyegarage.com
Tightening Loose Connections
Tightening loose connections is a key step to fix a leaking Craftsman floor jack. Loose fittings can cause hydraulic fluid to leak. Checking and securing these connections stops leaks and keeps your floor jack working well.
Checking Fittings
Start by inspecting all fittings on the floor jack. Look for any signs of fluid or damage around the joints. Use a clean cloth to wipe the area and find hidden leaks. Tighten any fittings that look loose but be careful not to overtighten. Too much force can damage the threads or seals.
Properly Securing Connections
Use the right tools like a wrench or pliers to tighten connections. Hold the fitting steady and turn slowly to avoid stripping. Check each connection point one by one. Secure hose clamps and bolts firmly. A loose connection can cause fluid to drip or spray out under pressure.
Ensuring Fluid Tightness
After tightening, test the floor jack by pumping it a few times. Watch for any fluid leaks around the connections. If you see drops or wet spots, tighten the fitting a little more. Make sure the jack holds pressure without losing fluid. Properly sealed connections prevent leaks and improve safety.
Refilling And Bleeding The Jack
Refilling and bleeding the Craftsman floor jack is crucial to fix leaks. It helps restore proper hydraulic pressure and smooth operation. Follow these steps carefully to ensure your jack works well again.
Adding Hydraulic Fluid
Start by locating the fluid reservoir on the jack. Clean the area around the cap to prevent dirt from entering. Remove the cap and check the fluid level inside. Use the recommended hydraulic fluid type for your jack. Slowly pour fluid into the reservoir until it reaches the fill line. Avoid overfilling, which can cause leaks or damage.
Bleeding Air From System
Air trapped inside the jack can reduce lifting power. To remove air, pump the handle several times with the release valve open. This action pushes trapped air out of the system. Close the release valve and pump the handle again to build pressure. Repeat these steps until the jack feels firm and lifts smoothly.
Final Leak Check
After refilling and bleeding, inspect the jack for leaks. Look closely around seals and fittings. Operate the jack fully up and down to see if any fluid escapes. Wipe away any excess fluid to spot new leaks easily. Fix small leaks promptly to avoid bigger problems later.
Maintenance Tips To Prevent Leaks
Preventing leaks in your Craftsman floor jack saves time and money. Good maintenance keeps the jack working well longer. Follow simple tips to avoid leaks before they start. These easy steps protect the jack’s parts and oil.
Regular Inspection
Check the floor jack often for signs of leaks or damage. Look under and around the jack for oil spots. Inspect seals and hoses for cracks or wear. Early detection helps fix small problems fast. Use a clean cloth to wipe dirt and oil away. This keeps the jack clean and easy to check.
Proper Storage
Store the floor jack in a dry, cool place. Keep it away from moisture and dust. Avoid places with extreme heat or cold. Position the jack flat on the floor. Do not leave it standing on its side. Proper storage stops rust and seal damage. Cover the jack with a cloth to protect it further.
Routine Lubrication
Lubricate moving parts regularly to keep the jack smooth. Use the right oil or grease as the manual says. Apply lubricant to joints, hinges, and the pump. This reduces friction and wear on seals. Clean old grease before applying new. Proper lubrication prevents leaks caused by dry parts.
Credit: www.lowes.com
Frequently Asked Questions
How To Identify A Leak In Craftsman Floor Jack?
A leak in a Craftsman floor jack is visible as hydraulic fluid around seals or base. Check for oil spots under the jack or reduced lifting power.
What Causes A Craftsman Floor Jack To Leak Oil?
Oil leaks often result from worn seals, damaged O-rings, or cracks in the hydraulic cylinder. Regular use and aging contribute to these issues.
How Can I Fix A Leaking Seal In My Floor Jack?
Replace the damaged seal with a compatible Craftsman seal kit. Drain the oil, disassemble the jack, swap the seal, and refill with fresh hydraulic fluid.
Is It Safe To Use A Leaking Craftsman Floor Jack?
No, leaking jacks can fail unexpectedly and cause accidents. Always repair leaks before use to maintain safety and jack performance.
Conclusion
Fixing a leaking Craftsman floor jack helps keep it safe and working well. Check seals and oil levels often to catch leaks early. Tighten loose parts and replace worn seals for best results. Regular care extends the jack’s life and keeps your work smooth.
Small fixes prevent big problems later. Stay patient and follow steps carefully to avoid damage. Your floor jack will lift safely again with simple maintenance.