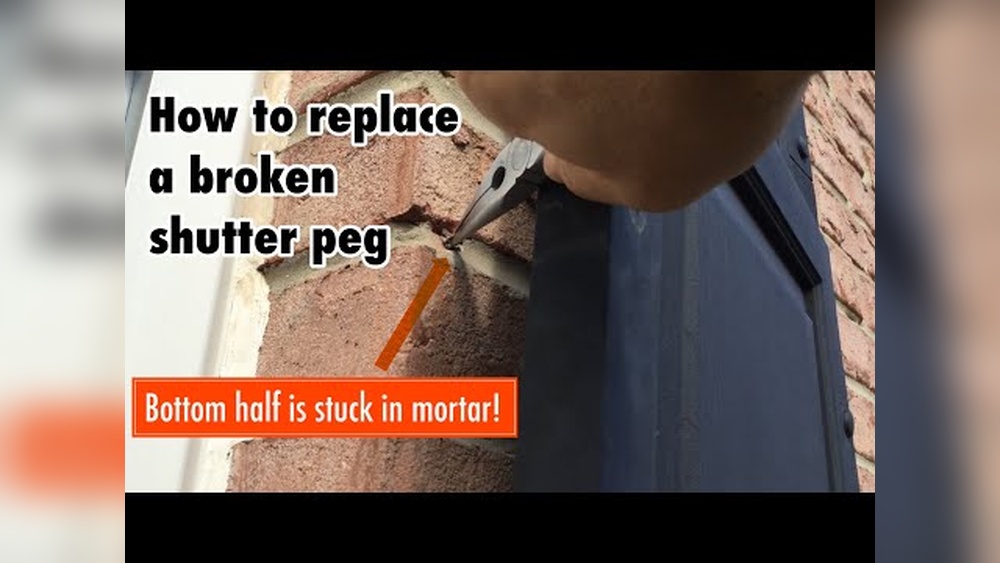
Have you ever faced the frustration of trying to remove broken shutter fasteners that just won’t budge? You’re not alone.
Dealing with stuck or damaged fasteners can stop your repair project in its tracks and leave you feeling stuck. But what if you could learn simple, effective ways to get those broken pieces out quickly and without extra damage? In this guide, you’ll discover easy steps and smart tricks that anyone can use to remove broken shutter fasteners fast.
Keep reading, and you’ll be ready to tackle this common problem with confidence and ease.

Credit: www.youtube.com
Tools Needed
Removing broken shutter fasteners requires the right tools. Having the correct tools makes the job easier and faster. Some tools are common and found in most toolkits. Others are specialized for stubborn or damaged fasteners. Knowing which tools to use helps avoid damage to the shutter or wall.
Common Tools For Removal
A screwdriver is the most basic tool needed. Flathead and Phillips screwdrivers cover most fasteners. Pliers help grip and pull out broken pieces. A hammer can gently tap to loosen stuck fasteners. A utility knife may be needed to cut around damaged areas. These tools are easy to find and use.
Specialized Fastener Tools
Some fasteners need special tools for removal. A screw extractor is designed to remove stripped or broken screws. An impact driver adds extra force to loosen tight fasteners. A fastener removal kit includes various bits and extractors. These tools work well on rusted or deeply embedded fasteners. They provide better control and reduce damage.
Identifying Fastener Types
Identifying the type of fastener used in your shutters is the first step in removing broken parts safely. Different fasteners need different tools and methods for removal. Knowing the fastener type helps avoid damage to the shutter or wall. It makes the repair process smoother and faster.
Common Shutter Fasteners
Shutters often use screws, bolts, or nails to hold them in place. Screws are the most common and come in flathead or Phillips head styles. Bolts are thicker and need a wrench or socket to remove. Nails are simpler but harder to pull out without special tools. Some shutters use hidden fasteners for a cleaner look. These require careful handling to avoid damage.
Signs Of Damage
Broken fasteners show visible signs like rust, bending, or stripping. Rust weakens the metal, making it brittle and easy to break. Bent fasteners can cause shutters to hang unevenly. Stripped heads make screws hard to turn or remove. Loose fasteners may cause the shutter to wobble or fall off. Spotting these signs early helps plan the right removal method.
Preparation Steps
Preparation is key to safely and effectively remove broken shutter fasteners. Taking time to plan and organize saves effort later. It also helps avoid accidents and damage.
Start by understanding the task and gathering the right tools. Preparing your workspace clears distractions and creates room to work. Safety must be a top priority before beginning.
Safety Precautions
Wear safety glasses to protect your eyes from debris. Use gloves to avoid cuts from sharp edges. Make sure your clothing fits well and does not catch on tools.
Keep children and pets away from the work area. Check that your tools are in good condition and sharp. Work slowly and carefully to prevent slips and injuries.
Setting Up Your Workspace
Choose a flat, stable surface to work on. Lay down a drop cloth to catch dust and small parts. Arrange all tools within easy reach before starting.
Good lighting helps you see screws and fasteners clearly. Open windows or use a fan to keep air fresh. Organize removed fasteners in a container to avoid losing them.
Removing Fasteners Manually
Removing broken shutter fasteners manually can be a practical way to fix your shutters. This method needs simple tools and patience. Manual removal helps avoid damage to the shutter or wall. It works well for fasteners stuck tight or partly broken.
Using Pliers And Screwdrivers
Start by gripping the fastener with pliers. Hold it firmly but gently. Twist the fastener back and forth to loosen it. If the fastener has a screw head, use a screwdriver. Turn the screwdriver slowly to back out the screw. Use a flathead screwdriver for slotted screws. A Phillips screwdriver works for crosshead screws. Combine pliers and screwdriver for better control. This method helps remove fasteners without breaking them further.
Tweaking With A Hammer
Use a hammer to tap the fastener lightly. Tap around the edges to loosen rust or paint. Avoid strong hits that can damage shutters. A small hammer or a mallet works best. You can also tap a screwdriver tip placed under the fastener. This creates leverage to lift it out. Repeat gentle tapping until the fastener moves freely. This technique helps with fasteners stuck deep in the shutter.
Using Power Tools
Using power tools can make removing broken shutter fasteners faster and easier. These tools help you work with less effort and more control. Power tools reduce the risk of damaging the shutter or wall. They also save time compared to manual methods. Choosing the right tool and technique is important for a clean removal.
Drill Techniques
Start with a drill to loosen stuck fasteners. Use a drill bit that fits the fastener size. Set the drill to reverse mode to unscrew the fastener. Apply steady pressure, but do not force the drill. A slow speed helps prevent stripping the fastener head. If the bit slips, try a larger or smaller bit. Drilling around the fastener can help loosen rust or paint. Always wear safety glasses to protect your eyes from debris.
Impact Drivers
Impact drivers deliver strong, sudden torque to remove tough fasteners. They work better on rusted or stuck screws than regular drills. Use the correct impact bit that matches the fastener head. Hold the driver firmly to control the force. Start slowly, then increase speed as the fastener loosens. Impact drivers reduce the chance of slipping and stripping the fastener. They are compact and easy to handle in tight spaces. Safety gloves help protect your hands from vibration.
Handling Stubborn Fasteners
Broken shutter fasteners can be tough to remove. Sometimes they are stuck tight and resist all efforts. Stubborn fasteners need careful handling to avoid damage. Using the right method helps loosen them smoothly. Two common ways to handle stuck fasteners are applying lubricants and using heat.
Applying Lubricants
Lubricants can loosen rust and dirt holding fasteners tight. Spray a small amount directly on the fastener. Let it sit for a few minutes to work. Oils like WD-40 or penetrating oil work well. They seep into tight spaces and reduce friction. Then try to turn the fastener gently. Repeat the process if needed to ease removal.
Heat Application
Heat can expand metal and break rust bonds. Use a heat gun or small torch carefully. Warm the fastener evenly for a few minutes. Avoid overheating to prevent damage to shutters. Heat helps loosen the fastener grip. After heating, try unscrewing while the metal is warm. Heat and lubricant together often give the best results.
Dealing With Stripped Or Rusted Fasteners
Broken shutter fasteners can be tough to remove, especially if they are stripped or rusted. These fasteners lose their grip, making regular tools slip or fail. Rust adds another layer of difficulty, causing the metal to stick and break easily. Handling these problems needs care and the right approach. This section covers easy ways to deal with these stubborn fasteners.
Extraction Methods
Start by cleaning the fastener and surrounding area. Use a wire brush to remove rust and dirt. This helps tools grip better. Tap the fastener gently with a hammer to loosen rust inside. Use pliers to twist the fastener if the head is exposed. Apply penetrating oil and wait for 10-15 minutes to soften rust. Try turning the fastener slowly with a screwdriver or wrench. For stripped heads, place a rubber band over the fastener. Press the screwdriver firmly on the rubber band for extra grip. If the fastener does not budge, drilling a small hole in the center may help. Use an easy-out tool or screw extractor to pull it out. Work slowly to avoid breaking the fastener inside the shutter.
Using Fastener Removal Kits
Fastener removal kits include special tools for damaged screws and bolts. They have drill bits sized for different fasteners and extractors. Start by drilling into the center of the broken fastener. Insert the extractor and turn it counterclockwise to remove the fastener. Kits often come with detailed instructions, making the process simple. These tools save time and reduce damage to the shutter. Use safety glasses and gloves for protection during removal. Keep the kit handy for future repairs involving rusted or stripped fasteners.

Credit: www.reddit.com
Replacing And Securing New Fasteners
Replacing and securing new fasteners is key to fixing broken shutter fasteners properly. This step ensures the shutters stay firmly attached and work well over time. Choosing the right fasteners and installing them correctly can prevent future damage and keep your shutters safe during storms or strong winds.
Using the right tools and materials helps make the process smoother. This section guides you through picking suitable fasteners and gives tips for a strong, lasting installation.
Choosing The Right Replacement
Select fasteners made from rust-resistant materials like stainless steel or brass. These last longer and withstand outdoor weather. Match the size of new fasteners with the old ones for a proper fit. Avoid using fasteners that are too long or too short. Choose fasteners designed for shutters, not general screws, for better strength. Check if the fastener head fits your shutter style for a clean look.
Installation Tips
Start by cleaning the shutter and frame to remove dirt and old fastener debris. Pre-drill holes slightly smaller than the fastener diameter to avoid wood splitting. Tighten fasteners firmly but do not overtighten, as this can damage the shutter. Use a screwdriver or drill with the right bit to avoid stripping fastener heads. Check the shutter movement after installation to ensure it opens and closes smoothly. Add a drop of waterproof sealant around the fastener heads to prevent rust and water damage.
Preventing Future Fastener Issues
Broken shutter fasteners can be frustrating and costly. Preventing future problems saves time and money. Simple steps help keep fasteners strong and secure. Small efforts today avoid repairs tomorrow. Focus on regular care and protection.
Regular Maintenance
Check fasteners often for rust or wear. Tighten loose screws before they break. Clean dirt and dust from shutters regularly. Use a soft brush or cloth for cleaning. Replace damaged fasteners immediately to stop damage. Regular care extends the life of fasteners.
Protective Coatings
Apply rust-resistant paint or spray on fasteners. Protective coatings block moisture and dirt. Use products designed for metal surfaces. Reapply coatings every year or after heavy rain. Coatings prevent rust and corrosion. They keep fasteners strong and looking good.

Credit: www.reddit.com
Frequently Asked Questions
How Do I Safely Remove Broken Shutter Fasteners?
Use pliers to grip the fastener firmly. Twist and pull gently to avoid damaging the shutter or wall. Apply lubricant if the fastener is stuck.
What Tools Are Needed To Remove Shutter Fasteners?
Common tools include pliers, screwdrivers, lubricant spray, and a hammer. These help loosen and extract broken or stuck fasteners effectively.
Can I Reuse Shutter Fasteners After Removal?
It’s best to replace broken fasteners with new ones. Reusing damaged fasteners reduces shutter stability and can cause future problems.
How To Prevent Shutter Fasteners From Breaking?
Regularly inspect and tighten fasteners. Avoid over-tightening and use quality hardware to ensure durability and prevent breakage.
Conclusion
Removing broken shutter fasteners can be simple with the right steps. Take your time and use the proper tools to avoid damage. Clean the area well before installing new fasteners for a strong hold. Regular checks help catch problems early and keep shutters secure.
Small repairs save money and improve home safety. Stay patient and careful for the best results. This guide helps you fix shutters quickly and easily.

