Have you ever tried to hang something on your wall and ended up with stubborn wall anchors left behind? Those little plastic or metal pieces can be tricky to remove, leaving holes that ruin the smooth look of your walls.
But don’t worry—fixing this problem is easier than you think. You’ll learn exactly how to spackle over wall anchors, step by step, to make your walls look flawless again. Whether you’re prepping for painting or just want a clean finish, these simple tips will save you time and frustration.
Keep reading, and soon your walls will look like new.
Removing Wall Anchors
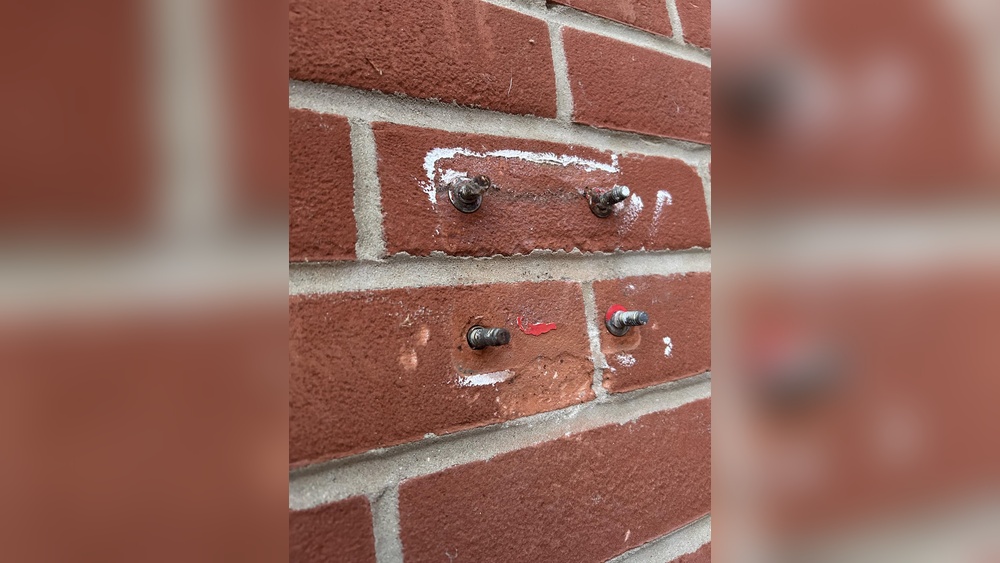
Removing wall anchors is the first step before spackling over holes. Wall anchors hold screws tightly in drywall. They come in many types like plastic expansion anchors, toggle bolts, and molly bolts. Taking them out carefully prevents damage to the wall. This helps create a smooth surface for spackling and painting.
Tools Needed
Gather a few simple tools for removing wall anchors. You will need pliers to grip and pull anchors out. A flathead screwdriver helps pry out stubborn anchors. A utility knife cuts around the anchor if needed. A drill may be useful for removing some types. Keep a small hammer handy for gentle tapping.
Safe Removal Techniques
Start by loosening the anchor gently. Use pliers to pull straight out with steady force. Twist the anchor slightly if it feels stuck. For plastic anchors, try pushing them into the wall cavity. Use a screwdriver to pry the edges carefully. Avoid pulling too hard to prevent drywall damage. Some anchors may need to be unscrewed first. Take your time for the best results.

Credit: www.youtube.com
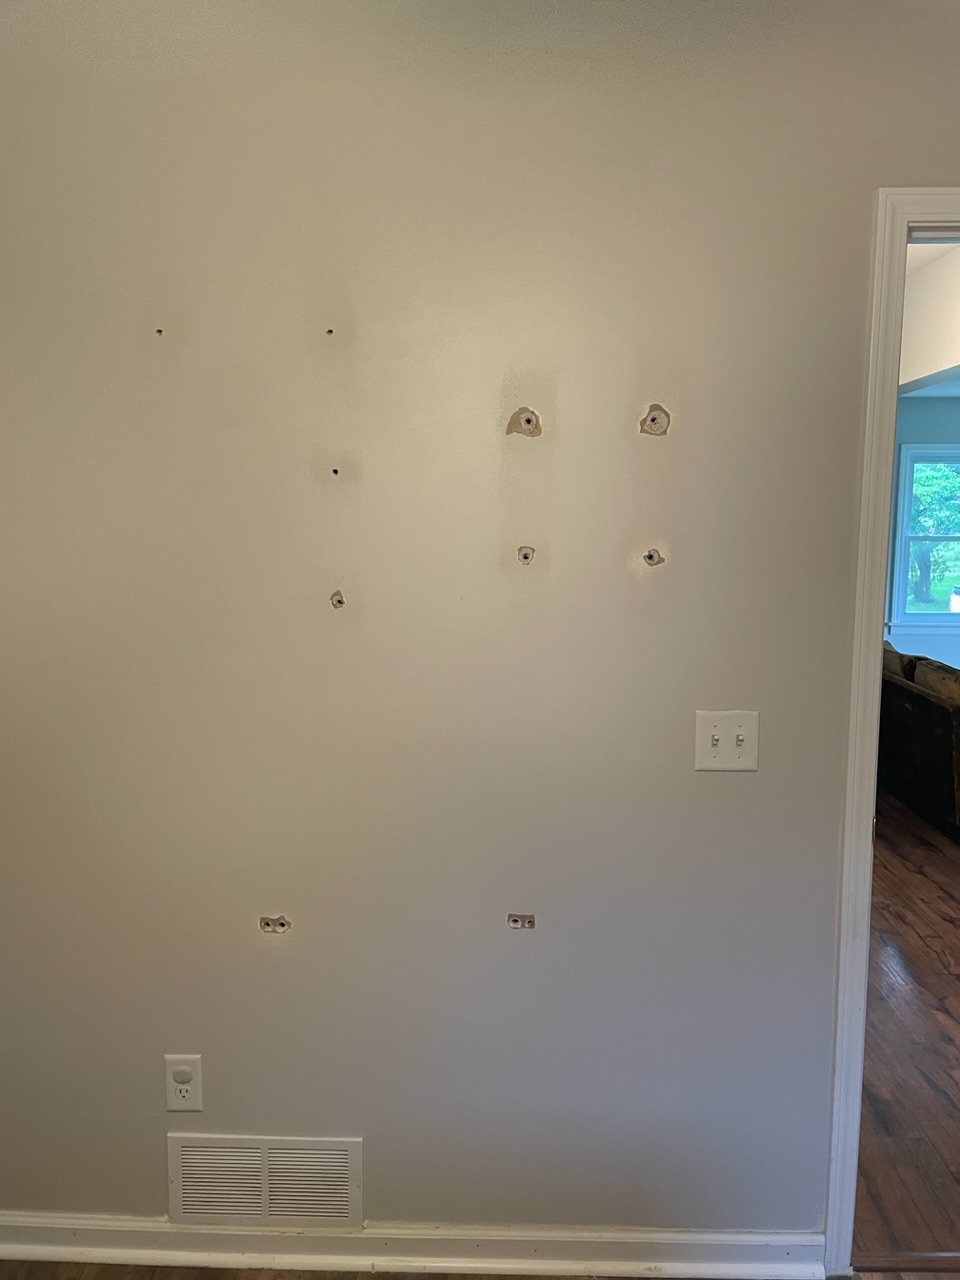
Preparing The Hole
Preparing the hole is the first step to spackle over wall anchors. This step ensures a smooth finish and strong hold. Proper preparation helps the spackle stick well and hides the repair.
Cleaning The Area
Start by removing the wall anchor carefully. Clear out any loose debris and dust from the hole. Use a small brush or cloth to wipe the inside clean. A clean surface helps the spackle adhere better.
Smoothing Edges
Check the hole’s edges for rough spots or peeling paint. Use sandpaper or a utility knife to smooth the edges gently. Smooth edges create a neat base for applying spackle evenly.
Choosing The Right Spackle
Choosing the right spackle is important for fixing holes left by wall anchors. The right spackle makes the repair strong and smooth. It also helps the wall look good after the job. Picking the correct type saves time and effort. It ensures the patch will last without cracking or shrinking.
Types Of Spackle
There are several types of spackle to choose from. Lightweight spackle is easy to spread and dries fast. It works well for small holes and simple repairs. Vinyl spackle is stronger and good for medium-sized holes. It holds up better on walls with some movement. Epoxy spackle is very strong and good for large holes. It sticks well to many surfaces and dries hard.
When To Use Each Type
Use lightweight spackle for holes smaller than a quarter. It is easy to sand and paint over quickly. Vinyl spackle suits holes up to an inch wide. It fills deeper holes and prevents cracking. Epoxy spackle fits best for holes larger than an inch. It creates a solid, durable patch. Choose the type based on hole size and wall material. This helps the repair last and look neat.

Credit: www.reddit.com
Applying Spackle
Applying spackle over wall anchors is a key step to make your walls smooth. It fills holes and covers imperfections. This process prepares your wall for painting or wallpaper. Correct application ensures a clean, professional finish.
Tools For Application
Gather these tools before starting:
- Putty knife or spackling knife
- Spackle or patching compound
- Sandpaper (fine grit)
- Clean cloth or sponge
- Drop cloth or protective covering
Step-by-step Process
Start by cleaning the wall around the hole. Remove any dust or loose debris.
Use the putty knife to scoop a small amount of spackle.
Press the spackle firmly into the hole, filling it completely.
Spread the spackle evenly, smoothing it over the surface.
Remove excess spackle by scraping the knife flat across the wall.
Let the spackle dry as per the product instructions.
After drying, lightly sand the area to make it smooth.
Wipe away dust with a clean cloth before painting or finishing.
Drying And Sanding
After applying spackle over wall anchors, the next steps are crucial. Drying and sanding ensure a smooth, even surface. Proper drying prevents cracks or dents. Good sanding makes the wall ready for paint.
Patience here means better results. Rushing can ruin your work.
Drying Times
Spackle drying time varies by brand and thickness. Thin layers dry fast, usually in 30 minutes. Thicker layers may take several hours or overnight. Check the product instructions for exact times. Touch the spackle gently to test dryness. It should feel firm and dry, not sticky. Avoid sanding before it fully dries to prevent damage.
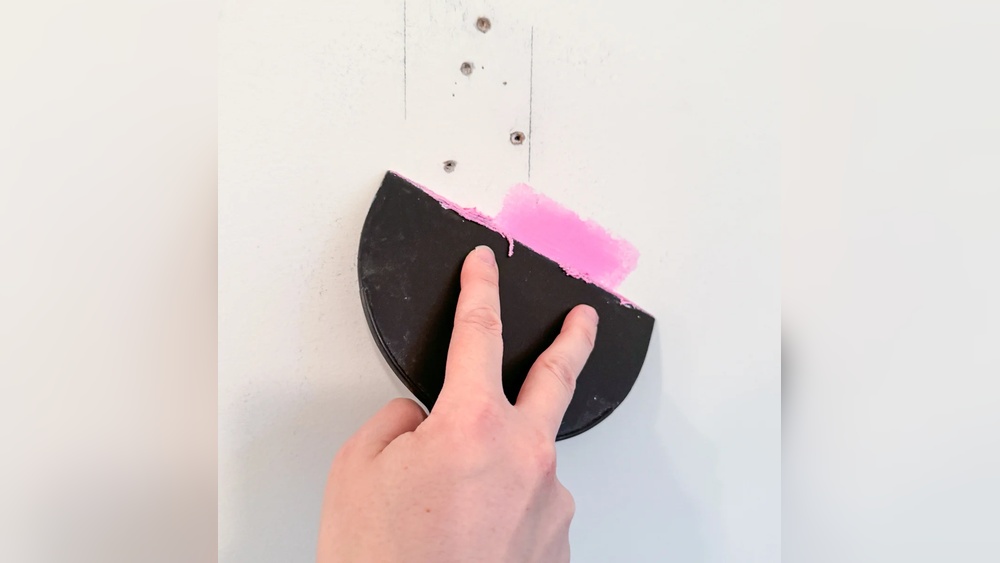
Sanding Tips For Smoothness
Use fine-grit sandpaper for the best finish. Sand lightly in circular motions. Keep checking the surface with your hand. Stop sanding when the area feels smooth and even. Avoid pressing too hard; it can create dips. Clean dust off with a damp cloth before painting. This step helps paint stick better and look smooth.
Painting Over Spackled Areas
Painting over spackled areas is the final step after filling holes left by wall anchors. It helps blend the repair with the rest of the wall. Done right, the patched spot becomes invisible. This process needs care to avoid uneven color or texture.
Priming Before Painting
Priming the spackled area is important. It seals the patch and creates a smooth surface. Without primer, paint may not stick well or may look blotchy. Use a small brush or roller for even coverage. Let the primer dry fully before applying paint.
Matching Wall Paint
Matching the wall paint color is key for a seamless fix. Take a paint chip from your wall to a store for an exact match. Test the paint on a small patch over the spackle first. Adjust the paint mix if needed. Apply paint in thin layers for the best finish.
Preventing Future Wall Damage
Preventing future wall damage is important after spackling over wall anchors. Proper care helps keep walls strong and smooth. Small mistakes can cause holes to return or cracks to form. Taking the right steps avoids these problems and keeps your walls looking good for longer.
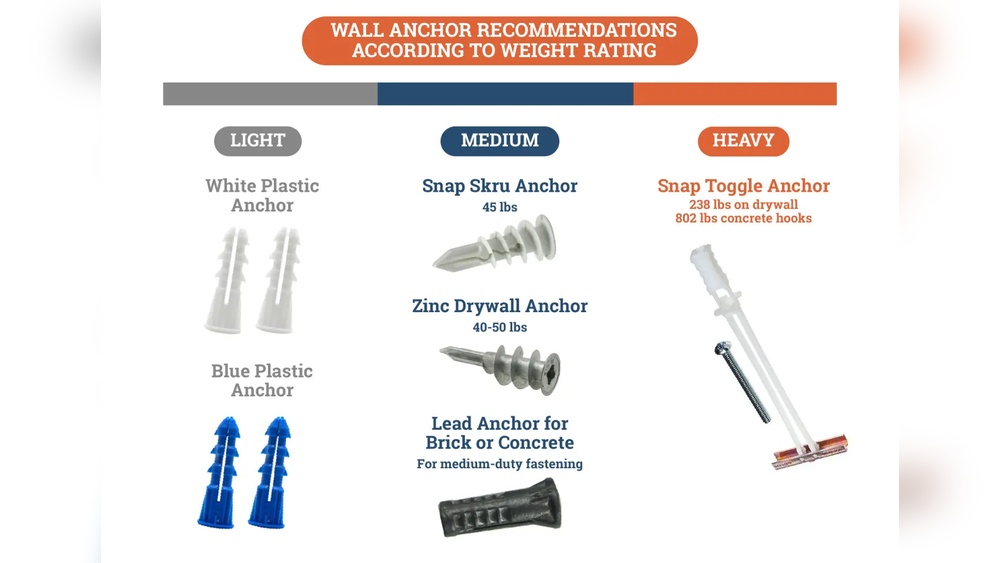
Using Proper Anchors
Choose wall anchors that fit the type of wall you have. Drywall anchors work best for drywall, while masonry anchors suit brick or concrete walls. Use anchors made for the weight and purpose of your item. Avoid cheap or weak anchors that can break or pull out. Proper anchors hold firmly and reduce wall damage.
Weight Limits And Placement
Check the weight limit of each anchor before use. Do not exceed the recommended weight to prevent holes from enlarging. Place anchors evenly to spread the load across the wall. Avoid putting too much weight on one spot. Correct placement and weight control keep walls safe and intact.
Credit: diy.stackexchange.com
Frequently Asked Questions
How Do You Remove Wall Anchors Before Spackling?
To remove wall anchors, gently pry them out using pliers or a screwdriver. Be careful not to damage the drywall. Once removed, clean the hole for smooth spackling.
What Type Of Spackle Is Best For Wall Anchor Holes?
Use lightweight spackle or drywall compound for wall anchor holes. These fill holes well and dry quickly. They also sand smoothly for a seamless finish.
How Long Does Spackle Take To Dry Over Wall Anchors?
Spackle usually dries within 1 to 4 hours, depending on the product and hole size. For best results, wait until fully dry before sanding or painting.
Can I Paint Over Spackled Wall Anchor Holes?
Yes, you can paint over dried and sanded spackle. Use primer if needed to ensure paint adhesion and a uniform finish.
Conclusion
Spackling over wall anchors is simple with the right steps. Fill the holes carefully and smooth the surface. Let the spackle dry fully before sanding it down. A clean, smooth wall looks fresh and neat. This small fix can improve any room’s appearance.
Take your time and be patient. You will see great results without much effort. Keep your walls ready for painting or decorating after spackling. A little care goes a long way in home repair.