Have you ever faced the frustration of a 3-way light switch that just won’t work the way you want? Maybe you want to control the light differently or fix a tricky wiring issue.
Understanding how to bypass a 3-way light switch can save you time, money, and headaches. In this guide, you’ll discover simple, clear steps to take control of your lighting setup without needing to call an electrician. Keep reading, and you’ll soon have the confidence to handle this common home wiring challenge yourself.
Tools And Materials Needed
Before starting to bypass a 3 way light switch, gather the right tools and materials. Having everything ready makes the job easier and safer. Use tools designed for electrical work to avoid damage or injury.
Keep the workspace clean and organized. This helps you focus and finish faster. Use materials that match your home’s wiring for best results.
Basic Tools
Start with a screwdriver set. Both flathead and Phillips types are needed. A voltage tester is essential. It ensures the power is off before you touch wires. Wire strippers help remove insulation safely. Needle-nose pliers assist with bending and holding wires.
Materials Required
Buy electrical tape to cover wire connections. Use wire nuts to join wires firmly. Choose wires that match the gauge of existing wiring. A new single-pole switch replaces the 3 way switch. Make sure it fits your electrical box.
Safety Equipment
Wear insulated gloves to protect from shocks. Safety glasses shield your eyes from debris. A flashlight helps if the area is dark. Use a sturdy ladder to reach high switches safely.
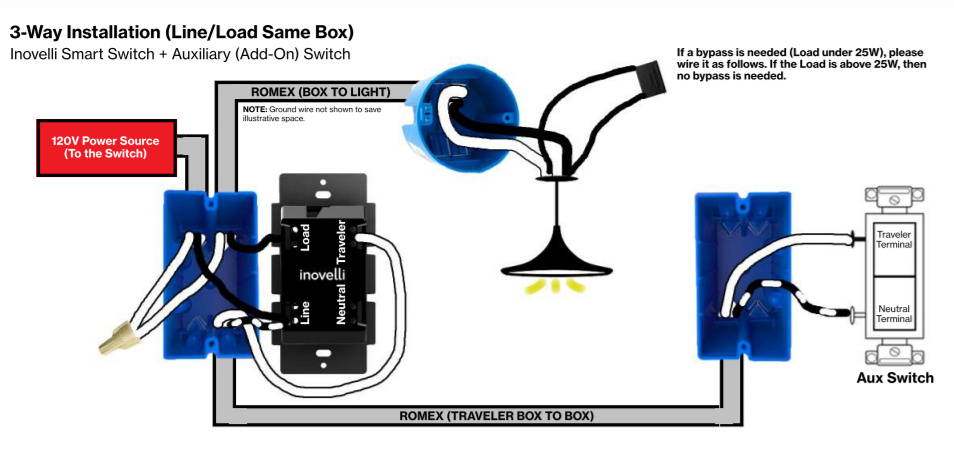
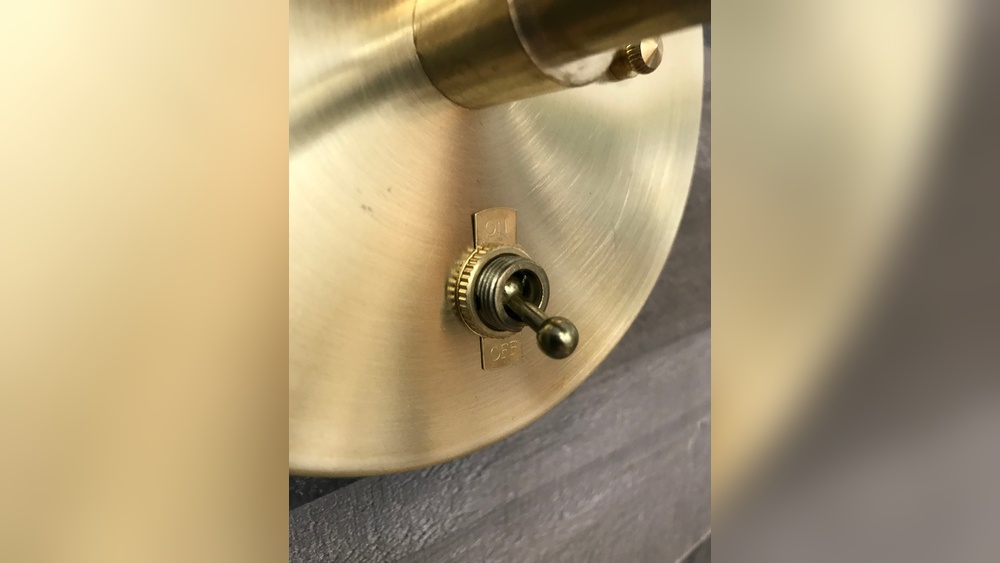
Credit: community.inovelli.com
How A 3 Way Switch Works
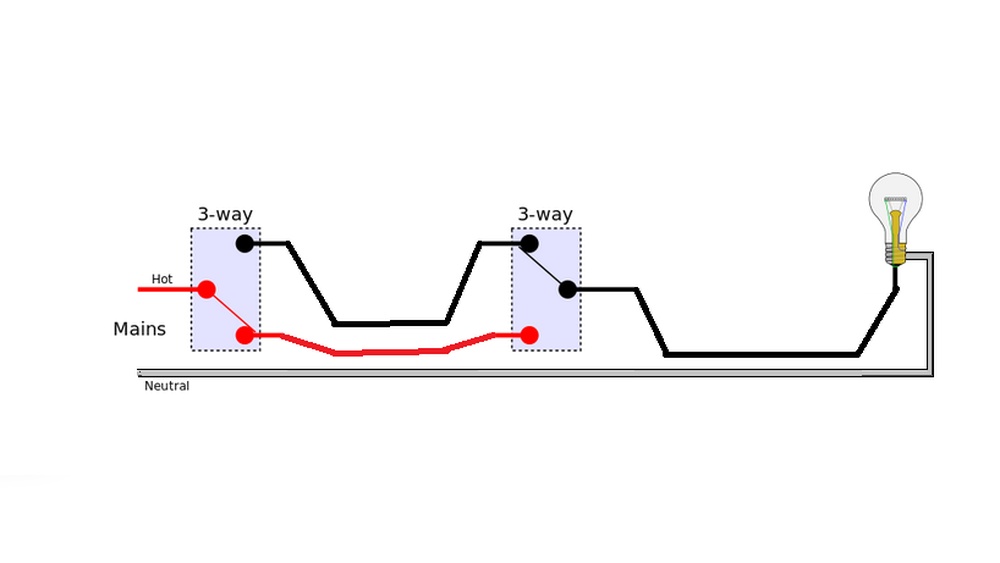
Understanding how a 3 way switch works is key before trying to bypass it. This type of switch controls one light from two different locations. It is common in hallways, staircases, or large rooms with two entrances.
A 3 way switch setup has two switches and one light. Both switches can turn the light on or off independently. This flexibility comes from the internal wiring and the way switches connect.
Basic Components Of A 3 Way Switch
Each 3 way switch has three terminals. Two are traveler terminals, and one is the common terminal. The common terminal connects to the power source or the light fixture. Traveler terminals connect the two switches together.
How Electricity Flows In A 3 Way Switch
Electricity flows through the common terminal to the light. The traveler terminals carry the current between switches. Depending on switch positions, the circuit either completes or breaks, turning the light on or off.
The Role Of Switch Position
Switches work by changing which traveler terminal connects to the common terminal. Flipping either switch changes the path of electricity. This switching allows control of the light from two places.
Safety Precautions Before Starting
Before starting, turn off the power at the circuit breaker to avoid electric shocks. Use a tester to make sure the wires are not live. Wear insulated gloves for extra safety.
Understand The Risks
Working with electrical switches can be dangerous. A small mistake may cause shock or fire. Always respect electricity. Take every risk seriously before starting any work.
Turn Off Power Supply
Switch off the power at the circuit breaker. Do not rely on the wall switch alone. Verify power is off by testing the switch with a voltage tester. Safety first.
Use Proper Tools
Use insulated tools designed for electrical work. Avoid metal tools without insulation. This reduces the chance of electric shock.
Wear Safety Gear
Wear rubber-soled shoes and safety goggles. Avoid wearing metal jewelry or watches. These precautions protect you from accidental shocks and injuries.
Work In A Dry Area
Ensure the work area is dry. Water increases the risk of shock. Do not work in damp or wet conditions.
Know Your Wiring
Understand the wiring layout before starting. Identify all wires and their functions. Mistakes in wiring can cause damage or injury.
Have A Helper Nearby
Work with someone who can assist or call for help. This adds safety in case of an emergency.
Identifying The Switch Wiring
Identifying the wiring of a 3-way light switch is the first step in bypassing it safely. Understanding the wires helps avoid mistakes and keeps you safe. Each wire has a specific role in the switch’s function. Knowing which wire does what makes the process easier and clearer.
Take your time to carefully check the wires before making any changes. Use a voltage tester to ensure no power is running through the wires. This step protects you from electric shocks. Proper identification reduces the risk of damaging your electrical system.
Tools Needed To Identify Switch Wiring
Gather a voltage tester, screwdriver, and electrical tape. These simple tools help find and mark the wires. A voltage tester shows if wires carry current. Screwdrivers remove switch covers and access wiring. Tape helps label each wire for easy reference.
Common Wire Colors And Their Functions
Black wires usually carry power or are travelers. White wires often act as neutral wires. Red wires are commonly traveler wires between switches. Ground wires are green or bare copper. Recognizing colors helps you know each wire’s job.
How To Trace The Wires In A 3-way Switch
Turn off the power before touching wires. Remove the switch cover carefully. Look at the wires connected to the switch terminals. Note the black, red, white, and ground wires. Use a tester to check which wires are live or travelers.
Bypassing The 3 Way Switch
Bypassing a 3 way light switch is a useful way to simplify your lighting control. This process removes one of the switches and allows the light to work from a single switch only. It can save time and reduce confusion in your home wiring. Follow these clear steps to do it safely and correctly.
Disconnecting The Switch
First, turn off the power to the switch at the breaker box. Use a voltage tester to make sure no electricity flows to the switch. Remove the switch cover plate and unscrew the switch from the wall box. Carefully pull the switch out to see the wires connected to it. Note the wire positions before disconnecting them.
Connecting The Wires
Identify the two traveler wires connected to the 3 way switch. These wires allow the switch to work with another switch. Twist these two traveler wires together with a wire nut. This connection bypasses the switch function. The common wire can be left disconnected or capped with a wire nut for safety.
Securing And Insulating Connections
Make sure all wire connections are tight and secure. Use wire nuts to cover exposed wire ends. Wrap electrical tape around the wire nuts for extra protection. Push the wires back into the wall box carefully. Attach a blank cover plate over the box to prevent accidents. Turn the power back on and test the light switch function.

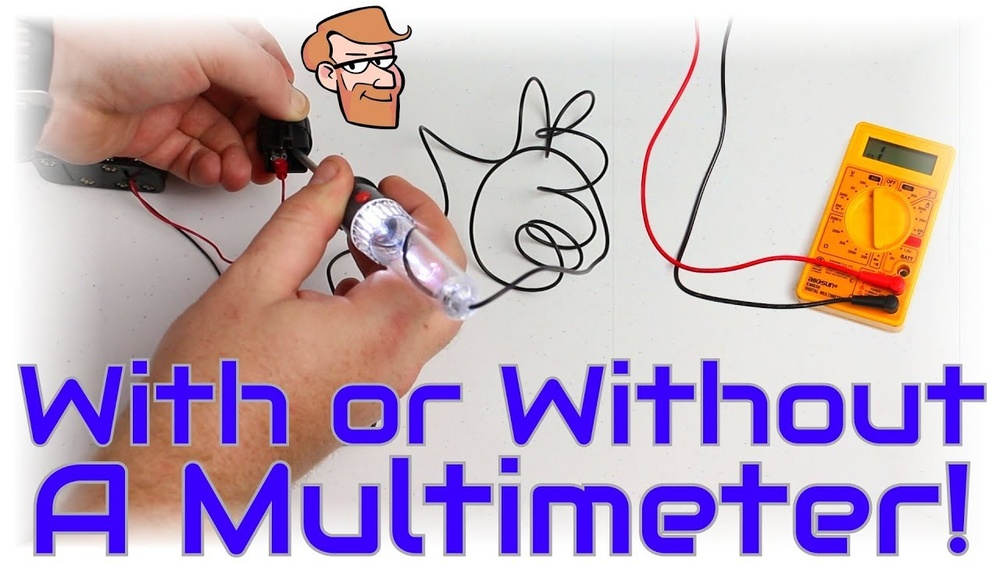
Credit: diy.stackexchange.com
Testing The Bypass
Testing the bypass is a critical step after modifying a 3 way light switch. It confirms the wiring changes worked correctly. This step ensures safety and proper function before finalizing the setup.
Testing also helps identify any wiring mistakes. A quick check can save time and avoid electrical hazards. Follow these simple tests to verify the bypass effectively.
Turn On The Power
First, restore power at the circuit breaker. This powers the switch circuit for testing. Never test without power; the switch won’t respond.
Check The Light Operation
Flip the bypassed switch on. The light should turn on immediately. Flip it off to confirm the light goes off.
Test Both Switch Locations
Operate each switch controlling the light. The light should respond only to the bypassed switch. The other switch will no longer work.
Use A Voltage Tester
Check for voltage at the light fixture terminals. Voltage should be constant when the bypass switch is on. No voltage means a wiring issue.
Look For Flickering Or Delays
Observe the light for flickering or delay in response. Smooth operation means correct wiring. Flickering indicates loose connections or errors.
Common Issues And Troubleshooting
Common problems with 3-way light switches can make bypassing tricky. Knowing the usual issues helps fix the switch quickly. Troubleshooting saves time and prevents extra work. It also keeps your home safe from electrical faults.
Understanding wiring and switch types is key. Some faults look similar but need different fixes. Testing tools like a voltage tester or multimeter help find issues fast. Careful steps reduce errors and improve results.
Identifying Wiring Mistakes
Wrong wire connections cause the switch to fail. Check that traveler wires connect between both switches. The common terminal must link to the power source or light. Loose or swapped wires often stop the switch from working.
Detecting Faulty Switches
Old or broken switches can cause flickering or no light. Test the switch by turning it on and off several times. A multimeter can confirm if the switch completes the circuit. Replace any switch that shows no continuity when on.
Testing Power Supply Issues
No power to the switch means the light won’t work. Use a voltage tester to check for live wires at the switch. Check the breaker panel for tripped breakers or blown fuses. Power problems often mimic wiring or switch faults.
Checking For Short Circuits
Short circuits cause breakers to trip or lights to flicker. Inspect wires for damage or bare spots touching each other. Replace damaged wires and use electrical tape for insulation. Avoid using switches if short circuits exist to prevent hazards.
When To Call A Professional
Bypassing a 3 way light switch might seem simple. Yet, some situations need expert help. Electrical work can be risky without proper skills. Knowing when to call a professional saves time and avoids danger.
Complex Wiring Issues
Some homes have complicated wiring setups. Identifying the right wires in a 3 way switch can be tricky. Mistakes can cause short circuits or damage. Professionals have tools and experience to handle complex wiring safely.
Unfamiliar With Electrical Codes
Electric codes vary by location. Following these rules keeps your home safe. Professionals know local codes and apply them correctly. This prevents future problems and fines.
Frequent Switch Problems
If your 3 way switch often fails, simple bypass may not fix it. Frequent issues might mean bigger electrical problems. An expert can diagnose and repair the root cause.
Safety Concerns
Electricity can cause shocks or fires. Handling live wires without knowledge is dangerous. Professionals use safety gear and follow strict procedures. Protect yourself by letting experts work on the switch.
Time And Convenience
Calling a professional saves time and effort. They finish the job quickly and correctly. Avoid frustration and multiple attempts by hiring an expert from the start.

Credit: www.youtube.com
Frequently Asked Questions
What Does Bypassing A 3 Way Light Switch Mean?
Bypassing a 3 way switch means disabling one switch to control the light from a single switch. It simplifies wiring and operation when multiple switch control is unnecessary.
Is It Safe To Bypass A 3 Way Switch?
Yes, bypassing is safe if done correctly. Always turn off power before working on switches. Use proper tools and follow wiring codes to prevent hazards.
Can I Bypass A 3 Way Switch Without An Electrician?
If you have basic electrical knowledge, yes. Follow step-by-step guides carefully. However, consult a professional if unsure to avoid mistakes or safety risks.
What Tools Are Needed To Bypass A 3 Way Switch?
You need a screwdriver, wire stripper, electrical tape, and voltage tester. These tools help safely disconnect and reconnect wires during the bypass process.
Conclusion
Bypassing a 3-way light switch can save time and effort. Always turn off power before starting any work. Follow the steps carefully to avoid mistakes. Use basic tools and simple wiring techniques. This task is doable with some patience and care.
Safety should be your top priority throughout the process. Now, you can handle this project with confidence. Remember, practice makes perfect. Keep these tips in mind for future electrical fixes.