Are you ready to make your home smarter and more convenient? Connecting your Kasa Light Switch is easier than you think, and once set up, it gives you full control over your lights right from your phone.
Whether you want to save energy, set schedules, or control your lights remotely, this guide will walk you through every step. Keep reading to discover how simple it is to connect your Kasa Light Switch and start enjoying a smarter home today.
Credit: www.reddit.com
Kasa Light Switch Features
Before installing your Kasa Light Switch, gather the right tools and materials. This makes the process smooth and safe. Having everything ready saves time and avoids frustration. Check the list carefully to prepare your workspace.
Basic Tools Checklist
- Flathead screwdriver
- Phillips screwdriver
- Voltage tester
- Wire stripper
- Needle-nose pliers
- Electrical tape
- Flashlight or work light
Additional Supplies
- Wire nuts (usually included with switch)
- Wall plate cover
- Smartphone or tablet for setup
- Wi-Fi access details
- Safety gloves
- Multimeter (optional for extra safety)
Tools And Materials Needed
Preparing for the installation of your Kasa light switch is a key step. It ensures safety and a smooth setup. Follow these simple steps before you start the installation.
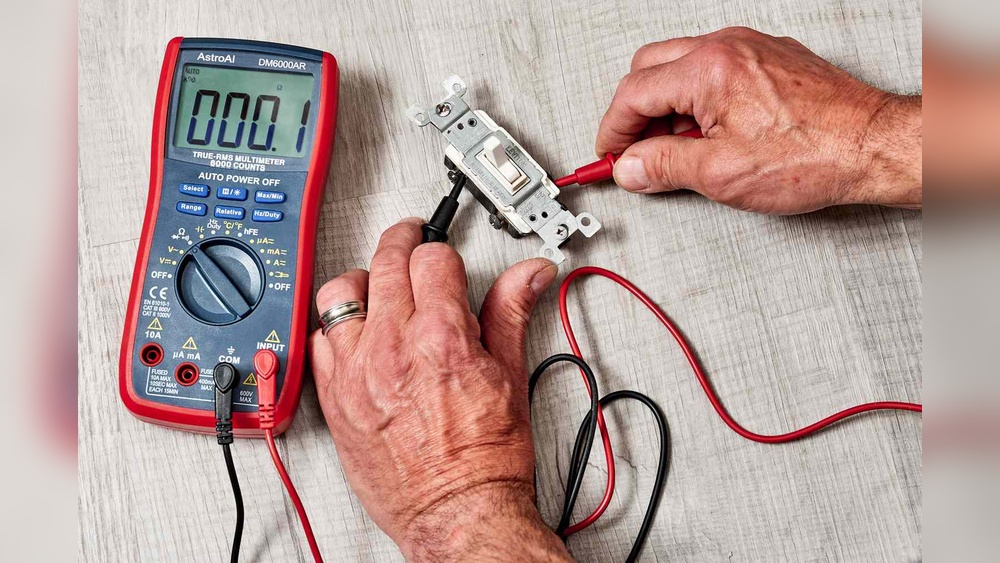
Turn Off Power
Safety comes first. Locate your home’s circuit breaker panel. Switch off the power to the room where you will install the switch. Use a voltage tester on the existing switch to confirm the power is off. This prevents any electric shock during installation.
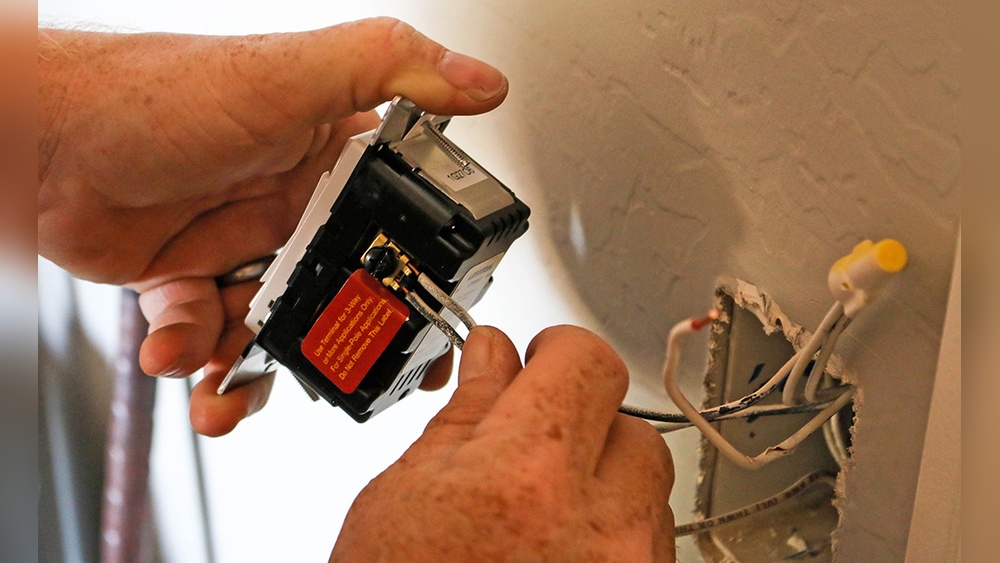
Remove Existing Switch
Remove the switch cover plate using a screwdriver. Unscrew the existing switch from the wall box carefully. Gently pull the switch out to expose the wiring. Note how the wires are connected or take a photo. This helps when connecting your new Kasa switch.
Preparing For Installation
Mounting the Kasa light switch is a key step in the installation process. It ensures the switch fits securely and works safely. Follow the steps carefully to avoid damage or loose connections. This part focuses on attaching the switch and installing the faceplate.
Attach To Wall Box
Start by aligning the Kasa switch with the wall box. Make sure wires are tucked inside the box neatly. Use the provided screws to fasten the switch into place. Tighten screws firmly but do not over-tighten. The switch should sit flush against the wall. Check the switch is stable and does not wiggle.
Install Faceplate
Place the faceplate over the mounted switch carefully. Align the screw holes with those on the switch. Insert and tighten the screws to secure the faceplate. Avoid overtightening to prevent cracking the plate. The faceplate should lay flat against the wall. This completes the mounting and gives a clean, finished look.
Credit: www.tp-link.com
Wiring The Kasa Light Switch
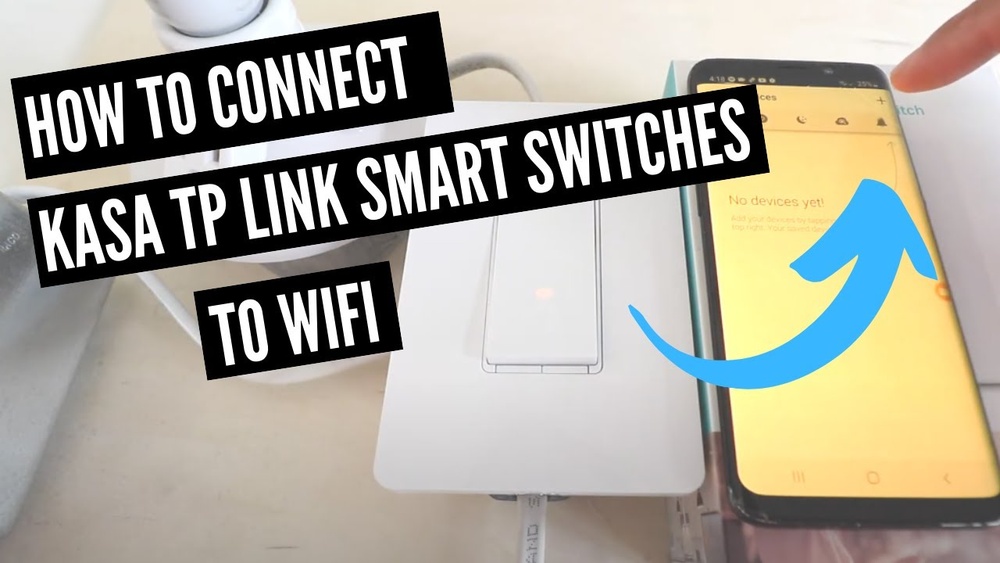
Setting up the app is the first step to control your Kasa Light Switch easily. The app lets you manage your lights from anywhere. Follow the simple steps below to get started quickly.
Download Kasa App
Go to the App Store or Google Play Store on your phone. Search for “Kasa Smart” and download the app. The app is free and works on both Android and iOS devices. Make sure you have a stable internet connection for a smooth download.
Create Account
Open the Kasa app after installation. Tap on “Sign Up” to create a new account. Enter your email and choose a strong password. Verify your email if asked to complete the signup. Having an account helps you save your settings and control devices remotely.
Add Device
Log in to your Kasa account. Tap the “+” button to add a new device. Select your Kasa Light Switch from the list. Follow the on-screen instructions to connect the switch to your Wi-Fi network. Make sure your phone is near the switch during setup for better connection.
Mounting The Switch
Configuring the Wi-Fi connection is the key step to control your Kasa Light Switch remotely. Without a stable connection, the switch will not respond to commands from your phone or smart home system. Follow clear steps to join your home network and fix common connection problems.
Connect To Home Network
Start by turning on your Kasa Light Switch. Open the Kasa app on your smartphone. Select “Add Device” and choose the light switch model. The app will ask you to connect to the switch’s temporary Wi-Fi. Go to your phone’s Wi-Fi settings and find the switch’s network. Join it. Return to the app and enter your home Wi-Fi name and password. Make sure your Wi-Fi is 2.4 GHz, as most Kasa switches do not support 5 GHz. Tap “Next” to connect the switch to your home Wi-Fi. Wait until the app shows a success message. Now, the switch is ready to use from anywhere.
Troubleshoot Connectivity Issues
Check if your Wi-Fi signal is strong near the switch location. Weak signals cause connection problems. Restart your router and the switch to refresh connections. Confirm the Wi-Fi password is correct. Use the Kasa app to reset the switch if it fails to connect. Ensure your phone is connected to the same Wi-Fi network during setup. Disable VPN or firewall apps temporarily, as they can block connections. Update the Kasa app to the latest version for better compatibility. If problems persist, move the switch closer to the router or add a Wi-Fi extender.
Setting Up The App
Connecting a Kasa Light Switch can be simple, but some common problems may occur. These issues can stop your switch from working properly. Knowing how to fix these problems saves time and frustration. Below are common problems users face and easy fixes to try.
Switch Not Responding
The switch may not respond to commands. First, check if the switch is properly installed. Loose wiring can cause no response. Press the reset button on the switch to restart it. Also, ensure the Kasa app is updated to the latest version. Sometimes, the app or device needs a quick reboot.
Wi-fi Connection Problems
Wi-Fi issues are common with smart switches. Confirm the switch is within range of your router. Walls and distance can weaken the signal. Restart your router to refresh the connection. Make sure you use a 2.4 GHz Wi-Fi network, as many switches do not support 5 GHz. Re-enter your Wi-Fi password in the app if needed.
Power Issues
Power problems stop the switch from working. Check if the circuit breaker is on and not tripped. Ensure the switch has a neutral wire, as many Kasa switches need it. Use a voltage tester to confirm power is reaching the switch. If unsure, ask a professional electrician to inspect the wiring.

Credit: www.youtube.com
Frequently Asked Questions
How Do I Connect A Kasa Light Switch To Wi-fi?
To connect a Kasa light switch to Wi-Fi, download the Kasa app. Follow the in-app instructions to power on the switch and connect it to your home Wi-Fi network. Ensure your phone is near the switch during setup for a smooth connection.
Can I Control Kasa Light Switches Remotely?
Yes, Kasa light switches can be controlled remotely via the Kasa app. You can turn lights on or off from anywhere using your smartphone, as long as your switch is connected to Wi-Fi and your phone has internet access.
What If The Kasa Light Switch Won’t Connect?
If your Kasa light switch won’t connect, check your Wi-Fi signal strength and password. Restart the switch and router. Ensure your phone is near the switch during setup. If issues persist, reset the switch and try the setup process again.
Is The Kasa Light Switch Compatible With Voice Assistants?
Yes, Kasa light switches work with Alexa and Google Assistant. You can control your lights using voice commands after linking your Kasa account to these platforms through their apps.
Conclusion
Connecting your Kasa light switch is simple and quick. Follow the steps carefully for a smooth setup. Make sure your Wi-Fi is strong and stable. Test the switch after installation to confirm it works well. Enjoy easy control of your lights anytime and anywhere.
This smart switch adds comfort and convenience to your home. Stay safe by turning off power before starting. You’ll find controlling your lights more fun and flexible now.