Are you tired of harsh lighting in your room? Switching to a dimmer switch can transform your space with just the right amount of light.
Replacing a regular light switch with a dimmer is easier than you might think. In this guide, you’ll learn simple, step-by-step instructions to do it yourself safely and quickly. By the end, you’ll have full control over your lighting mood without calling an electrician.
Ready to brighten up your home your way? Let’s get started!

Credit: www.youtube.com
Tools And Materials Needed
Replacing a light switch with a dimmer switch requires specific tools and materials. Having the right items makes the job safer and easier. Prepare everything before starting the project.
Tools Needed
- Screwdriver set (flathead and Phillips)
- Voltage tester
- Wire stripper
- Needle-nose pliers
- Electrical tape
- Flashlight or portable light source
Materials Needed
- Dimmer switch compatible with your light fixture
- Wire connectors (wire nuts)
- Wall plate for the dimmer switch
- Optional: new screws for mounting
Each tool and material plays a key role in the replacement process. Using a voltage tester ensures safety by checking power. Wire strippers help prepare wires for connection. Proper wire connectors keep wires secure and prevent shorts.

Credit: www.youtube.com
Choosing The Right Dimmer Switch
Choosing the right dimmer switch is important for a smooth lighting experience. The right dimmer controls light brightness and saves energy. It also fits well with your existing bulbs and wiring. Knowing the types of dimmers, bulb compatibility, and load limits helps you pick the best one.
Types Of Dimmer Switches
There are several types of dimmer switches. Rotary dimmers turn a knob to adjust light levels. Slide dimmers use a sliding control for brightness changes. Touch dimmers work by tapping or holding a button. Each type offers different ease of use and style. Choose one that fits your habits and room design.
Compatibility With Bulbs
Not all dimmers work with every bulb type. Some dimmers are made for incandescent bulbs only. Others support LED and CFL bulbs. Using the wrong dimmer can cause flickering or buzzing. Check the dimmer packaging for bulb compatibility. Match your dimmer to the bulbs in the room for best results.
Wattage And Load Considerations
Every dimmer switch has a wattage limit. This limit shows the maximum power it can handle. Calculate total wattage by adding all bulbs on the circuit. Choose a dimmer with a higher wattage rating than your total load. Overloading a dimmer can cause damage or poor performance.
Safety Precautions
Working with electrical wiring can be risky. Safety must be your top priority before replacing a light switch with a dimmer switch. Simple steps can protect you from electric shock or damage to your home.
Turning Off Power
Start by turning off the power at the main circuit breaker. This stops electricity from flowing to the switch. Never rely on just the wall switch to cut power. Use the breaker to be sure.
Double-check that the right breaker is off by flipping it completely. This small action can save your life. Safety first, always.
Testing For Live Wires
Use a voltage tester to check for live wires. Touch the tester to the wires connected to the switch. If the tester lights up or beeps, the wire still has power.
Test all wires, not just the black one. If any wires are live, turn off the breaker again. Do this until no wires show power.
Removing The Existing Switch
Removing the existing switch is the first step in replacing it with a dimmer switch. This task requires care to avoid any electrical hazards. Make sure the power is off at the circuit breaker before starting.
Take your time to carefully remove the old switch. This allows you to work safely and prepares the wall for the new dimmer switch.
Unscrewing The Wall Plate
Begin by unscrewing the wall plate that covers the switch. Use a flathead or Phillips screwdriver depending on the screws. Keep the screws safe; you will need them later.
Gently pull the wall plate away from the wall. Avoid forcing it to prevent damage to the wall or plate.
Disconnecting Wires
Next, unscrew the screws holding the switch in place. Carefully pull the switch out from the wall box.
Identify the wires connected to the switch. Usually, there are two or three wires: one or two hot wires and a ground wire.
Loosen the screws or disconnect the wires from the switch terminals. Use a voltage tester first to confirm no electricity flows through the wires.
Set the old switch aside. The wires are now ready to connect to the dimmer switch.
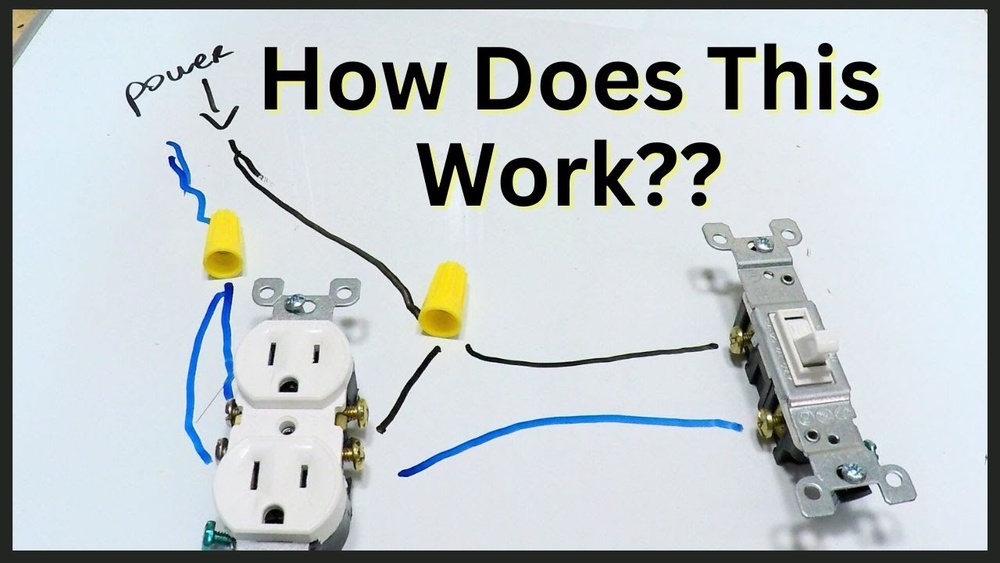
Wiring The Dimmer Switch
Wiring the dimmer switch is a key step in the replacement process. It controls the light’s brightness. Proper wiring ensures safety and functionality. Understanding wire types and making secure connections is essential. Follow each step carefully for best results.
Identifying Wire Types
First, identify the wires in your switch box. Usually, there are three main wires: live (hot), neutral, and ground. The live wire carries current from the power source. The neutral wire completes the circuit. The ground wire protects against electrical faults. Use a voltage tester to confirm the live wire. Wires often come in black, white, and green or bare copper colors.
Connecting Wires To Dimmer
Match the dimmer switch wires to the house wires. Connect the live dimmer wire to the live house wire. Join the neutral dimmer wire to the neutral house wire. Attach the ground wire from the dimmer to the ground wire in the box. Use wire connectors to join wires. Make sure no copper is exposed outside the connectors. Follow the dimmer switch instructions for exact wire colors and connections.
Securing Wire Connections
Secure each wire connection tightly. Twist wires together and screw on wire nuts. Tug gently to check for firmness. Wrap electrical tape around wire nuts for extra safety. Push wires neatly into the electrical box. Avoid sharp bends or pinches in the wires. Proper securing prevents loose connections and electrical hazards.
Mounting The Dimmer Switch
Mounting the dimmer switch is an important step in the replacement process. It ensures the switch fits securely and functions properly. Proper mounting also helps avoid electrical hazards and keeps the switch looking neat.
Follow each step carefully to attach the dimmer switch to the electrical box. After that, replace the wall plate to finish the installation.
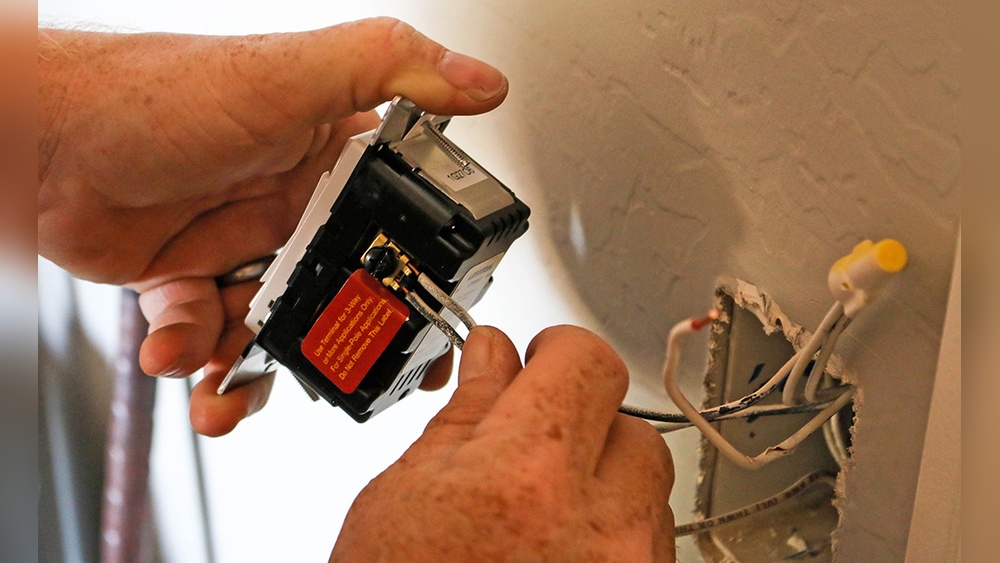
Attaching To Electrical Box
Start by aligning the dimmer switch with the electrical box. Hold it firmly in place. Use the screws provided to attach the switch. Tighten screws evenly, but do not over-tighten. The switch should sit flush against the wall. Check that it does not move or wiggle.
Replacing The Wall Plate
Once the switch is secure, place the wall plate over it. Align the screw holes in the wall plate with the switch. Use a screwdriver to fasten the screws. Tighten just enough to hold the plate firmly. Avoid cracking the plate by tightening too much. The wall plate should fit smoothly and look clean.
Testing The Dimmer Switch
Testing the dimmer switch is an important step after installation. It ensures the switch works correctly and controls the light as expected. This step prevents any electrical issues and confirms that your new dimmer switch is ready to use.
Restoring Power
Turn the circuit breaker back on to restore power. Be careful and make sure your hands are dry. Check the switch area for any signs of sparks or unusual sounds. If everything looks normal, proceed to test the dimmer switch.
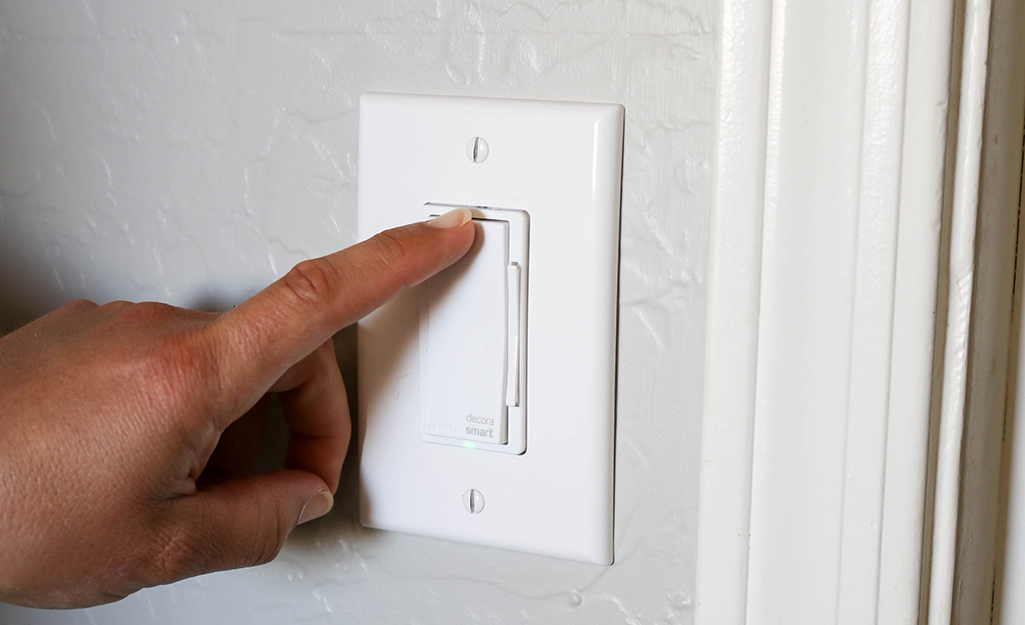
Checking Dimmer Functionality
Press the dimmer switch to turn the light on. Slowly move the dimmer slider or knob to adjust brightness. The light should smoothly get brighter or dimmer. If the light flickers or does not change, double-check your wiring. Proper function means your dimmer switch is working well.
Troubleshooting Common Issues
Replacing a light switch with a dimmer switch can improve your room’s ambiance. Sometimes, small problems appear after installation. These common issues can usually be fixed quickly. Understanding these problems helps keep your dimmer switch working well.
Dimmer Not Working
Check if the dimmer switch is properly connected. Loose wires can stop it from working. Make sure the circuit breaker is on. Some dimmers need specific bulbs to work. Using the wrong bulb can cause failure. Test the dimmer with a known good bulb.
Flickering Lights
Flickering often means a poor connection. Tighten the switch wires carefully. Dimmers need compatible bulbs to avoid flicker. LED and CFL bulbs need dimmer-friendly types. Sometimes, the bulb is old or faulty. Replace the bulb if flickering continues.
Buzzing Sounds
Buzzing comes from electrical current flow. Dimmers can make sounds with some bulbs. Using dimmer-compatible bulbs reduces buzzing. Check if the dimmer switch fits the bulb load. Excess load causes noise and damage. Replace the dimmer or bulb to stop buzzing.
Credit: www.homedepot.com
Frequently Asked Questions
What Tools Do I Need To Replace A Light Switch With A Dimmer?
You need a screwdriver, voltage tester, wire stripper, and the dimmer switch. Turn off power before starting. These tools ensure safe and easy installation.
Can I Replace Any Light Switch With A Dimmer Switch?
No, dimmer switches work best with compatible bulbs like LEDs or incandescent. Check bulb compatibility to avoid flickering or damage when replacing switches.
How Do I Safely Turn Off Power Before Replacing The Switch?
Turn off the circuit breaker controlling the switch’s power. Use a voltage tester to confirm no electricity flows. Safety is crucial to prevent shocks.
Will A Dimmer Switch Save Energy Compared To A Regular Switch?
Yes, dimmers reduce energy use by lowering light brightness. This extends bulb life and cuts electricity bills. It’s an eco-friendly lighting upgrade.
Conclusion
Replacing a light switch with a dimmer switch is simple and useful. It lets you control light brightness easily. Always turn off the power before starting work. Follow each step carefully to stay safe. With patience, you can finish the job well.
Enjoy better lighting and save energy at home. Try this small change to improve your space today.