Are you struggling with a stubborn Baldwin deadbolt that just won’t come off? Whether you’re upgrading your locks or fixing a jam, knowing how to remove your Baldwin deadbolt quickly and safely can save you time and frustration.
In this guide, you’ll discover simple steps that anyone can follow, even if you’ve never handled a lock before. Keep reading, and you’ll have your deadbolt removed smoothly, without damaging your door or lock. Let’s get started!
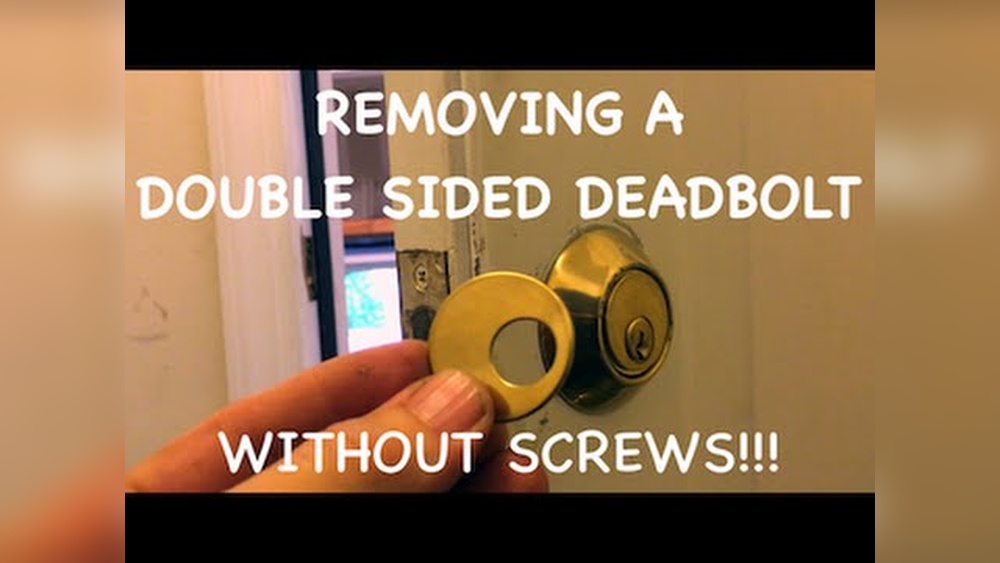
Credit: www.youtube.com
Tools Needed
Removing a Baldwin deadbolt requires a few basic tools. These tools help you work quickly and safely. Having the right tools makes the job easier and avoids damage to the door or lock.
Keep all tools ready before starting. This saves time and frustration during the removal process.
Phillips Screwdriver
A Phillips screwdriver is essential for removing screws. Baldwin deadbolts usually have Phillips head screws. Use a screwdriver with a comfortable handle for better grip.
Flathead Screwdriver
A flathead screwdriver helps pry off covers or trim pieces. It also assists in lifting parts gently without scratching surfaces.
Allen Wrench
Some Baldwin deadbolts use Allen screws. An Allen wrench set ensures you can remove these screws easily. Choose the right size to avoid stripping the screw head.
Needle-nose Pliers
Needle-nose pliers help grip small parts and pull out pins. They are useful in tight spaces where fingers cannot reach.
Flashlight
A flashlight improves visibility inside the lock area. It helps locate hidden screws or pins during removal.
Prepare The Door
Preparing the door is the first step in removing a Baldwin deadbolt. This stage ensures safety and makes the process easier. A properly prepared door lets you work smoothly without damage. It also helps you avoid frustration or mistakes.
Gathering the right tools and understanding the door’s parts is important. Clean and clear the area around the lock. Check the lock’s condition to know what to expect next.
Gather Necessary Tools
Collect the tools needed for deadbolt removal. You will need a screwdriver, usually Phillips or flathead. A drill may help for stuck screws. A flashlight can improve visibility. Keep a small container for screws and parts.
Clear The Work Area
Remove any objects near the door. Clear the floor around the door to avoid tripping. Good lighting helps you see screws and parts clearly. Open the door fully for easy access. This makes the removal faster and safer.
Inspect The Deadbolt
Look closely at the deadbolt’s exterior and interior parts. Note the type of screws used. Check if the screws are tight or loose. Identify if the deadbolt has a faceplate. This helps you understand how to remove it correctly.
Locate Screws
Locating the screws is the first step to remove a Baldwin deadbolt. Without finding these screws, you cannot take the lock apart. The screws hold the deadbolt components firmly on the door. They are usually easy to spot but may be hidden under some covers. Knowing their exact location saves time and prevents damage to the lock or door.
Find Screws On The Interior Side
Most Baldwin deadbolt screws are on the inside of the door. This side has the thumb turn or knob. Look around the circular plate that holds the lock. The screws often sit at the edges of this plate. Use a flashlight if the area looks dark or hard to see.
Check For Decorative Covers
Some models have a small cover hiding the screws. These covers snap or twist off easily. Use a flat tool like a screwdriver to gently pry off these covers. Removing covers reveals the screws underneath. Handle covers carefully to avoid breaking them.
Locate Screws On The Exterior Side
Sometimes screws are also on the outside. This side has the keyhole. Look closely near the lock’s faceplate. Some Baldwin deadbolts use hidden screws that need a special tool to access. If you cannot find screws here, focus on the interior side instead.

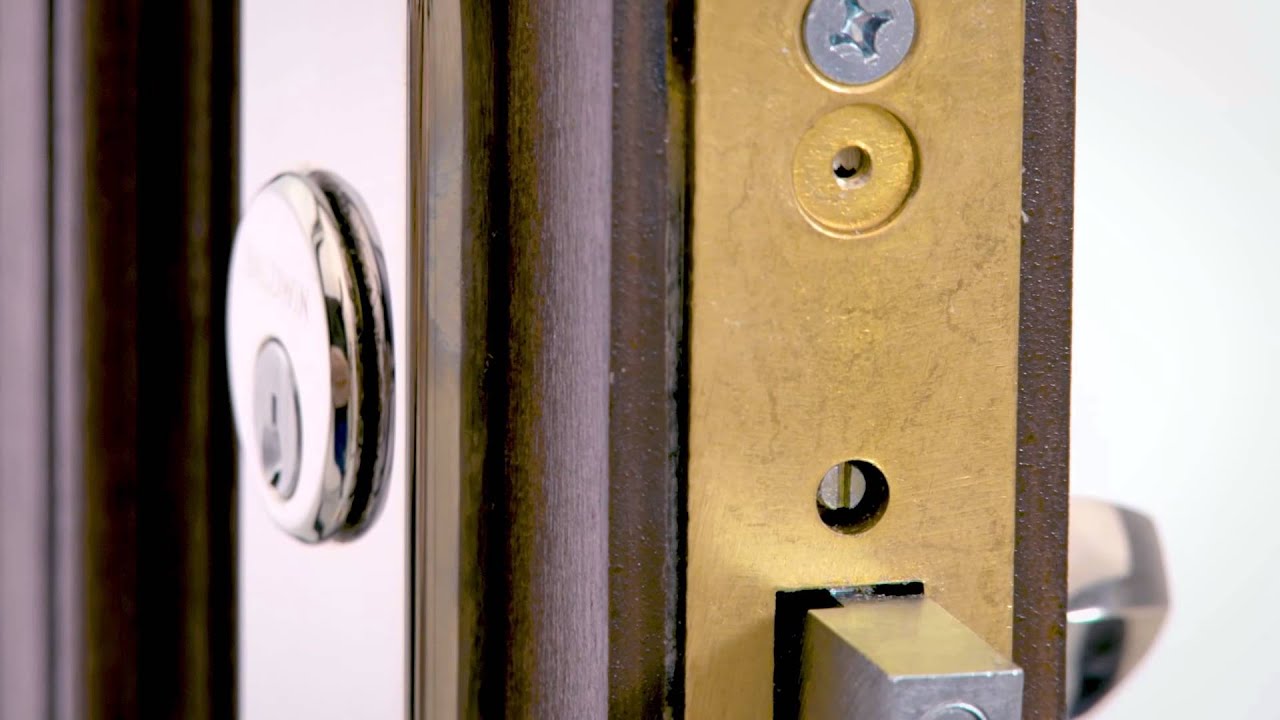
Credit: www.reddit.com
Remove Exterior Part
Removing the exterior part of a Baldwin deadbolt is the first step. This part is the lock face you see on your door. It holds the keyhole and the outside knob or thumb turn. Carefully removing it helps you access the internal parts for repair or replacement.
Gather The Necessary Tools
Get a screwdriver that fits the screws on your lock. Usually, a Phillips head screwdriver works well. Have a small container ready to keep screws safe. This prevents losing small parts during removal.
Locate And Remove The Screws
Look for screws on the edge of the door or around the lock face. These screws hold the exterior part in place. Turn each screw counterclockwise to loosen. Remove all screws fully before pulling the lock off.
Carefully Pull Off The Exterior Part
Hold the exterior part firmly. Gently pull it straight away from the door. Avoid twisting or forcing it. If it feels stuck, double-check for missed screws. Set the exterior part aside on a soft surface.
Remove Interior Part
Start by unscrewing the interior part of the Baldwin deadbolt. Gently pull it away from the door to access the lock mechanism. This step clears the way for removing the entire deadbolt easily.
Locate The Interior Side Of The Deadbolt
Start by identifying the inside part of the Baldwin deadbolt. This is the side you control from inside your home. It usually has a thumb turn or a knob.
Make sure the door is open. This gives you space to work safely.
Remove The Screws Holding The Interior Plate
Use a screwdriver to remove the screws on the interior plate. These screws keep the inside part attached to the door.
Keep the screws in a safe place. You will need them if you reinstall the deadbolt later.
Pull Off The Interior Assembly
Gently pull the interior assembly away from the door. It should come off easily once the screws are removed.
If it feels stuck, wiggle it slightly while pulling. Avoid using too much force to prevent damage.
Disconnect The Tailpiece
Look for the tailpiece. It is a metal rod that connects the interior knob to the lock mechanism inside the door.
Slide or lift the tailpiece out of the lock. This step frees the interior part completely.

Credit: www.reddit.com
Extract Deadbolt Mechanism
Removing the deadbolt mechanism is a key step in taking out a Baldwin deadbolt. This part holds the locking bolt and controls the lock’s movement. Extracting it carefully prevents damage to the door and lock parts.
Follow simple steps to remove the deadbolt mechanism safely. Use the right tools and work patiently. This makes the process easier and keeps the lock intact for future use or replacement.
Remove Interior Thumb Turn
Start by unscrewing the interior thumb turn. This small knob controls the deadbolt from inside the door. Use a screwdriver to remove the screws holding it in place. Gently pull the thumb turn off the spindle.
Unscrew Deadbolt Faceplate
Next, open the door and find the faceplate on the edge. The faceplate covers the bolt and its mechanism. Unscrew all the screws on the faceplate. Pull the faceplate away carefully to avoid damage.
Pull Out Deadbolt Mechanism
After removing the faceplate, pull the deadbolt mechanism out. Hold it firmly and slide it straight from the door’s edge. If it feels stuck, wiggle gently. Avoid forcing it to prevent breaking parts.
Check For Hidden Screws
Sometimes, extra screws hide under stickers or paint. Check the deadbolt area closely. Remove any hidden screws before trying to extract the mechanism again. This step helps the mechanism come out smoothly.
Check Door Alignment
Checking door alignment is a key step in removing a Baldwin deadbolt. A misaligned door can cause the deadbolt to stick or not turn properly. Ensuring the door lines up with the frame helps the lock work smoothly. It also makes removing the deadbolt easier and safer.
Even small shifts in the door’s position can create problems. Look at the gap between the door and the frame. It should be even from top to bottom. Uneven gaps might mean the door is sagging or warped.
Inspect The Door Frame
Start by examining the door frame closely. Look for cracks, dents, or damage that might affect alignment. Check if the strike plate is loose or bent. These issues can stop the deadbolt from sliding out cleanly.
Check The Door Hinges
Loose or worn hinges can cause the door to sag. Use a screwdriver to tighten all hinge screws. Replace any that are stripped or missing. Proper hinge alignment keeps the door in the correct position for the deadbolt.
Test The Door Movement
Open and close the door slowly. Notice if it sticks or rubs against the frame. If it does, the door needs adjustment. Adjusting the hinges or sanding down the edge may help the door align better.
Adjust The Strike Plate
The strike plate should line up perfectly with the deadbolt. If it does not, the bolt won’t retract easily. Loosen the screws on the strike plate slightly. Move it to better align with the deadbolt. Then tighten the screws securely.
Replace Or Repair Options
Deciding between replacing or repairing your Baldwin deadbolt depends on the lock’s condition and your needs. Both options have benefits. Repairing can save money and time. Replacing offers improved security and a fresh look.
Understanding each choice helps you make the best decision. Keep your home safe and your lock working smoothly.
Repairing Your Baldwin Deadbolt
Small issues like sticking or loose parts often need simple repairs. Tighten screws and clean the lock mechanism. Lubricate moving parts with graphite or silicone spray. These steps restore smooth operation.
Replacing worn pins or springs inside the lock can fix deeper problems. Repair kits are available for many Baldwin models. Repair keeps the original lock and saves cost.
Replacing Your Baldwin Deadbolt
Replace the deadbolt if the lock is old or severely damaged. New locks improve security and work better. Choose a model compatible with your door and key type.
Installation is easy with basic tools. Remove the old deadbolt by unscrewing it. Insert the new lock and tighten screws. Test the lock for smooth turning and proper latch action.
When To Choose Repair Or Replace
Repair if the lock mostly works and only has minor issues. Replace if the lock jams, the key won’t turn, or parts break often. Consider upgrading to a more secure model for better protection.
Think about your budget and time available. Repair is quick and cheaper. Replacement offers long-term reliability and peace of mind.
Tips For Reinstallation
Reinstalling a Baldwin deadbolt requires care and attention. Proper reinstallation ensures the lock works smoothly and stays secure. Follow clear steps to avoid common mistakes and keep your door safe.
Prepare All Parts Before Starting
Lay out every piece of the deadbolt. Check for damage or dirt. Clean parts if needed to prevent problems later. Having everything ready saves time and stress.
Align The Deadbolt Correctly
Make sure the deadbolt fits into the door hole evenly. The bolt should slide in and out without force. Proper alignment stops jamming and wear.
Tighten Screws Firmly But Gently
Use a screwdriver to secure screws firmly. Avoid over-tightening to prevent stripping or damage. Screws should hold parts tightly without bending.
Test The Lock Before Finalizing
Turn the key or knob several times. Check for smooth movement and full locking. Fix any stiffness or misalignment before finishing.
Use Lubricant For Smooth Operation
Apply a small amount of graphite or silicone spray. Avoid oil-based lubricants that attract dust. Proper lubrication helps the lock last longer.
Frequently Asked Questions
How Do I Remove A Baldwin Deadbolt Lock?
Start by unscrewing the interior screws holding the lock. Then, remove both interior and exterior parts carefully. Finally, pull out the deadbolt mechanism from the door edge.
What Tools Are Needed To Remove Baldwin Deadbolt?
You need a screwdriver, usually Phillips head, and optionally a flathead. A drill may help if screws are stripped or stuck.
Can I Remove Baldwin Deadbolt Without A Key?
Yes, if the lock is unlocked. Remove screws from the interior side and pull the lock apart. Locked deadbolts require key or lock-picking tools.
How To Avoid Damaging Door When Removing Deadbolt?
Use the right screwdriver size to prevent stripping screws. Work gently to avoid scratching the door surface. Protect the door edge with tape if needed.
Conclusion
Removing a Baldwin deadbolt can be simple with the right steps. Take your time and follow each instruction carefully. Use the proper tools to avoid damage. Double-check the lock before starting the removal. This way, you ensure safety and avoid mistakes.
Practice makes the task easier next time. Keep this guide handy for future reference. You can handle the job yourself without extra help. Stay patient and work steadily for the best results.


