Are you ready to enjoy your favorite TV shows with crystal-clear satellite reception? Hooking up a wall satellite for your TV might sound tricky, but it doesn’t have to be.
With the right steps, you can get everything set up quickly and start watching in no time. In this guide, you’ll learn exactly what you need to do, avoiding common mistakes that can cause frustration. By the end, you’ll feel confident and in control of your satellite connection.
Keep reading to discover how simple it really is to bring top-quality TV right into your living room.

Credit: www.amazon.com
Choosing The Right Satellite Dish
Choosing the right satellite dish is a key step in setting up your wall satellite for TV. The dish must fit your needs and work well with your location. Picking the correct dish ensures a strong signal and clear picture.
Different dishes serve different purposes. The right spot for the dish helps avoid signal problems. Having the right tools makes installation easier and safer.
Types Of Satellite Dishes
Satellite dishes come in various shapes and sizes. The most common are parabolic dishes, which focus signals to a single point. They offer strong signal reception.
Flat panel dishes are smaller and less visible. They work well in places with limited space. Offset dishes are angled to avoid obstacles like trees or buildings. Choose a dish type that fits your area and signal needs.
Selecting The Best Location
Pick a spot with a clear view of the sky. Avoid trees, walls, or other objects that block signals. The dish should face the satellite’s direction, usually south in many regions.
Mount the dish on a stable wall or pole. Higher locations reduce signal loss from obstacles. Check for easy access for future adjustments or repairs.
Tools And Materials Needed
Gather basic tools before starting installation. A drill, screwdriver, wrench, and level are essential. Use coaxial cables to connect the dish to your TV receiver.
Also, get mounting brackets and screws that match your wall type. A compass or satellite finder can help point the dish correctly. Safety gear like gloves and goggles is important too.
Setting Up The Satellite Dish
Setting up the satellite dish is the first step to receive clear TV signals. You need to place the dish where it can see the sky without obstacles. The dish must be stable and correctly aimed to catch the best signal.
Follow these steps to mount and align your dish properly. Each part plays a role in getting good picture quality on your TV.
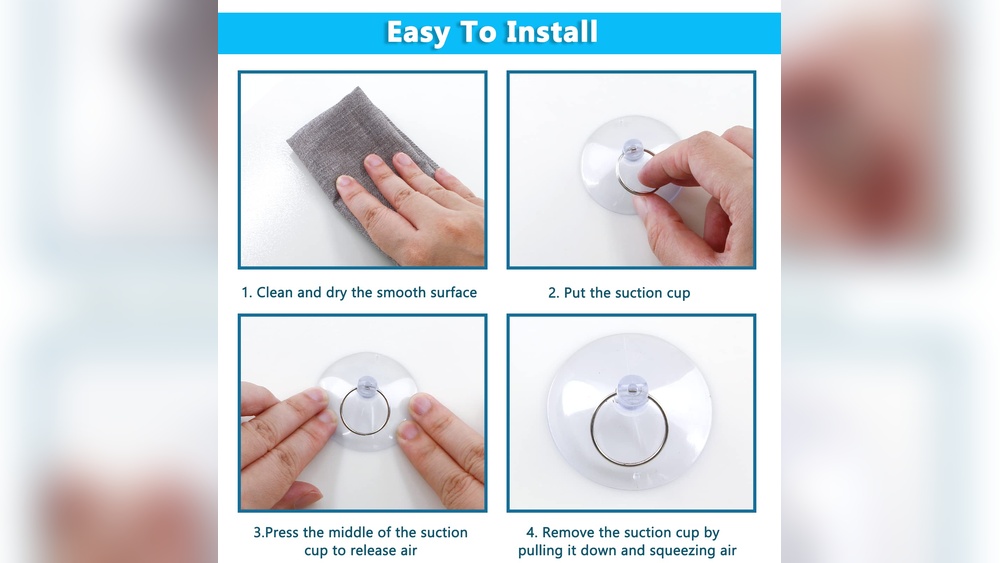
Mounting The Dish Securely
Choose a strong wall or pole for mounting the dish. Use the right tools and brackets to hold it firmly. The dish should not move in the wind or weather. Check that the mount is level and tight. A secure mount keeps the dish steady and signal strong.
Aligning The Dish For Optimal Signal
Point the dish towards the satellite in the sky. Use a compass or a smartphone app to find the right direction. Adjust the dish slowly for the best signal strength. Small changes can make a big difference. Lock the dish in place once the signal is clear.
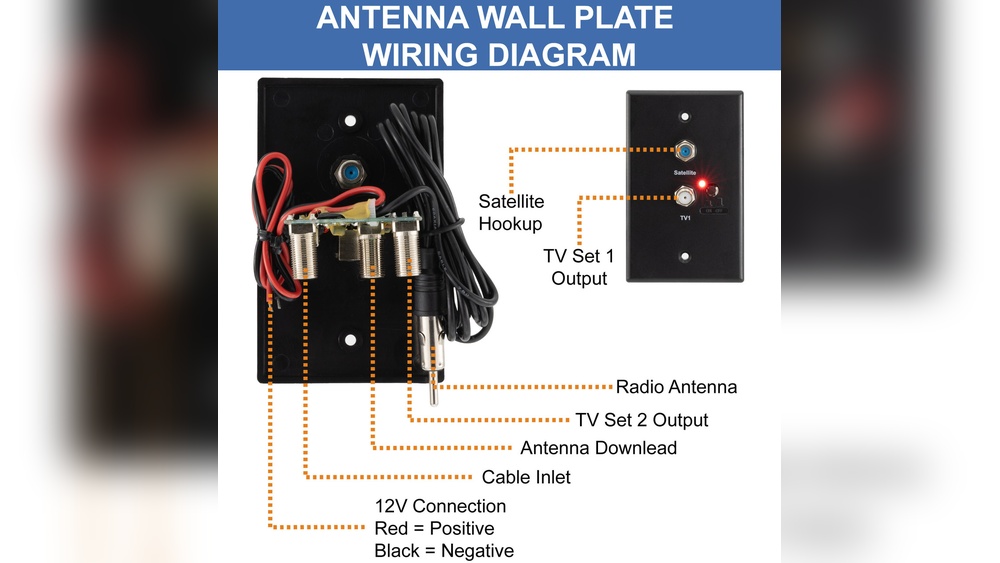
Connecting The Lnb
The LNB is the small box on the dish that receives signals. Connect the coaxial cable to the LNB’s output port. Make sure the connection is tight and weatherproof. This cable carries the signal to your TV receiver. Check all connections before testing the system.
Running The Cable To Your Tv
Running the cable from your wall satellite to your TV is a key step for clear signal reception. Proper cable setup ensures your TV gets the best picture and sound quality. This process involves choosing the right cable, routing it safely, and connecting it correctly. Each step matters to avoid signal loss or damage.
Selecting The Appropriate Cable
Choose a coaxial cable designed for satellite TV signals. RG6 cables are the most common and reliable choice. They shield well against interference and carry signals over long distances. Avoid older or thin cables, as they may degrade signal quality. Ensure the cable length fits your room layout without stretching.
Routing The Cable Safely
Plan the cable path before installation. Keep the cable away from power cords and sources of heat. Use clips or cable ties to secure it along walls or baseboards. Avoid sharp bends or kinks that can damage the cable. If running cable through walls or ceilings, check local codes and use proper tools.
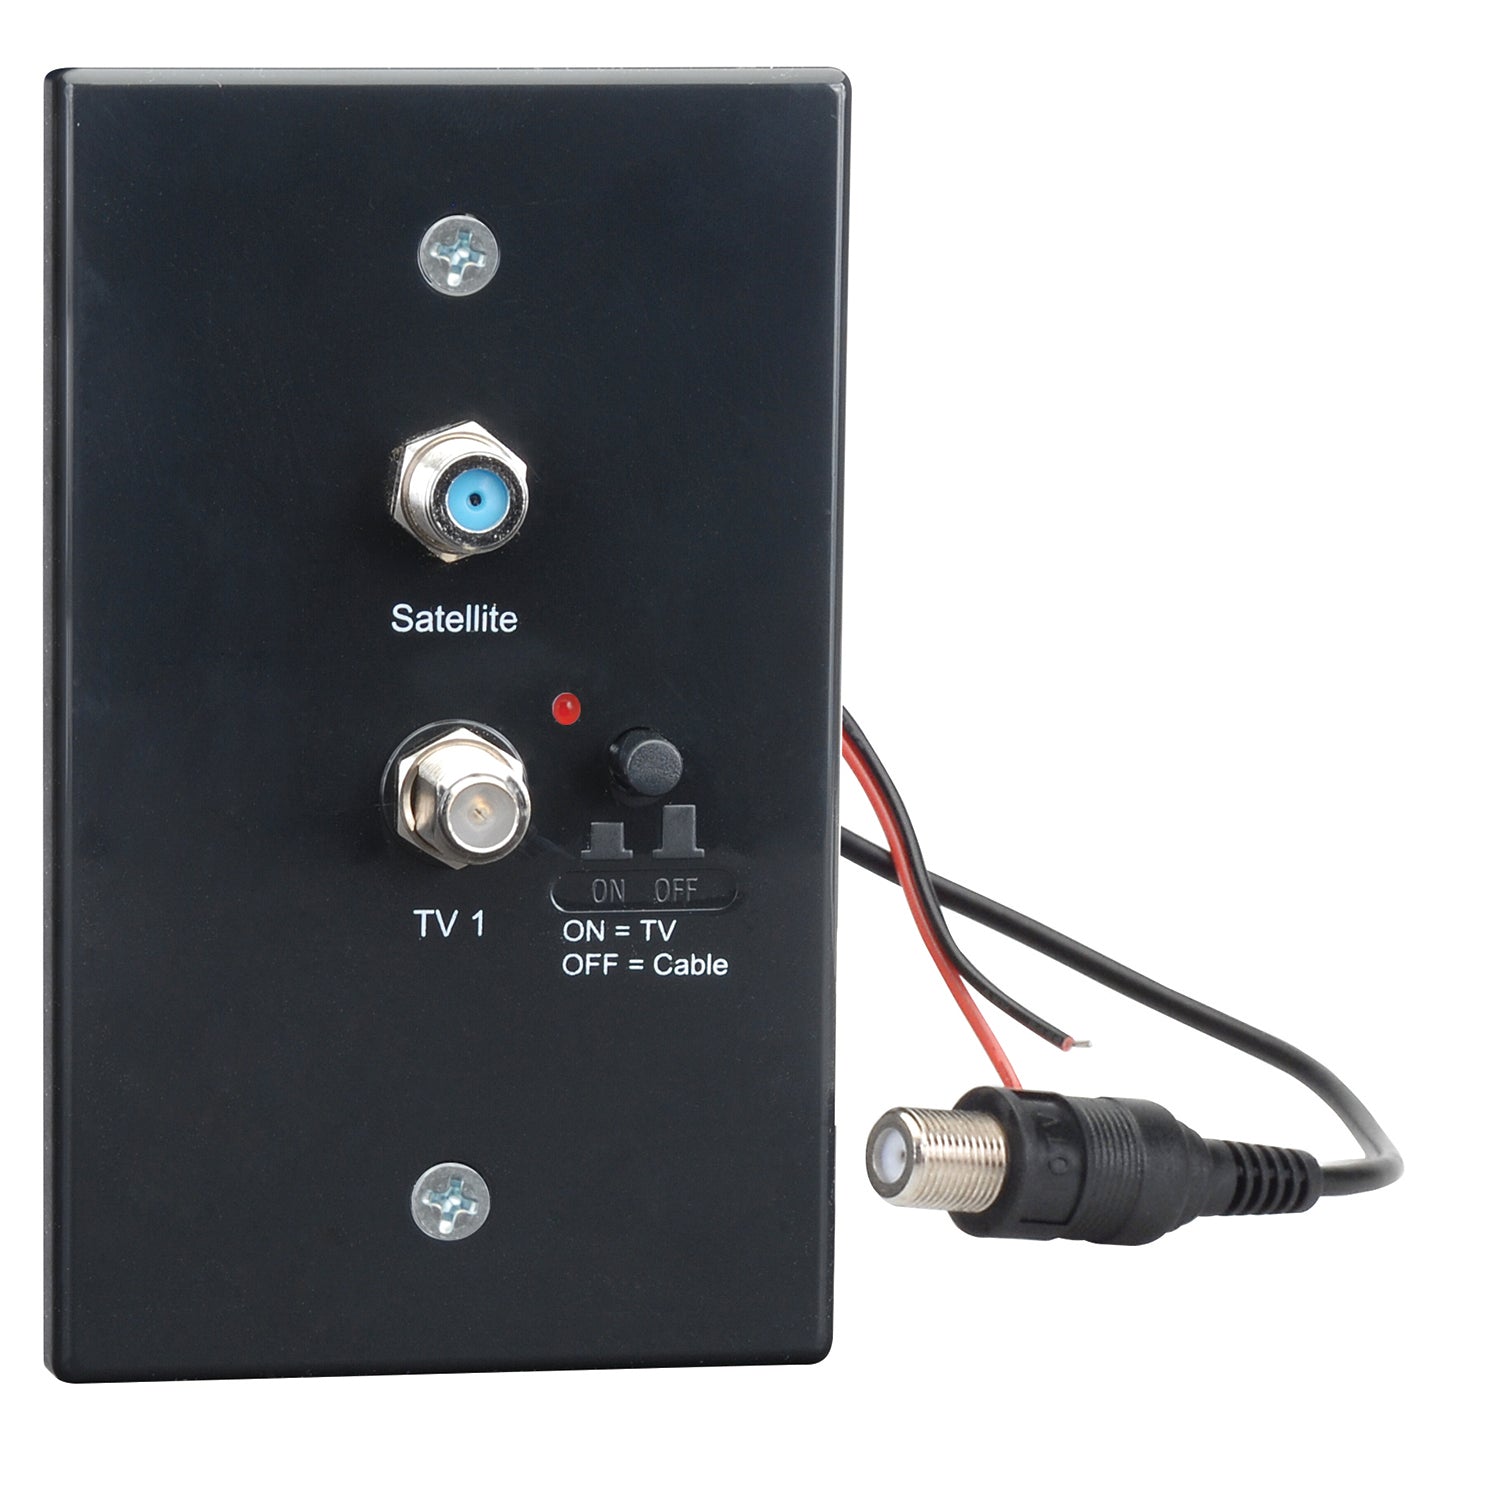
Connecting The Cable To The Receiver
Attach the cable’s F-connector firmly to the satellite receiver’s input port. Tighten the connection by hand, then gently with a wrench. Do not over-tighten, as this can damage the connector. Make sure the connection is secure to prevent signal loss. Test the setup by turning on your TV and checking the signal strength.
Configuring The Satellite Receiver
Configuring the satellite receiver is a key step after hooking up your wall satellite for TV. This process helps your TV receive clear signals and show the right channels. It involves turning on the receiver, scanning for available channels, and adjusting settings for the best picture quality. Each step ensures your viewing experience is smooth and enjoyable.
Powering Up And Initial Setup
Start by plugging the satellite receiver into a power outlet. Connect it to your TV using the correct cable, usually HDMI. Turn on both the TV and the receiver. Follow the on-screen instructions to select your language and region. This setup helps the receiver match your location for accurate channel lists.
Scanning For Channels
Access the menu on your satellite receiver using the remote. Find the option to scan for channels or auto-tune. This process lets the receiver search for all available satellite signals. Wait for the scan to finish. The receiver will save the channels it finds. This step ensures you get all local and satellite channels.
Adjusting Settings For Best Picture
Open the picture or display settings on your receiver. Adjust brightness, contrast, and color to suit your room lighting. Test these settings by watching different channels. Fine-tune until the picture looks clear and natural. Good picture settings make watching TV more comfortable and enjoyable.
Troubleshooting Common Issues
Troubleshooting common issues helps keep your wall satellite working well. Problems can stop your TV from showing your favorite programs. Fixing them often needs small checks and simple steps.
Below are solutions to three frequent problems. These tips will save time and avoid frustration.
Weak Or No Signal
Check all cable connections. Loose or damaged cables cause weak or no signal. Make sure the satellite dish faces the right direction. Clear any objects blocking the dish. Bad weather can also weaken the signal. Wait for clear skies to test again.
Picture Or Sound Problems
Inspect the HDMI or AV cables for damage. Replace old or worn cables. Adjust your TV’s volume and picture settings. Reset the receiver to fix glitches. Interference from other devices can cause issues. Move devices like routers or phones away from the satellite box.
Receiver Not Responding
Unplug the receiver for 30 seconds, then plug it back in. This resets the system. Check the remote control batteries. Replace them if dead. Confirm the receiver is powered on. If the receiver still does not respond, contact customer support for help.
Credit: magnadyne.com
Maintaining Your Satellite System
Maintaining your satellite system ensures clear TV signals and long equipment life. Regular care prevents common problems like signal loss and damage. Simple steps can keep your system working well all year.
Regular Cleaning And Inspections
Check the satellite dish and cables every few months. Dirt, dust, and bird droppings can block the signal. Use a soft cloth and mild soap to clean the dish surface gently. Look for loose or damaged cables that may cause signal issues. Tighten any loose parts and replace worn cables quickly.
Weatherproofing Tips
Protect your satellite system from rain, snow, and wind. Use waterproof covers on connectors and cables. Seal any gaps with weatherproof tape to stop water from entering. Secure the dish firmly to avoid movement during storms. Proper weatherproofing helps maintain strong signals and prevents rust.
Upgrading Equipment When Needed
Technology improves fast. Older satellite receivers may not support new channels or features. Replace outdated receivers and cables for better performance. Choose equipment that matches your TV and signal needs. Upgrading keeps your system efficient and enhances your viewing experience.

Credit: recpro.com
Frequently Asked Questions
How Do I Connect A Wall Satellite To My Tv?
To connect a wall satellite, use a coaxial cable from the satellite outlet to your TV’s satellite input. Ensure the cable is secure, then switch your TV to the satellite input mode to receive the signal.
What Tools Are Needed For Hooking Up A Wall Satellite?
You need a coaxial cable, a coaxial cable stripper, a wrench, and possibly a satellite receiver. These tools help ensure a secure and proper connection between the satellite outlet and your TV.
Can I Connect Multiple Tvs To One Wall Satellite?
Yes, use a coaxial splitter to divide the satellite signal. Each TV connects to a splitter output, but signal strength may reduce, so consider an amplifier for multiple connections.
How Do I Check If My Wall Satellite Connection Works?
Switch your TV to satellite input and run a channel scan. If channels appear, the connection works. If not, check cable connections and settings on your satellite receiver.
Conclusion
Hooking up a wall satellite for TV is simple with the right steps. Start by checking all connections carefully. Use proper cables and tools to avoid issues. Take your time to secure each part firmly. Test the signal before finalizing the setup.
This way, you enjoy clear and stable TV reception. Remember, patience and careful work make the process smooth. Now, you can watch your favorite shows without trouble. Easy to do, even for beginners. Give it a try today!