Is your drawstring light switch not working like it used to? You’re not alone, and the good news is you don’t need to call an electrician right away.
Fixing a drawstring light switch can be simpler than you think. In this guide, you’ll learn easy steps to get your light working smoothly again. Imagine flicking that switch without any hassle—sounds good, right? Keep reading, and you’ll have your drawstring light switch fixed in no time.
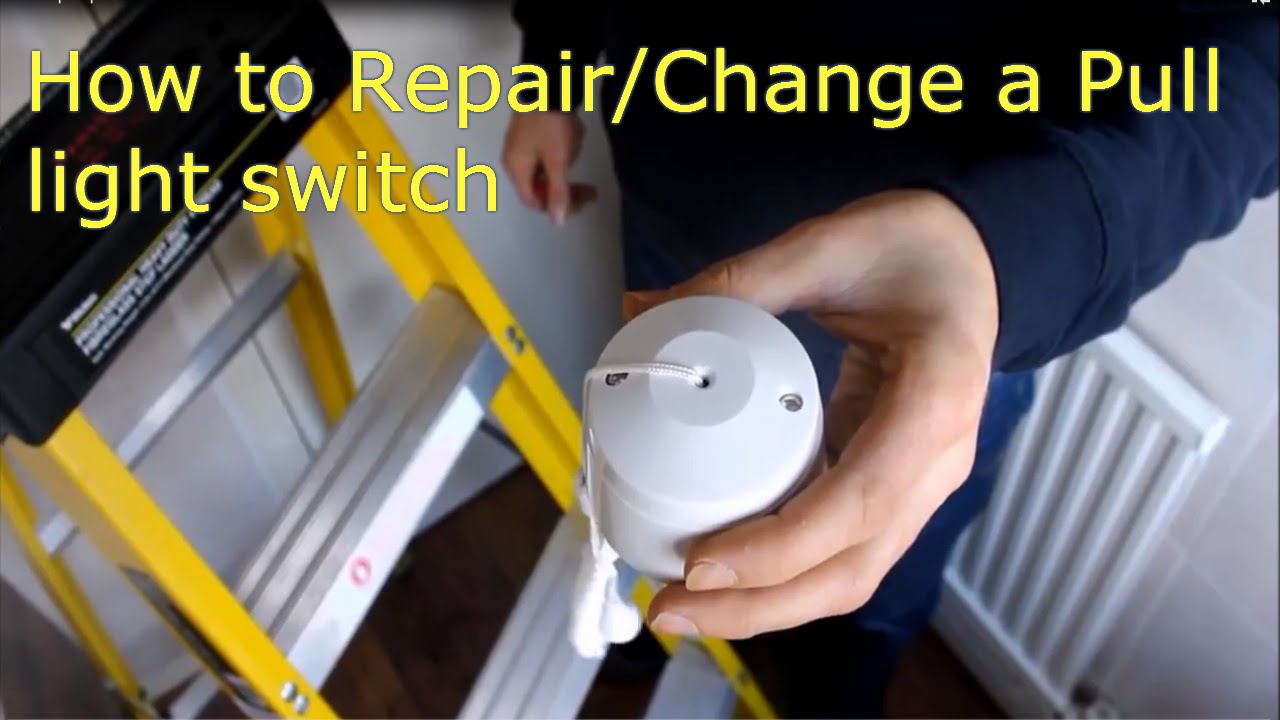
Credit: readinghandyman.co.uk
Common Drawstring Switch Problems
Drawstring light switches often face problems that stop them from working well. These issues cause the light to not turn on or off properly. Understanding common problems helps you fix the switch quickly. Many of these problems come from wear and tear or parts breaking over time.
Loose Or Broken Pull Cord
The pull cord may become loose or break from frequent use. A loose cord slips inside the switch and does not activate the light. A broken cord means there is nothing to pull at all. Fixing this often involves replacing the cord or tightening it securely.
Faulty Internal Mechanism
The internal parts of the switch can wear out or break. Springs and levers inside may stop moving correctly. This prevents the switch from clicking on or off. Repairing the mechanism may require opening the switch and checking each part carefully.
Worn Out Contacts
Contacts inside the switch carry the electric current. Over time, they can wear out or get dirty. This causes poor connection and the light may flicker or not work. Cleaning or replacing the contacts often solves the problem and restores proper function.
Tools And Materials Needed
Fixing a drawstring light switch needs the right tools and parts. Having everything ready makes the job easier and faster. This list covers what you need for a smooth repair.
Basic Hand Tools
You will need a screwdriver set, usually flathead and Phillips. A pair of pliers helps with gripping and pulling. Wire strippers are useful to remove insulation from wires safely. A voltage tester checks if the power is off. Keep a small flashlight nearby for better visibility.
Replacement Parts
Get a new drawstring switch that matches your current one. Use electrical tape to secure wires. Have spare wire nuts to connect wires safely. Sometimes, you may need extra wire if the old one is damaged. Check your switch’s size and type before buying parts.
Safety Equipment
Wear insulated gloves to protect from electric shocks. Safety glasses prevent dust or debris from entering your eyes. Use non-slip shoes to avoid accidents. Turn off the power at the circuit breaker before starting work. Double-check with a voltage tester to ensure safety.
Safety First
Safety is the top priority when fixing a drawstring light switch. Electrical work can be risky without the right steps. Taking simple safety measures prevents accidents and injuries. Follow clear instructions before starting any repair.
Turning Off Power
Always turn off the power at the breaker box first. This stops electricity from flowing to the switch. Never rely on just the light switch to cut power. Use the main switch for full safety. Confirm the power is off before touching any wires.
Using A Voltage Tester
A voltage tester checks if wires still have electricity. Use it on all wires before you begin work. The tester will show if current is present. This tool adds an extra layer of safety. Do not skip this step even if the breaker is off.
Wearing Protective Gear
Wear rubber gloves to stop electric shocks. Safety glasses protect your eyes from debris. Avoid loose clothing that might catch on wires. Use proper shoes with rubber soles. Protective gear keeps you safe during the repair process.
Removing The Old Switch
Removing the old drawstring light switch is the first step to fixing it. This process ensures safety and prepares the switch for replacement. Follow these simple steps carefully to avoid any issues. Take your time and work patiently.
Accessing The Switch Box
Turn off the power at the circuit breaker to avoid shocks. Use a voltage tester to check the switch is off. Remove the switch cover plate by unscrewing it. Gently pull the switch out of the wall box. This reveals the wires connected to the switch.
Disconnecting Wires
Note the wire positions before disconnecting to help later. Use a screwdriver to loosen the terminal screws holding wires. Carefully pull the wires free from the switch terminals. Avoid pulling on the wires themselves to prevent damage. Set the wires aside safely, keeping them separated.
Removing The Switch From The Wall
Check that all wires are disconnected from the switch. Remove the screws securing the switch to the wall box. Gently pull the switch out completely from the wall. Inspect the wall box for any damage or debris. The old switch is now ready to be replaced.
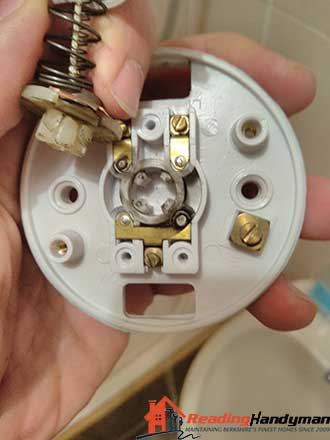
Inspecting The Switch Components
Inspecting the switch components is the first step to fix a drawstring light switch. This process helps to find what is wrong with the switch. Careful inspection can save time and effort during repairs. It also prevents further damage to the switch or wiring. Follow simple checks to understand the problem better.
Checking The Pull Cord
Start by pulling the cord gently. The cord should move smoothly without sticking. If the cord feels loose or breaks, it needs replacement. Make sure the cord is not tangled inside the switch. A damaged or worn-out pull cord often causes the switch to fail.
Examining Internal Parts
Open the switch carefully to see inside. Look for any loose or disconnected wires. Check if the internal mechanism moves when you pull the cord. Dust and dirt can block the parts from working well. Clean the inside with a dry cloth before testing again.
Identifying Visible Damage
Look for cracks or burns on the switch body. Damaged parts may cause shorts or failure. Check metal contacts for rust or corrosion. Replace any broken or worn components you find. Visible damage often points to the cause of the problem.
Credit: www.youtube.com
Repairing Or Replacing The Cord
Repairing or replacing the cord of a drawstring light switch is key to its proper function. A damaged or loose cord can stop the light from turning on or off. Fixing this issue can save money and avoid the need for a full replacement.
Some problems only need a simple fix, like tightening the cord. Other times, the cord must be replaced with a new one. Either way, the cord must be secure to work correctly and safely.
Fixing A Loose Cord
Check the cord for any slack or looseness. Pull the cord gently to see if it moves easily. Tighten any screws or clamps holding the cord in place. If the cord slips, use a small knot to keep it tight. A loose cord can cause the light switch to fail.
Installing A New Drawstring
Remove the old cord carefully. Measure the length of the new cord to match the old one. Thread the new cord through the switch housing. Attach the cord to the switch mechanism securely. Test the switch by pulling the new cord several times. Replace the cord if it feels weak or worn out.
Securing The Cord Properly
Ensure the cord is fastened tightly inside the switch. Use clamps or knots to stop the cord from slipping. Keep the cord away from sharp edges or moving parts. This prevents wear and tear on the cord. A well-secured cord lasts longer and works smoothly.
Fixing Internal Switch Issues
Fixing internal switch issues is key to restoring your drawstring light switch. The problem often lies inside the switch rather than the cord or wiring. Small parts may get dirty, misaligned, or broken over time. This section covers simple steps to fix these common problems and make your switch work smoothly again.
Cleaning Contacts
Dirty contacts stop the switch from working correctly. Dust and grime build up inside and block electricity flow. Use a small brush or cloth to clean the metal parts gently. Rubbing alcohol helps remove stubborn dirt. Clean contacts improve connection and switch performance.
Realigning Mechanism
The internal parts must line up perfectly to work. Pulling the string can move pieces out of place. Check the switch mechanism and adjust parts so they fit well. Use a small tool to move levers or springs back into position. Proper alignment restores smooth operation.
Replacing Faulty Parts
Sometimes parts wear out or break completely. Springs, contacts, or plastic pieces may need replacing. Find exact replacements from hardware stores or online. Remove damaged parts carefully and install new ones. This step often fixes stubborn switch problems and extends its life.
Reassembling And Testing
After fixing the internal parts of the drawstring light switch, it’s time to put everything back. This stage is important to make sure your repair works well and is safe to use. Follow these steps carefully to reassemble the switch and test its function.
Reconnecting Wires
Start by connecting the wires to their proper terminals. Match the wires by color or label to avoid mistakes. Use a screwdriver to tighten the wire screws securely. Loose wires can cause the switch to fail or create a safety hazard. Double-check each connection before moving on.
Mounting The Switch
Place the switch back into its housing or wall box. Align the screw holes with the mounting points. Use screws to fix the switch firmly in place. Make sure it sits evenly and does not wiggle. A stable switch prevents wear and keeps the wiring safe.
Testing Functionality
Pull the drawstring slowly to test the switch action. The light should turn on and off with each pull. Try pulling the string several times to confirm consistent operation. If the light does not respond, revisit the wiring or mounting steps. Proper testing ensures your switch is ready for daily use.
Tips For Maintaining Your Switch
Maintaining your drawstring light switch helps it last longer and work better. Small care steps keep it smooth and safe. Follow these simple tips to avoid common problems and enjoy hassle-free use every day.
Regular Cleaning
Dust and dirt can build up on the switch. Wipe it gently with a dry cloth every few weeks. Avoid using water or cleaners that can harm the switch. Clean parts help the switch move freely and stop it from sticking.
Avoiding Excessive Pulling
Pull the string gently and slowly. Hard or fast pulling can damage the switch inside. Teach everyone in the house to handle the switch with care. This prevents parts from breaking and keeps the switch working well.
Scheduling Routine Checks
Look at the switch regularly for any signs of wear. Check if the string is frayed or loose. Fix small issues early to stop bigger problems. Routine checks keep your switch safe and reliable over time.

Credit: www.reddit.com
Frequently Asked Questions
How Do I Fix A Drawstring Light Switch?
To fix a drawstring light switch, first turn off power. Check the cord for damage and replace if needed. Tighten loose connections and clean contacts. If the switch mechanism is faulty, replace the entire switch for safety.
Why Is My Drawstring Switch Not Working?
A drawstring switch may stop working due to worn internal parts or broken cords. Dirt or debris can block contacts. Inspect the switch and cord, clean contacts, and replace broken components to restore function.
Can I Replace A Drawstring Switch Myself?
Yes, you can replace a drawstring switch yourself if you follow safety steps. Turn off power, remove the old switch, and connect the new one properly. Use a compatible switch and ensure wires are secured to prevent hazards.
How Much Does Fixing A Drawstring Light Switch Cost?
Fixing a drawstring light switch usually costs between $10 and $30 for parts. If you hire an electrician, labor fees may add $50 to $100. DIY repair saves money but requires caution and proper tools.
Conclusion
Fixing a drawstring light switch does not have to be hard. Follow the steps carefully and take your time. Double-check the connections before turning the power back on. A working switch makes your room safer and brighter. Small repairs save money and add confidence.
Try it yourself and see the difference. You can handle simple home fixes like this. Keep tools and instructions close for next time. Stay safe and enjoy the bright results.