Are you tired of struggling with tricky fasteners that never seem to stay put? Learning how to sew fasteners correctly can save you time and frustration, while giving your clothes and projects a professional finish.
Whether you’re fixing a favorite jacket or creating something new, mastering this simple skill puts you in control. Keep reading, and you’ll discover easy steps that make sewing fasteners quick and foolproof—your wardrobe will thank you!
Choosing The Right Fastener
Choosing the right fastener is important for a neat, durable finish. The fastener must suit the fabric and the garment’s use. Picking the wrong fastener can cause damage or make the item hard to wear. Understanding different fasteners helps you make the best choice for your project.
Types Of Fasteners
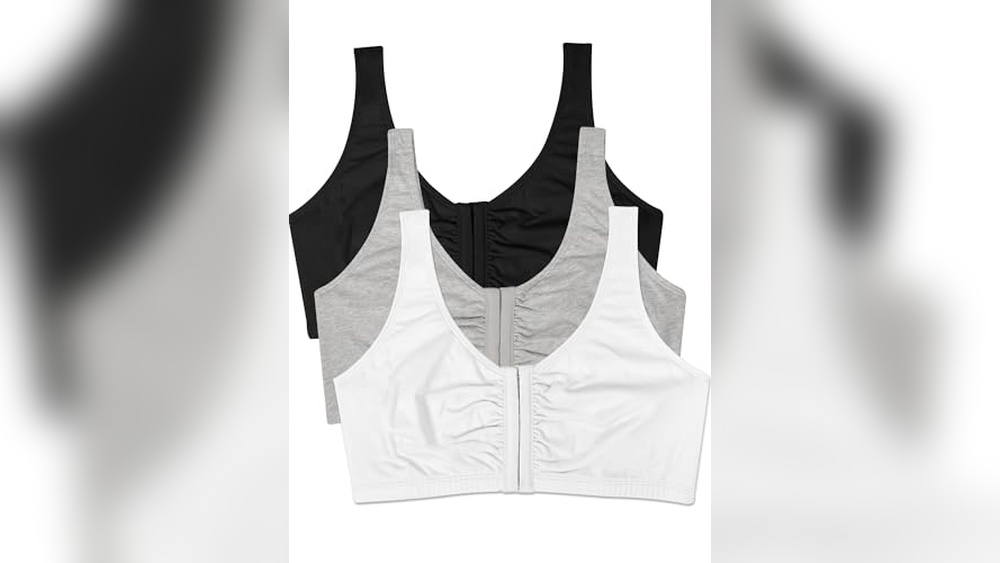
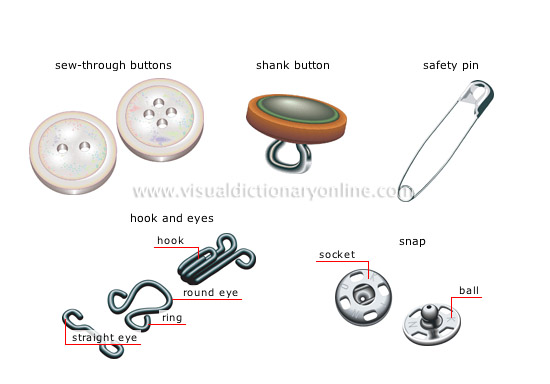
Fasteners come in many forms. Buttons are classic and easy to sew. Snaps are quick to open and close. Zippers work well for secure, long closures. Hook and loop tape, also called Velcro, is simple and adjustable. Each type fits different styles and needs.
Matching Fasteners To Fabric
Heavy fabrics need strong fasteners like large buttons or sturdy zippers. Light fabrics suit small buttons or snaps. Stretch fabrics require flexible fasteners to avoid tearing. Choose fasteners that blend with the fabric’s weight and texture. This keeps the garment comfortable and lasting.
Tools Needed
Basic tools include needles, thread, and scissors. Use a needle suitable for the fabric thickness. Thread should be strong and match the fabric color. A seam ripper helps fix mistakes. For some fasteners, pliers or special tools may be necessary. Having the right tools makes sewing easier and cleaner.

Credit: sewguide.com
Preparing Your Fabric
Preparing your fabric is the first step before sewing any fasteners. It helps your project look neat and last longer. Taking time now will save you trouble later. Follow these simple steps to get ready.
Marking Placement
Mark the exact spot where the fastener will go. Use a fabric pencil or chalk. Make small, clear marks to avoid mistakes. Check the alignment on both fabric pieces. This keeps your fastener straight and functional.
Reinforcing Fabric
Strengthen the fabric around the fastener area. Use interfacing or extra fabric layers. This prevents tearing from repeated use. Sew a small patch on the wrong side. It adds support without changing the look.
Gathering Materials
Collect all tools before starting. Needles, thread, scissors, and your fasteners should be ready. Choose thread that matches your fabric color. Have a thimble if your fabric is thick. Being prepared helps your work go smoothly.
Sewing Buttons
Sewing buttons is a basic skill in clothing repair and creation. It helps keep clothes functional and neat. Learning to sew buttons saves money and extends garment life. This guide shows simple steps to sew buttons firmly and neatly.
Threading The Needle
Choose a needle with a small eye for fine threads. Cut a piece of thread about 18 inches long. Thread the needle carefully through the eye. Pull the thread until both ends meet. Tie a small knot at the thread’s end.
Stitching Techniques
Place the button on the fabric where it belongs. Push the needle through the fabric from the back. Go through one hole of the button. Pull the thread tight but not too tight. Move the needle down through the opposite hole. Repeat this process several times. For four-hole buttons, sew diagonally or straight across.
Securing The Button
After enough stitches, bring the needle to the back. Make a small knot close to the fabric. Pass the needle through the fabric once more. Pull the thread tight and cut off the excess. Check the button to ensure it is secure and straight.
Credit: www.visualdictionaryonline.com
Attaching Snaps
Attaching snaps is a simple way to fasten clothing and accessories. Snaps hold fabric pieces together with ease. They give a neat finish and are quick to open and close. Understanding how to place and sew snaps helps you improve your sewing projects.
Positioning Snaps
Start by marking where each snap will go. Use chalk or a fabric marker. Place the snap parts on opposite fabric sides. Check alignment to ensure they close properly. Avoid placing snaps too close to fabric edges. Leave enough space for sewing and strength.
Hand Sewing Snaps
Thread a needle with strong thread. Knot the end to secure it. Sew through the snap holes and fabric. Use small, tight stitches to hold the snap firmly. Stitch around each hole several times. Tie off the thread on the back side. Trim excess thread carefully.
Using Snap Fastener Tools
Snap fastener tools make attaching snaps easier. Place the snap parts in the tool’s slots. Align the fabric between snap pieces. Squeeze the tool handles firmly to press snaps together. Check the snap to ensure it is secure. These tools save time and give consistent results.
Installing Hook And Eye
Installing a hook and eye fastener is a simple way to secure garments. This fastener keeps clothes closed neatly and is easy to sew by hand. Follow these steps to attach the hook and eye correctly for a strong hold.
Aligning Components
Start by placing the hook on one side of the fabric edge. Place the eye on the opposite side, matching the hook’s position. Make sure both parts line up so they close smoothly. Pin them if needed to keep them steady while sewing.
Sewing Hooks
Thread a needle with strong thread matching the fabric color. Insert the needle through the fabric under the hook’s base. Sew small, tight stitches around each loop of the hook. Pull the thread firmly but not too tight to avoid puckering. Repeat a few times for a secure hold.
Sewing Eyes
Place the eye on the fabric edge opposite the hook. Use the same thread and needle to sew around its loops. Sew tightly with small stitches. Check the eye stays flat and secure against the fabric. Knot the thread on the back and cut the excess.
Sewing Zippers
Sewing zippers is an important skill for many projects. Zippers help close bags, clothes, and cushions. A well-sewn zipper looks neat and works smoothly. This guide shares simple steps to sew zippers correctly.
Choosing The Right Zipper
Pick a zipper that fits your project size. Use nylon zippers for light fabrics. Metal zippers suit heavy materials like denim. Check zipper length matches your opening. Color also matters; try to match fabric color.
Pinning And Basting
Start by placing the zipper on fabric edges. Use pins to hold it in place. Pin carefully to avoid shifting. Next, baste the zipper with long stitches. Basting keeps the zipper steady while sewing. Remove pins after basting for clear sewing space.
Stitching The Zipper
Use a zipper foot on your sewing machine. This foot helps sew close to zipper teeth. Sew slowly to keep stitches even. Backstitch at the start and end for strength. Check zipper moves smoothly after sewing. Fix any puckers by adjusting stitches.
Tips For Durable Fasteners
Durable fasteners make your sewing projects last longer. They keep clothes and items secure through daily use. Using the right techniques helps avoid loose or broken fasteners. Below are useful tips to make your fasteners strong and reliable.
Using Strong Thread
Choose thread that matches the fabric’s weight. Thick thread works best for heavy materials. Polyester thread offers good strength and flexibility. Avoid thin thread for buttons and snaps. Strong thread holds fasteners firmly in place.
Reinforcing Stitches
Double or triple stitch around fasteners for extra strength. Stitch back and forth to prevent loosening. Use small, tight stitches near the edges. Reinforced stitching stops fasteners from pulling away. It ensures long-lasting hold on your fabric.
Regular Maintenance
Check fasteners often for signs of wear or damage. Tighten loose stitches before they break. Replace worn threads to avoid fastener loss. Clean fasteners gently to keep them working well. Regular care extends the life of your sewing projects.

Credit: www.velcro.com
Frequently Asked Questions
What Types Of Fasteners Can I Sew By Hand?
You can sew buttons, snaps, hooks, and Velcro by hand. Each fastener requires specific stitches for secure attachment. Hand sewing is ideal for small repairs or delicate fabrics. Choose the right needle and thread strength for durability and neatness.
How Do I Choose The Right Thread For Fasteners?
Select a strong, durable thread like polyester or nylon for fasteners. Match the thread color to your fabric for a clean look. Use thicker thread for heavy fabrics to ensure fasteners stay firmly attached. Avoid weak threads that can break easily.
Can I Sew Fasteners On Stretchy Fabrics?
Yes, you can sew fasteners on stretchy fabrics with care. Use a stretch stitch or a zigzag stitch to allow fabric movement. Avoid pulling the fabric tight while sewing to prevent puckering. Test on a scrap piece before sewing the final garment.
How Do I Prevent Fabric Damage When Sewing Fasteners?
Use a thimble and sharp needle to avoid fabric damage. Stabilize the fabric with interfacing or a fabric patch under fasteners. Sew slowly and gently to maintain fabric integrity. Proper technique ensures the fasteners hold without tearing fabric.
Conclusion
Sewing fasteners is simple with practice and patience. Choose the right fastener for your fabric. Use proper tools and follow clear steps. Take your time to sew each stitch carefully. This helps your fastener stay strong and last long. Keep practicing to improve your sewing skills.
Soon, attaching buttons, snaps, or hooks will feel easy. Enjoy creating neat and useful clothing or crafts. Sewing fasteners adds a professional touch to your work. Try different fasteners to find what suits you best. Sewing can be fun and rewarding.