Thinking about giving your cabinets a fresh new look without splurging on brand-new hardware? You might wonder, “Can you paint hardware on cabinets?” The good news is yes—you absolutely can transform your cabinet handles and knobs with paint, making them look stylish and brand new.
But it’s not just about slapping on a coat of paint; doing it right takes a little know-how. If you want a finish that lasts and impresses, keep reading. We’ll walk you through simple steps to make your hardware look amazing and give your entire space a quick, affordable facelift.
Ready to learn how to paint your cabinet hardware like a pro? Let’s dive in!
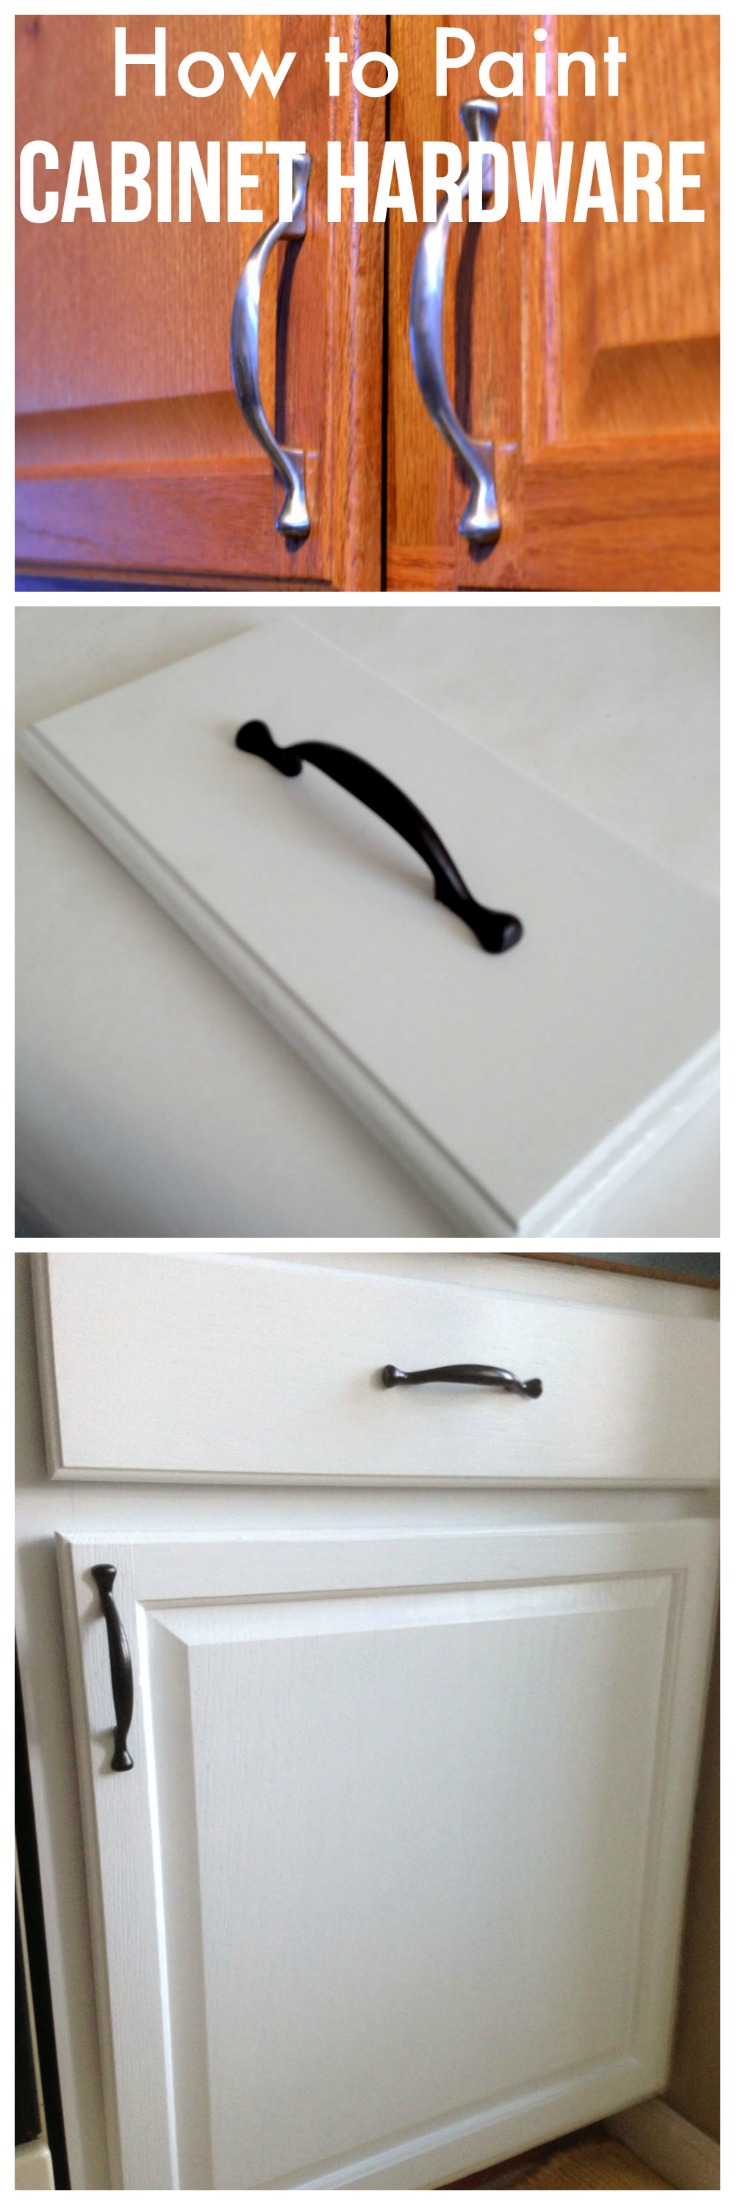
Credit: createandbabble.com
Painting Cabinet Hardware
Painting cabinet hardware is a simple way to refresh your kitchen or bathroom. It can change the look of your cabinets without spending much money. The process involves cleaning, sanding, and applying paint. This can give old hardware a new, modern feel. Many people choose to paint hardware to match their style or update their space quickly.
Can Hardware Be Painted?
Yes, hardware can be painted. Most types, like metal, wood, or plastic, accept paint well. The key is to prepare the surface properly. Clean the hardware to remove dirt and grease. Lightly sand it to help the paint stick better. Use a primer made for the hardware type. After that, apply paint designed for metal or plastic. This ensures a smooth, long-lasting finish.
Benefits Of Painting Hardware
Painting hardware saves money compared to buying new pieces. It allows you to customize colors and finishes easily. You can match hardware to your cabinet color or room style. Painted hardware can look fresh and modern or vintage and rustic. It also protects the hardware from rust and wear. Changing hardware color can update the whole room’s appearance fast.
Preparing Hardware For Paint
Preparing hardware for paint is a key step to achieve a smooth and lasting finish on your cabinets. Proper preparation helps paint stick better and prevents peeling or chipping later. It involves cleaning, sanding, and setting up the hardware correctly. Taking time to prep ensures your painted hardware looks professional and fresh.
Cleaning Techniques
Start by removing all dirt, grease, and grime from the hardware. Use warm water mixed with mild soap or a degreasing cleaner. Scrub gently with a soft brush or cloth to avoid scratches. Rinse thoroughly and dry completely to prevent rust and paint bubbles. Clean hardware allows paint to bond properly.
Sanding Tips
Lightly sand the hardware to create a rough surface for paint to grip. Use fine-grit sandpaper, around 220 grit, for best results. Sand evenly over all areas, including edges and corners. Avoid deep scratches or gouges that might show through paint. After sanding, wipe away dust with a damp cloth and let dry before painting.
Setting Up Hardware
Arrange hardware on a clean, flat surface for easy painting. Use cardboard, foam, or painter’s tape to keep pieces steady and prevent rolling. Hanging hardware with clips or string is another good option for spray painting. Proper setup allows you to paint all sides evenly without touching wet paint.
Choosing Paint And Primer
Choosing the right paint and primer is key to a smooth, lasting finish on cabinet hardware. The paint must stick well and resist wear. The primer helps the paint bond to metal or plastic surfaces. Both affect how the final color looks and lasts over time.
Proper selection protects your hardware from chipping and fading. It also makes your paint job look professional and fresh. Below are tips on the best primer types, spray paint choices, and paint finishes for your cabinet hardware.
Best Primer Types
Use a primer made for metal or plastic, depending on your hardware material. An oil-based primer works well on metal surfaces. It prevents rust and improves paint adhesion. For plastic hardware, choose a bonding primer designed for slick surfaces. Avoid primers that are not meant for your hardware type. They may peel or fail over time.
Selecting Spray Paint
Spray paint gives an even coat and smooth finish on small hardware pieces. Pick spray paint labeled for metal or plastic use. This ensures durability and proper coverage. Choose paint with rust protection for metal hardware. Use light, multiple coats to avoid drips. Let each coat dry fully before adding the next.
Paint Finish Options
Choose a finish that matches your style and use. Glossy paint looks bright and modern but shows fingerprints easily. Satin or semi-gloss finishes offer a soft shine and are easier to keep clean. Matte finishes hide smudges but may wear faster. Consider how often the hardware will be touched and cleaned.

Credit: www.youtube.com
Painting Process
Painting hardware on cabinets requires careful preparation and technique. The painting process involves cleaning, priming, and applying paint evenly. Proper steps help achieve a smooth, lasting finish. Skipping steps can cause peeling or uneven color.
Follow each stage precisely to refresh your cabinet hardware successfully. This guide covers the key parts of the process.
Applying Primer
Start by cleaning the hardware to remove dust and grease. Use a degreaser or soap and water. Let the pieces dry fully before moving on.
Lightly sand the surface with fine-grit sandpaper. This creates a rough texture that helps primer stick. Wipe off sanding dust with a clean cloth.
Apply a thin coat of primer made for metal surfaces. Use a spray primer for even coverage. Hold the spray can about 8-10 inches from the hardware. Let the primer dry completely before painting.
Spray Painting Tips
Shake the spray paint can well for a minute before use. Spray in light, even coats. Keep the can moving side to side to avoid spots.
Hold the spray can 8-12 inches away from the hardware. Start spraying before the hardware and stop after you pass it. This prevents buildup at the edges.
Allow each coat to dry before applying the next. Usually, two to three coats create a strong finish. Patience helps avoid drips and uneven color.
Avoiding Drips And Runs
Apply thin layers to prevent paint from dripping. Thick paint causes runs and makes the finish look sloppy. Use short bursts of spray, not long sprays.
Check the hardware from different angles while painting. Catch drips early and smooth them with a brush or cloth. Avoid painting in humid or windy places.
Let the hardware dry flat on a protected surface. Drying upside down or on its side can cause paint to pool and drip. Proper drying ensures a clean, professional look.
Finishing Touches
The finishing touches are key to making painted cabinet hardware look great and last long. These final steps protect the paint and give the hardware a smooth, polished look. Proper care during this stage helps keep the new finish fresh and beautiful for years.
Applying Top Coat
After the paint dries, add a clear top coat. Choose a clear spray or brush-on sealant. This layer protects the paint from scratches and chips. Apply thin, even coats to avoid drips. Let each coat dry before adding the next. The top coat also adds a nice shine or matte finish based on your choice.
Drying And Curing Time
Give the hardware enough time to dry fully. Drying means the paint feels dry to touch. Curing means the paint hardens completely. Curing takes longer but is important for durability. Wait at least 24 hours before handling the hardware. For best results, wait up to a week before reinstalling. Avoid rushing this step to prevent damage.
Maintaining Painted Hardware
Keep painted hardware clean using a soft cloth and mild soap. Avoid harsh chemicals and abrasive scrubbers. Wipe gently to prevent scratching the paint. Check the hardware regularly for chips or wear. Touch up any damaged spots quickly to stop peeling. Proper care helps maintain the fresh look and extends the life of your painted hardware.

Credit: www.thriftydecorchick.com
Creative Ideas And Styles
Painting hardware on cabinets opens up many creative possibilities. It allows you to customize your kitchen or bathroom with unique styles. Changing the hardware finish can refresh the entire room without a full renovation. Experimenting with different paint types and colors adds personality to your space.
Choosing the right style for your hardware paint is essential. This choice can influence the mood and look of your cabinetry. From shiny metallics to soft matte tones, each finish offers a distinct vibe. Here are some ideas and styles to inspire your hardware painting project.
Metallic Finishes
Metallic finishes give hardware a modern and elegant look. Popular options include gold, silver, bronze, and copper. These finishes catch light and add a subtle shine to your cabinets. Use metallic spray paint designed for metal for best results. It is important to prepare the hardware by cleaning and sanding before painting. Metallic hardware pairs well with both traditional and contemporary cabinet styles.
Matte Vs Glossy Looks
Matte finishes provide a soft, understated appearance. They hide fingerprints and scratches well. Glossy finishes offer a bright, reflective surface that stands out. Glossy hardware can make your cabinets look more polished and vibrant. Choose matte for a natural, muted effect or glossy for a bold statement. Both finishes can be painted easily with the right spray paint.
Color Trends For Hardware
Color trends for cabinet hardware evolve with interior design styles. Black hardware remains popular for its sleek and timeless look. White and pastel tones create a fresh, light feel. Deep blues and greens add a rich, sophisticated touch. Bright colors like red or yellow bring fun and energy to your kitchen. Select colors that complement your cabinet color and room theme.
Common Mistakes To Avoid
Painting cabinet hardware can refresh your kitchen’s look without much cost. Many make simple errors that ruin the finish or cause paint to peel. Avoiding these mistakes ensures a smooth, lasting result. Here are the common errors to watch out for.
Skipping Prep Work
Prep work is the base for good paint adhesion. Clean hardware with soap or a degreaser. Remove all dirt, oil, and grime. Lightly sand the surface to help paint stick better. Skipping these steps leads to chipping and peeling paint.
Using Wrong Paint Type
Choose paint made for metal or plastic, depending on your hardware. Regular wall paint will not hold up well on hardware. Spray paint designed for metal often gives a smooth, durable finish. Avoid using oil-based paint unless specified for hardware.
Ignoring Drying Times
Let each coat dry fully before applying the next one. Rushing this step causes uneven texture and smudges. Follow the paint’s instructions for drying times. Proper drying improves the paint’s durability and appearance.
Frequently Asked Questions
Can You Paint Kitchen Cabinet Hardware?
Yes, you can paint kitchen cabinet hardware. Clean, sand, prime, and use metal-specific spray paint for best results. Seal for durability.
Can Metal Hardware Be Painted?
Yes, metal hardware can be painted. Clean, sand lightly, prime, then apply metal-specific spray paint for best results. Seal for durability.
What Type Of Cabinet Cannot Be Painted?
Laminate and veneer cabinets with damaged surfaces often resist paint adhesion. Also, oily or textured cabinets do not hold paint well. Avoid painting untreated raw wood without sealing. Proper surface preparation is crucial for paint to stick effectively on any cabinet type.
Can You Change The Color Of Cabinet Hardware?
Yes, you can change cabinet hardware color by cleaning, sanding, priming, and spray painting with metal-friendly paint.
Conclusion
Painting hardware on cabinets can refresh your space without much cost. Clean and sand the hardware well for good paint adhesion. Use a primer made for metal before applying paint. Choose spray paint designed for metal to get a smooth finish.
Let each layer dry fully to avoid smudges or peeling. With patience and care, painted hardware looks neat and lasts long. This simple update can change your cabinets’ style easily. Try it yourself and enjoy a fresh, personalized look in your kitchen.