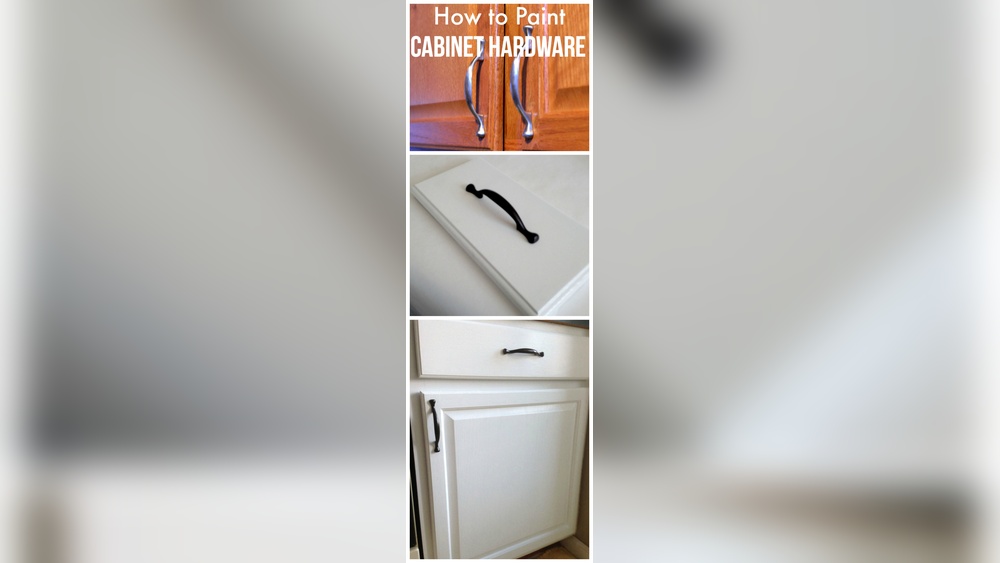
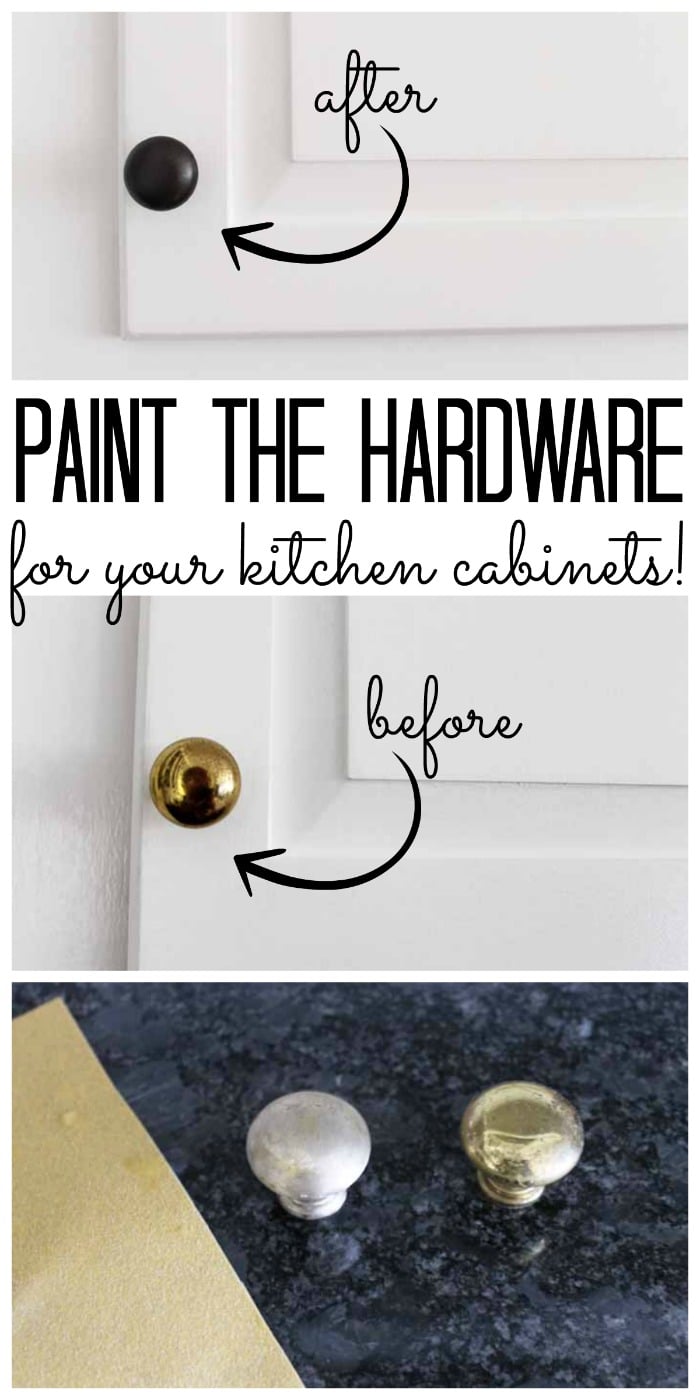
Are your kitchen cabinets looking tired because of old, dull hardware? You don’t need to replace everything to give your kitchen a fresh, new look.
Painting your cabinet hardware is an easy and affordable way to transform your space instantly. In this guide, you’ll learn simple, step-by-step tips to paint your kitchen cabinet hardware like a pro. By the end, you’ll know exactly how to refresh your kitchen with a few coats of paint—no mess, no stress, just stunning results.
Ready to upgrade your kitchen without breaking the bank? Let’s dive in!
Gathering Supplies
Gathering the right supplies is the first step to painting kitchen cabinet hardware. It sets the foundation for a smooth and successful project. Preparing well helps you save time and avoid mistakes.
Focus on the paint, brushes, and cleaning tools. Each choice impacts the final look and durability. Get everything ready before you start painting.
Choosing The Right Paint
Pick paint made for metal surfaces. It sticks well and resists chipping. Spray paint can give an even finish and dries fast. Look for paint labeled as rust-resistant or durable. Choose a color that matches your kitchen style.
Selecting Brushes And Tools
Use small brushes for detailed work. A fine-tip brush helps reach tight spots. Foam brushes create smooth layers without streaks. Have a small container to hold paint. Painter’s tape can protect areas you don’t want to paint.
Preparing Cleaning Materials
Clean the hardware before painting. Use warm water and mild soap to remove dirt and oils. A soft cloth or sponge works best. Dry completely to avoid paint peeling. Use rubbing alcohol to wipe away any leftover grease. Clean tools after use to keep them ready.
Removing Hardware
Removing hardware from kitchen cabinets is the first step in painting them. This task requires care to avoid damage to the cabinets or hardware. Taking your time helps keep everything intact and ready for reuse.
Proper removal also makes the painting process smoother and more professional. Organizing the hardware after removal saves time during reinstallation. Follow simple steps to detach and store your cabinet handles and knobs safely.
Safely Detaching Handles And Knobs
Use a screwdriver that fits the screws exactly. Turn the screws slowly to avoid stripping them. Hold the handle or knob firmly while unscrewing. Remove screws completely before pulling the hardware off. Place screws and hardware on a soft surface to prevent scratches. Do not force any part to avoid damage.
Organizing Hardware Pieces
Sort hardware pieces by cabinet or drawer. Use small containers or zip bags for screws and knobs. Label each container with the cabinet name or location. Keep all parts together to avoid losing them. This method speeds up reinstallation and keeps your work area tidy.
Cleaning And Prepping
Cleaning and prepping kitchen cabinet hardware is the first step for a smooth paint job. Proper preparation helps paint stick well and last longer. It also ensures a neat, professional look. Skipping these steps can cause paint to peel or chip quickly.
Removing Dirt And Grease
Start by wiping the hardware with a soft cloth to remove dust. Use a mild soap mixed with warm water to clean grease and grime. Scrub gently with a toothbrush for hard-to-reach areas. Rinse with clean water and dry completely. Clean surfaces help paint stick better.
Sanding For Better Adhesion
Lightly sand the hardware using fine-grit sandpaper. This creates tiny scratches that give paint a surface to grip. Sand evenly but avoid removing too much material. After sanding, wipe off dust with a damp cloth. Smooth surfaces make paint prone to peeling.
Using Primer For Durability
Apply a primer designed for metal surfaces to the hardware. Primer improves paint adhesion and prevents rust. Use a thin, even coat and let it dry fully before painting. Skipping primer can cause paint to chip and reduce durability.

Credit: www.youtube.com
Painting Process
Painting kitchen cabinet hardware is a simple way to refresh your kitchen’s look. The painting process involves a few clear steps. These steps help you get a smooth and lasting finish on your hardware.
Follow these steps carefully to make sure the paint sticks well and looks good for a long time.
Applying Base Coats
Start by cleaning the hardware to remove dirt and grease. Use a primer or base coat made for metal surfaces. This base coat helps the paint stick better and stops rust. Apply a thin, even layer and let it dry fully before moving on.
Adding Multiple Layers
Paint the hardware with thin coats rather than one thick one. Thin layers dry faster and look smoother. Apply two or three coats, letting each coat dry before adding the next. This builds up a strong, even color without drips or bubbles.
Allowing Proper Drying Time
Let each layer dry completely before handling the hardware. Drying times depend on paint type and room temperature. Rushing this step can cause smudges or peeling later. Patience here ensures your hardware looks its best and lasts longer.
Finishing Touches
Finishing touches bring your painted kitchen cabinet hardware to life. They protect your work and help it last longer. Small steps now save you from future repairs. These final steps make your cabinets look neat and fresh.
Sealing With Protective Coating
Apply a clear protective coating to seal the paint. Choose a product made for metal surfaces. Use a brush or spray for even coverage. Let the coating dry completely before handling. This layer stops scratches and chips. It also keeps the shine bright and smooth.
Reattaching Hardware To Cabinets
Put the hardware back on the cabinets carefully. Tighten screws without forcing them. Check that each piece fits well and moves freely. Clean any fingerprints or smudges on the paint. Step back to admire your refreshed kitchen look.

Credit: porchdaydreamer.com
Tips For Long-lasting Results
Painting kitchen cabinet hardware can refresh your kitchen’s look. Lasting results depend on careful preparation and proper care. Follow key tips to keep the paint strong and smooth.
Proper steps prevent peeling and chipping. Simple habits help your painted hardware stay beautiful for years.
Avoiding Common Mistakes
Clean hardware thoroughly before painting. Dirt or oil stops paint from sticking well. Use a degreaser or soap and water. Dry completely before starting.
Use light sanding to roughen the surface. This helps paint bond better. Skip thick paint layers. Thin coats dry evenly and last longer. Let each coat dry fully before the next.
Choose the right paint type. Use spray paint or enamel made for metal. Avoid cheap paints that peel quickly. Handle hardware gently while painting to avoid scratches.
Maintaining Painted Hardware
Wipe hardware with a soft cloth and mild cleaner. Avoid harsh chemicals or abrasive scrubbing. Clean spills and stains quickly to prevent damage.
Check hardware often for chips or scratches. Touch up small spots with matching paint. Remove hardware for a fresh coat if needed after some time.
Keep cabinet doors closed gently. Slamming can damage the paint. Regular care keeps your kitchen hardware looking fresh and new.
Credit: www.thecountrychiccottage.net
Frequently Asked Questions
How Do I Prepare Kitchen Cabinet Hardware For Painting?
Clean hardware thoroughly to remove grease and dirt. Lightly sand the surface for better paint adhesion. Remove any existing paint or rust before priming.
What Type Of Paint Is Best For Cabinet Hardware?
Use spray paint designed for metal surfaces. Choose durable, rust-resistant paint like enamel or oil-based spray paint for long-lasting results.
Should I Remove Hardware Before Painting Kitchen Cabinets?
Yes, removing hardware ensures even paint coverage and prevents damage to cabinets. It also makes the painting process easier and cleaner.
How Many Coats Of Paint Are Needed On Hardware?
Apply 2-3 thin coats for smooth, durable coverage. Allow each coat to dry fully before applying the next to avoid drips.
Conclusion
Painting kitchen cabinet hardware can refresh your space quickly. Choose the right paint and prep the surfaces well. Take your time to apply thin, even coats for best results. Let each layer dry fully before adding the next. This simple project saves money and adds a personal touch.
You’ll enjoy the new look without a full remodel. Small changes can make a big difference. Start painting and see your kitchen shine!


