Have you ever struggled with a bracelet that won’t stay on or wished you could fix it yourself? Knowing how to make a bracelet fastener can save you time, money, and frustration.
Imagine creating a strong, stylish closure that fits perfectly with your favorite bracelet. In this guide, you’ll learn simple steps to make your own fastener quickly and easily. Keep reading, and you’ll never have to worry about a loose bracelet again!
Credit: www.kernowcraft.com
Materials Needed
Making a bracelet fastener needs the right materials. These materials help you create a strong and neat finish. Choosing the correct items makes the process easier. It also ensures the fastener works well and lasts long.
Types Of Fasteners
Bracelet fasteners come in many styles. Common types include lobster clasps, toggle clasps, and magnetic clasps. Each type fits different bracelet designs. Pick one that suits your style and skill level. Small jump rings often connect fasteners to the bracelet ends.
Tools Required
Basic tools make fastener making simple. Needle-nose pliers help open and close jump rings. Wire cutters trim excess cord or wire. A ruler measures your bracelet length. Sometimes, a small screwdriver is needed for some clasps. Keep your tools clean and ready.
Choosing The Right Cord
The cord type affects the bracelet’s look and strength. Leather cords offer durability and style. Nylon or waxed cotton cords are flexible and easy to knot. Choose a cord thickness that fits your fastener size. Ensure the cord matches your bracelet’s design and comfort needs.

Credit: www.youtube.com
Preparing The Bracelet
Preparing the bracelet is the first step to creating a beautiful fastener. It involves measuring, adding decorations, and securing the ends. These tasks help make the bracelet look great and fit well. Follow these steps carefully to prepare your bracelet perfectly.
Measuring And Cutting
Start by measuring your wrist with a tape or string. Leave a little extra length for the fastener. Mark the measurement clearly. Cut the bracelet material to this length. Use sharp scissors or cutters for a clean edge.
Attaching Beads And Charms
Choose beads and charms that match your style. Thread them carefully onto the bracelet. Space them evenly or cluster them as you like. Push each bead close together to avoid gaps. Check the design before moving on.
Securing The Ends
Use strong knots or crimps to hold beads in place. Apply glue for extra strength if needed. Attach jump rings or loops at both ends. Make sure the fastener parts are tight and secure. Test the bracelet to ensure it stays on well.
Creating Simple Knot Fasteners
Creating simple knot fasteners is a great way to finish your bracelet. These fasteners hold your bracelet tight and look neat. They are easy to make and do not need special tools. You can use these knots with many types of threads and cords.
Square Knot Technique
The square knot is strong and looks clean. Start with two ends of the cord. Cross the right end over the left one. Then, tuck it under and pull tight. Repeat the same steps but start with the left end. Pull the ends to tighten the knot. This knot stays secure and is easy to undo.
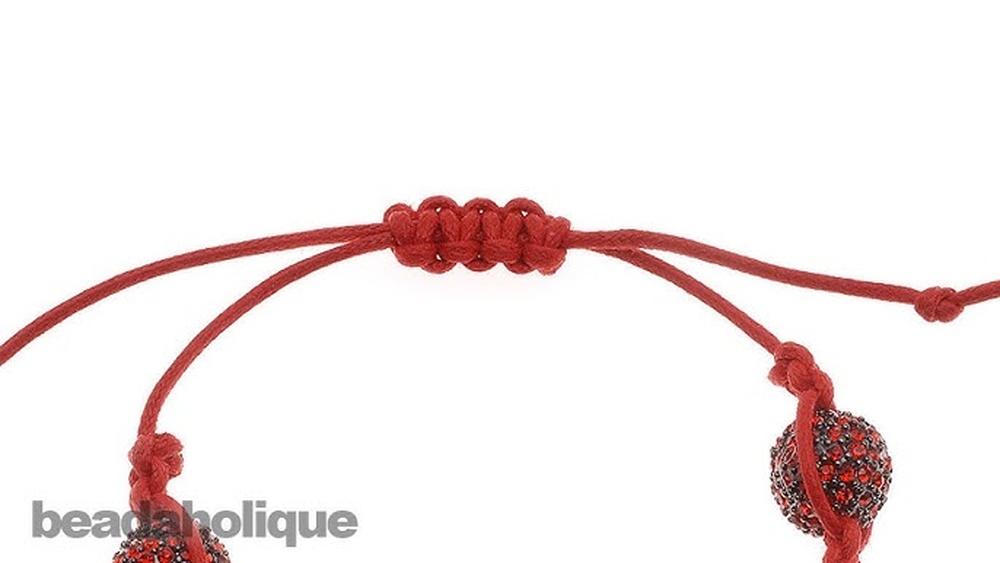
Sliding Knot Method
The sliding knot lets you adjust the bracelet size. Take one cord end and make a loop. Wrap the cord around the loop two or three times. Pass the end through the loops and pull tight. Repeat this on the other side. The knots slide to fit your wrist comfortably.
Adjusting Knot Tension
Knot tension controls how tight your bracelet fits. Pull gently on the cords to adjust tension. Too tight knots can damage the thread. Too loose knots might come undone. Find a balance by testing the fit on your wrist. Tighten or loosen knots as needed for comfort and security.
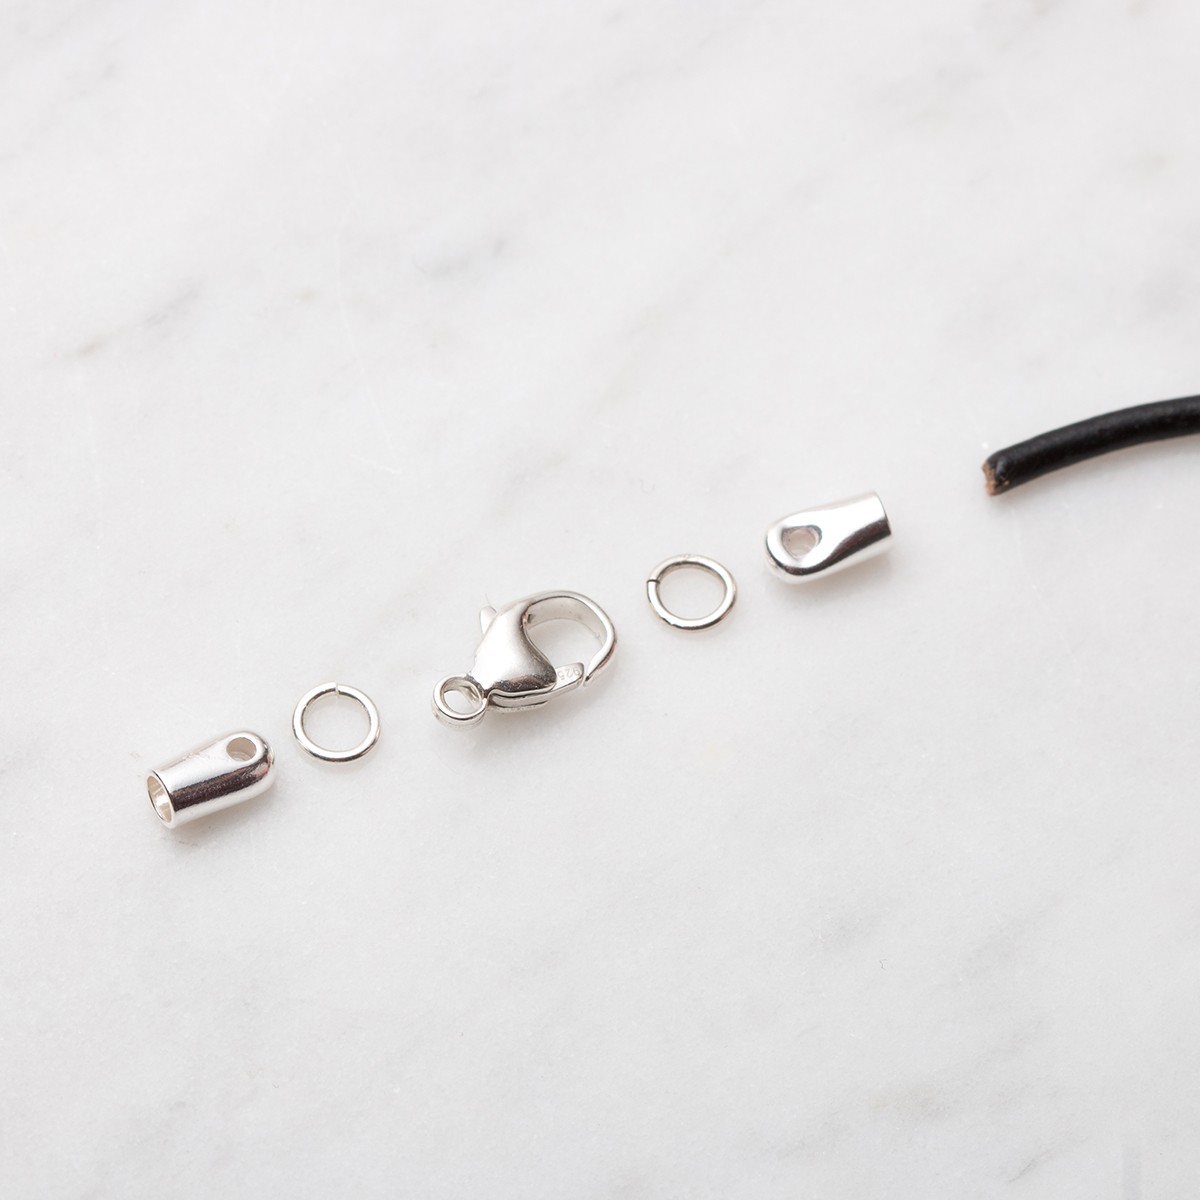
Using Clasps And Hooks
Using clasps and hooks is a simple way to fasten a bracelet. They hold the ends together securely. Choosing the right type depends on style and ease of use. Clasps come in many shapes and sizes. Each type offers a different look and function.
Attaching Lobster Clasps
Lobster clasps are popular and reliable. They have a small lever that opens the clasp. Attach the clasp using a jump ring. Use pliers to open the jump ring gently. Slide the jump ring through the bracelet end loop. Close the jump ring tightly to secure it. This clasp works well for most bracelet types.
Adding Toggle Clasps
Toggle clasps have two parts: a bar and a ring. Insert the bar through the ring to close. Attach the ring and bar to each bracelet end. Use jump rings or wire loops for attachment. Toggle clasps add a decorative touch. They are easy to fasten with one hand.
Using Magnetic Closures
Magnetic closures use magnets to hold bracelet ends. They snap together quickly and easily. Attach each magnet to the bracelet ends. Secure magnets with glue or loops. Magnetic clasps suit light and medium-weight bracelets. They are perfect for people who want fast fastening.
Finishing Touches
Finishing touches make your bracelet fastener strong and neat. These steps help your bracelet last longer and look great. Pay attention to small details for a clean, professional finish.
Trimming Excess Cord
Cut off extra cord close to the knot or clasp. Use sharp scissors for a clean cut. Avoid cutting too close to prevent the knot from slipping. Trim slowly and carefully for best results.
Applying Glue For Security
Add a small drop of glue on the knot or cord ends. Use jewelry glue or clear craft glue. This step keeps the fastener from coming apart. Let the glue dry fully before wearing the bracelet.
Polishing The Fastener
Wipe the fastener gently with a soft cloth. This removes dirt and fingerprints. Shine metal parts to make them look new. Polishing improves the overall appearance and feel.

Credit: jewelrymakingjournal.com
Troubleshooting Common Issues
Troubleshooting common issues with bracelet fasteners helps keep your jewelry secure and comfortable. Many problems are easy to fix at home. Understanding simple solutions saves time and money. Below are common problems and how to solve them.
Loose Fastener Fixes
A loose fastener can cause the bracelet to fall off. Tighten small screws or clamps gently with a screwdriver or pliers. Check if the clasp hooks properly. If it slides too much, add a small bead or knot behind the clasp to hold it in place.
Replacing Broken Parts
Broken fastener parts need replacing to restore function. Remove the damaged piece carefully using pliers. Match the new part with the old one to ensure fit. Attach the replacement with jump rings or clasps. Secure connections firmly to avoid future breaks.
Adjusting Bracelet Length
Bracelets that are too long or short affect comfort and look. Remove or add links to adjust length. Use pliers to open jump rings or connectors. Measure the wrist before making changes. Proper length makes wearing the bracelet easier and safer.
Frequently Asked Questions
What Materials Are Needed To Make A Bracelet Fastener?
To make a bracelet fastener, you need clasps, jump rings, pliers, and bracelet cords. These materials are essential for a secure and durable fastener.
How Do I Attach A Fastener To A Bracelet?
Use pliers to open a jump ring, slide it through the bracelet end and fastener, then close securely. This ensures the fastener stays in place.
Which Fastener Type Is Best For Beginners?
Magnetic clasps and lobster clasps are beginner-friendly. They are easy to attach and provide a strong hold for bracelets.
Can I Customize Bracelet Fasteners For Different Styles?
Yes, bracelet fasteners come in various designs and finishes. Customize to match your bracelet’s style and personal preference easily.
Conclusion
Making a bracelet fastener is easier than you think. With simple tools and steps, anyone can do it. You can create a strong, neat fastener to hold your bracelet well. Practice a few times to get better and faster. This skill adds a personal touch to your jewelry.
Enjoy crafting and wearing your unique bracelets every day. Keep trying and have fun with your designs!