Are you ready to give your cabinets a fresh new look with stylish knobs and handles? Drilling holes for cabinet hardware might sound tricky, but with the right tools and simple steps, you can do it yourself like a pro.
Whether you’re updating your kitchen, bathroom, or storage space, knowing how to drill accurately will save you time, prevent damage, and ensure a perfect fit every time. Keep reading, and you’ll discover easy tips and tricks that make installing cabinet hardware a breeze—no guesswork, no costly mistakes.
Let’s get started on transforming your cabinets today!
Tools And Materials
Drilling holes for cabinet hardware requires the right tools and materials. Using proper equipment ensures clean holes and secure installation. Preparing everything before you start saves time and avoids mistakes.
Essential Drill Bits
Select drill bits designed for cabinet hardware. A 3/16 inch or 5mm bit fits most knobs and pulls. Tapered drill bits reduce wood splintering. Always check hardware instructions for exact sizes. Test drill bits on scrap wood to confirm fit. Sharp bits make clean, precise holes every time.
Choosing The Right Screwdriver
Use a screwdriver that matches your hardware screws. A Phillips or flathead screwdriver works for most cabinet knobs. Electric screwdrivers speed up installation and reduce hand strain. Avoid using the drill to drive screws directly; it can damage the wood or strip screws. A manual or powered screwdriver gives better control.
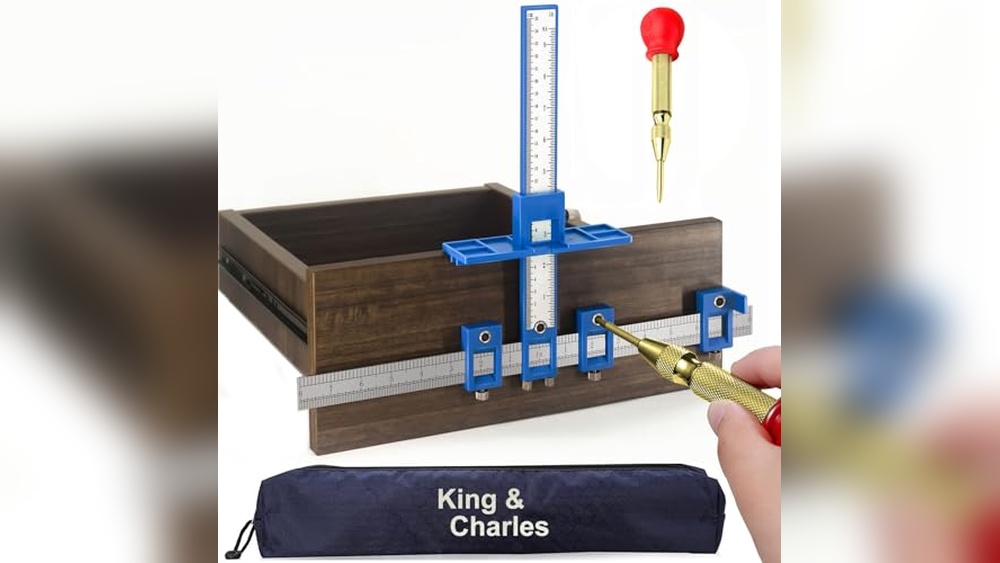
Using A Cabinet Hardware Jig
A cabinet hardware jig helps mark drill hole locations evenly. It keeps holes aligned on all doors and drawers. Using a jig prevents mistakes and saves measuring time. Some jigs come with adjustable guides for different hardware sizes. Practice on scrap wood to get comfortable using the jig before drilling your cabinets.

Credit: www.superiorstoneandcabinet.com
Measuring And Marking
Measuring and marking are the first steps to a perfect cabinet hardware installation. Precise measurements ensure your knobs and pulls look balanced and aligned. Careful marking helps avoid mistakes and prevents damage to your cabinets. Taking time here saves effort later.
Finding The Perfect Placement
Start by deciding where the hardware should go. Consider the cabinet door size and style. For knobs, place them where your hand naturally grabs. For pulls, position them vertically or horizontally based on door shape. Use a ruler or tape measure for consistent spacing.
Marking Drill Points Accurately
Measure twice to avoid errors. Use a pencil to mark drill points lightly. Double-check measurements before drilling. Keep marks small and clear for easy visibility. Use a square tool to ensure straight lines and right angles.
Using A Punch For Precision
A center punch helps guide the drill bit. Lightly tap the punch on each mark to create a small dent. This dent prevents the drill bit from slipping. Using a punch increases accuracy and protects the cabinet surface. It makes drilling easier and cleaner.
Selecting Drill Bits
Selecting the right drill bit is key for drilling cabinet hardware. The correct bit ensures clean holes and a perfect fit for screws. Choosing the wrong size or type can damage your cabinet doors or make hardware loose. It is important to understand the differences between drill bits and their uses. This guide covers the basics to help you pick the best drill bit for your project.
Standard Vs Metric Sizes
Drill bits come in standard (imperial) and metric sizes. Standard sizes are measured in inches, such as 3/16 inch. Metric sizes use millimeters, like 5mm. Cabinet hardware screws often match one system or the other. Using a bit that matches the screw size prevents holes from being too tight or too loose. Check your hardware packaging or instructions to find the right size system. If unsure, try a test hole on scrap wood before drilling your cabinets.
Tapered Drill Bits Benefits
Tapered drill bits have a slightly cone-shaped tip. This design helps create cleaner holes with less splintering. They reduce the chance of cracking the cabinet door surface. Tapered bits also allow screws to fit smoothly and securely. This is important for cabinet knobs and pulls that need tight attachment. Using tapered bits can make your hardware installation look more professional and last longer.
Drilling Through Different Materials
Cabinet doors can be made from wood, MDF, or laminate. Each material needs a different drilling approach. Wood usually works well with standard bits. MDF may require slower drilling to avoid chipping. Laminate surfaces need sharp bits to prevent peeling. For harder materials, consider using a brad point bit for accuracy. Always drill slowly and steadily. Use masking tape over the drilling spot to reduce surface damage.

Credit: www.youtube.com
Drilling Techniques
Drilling cabinet hardware requires careful technique to ensure a clean, professional result. Proper drilling protects the wood and helps hardware fit perfectly. Use the right tools and methods for straight, precise holes. Focus on avoiding common mistakes like blowouts and splintering. Testing your drill settings before working on cabinets saves time and materials.
Drilling Straight Holes
Hold the drill perpendicular to the cabinet surface. This angle keeps the hole straight. Use a drill guide or jig for extra accuracy. Mark the hole location clearly with a pencil or awl. Start drilling slowly to avoid slipping. Keep the drill steady as you go through the wood. Straight holes make hardware installation easier and look better.
Avoiding Blowouts And Splintering
Blowouts happen when the drill bit tears the wood on the back side. To prevent this, place painter’s tape over the drilling spot. Drill slowly and steadily to reduce splintering. Use a brad point bit designed for wood for cleaner edges. Support the back of the cabinet door with a scrap piece of wood while drilling. This support helps keep the wood intact.
Using Scrap Wood For Test Holes
Test drilling on scrap wood saves your cabinet doors from damage. Match the thickness and type of your cabinet wood. Drill holes using the chosen bit and check fit with the hardware screws. Adjust drill speed or bit size if holes are too tight or loose. Practice on scrap wood builds confidence and prevents mistakes on real cabinets.
Installing Hardware
Installing hardware on cabinets requires care and precision. Proper installation ensures the knobs and pulls fit well and last long. Each step in the process matters, from drilling to tightening screws. A careful approach prevents damage and keeps your cabinets looking neat.
Follow these tips to make your hardware installation smooth and successful.
Screw Tightening Tips
Use the correct screwdriver size to avoid stripping screws. Tighten screws until snug, not too tight. Over-tightening can crack the cabinet or damage the hardware. Turn screws slowly and check the fit often. If a screw feels stuck, back it out and try again. Proper tightening keeps hardware secure without harm.
Preventing Damage To Threads
Drill pilot holes slightly smaller than the screw diameter. This helps screws enter smoothly without splitting wood. Use a drill bit designed for wood or metal, depending on your cabinet material. Avoid forcing screws into holes that are too small. If threads start to strip, stop and redrill the hole. Protecting threads ensures a firm hold and easy future removal.
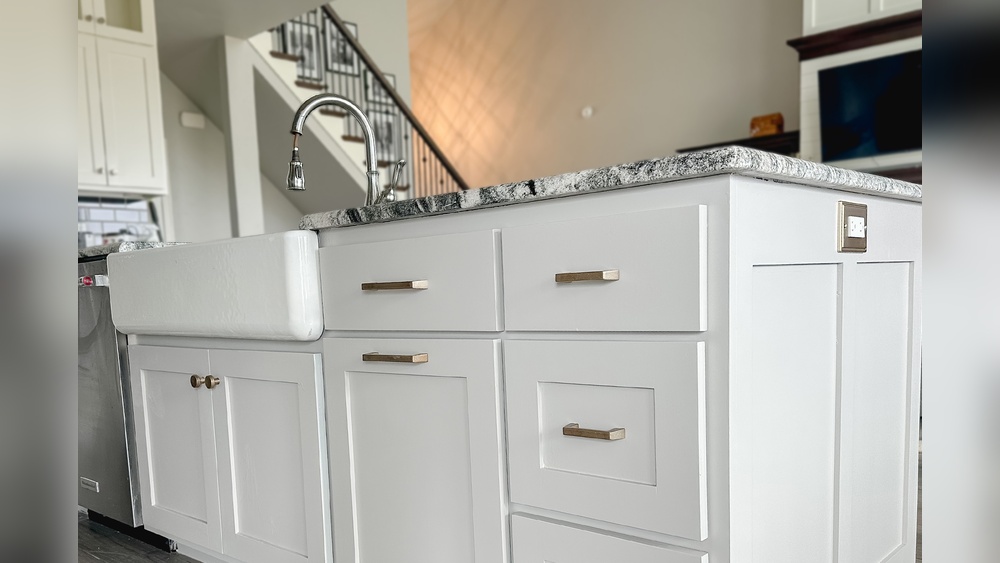
Aligning Knobs And Pulls
Measure and mark hole positions carefully before drilling. Use a template or jig for consistent placement on multiple cabinets. Check alignment by holding the hardware in place before drilling. Ensure pulls are straight and knobs are centered on doors or drawers. Proper alignment improves both function and appearance.

Credit: us.plankhardware.com
Troubleshooting Tips
Drilling holes for cabinet hardware can sometimes bring unexpected issues. These troubleshooting tips help fix common problems fast. You keep your project on track and avoid delays. Follow these easy fixes to save time and get perfect results.
Fixing Misaligned Holes
Misaligned holes can ruin the look of your cabinets. Start by checking your measurements carefully. Use a pencil to mark the correct spots clearly. If the hole is off, fill it with wood filler or a wooden dowel. Let it dry completely. Then, sand the surface smooth before drilling again. A drill guide or jig helps keep holes straight and aligned. Take your time and double-check before drilling.
Dealing With Stripped Screws
Stripped screws lose their grip and slip during installation. Use a screwdriver with a good fit for the screw head. Apply firm, steady pressure while turning. If stripped, try a rubber band over the screw head for extra grip. For badly stripped screws, remove them with pliers or a screw extractor. Replace stripped screws with new ones of the correct size. Tighten screws carefully to avoid damage.
Adjusting Hole Size
Sometimes holes are too big or too small for hardware. For small holes, gently widen with a larger drill bit. Drill slowly to avoid splintering the wood. For holes that are too large, use a wooden plug or toothpicks dipped in wood glue. Insert them into the hole and trim the excess. After drying, sand smooth and redrill the correct size hole. Always test hardware fit on scrap wood first.
Advanced Tips
Advanced tips help improve precision and ease when drilling for cabinet hardware. These techniques save time and reduce mistakes. They work well for both beginners and experienced DIYers. Use these methods to get perfect holes every time.
Using A Drill Guide For Consistency
A drill guide keeps your drill bit steady and straight. It prevents angled or uneven holes. This tool is essential for installing multiple knobs or pulls. Mark the spot, clamp the guide, and drill through the guide hole. This ensures all holes line up perfectly across cabinet doors and drawers.
Drilling Stainless Steel Cabinets
Stainless steel cabinets require special care. Use a high-speed steel (HSS) or cobalt drill bit. Start with a small pilot hole to avoid slipping. Apply steady pressure and drill slowly to reduce heat build-up. Lubricate the drill bit with cutting oil for smoother drilling. Wear safety glasses to protect from metal shards.
Customizing Hardware Placement
Not all cabinets need hardware in the same spot. Adjust placement to suit your style and cabinet design. Measure carefully and mark holes with a pencil. Test different positions by holding hardware in place before drilling. Custom placement can enhance both function and appearance of your cabinets.
Frequently Asked Questions
What Drill Bit To Use For Cabinet Hardware?
Use a 3/16-inch (5mm) drill bit for most cabinet hardware holes. Always test on scrap wood first.
How To Drill Holes For Cabinet Hardware?
Mark hole positions with a template or ruler. Use a 3/16-inch drill bit for standard hardware. Drill straight and slow. Test on scrap wood first. Avoid overtightening screws to prevent damage.
What Is The 1 3 Rule For Cabinet Hardware?
The 1-3 rule for cabinet hardware means placing knobs 1 inch from the edge and pulls 3 inches apart for balanced look and function.
What Kind Of Drill Bit Do I Use To Drill Through Stainless Steel?
Use cobalt drill bits to drill through stainless steel. They resist heat and stay sharp longer. Keep speed slow and apply steady pressure.
Conclusion
Drilling cabinet hardware is simple with the right steps and tools. Measure carefully and mark the spots before drilling. Use the correct drill bit size to avoid damage. Take your time to drill straight and steady holes. Testing on scrap wood can help prevent mistakes.
Following these tips will make your project smoother and more precise. Enjoy the satisfaction of installing hardware yourself. Your cabinets will look neat and professional in no time.