Are you tired of nails that won’t hold or pictures that keep falling? Knowing how to put wall anchors into the wall can change everything.
It’s a simple skill that makes your shelves, mirrors, and decorations stay secure and look great. In this guide, you’ll discover easy steps to get it right the first time—no guesswork, no damage to your walls. Keep reading, and soon you’ll feel confident tackling any wall project like a pro.

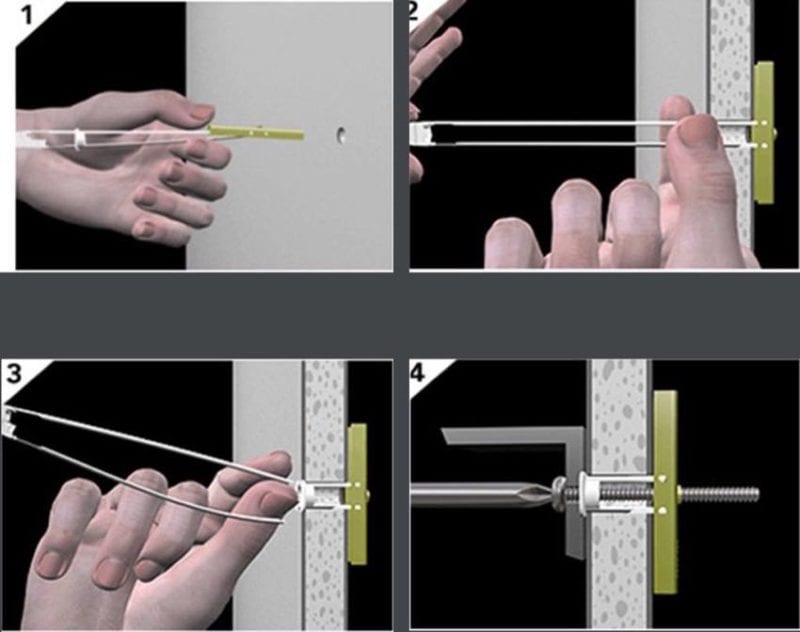
Credit: www.do-it-yourself-help.com
Types Of Wall Anchors
Wall anchors help secure objects to walls. They work by spreading the load inside the wall. Different anchors suit different wall types and weights. Choosing the right type is key for a strong hold. Below are common types of wall anchors and how they work.
Plastic Expansion Anchors
Plastic expansion anchors are simple and cheap. They work best in drywall or plaster. Insert the anchor into a drilled hole. As a screw goes in, the anchor expands. This expansion grips the wall tightly. They hold light to medium-weight items well.
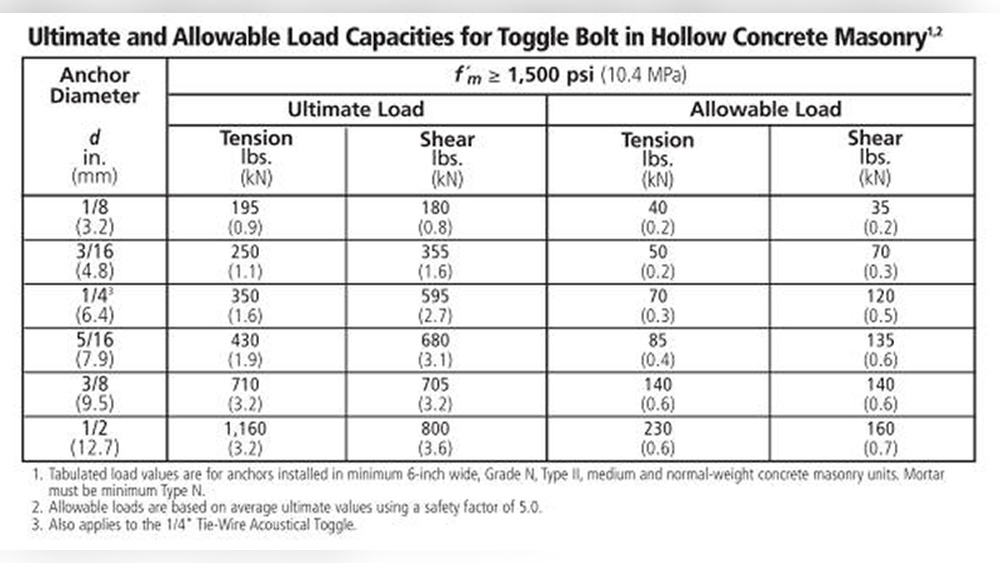
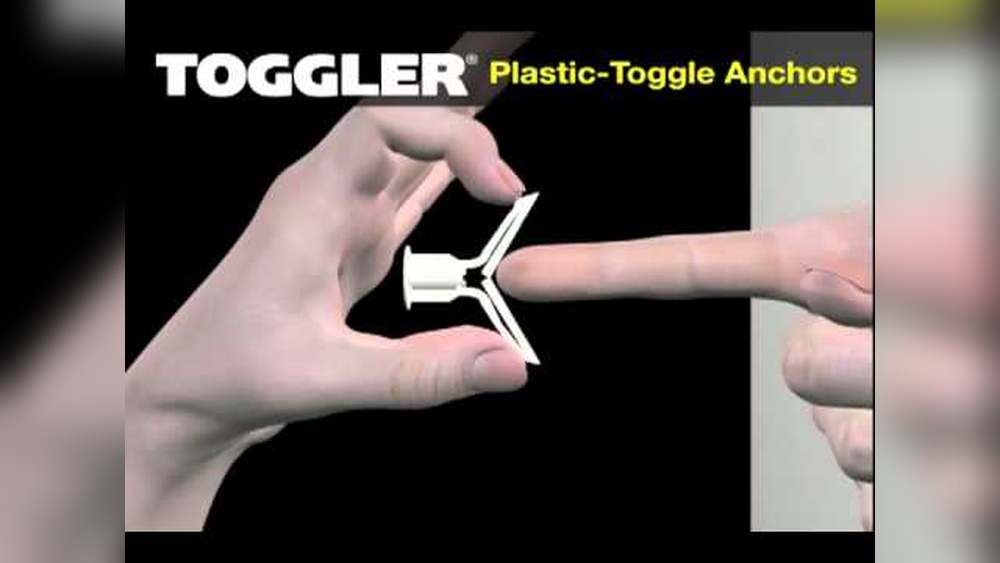
Toggle Bolts
Toggle bolts have metal wings that open inside the wall. They need a larger hole to fit the folded wings. Once inside, the wings spread out to hold firmly. Toggle bolts support heavy objects on hollow walls. They are strong but require more space.
Molly Bolts
Molly bolts are metal anchors for hollow walls. Insert them into a drilled hole, then tighten the screw. Tightening pulls the sleeve, expanding it behind the wall. This creates a strong hold for medium to heavy items. They stay in place even if the screw loosens.
Self-drilling Anchors
Self-drilling anchors do not need a pre-drilled hole. Their sharp tip cuts into drywall as you screw them in. These anchors expand inside the wall to hold firmly. They are quick and easy to use for light to medium loads. Perfect for small projects and quick fixes.

Credit: www.youtube.com
Tools Needed
To put wall anchors into the wall, you need the right tools. These tools make the job easier and safer. Preparing them before starting saves time and frustration. Each tool has a specific role in the process. Knowing which tools to use helps you work with confidence.
Drill And Drill Bits
A drill is essential for making holes in the wall. Choose a drill bit that matches the size of the wall anchor. The right size ensures a tight fit. A hand drill or a power drill works well. Use steady pressure to avoid damaging the wall.
Screwdriver
A screwdriver helps you insert screws into the wall anchors. Use the correct type, either flat-head or Phillips, depending on the screw. Turn screws slowly to avoid stripping them. A good grip on the screwdriver makes the task easier.
Hammer
A hammer is useful for gently tapping the wall anchor into the hole. Light taps help the anchor fit snugly without cracking the wall. Avoid heavy hits to prevent damage. Use the hammer carefully to keep everything in place.
Measuring Tape And Pencil
Measuring tape helps mark the exact spot for the hole. Accurate measurements keep your anchors level and well-placed. Use a pencil to mark spots clearly on the wall. These simple tools improve the overall look of your work.
Choosing The Right Anchor
Choosing the right wall anchor is key for a strong and safe hold. Different walls need different anchors. Picking the wrong one can cause damage or make your item fall. Learn how to select the best anchor for your project.
Assessing Wall Material
First, check what your wall is made of. Drywall, plaster, brick, or concrete need different anchors. Drywall anchors work well in hollow walls. Masonry anchors fit better in brick or concrete. Knowing the wall type helps you pick the right anchor.
Weight Capacity Considerations
Think about how heavy your item is. Choose anchors that can hold more weight than your item. This keeps things safe and secure. Light anchors are for small pictures. Heavy anchors suit shelves or mirrors. Always check the weight limit on the package.
Anchor Size Selection
Anchor size affects strength and fit. Small anchors suit light objects. Large anchors hold heavy items better. Match the anchor size to the screw and wall thickness. Using the correct size prevents wall damage. It also keeps your item stable and strong.
Preparing The Wall
Preparing the wall is a key step before putting wall anchors. It ensures the anchors hold firmly and the wall stays undamaged. This process involves marking spots, checking for studs or pipes, and drilling pilot holes. Each step helps avoid mistakes and makes installation smooth.
Marking Anchor Locations
Start by deciding where to place the anchors. Use a pencil to mark the exact spots on the wall. Measure carefully to keep the marks level and spaced correctly. Clear, accurate marks guide you during drilling and anchor placement.
Checking For Studs And Obstructions
Use a stud finder to locate wooden studs behind the drywall. Avoid drilling into studs unless needed for heavy items. Also, check for pipes and electrical wires to prevent damage. Knowing what’s inside the wall keeps the project safe and clean.
Drilling Pilot Holes
Choose a drill bit size that matches the anchor size. Drill pilot holes at the marked spots slowly and straight. Pilot holes help anchors fit well and prevent the wall from cracking. Clean out dust from the holes before inserting anchors.
Installing The Anchor
Installing the wall anchor correctly is key for a strong hold. The process varies by anchor type. Each type fits different wall materials and weights. Follow simple steps to ensure safety and durability.
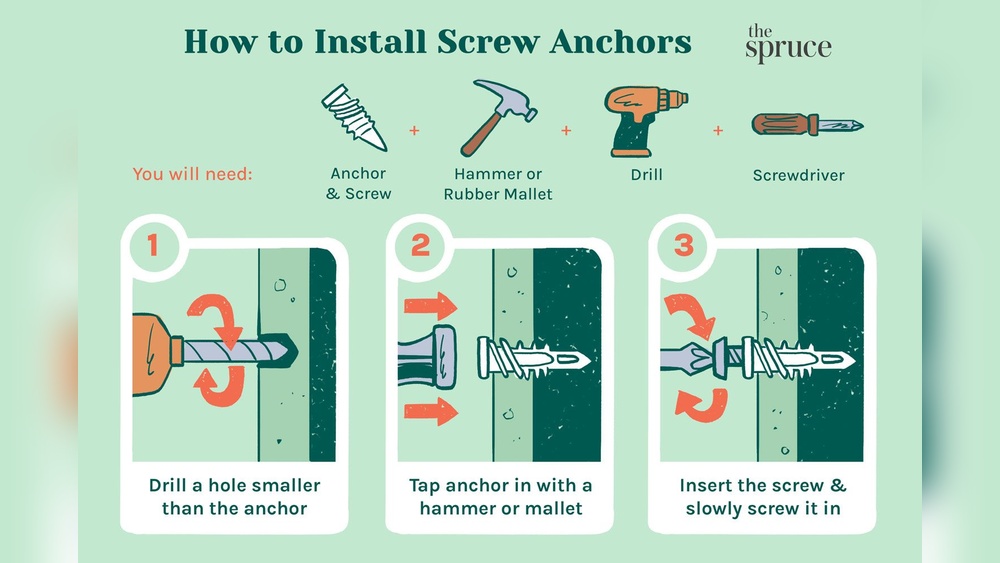
Inserting Plastic Expansion Anchors
Start by drilling a hole that matches the anchor size. Push the plastic anchor gently into the hole. Tap it lightly with a hammer until flush with the wall. Avoid forcing it, or the wall may crack.
Securing Toggle Bolts
Thread the bolt through the object you want to hang. Screw the toggle wings onto the bolt. Push the wings through the drilled hole. Once inside, the wings open and lock behind the wall. Tighten the bolt carefully to hold the object firmly.
Setting Molly Bolts
Drill a hole slightly smaller than the molly bolt. Insert the bolt into the hole. Use a screwdriver to turn the bolt clockwise. The sleeve expands inside the wall for a tight grip. Remove the screw to hang your item, then reinsert it for support.
Using Self-drilling Anchors
Position the anchor tip against the wall. Screw it in by hand or with a screwdriver. The anchor cuts into drywall without pre-drilling. Stop when the anchor head is flush with the wall. Insert the screw into the anchor to secure your item.
Attaching Fixtures
Attaching fixtures to walls with anchors needs care. It helps the fixture stay strong and safe. A few simple steps make the job easy. Follow each step to get the best hold and avoid damage.
Aligning Fixtures With Anchors
Check the anchor spots in the wall. Place the fixture so holes match the anchors exactly. Hold the fixture steady. This ensures screws fit right and hold tight. Misalignment can cause loose fixtures or wall damage.
Driving Screws Properly
Use the right screwdriver or drill bit. Turn screws slowly at first. Push screws straight into anchors. Stop when screws are tight but not too tight. Over-tightening can break anchors or damage walls. Proper screw driving keeps fixtures steady and secure.
Ensuring Firm Support
After attaching, gently test the fixture. Give it a small shake or pull. It should not move or feel loose. Firm support means the anchors and screws work well. If loose, check alignment and screw tightness again. Strong support keeps your fixture safe and lasting.
Common Mistakes To Avoid
Putting wall anchors in the wall seems easy but many make mistakes. These errors can cause anchors to fail or damage walls. Knowing common mistakes helps you avoid problems and secure anchors properly.
Overdrilling Holes
Drilling a hole too big is a frequent mistake. The anchor will not hold well in a large hole. Always use the drill bit size suggested on the anchor package. Drill slowly and check the hole size often.
Using Incorrect Anchor Type
Not all anchors fit all walls or weights. Plastic anchors suit light loads and drywall. Metal or toggle anchors work better for heavy items or hollow walls. Choose the right anchor type for your wall and object.
Ignoring Weight Limits
Each anchor has a weight limit. Exceeding this limit risks anchor failure and wall damage. Check the weight rating before buying anchors. Use multiple anchors for heavier objects. Safety first.
Credit: www.protoolreviews.com
Tips For Long-lasting Support
Wall anchors hold items securely on walls. To keep them strong, follow simple care tips. These tips help avoid damage and keep anchors stable over time. Read on for easy ways to maintain solid support.
Regular Inspection
Check wall anchors often for any signs of wear or looseness. Look for cracks or movement around the anchor. Early spotting can prevent bigger problems later. Tighten anchors if they feel loose to keep items safe.
Avoiding Excessive Load
Do not hang items heavier than the anchor’s limit. Too much weight stresses anchors and walls. Use multiple anchors for heavier objects. This spreads the weight and prevents anchors from failing.
Proper Maintenance
Keep the area around anchors clean and dry. Moisture can weaken wall materials and anchors. Avoid bumping or pulling on anchored items roughly. Gentle handling helps anchors last longer and hold better.
Frequently Asked Questions
What Tools Do I Need To Install Wall Anchors?
You need a drill, drill bits, a screwdriver, and the correct wall anchors. A hammer may help for some anchor types. These tools ensure a secure and precise installation.
How Do I Choose The Right Wall Anchors?
Select anchors based on wall type and weight load. Plastic anchors suit light loads; metal anchors hold heavier items. Always check the packaging for weight limits and wall compatibility.
Can I Install Wall Anchors Without A Drill?
Yes, some anchors like self-drilling or expansion anchors can be installed without a drill. However, drilling is recommended for stronger, more secure mounting in most walls.
How Deep Should I Drill For Wall Anchors?
Drill a hole slightly deeper than the anchor length. This ensures the anchor fits fully and holds firmly without damaging the wall.
Conclusion
Putting wall anchors into your wall is simple with the right steps. Start by choosing the correct anchor for your wall type. Drill a hole carefully and insert the anchor firmly. Tighten screws slowly to avoid damage. These anchors hold items securely and keep your walls safe.
Practice makes perfect, so don’t worry if it feels tricky at first. With patience and care, you can hang shelves, pictures, and more easily. Ready to try? Your walls will thank you for the strong support.