Are you struggling to figure out how to add a neutral wire to your light switch? You’re not alone.
Many homes have older wiring that doesn’t include a neutral wire at the switch box, making it tricky to install modern smart switches or certain lighting controls. But don’t worry—this guide will walk you through simple, step-by-step instructions to help you add a neutral wire safely and confidently.
By the end, you’ll know exactly what to do to upgrade your lighting setup without confusion or costly mistakes. Keep reading, and you’ll be ready to tackle this project like a pro.
Tools And Materials Needed
Adding a neutral wire to a light switch requires some specific tools and materials. Having these ready makes the job safer and easier. This section lists everything you need before starting.
Essential Tools
- Screwdriver set (flathead and Phillips)
- Wire stripper or cutter
- Voltage tester
- Needle-nose pliers
- Electrical tape
- Flashlight or work light
Required Materials
- Neutral wire (typically white)
- Wire connectors (wire nuts)
- Electrical box (if replacement is needed)
- Light switch with neutral terminal
- Wire labels or markers
Safety Gear
- Insulated gloves
- Safety goggles
- Rubber-soled shoes
- Fire-resistant clothing
Basic Electrical Concepts
Understanding basic electrical concepts helps you safely add a neutral wire to a light switch. This knowledge makes wiring easier and prevents mistakes. It also ensures your home’s electrical system works properly. Below are key ideas to know before starting.
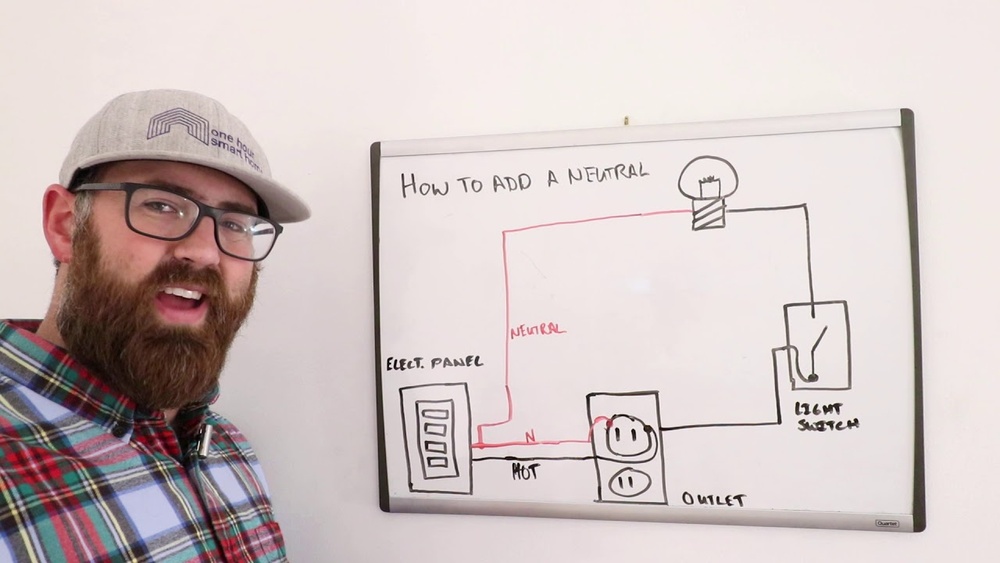
Neutral Wire Role
The neutral wire carries electricity back to the power source. It completes the electrical circuit. Without a neutral wire, some devices will not function correctly. The neutral wire is usually white or gray. It is essential for modern switches and smart devices.
Live And Ground Wires
The live wire delivers electricity from the power source. It is often black, red, or brown. The ground wire is a safety feature. It prevents electric shocks by directing current safely to the ground. Ground wires are usually green or bare copper. Correct wiring of live and ground wires is critical for safety.
Switch Types And Wiring
Light switches come in different types. Single-pole switches control one light from one place. Three-way switches control a light from two locations. Some switches need a neutral wire to work properly. Knowing your switch type helps you wire it correctly. This prevents electrical problems and ensures switch functionality.
Preparing For The Project
Preparing for the project is the most important step before adding a neutral wire to a light switch. Taking time to prepare ensures safety and smooth work. Follow each step carefully to avoid any accidents or mistakes.
This part covers turning off power, testing voltage, and removing the existing switch. These actions lay the foundation for a safe and successful installation.
Turning Off Power
Start by turning off the power at the circuit breaker. This stops electricity from flowing to the switch. Use the breaker box and flip the correct switch to the off position. Never work on electrical parts with power on. Safety first.
Testing For Voltage
After switching off power, test the wires for voltage. Use a voltage tester or multimeter. Touch the tester to the wires in the switch box. No light or beep means power is off. If you detect power, turn off the breaker again and retest. Always be sure before touching wires.
Removing The Existing Switch
Remove the switch cover plate with a screwdriver. Unscrew the switch from the electrical box. Gently pull the switch out but keep wires attached. Note where each wire connects. Take a picture or mark wires to avoid confusion. Now the switch is ready for adding the neutral wire.
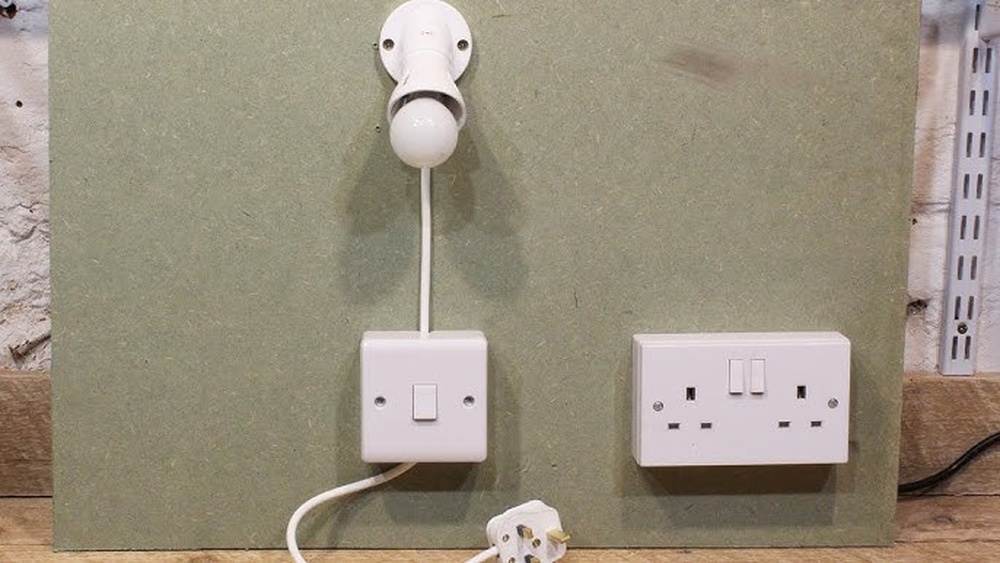
Credit: www.reddit.com
Identifying The Neutral Wire
Identifying the neutral wire is a key step when adding a neutral to a light switch. The neutral wire carries current back to the electrical panel. It ensures the circuit works safely and properly. Knowing how to spot this wire prevents mistakes and hazards. Follow simple steps to find the neutral wire in your switch box.
Locating Neutral In The Box
First, remove the switch cover and unscrew the switch. Look inside the electrical box. Neutral wires usually group together in a bundle. They may be tied with a wire nut. Unlike the hot wires, neutrals do not connect to the switch. Check the back of the box for white or gray wires. This bundle is often the neutral wire.
Using A Voltage Tester
Use a voltage tester to confirm the neutral wire. Turn off power at the breaker for safety. Then, turn power back on carefully. Touch the tester to the suspected neutral wire and a hot wire. The tester should read voltage only between hot and neutral. No voltage should show between neutral and ground. This test helps you find the true neutral wire.
Color Codes And Wire Identification
Neutral wires are usually white or gray in color. Hot wires are often black, red, or blue. Ground wires are green or bare copper. Sometimes colors may differ, especially in older homes. Always check wires with a tester before making connections. Color codes guide you but testing ensures safety.
Wiring The Neutral To The Switch
Wiring the neutral wire to a light switch is important for safe and effective electrical work. The neutral wire completes the electrical circuit, allowing current to flow properly. Many modern switches require a neutral connection to function correctly, especially smart switches. Understanding how to connect and secure the neutral wire helps prevent electrical problems and improves switch performance.
Connecting Neutral Wire
Start by turning off power at the breaker box. Locate the neutral wire, usually white in color, inside the switch box. Carefully strip about half an inch of insulation from the wire end. Connect the neutral wire from the power source to the neutral terminal or wire on the switch. Ensure the connection is firm and stable. Do not confuse neutral with the live or ground wires.
Securing Wire Connections
Once the neutral wire is connected, secure it to avoid loose contacts. Tighten screws on the switch terminal if used. Hold the wire firmly while tightening to prevent slippage. Loose wires can cause sparks or switch failure. Double-check all connections before closing the switch box. Proper securing enhances safety and switch reliability.
Using Wire Nuts And Connectors
Wire nuts or connectors join neutral wires safely inside the box. Twist the wires together evenly before placing the wire nut. Turn the nut clockwise until tight and wires feel secure. Tug gently on the wires to check stability. Use wire nuts rated for your wire size. Good connectors prevent shorts and maintain good electrical contact.
Reinstalling The Switch
Reinstalling the switch is the final step in adding a neutral wire to your light switch. This step ensures the switch works safely and correctly. Taking your time during this process helps avoid future problems.
Mounting The Switch
Start by placing the switch back into the electrical box. Align the screw holes with those in the box. Use a screwdriver to secure the switch with the mounting screws. Tighten the screws until the switch feels firm. Avoid over-tightening, as it can damage the switch or box.
Attaching The Cover Plate
Next, place the cover plate over the switch. Align the plate so the switch fits through the opening. Insert the screws into the plate holes. Tighten them gently to hold the plate in place. The cover plate protects the wires and gives a clean look.
Double-checking Connections
Before finishing, check all wire connections again. Make sure each wire is tightly connected to the correct terminal. Look for loose or exposed wires. Secure any loose wires with electrical tape if needed. Confirm the neutral wire is properly connected. This step is important for safety and switch function.
Testing The Installation
Testing the installation is a key step after adding a neutral wire to your light switch. This step ensures the switch works safely and correctly. It helps catch any wiring mistakes early. Take your time and follow each step carefully.
Restoring Power
First, turn the power back on at the circuit breaker. Make sure the breaker is fully switched on. Be cautious and avoid touching wires during this step. The power must be on to test the switch.
Checking Switch Functionality
Flip the switch up and down. Notice if the light turns on and off properly. Check if the switch feels normal when you flip it. No buzzing or flickering should occur. This shows the neutral wire is working right.
Troubleshooting Common Issues
If the light does not work, double-check the wiring connections. Look for loose or reversed wires. Use a voltage tester to find power at the switch. Replace the switch if it seems faulty. Sometimes the neutral wire may need adjustment.

Credit: www.youtube.com
Safety Tips For Diy Electrical Work
Working with electrical wiring at home can be risky. Safety must be your top priority. This section covers essential safety tips for DIY electrical work. Follow these rules to protect yourself and your home.
When To Call A Professional
Some electrical tasks need expert skills. Complex wiring or old electrical panels require a licensed electrician. Calling a professional prevents mistakes and hazards. If unsure about any step, stop and ask for help.
Avoiding Electrical Hazards
Always turn off power at the breaker before starting work. Use a voltage tester to confirm no electricity flows. Wear insulated gloves and use tools with insulated handles. Keep water away from work areas. Never work in wet conditions.
Maintaining Electrical Systems
Regularly check switches and outlets for damage or wear. Replace any broken parts immediately. Keep electrical panels clear of dust and debris. Schedule yearly inspections by a qualified electrician. Proper maintenance reduces risks and extends system life.

Credit: www.marrold.co.uk
Frequently Asked Questions
What Is A Neutral Wire In A Light Switch?
A neutral wire completes the electrical circuit by carrying current back to the panel. It is usually white or gray. Adding a neutral wire helps modern switches work properly and safely.
Why Add A Neutral Wire To A Light Switch?
Adding a neutral wire enables smart switches and advanced controls. It ensures the switch functions correctly without flickering or power issues. It also improves safety by providing a complete circuit path.
How Do I Find The Neutral Wire In A Switch Box?
Look for a bundle of white wires twisted together in the switch box. These are typically the neutral wires. Use a voltage tester to confirm which wire is neutral before connecting.
Can I Add A Neutral Wire If None Exists?
If no neutral wire is present, you may need to run a new wire from the electrical panel or junction box. Consult a licensed electrician for safe installation and code compliance.
Conclusion
Adding a neutral wire to a light switch can improve your home’s wiring safety. Always turn off power before starting any work. Use the right tools and follow clear steps. If unsure, ask a professional electrician for help. This small change can make your lighting system more reliable.
Take your time and work carefully. Safety comes first in every home project. Now you have the basics to add a neutral wire with confidence.