Are you looking to add a hook to the outside of your wall but aren’t sure how to do it right? Drilling a hook might sound simple, but if it’s not done correctly, it can damage your wall or fail to hold the weight you need.
In this guide, you’ll learn clear, step-by-step tips to drill a hook safely and securely. Whether you want to hang plants, lights, or tools, mastering this skill will save you time and frustration. Keep reading, and you’ll be ready to tackle your project with confidence.
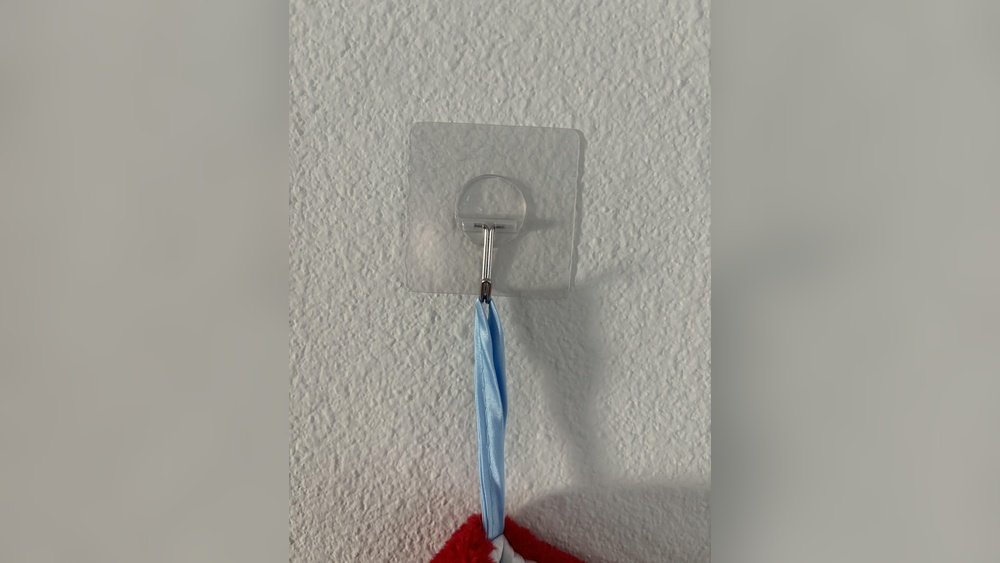
Choosing The Right Hook
Choosing the right hook is the first step to a strong hold on an outside wall. The hook must fit the wall type and the item you want to hang. The wrong hook can cause damage or fall off quickly. Understanding hook types and their materials helps you pick the best option.
Types Of Hooks For Exterior Walls
Metal hooks are common and very strong. They work well for heavy items like plants or lights. Plastic hooks suit lighter objects but may not last long outside. Screw hooks need drilling, giving a firm hold. Adhesive hooks stick without drilling but may fail on rough or uneven walls. Choose a hook type that matches the wall surface and the weight of the item.
Materials And Weight Capacity
Hooks come in steel, brass, plastic, and aluminum. Steel hooks offer the strongest support and resist rust if coated. Brass hooks look nice but are softer and less strong. Plastic hooks are light but usually hold less weight. Aluminum is light and rust-resistant but not as strong as steel. Always check the hook’s weight capacity. Pick a hook that can carry more than your item weighs for safety.
Credit: www.theartofdoingstuff.com
Gathering Essential Tools
Before you start drilling a hook into the outside wall, gather the right tools. Proper tools make the job easier and safer. They also ensure the hook stays firmly in place. Here is a list of essential tools you need.
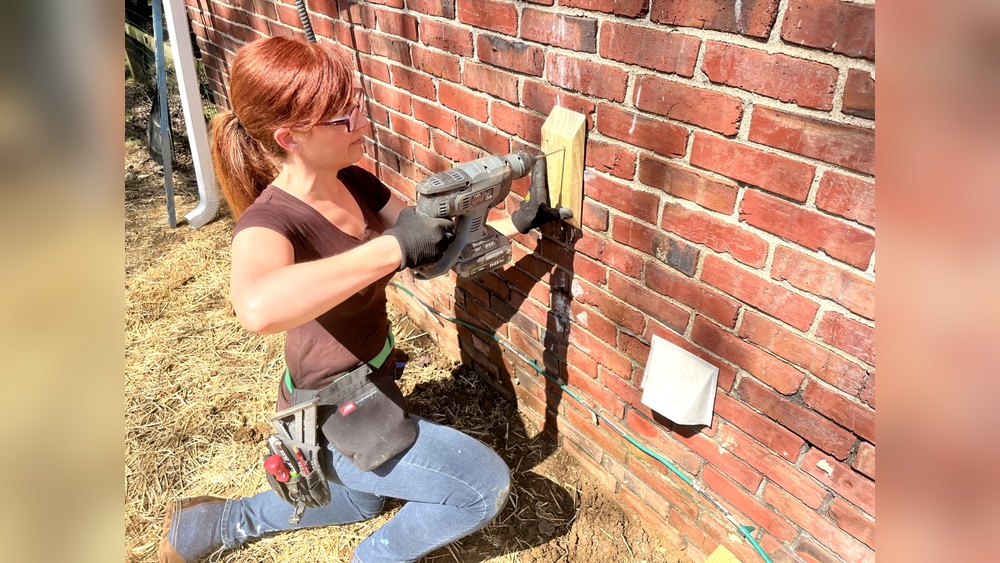
Drill And Drill Bits
Choose a drill that is easy to handle. Cordless drills offer more flexibility. Pick drill bits that match the size of your screws. Use masonry bits for brick or concrete walls. This helps create clean holes without damage.
Anchors And Screws
Use anchors to hold the hook securely. Anchors prevent screws from pulling out. Pick anchors based on wall type and hook weight. Match screws with anchors for a tight fit. This ensures your hook will hold strong.
Safety Gear
Protect yourself during drilling. Wear safety glasses to shield your eyes from dust. Use gloves to protect your hands. Ear protection helps if the drill is loud. Safety gear keeps you safe and comfortable.
Preparing The Wall Surface
Preparing the wall surface is key before drilling a hook outside. Proper preparation helps the hook hold firmly and avoids damage. It starts with cleaning the area to remove dirt and debris. Then, find the best spot by locating studs or solid surfaces. These steps make sure your hook stays secure and lasts long.
Cleaning The Area
Clean the wall surface using a cloth or brush. Remove dust, dirt, and loose paint. A clean surface helps the drill bit work better. It also prevents slipping while drilling. Use water and mild soap for stubborn dirt. Let the wall dry completely before drilling.
Locating Studs Or Solid Surfaces
Find studs or solid parts behind the wall for strong support. Use a stud finder or tap gently to listen for solid sounds. Avoid drilling into empty spaces or thin panels. Mark the stud location with a pencil. This step ensures the hook holds heavy items safely.

Credit: www.amazon.ae
Marking The Spot
Marking the spot is the first step to drill a hook on an outside wall. It helps place the hook exactly where you want it. A well-marked spot makes drilling easier and more accurate. This step saves time and avoids mistakes. Follow simple ways to mark the spot clearly and correctly.
Measuring And Leveling
Start by measuring the height where the hook will go. Use a tape measure for exact numbers. Check the spot is level with a spirit level. A level spot keeps the hook straight. Mark the place only after measuring and leveling. This ensures the hook looks neat and works well.
Using A Pencil Or Marker
Use a pencil or a fine marker to mark the spot. A pencil mark is easy to remove later. Make a small dot to guide the drill bit. Avoid large marks that can smudge or cause errors. Keep the mark clear and visible. This helps drill in the right place without guesswork.
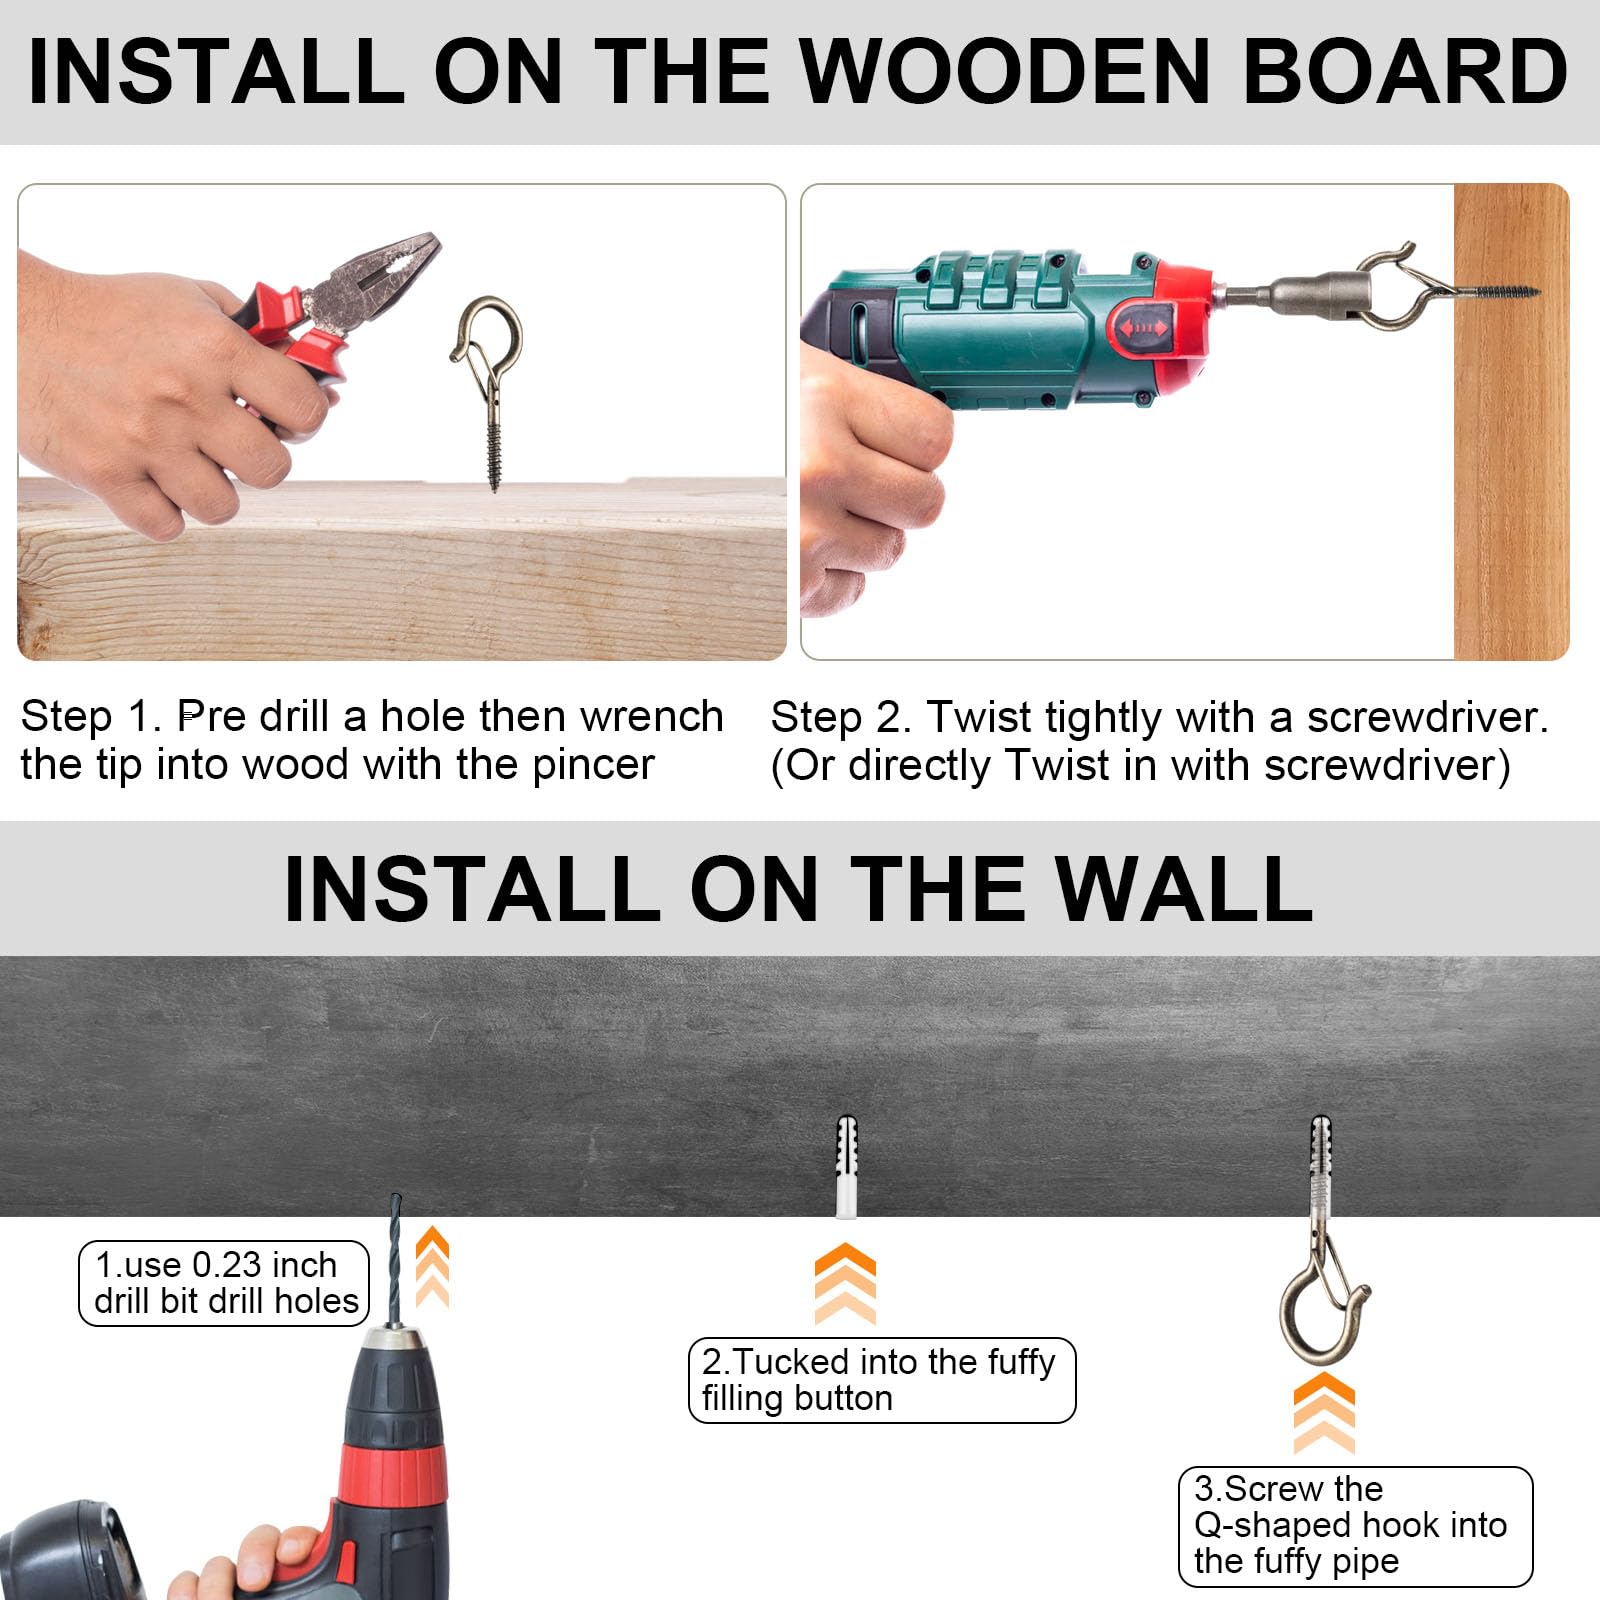
Drilling The Hole
Drilling a hole into the outside wall is the first step to hang a hook securely. It requires careful preparation and attention. A well-drilled hole ensures the hook will hold tight and last long. Take your time and follow simple steps for best results.
Selecting The Drill Bit Size
Choose a drill bit that matches the hook’s anchor size. Too small, and the hook won’t fit. Too large, and the hole will be loose. Check the package of your hook for recommended drill bit size. Use a masonry drill bit if drilling into brick or concrete. For wood or siding, a standard bit works well.
Drilling At The Correct Angle
Hold the drill straight and steady. Aim perpendicular to the wall surface for a clean, deep hole. Tilting the drill can cause the hole to be uneven or too shallow. A steady hand helps the drill bit bite into the wall properly. Mark the spot clearly before drilling to stay accurate.
Avoiding Common Mistakes
Don’t rush the drilling process. Drill slowly and steadily. Pressing too hard can damage the drill bit or wall. Avoid drilling too deep; it can weaken the wall or cause the anchor to slip. Always wear safety goggles to protect your eyes from dust. Check for wires or pipes behind the wall before starting.
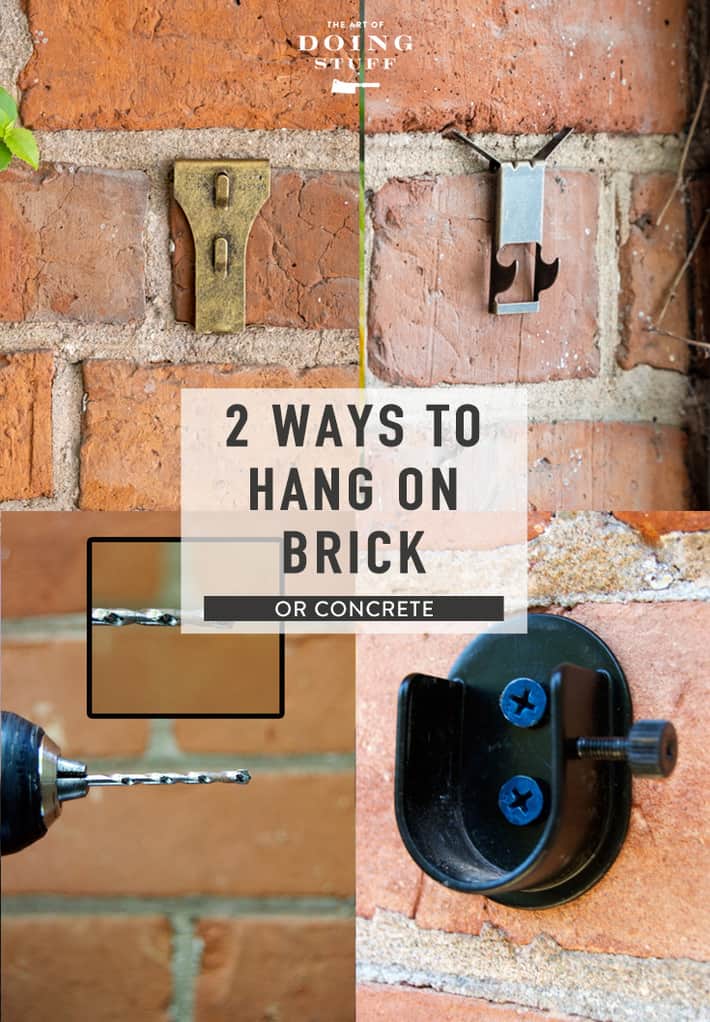
Installing Anchors And Hooks
Installing anchors and hooks on an outside wall is key for strong support. Anchors hold the weight safely. Hooks provide a place to hang items like plants or lights. Follow these steps for a secure fit that lasts.
Inserting Wall Anchors
Start by drilling a hole in the wall. The hole size should match the anchor size. Push the anchor gently into the hole. It should fit tightly without wobbling. Use a hammer to tap it in if needed. The anchor grips the wall to hold screws firmly.
Securing The Hook With Screws
Place the hook against the wall over the anchor. Insert the screw through the hook’s hole. Use a screwdriver to tighten the screw slowly. Stop when the hook feels solid and won’t move. Check the hook by pulling lightly to ensure it is secure.
Testing The Hook’s Stability
Testing the hook’s stability is key to ensure it holds firm on the outside wall. This step avoids accidents and damage. Taking time here makes your work safer and longer-lasting.
Applying Weight Gradually
Start by adding a small weight to the hook. Watch closely for any movement or slipping. Add more weight slowly to see how much it can hold. This method helps find the hook’s true strength without sudden strain.
Adjusting If Necessary
If the hook shifts or feels loose, stop adding weight. Tighten the hook or drill a deeper hole. Check the wall surface for cracks or weak spots. Make changes carefully to keep the hook secure and stable.
Maintaining Hooks On Exterior Walls
Maintaining hooks on exterior walls keeps them strong and safe. Hooks face sun, rain, and wind every day. These elements can weaken hooks and cause damage. Regular care helps hooks last longer and hold items securely.
Regular Inspection
Check hooks often for rust or looseness. Tighten screws if hooks feel wobbly. Look for cracks around the hook area. Replace hooks if they show signs of heavy wear. Early fixes prevent bigger problems later.
Protecting Against Weather Damage
Use weather-resistant hooks made of stainless steel or coated metal. Apply a clear sealant to wooden hooks for extra protection. Avoid hanging very heavy items on hooks exposed to rain. Cover hooks with plastic caps in winter to stop rust. Small steps protect hooks from harsh weather.
Credit: www.amazon.com
Frequently Asked Questions
How Do I Choose The Right Drill Bit For Outside Walls?
Select a masonry drill bit for brick, stone, or concrete walls. Use a standard bit for wooden siding. Ensure the bit matches the hook’s anchor size for a secure fit.
What Safety Gear Is Needed When Drilling Outside Walls?
Wear safety goggles to protect your eyes from debris. Use gloves for hand protection and a dust mask to avoid inhaling dust. Always ensure the area is clear of electrical wires before drilling.
How Deep Should I Drill For An Outdoor Wall Hook?
Drill a hole about 1 to 1. 5 inches deep, matching the length of the wall anchor. This depth ensures the hook stays firmly in place and supports the intended weight safely.
Can I Drill A Hook Into Any Outside Wall Material?
You can drill into brick, concrete, wood, and stucco. Avoid drilling into metal siding without proper bits and anchors. Always check the wall type before selecting tools and anchors.
Conclusion
Drilling a hook into an outside wall is simple with the right steps. Choose the correct drill bit and anchors for your wall type. Mark the spot clearly and drill carefully to avoid damage. Secure the hook tightly to hold your items safely.
Taking your time ensures a strong hold and lasting result. Now, you can hang decorations or tools outside with confidence. Try these tips for easy and safe hook installation every time.