Are you tired of fumbling for the light switch when you enter a room? Adding an extra light switch can make your space more convenient and comfortable.
Imagine controlling your lights from two different spots—no more walking across a dark room just to turn off the light. In this guide, you’ll learn exactly how to add an extra light switch quickly and safely, even if you’re not an expert.
Keep reading, and you’ll discover simple steps that will transform your home lighting in no time.

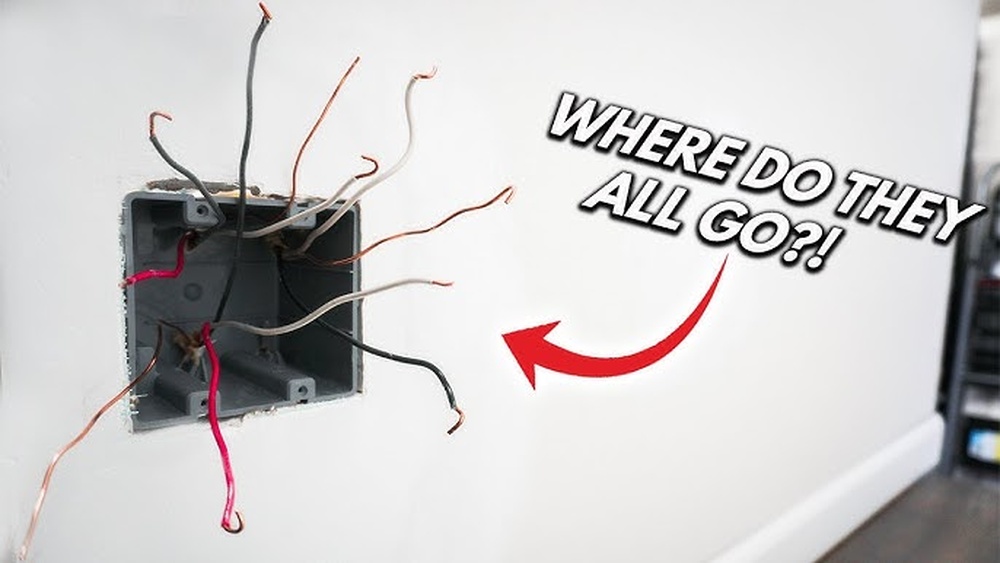
Credit: www.youtube.com
Tools And Materials Needed
Adding an extra light switch requires some basic tools and materials. Having the right items makes the job easier and safer. Prepare everything before starting to avoid interruptions.
Gather tools that help you cut wires, measure, and connect electrical parts. Also, collect materials like wires and switches that fit your home’s setup.
Essential Tools For The Job
Start with a screwdriver set for opening switch boxes. Wire strippers remove insulation from wires neatly. A voltage tester checks if wires carry electricity. Pliers help bend and twist wires safely. A tape measure ensures correct wire length.
Materials You Will Need
Use electrical wires matching your current wiring type. Get a new light switch that fits your wall box. Electrical tape secures wire connections. Wire nuts connect wires safely and prevent shorts. A switch box may be necessary if adding a new box.
Safety Gear To Protect Yourself
Wear insulated gloves to avoid electric shocks. Safety glasses protect your eyes from debris. Use a flashlight if working in dim areas. Always turn off power before starting any work.
Safety First
Safety comes first when adding an extra light switch. Electricity can be dangerous without care. Taking the right steps keeps you safe and protects your home. Follow simple rules to avoid accidents and damage.
Turn Off Power At The Circuit Breaker
Always cut power before starting any electrical work. Find the correct breaker and switch it off. Use a tester to make sure the power is off. Never trust a switch alone to stop electricity.
Use Proper Tools And Equipment
Select tools made for electrical jobs. Insulated screwdrivers and wire strippers reduce shock risk. Keep tools in good condition. Avoid using damaged or worn tools.
Wear Safety Gear
Wear gloves to protect your hands. Safety glasses shield your eyes from sparks or debris. Use rubber-soled shoes for better grip and insulation. Dress in clothes that cover your skin.
Check Local Electrical Codes
Follow your area’s electrical rules and standards. Codes ensure safe and proper wiring. Check if a permit or inspection is needed. This helps avoid problems later.
Know Your Limits
Do not try tasks beyond your skill level. Call a licensed electrician if unsure. Mistakes can cause fires or injury. Being careful protects you and your family.
Choosing The Right Switch
Choosing the right switch is the first step to add an extra light switch. The type of switch affects how your lights work. It also impacts safety and ease of use. Understanding the differences helps you make the best choice for your home.
Single-pole Vs. Three-way Switch
A single-pole switch controls one light from one location. It is the most common switch in homes. Easy to install and simple to use.
A three-way switch controls one light from two locations. Useful for hallways or large rooms with two entrances. Requires two three-way switches and extra wiring.
Choose single-pole for one control point. Pick three-way to control lights from two places.
Switch Ratings And Compatibility
Switch ratings show how much electricity the switch can handle. Check the voltage and amperage ratings on the switch label. Your home’s wiring should match these ratings for safety.
Make sure the switch matches your light fixture type. Some switches work better with LED or CFL bulbs. Using the right switch prevents flickering and extends bulb life.
Pick a switch with proper ratings and compatible with your lighting system.

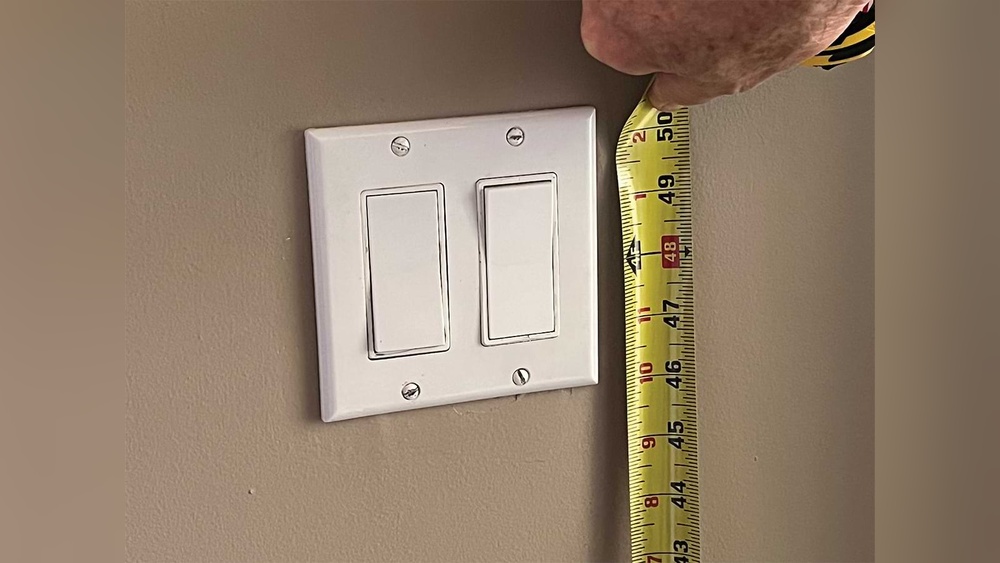
Credit: diy.stackexchange.com
Planning The Wiring Route
Planning the wiring route is a key step when adding an extra light switch. It ensures safety and proper function. Careful planning saves time and prevents costly mistakes. Follow a clear plan for wiring paths and switch placement.
Locating Existing Wiring
Start by finding the current wires connected to your light fixture or switch. Use a voltage tester to check if power is on. Turn off the main power before touching any wires. Trace the wires through walls or ceilings carefully. Note their paths and where they connect to switches or outlets.
Mapping The New Switch Location
Choose a spot for your new switch that is easy to reach. Measure the distance from the existing wiring to the new location. Plan a route for the wires that avoids pipes and studs. Mark the path on walls or ceilings for reference. This map guides you during installation and keeps wiring neat.
Turning Off Power
Turning off power is the first and most important step before adding an extra light switch. It keeps you safe from electric shocks. Never skip this step. Always make sure the power is completely off before you start working.
Electricity can be dangerous. Even a small mistake can cause injury. So, take this part seriously. Safety is more important than speed.
Locate The Circuit Breaker
Find your home’s circuit breaker panel. It is usually in the basement, garage, or utility room. The panel has switches that control electricity to different parts of your home.
Look for the breaker that controls the light switch you want to work on. It might be labeled. If not, you will need to test which breaker turns off the correct power.
Turn Off The Correct Breaker
Flip the breaker switch to the off position. This cuts the electricity to the area where you will add the switch. Make sure the switch stays firmly in the off position.
Do not rely on just the light switch to turn off power. The breaker must be off to work safely.
Test The Power Is Off
Use a voltage tester or a multimeter to check if the power is off. Touch the tester to the wires in the switch box. The tester should show no voltage.
Double-checking prevents accidents. If the tester shows power, turn off the breaker again and test once more.
Removing The Existing Switch
Removing the existing switch is the first step to add an extra light switch. This task requires care and attention to safety. You need to prepare your tools and switch off the power before starting. Working with electricity can be dangerous. Follow each step slowly and carefully.
Turn Off The Power
Locate the circuit breaker for the switch you want to remove. Switch it off to cut the electricity supply. Use a voltage tester to check if the power is off. Never start without confirming the power is off.
Remove The Switch Plate
Use a screwdriver to take out the screws holding the switch plate. Gently pull the plate away from the wall. Keep the screws safe for later use. This step reveals the switch and wiring behind it.
Unscrew The Existing Switch
Loosen the screws on the sides of the switch. Pull the switch out carefully from the electrical box. Avoid pulling on the wires directly to prevent damage. The switch should come out easily once screws are loose.
Note Wire Positions
Look closely at how wires connect to the switch. Take a photo or make notes of wire positions and colors. This helps when installing the new switch. Knowing wire placement prevents wiring mistakes and keeps things safe.
Disconnect The Wires
Use a screwdriver to loosen the terminal screws holding the wires. Carefully remove the wires from the switch. Keep the wires separate to avoid mixing them up. Your switch is now ready for replacement or additional wiring.
Running New Wires
Running new wires is a key step in adding an extra light switch. It involves careful planning and safe handling. You must know where the wires go and how to pass them through walls. Proper wiring ensures your new switch works well and stays safe.
Fishing Wires Through Walls
Fishing wires through walls needs patience and the right tools. Use a fish tape or wire puller to guide the wire inside the wall. Cut a small hole near the switch box and the light fixture. Push the fish tape from one hole to the other. Attach the wire to the tape and pull it back slowly. Take care not to damage the wire or wall. Check for obstacles like insulation or studs while pulling.
Securing And Connecting Wires
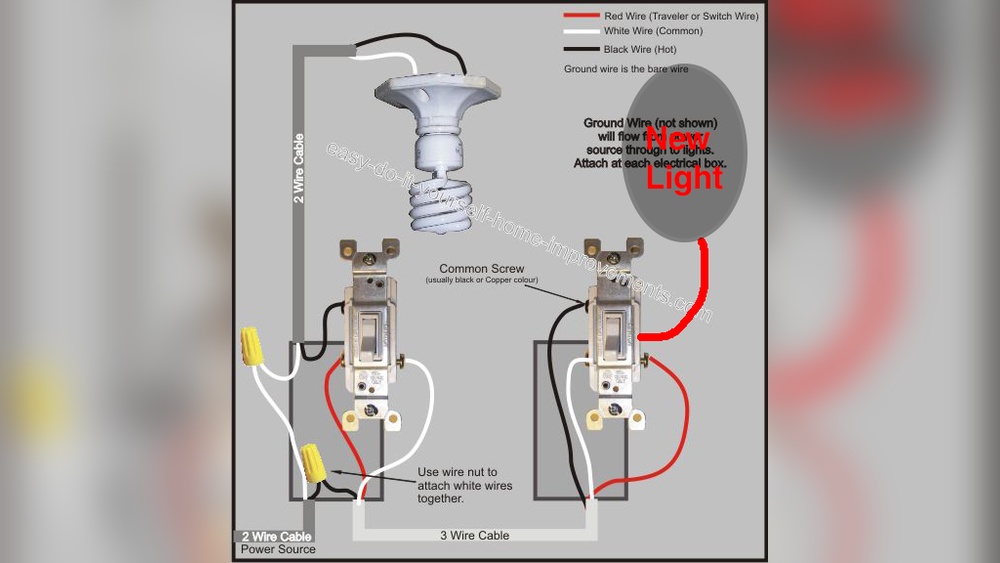
After fishing the wire, secure it inside the wall using wire staples. Make sure the wire is tight but not pinched. Strip the wire ends carefully to expose the copper. Connect the wires to the switch and light fixture terminals. Match the color codes: black (hot), white (neutral), and green or bare (ground). Tighten the screws to hold wires firmly. Test the switch to ensure it controls the light properly.
Installing The Extra Switch
Installing an extra light switch can improve your home’s lighting control. It allows you to turn lights on or off from another spot. This is useful for long hallways or big rooms. Follow these steps carefully for a safe and effective installation.
Wiring The New Switch
First, turn off the power at the circuit breaker. Safety is the top priority. Use a voltage tester to confirm no electricity flows to the wires. Next, connect the wires to the new switch. Attach the black (hot) wire to the switch’s brass screw. Connect the white (neutral) wires together with a wire nut. Attach the ground wire to the green screw on the switch. Make sure all connections are tight and secure. Use electrical tape around screws for extra safety.
Mounting The Switch Box
Choose a spot on the wall that is easy to reach. Use a stud finder to avoid drilling into studs or pipes. Cut an opening in the drywall that fits the new switch box. Insert the box and secure it with screws. Pull the wires through the box before fixing it completely. Check that the box sits flush with the wall surface. Finally, screw the switch into the box and attach the cover plate. Turn the power back on and test the new switch.
Testing The Setup
Testing the setup is a vital step after adding an extra light switch. It ensures the switch works safely and correctly. Skipping this step can cause electrical issues or safety hazards.
Careful testing helps you confirm that wires connect properly. It also shows if the switch controls the light as planned. Follow each test step closely for best results.
Checking The Power Supply
Turn the main power back on. Use a voltage tester to check if power reaches the new switch. No power means wiring needs a second look. Ensure the tester works on a known live circuit first.
Testing The Switch Operation
Flip the new switch on and off slowly. The light should turn on and off accordingly. If the light does not respond, wiring may be incorrect. Double-check connections and try again.
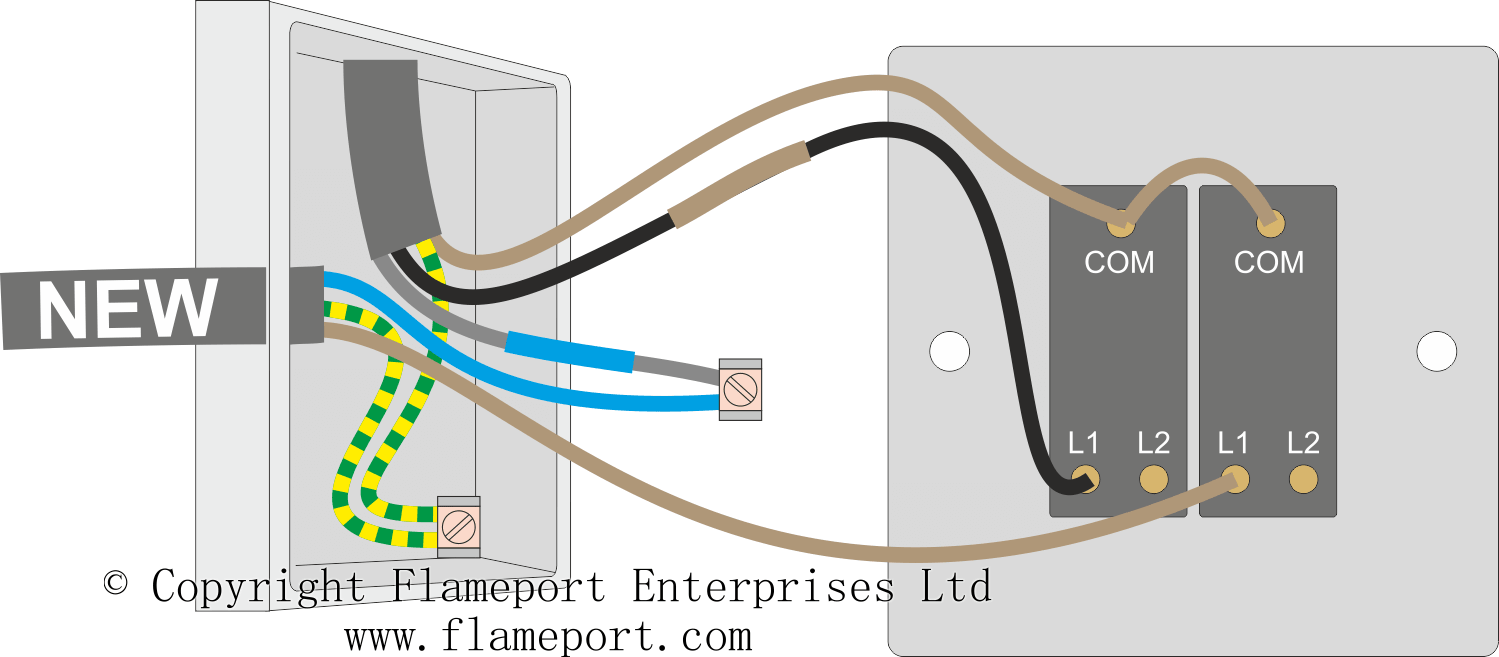
Verifying Both Switches Work Together
If the new switch is part of a two-switch setup, test both. Turn one switch on and off. Then operate the other switch. The light should respond to both switches independently.
Inspecting For Safety Issues
Look for sparks, buzzing, or unusual smells near the switch. These signs indicate wiring problems or short circuits. Turn off power immediately if any appear. Fix issues before finalizing the setup.
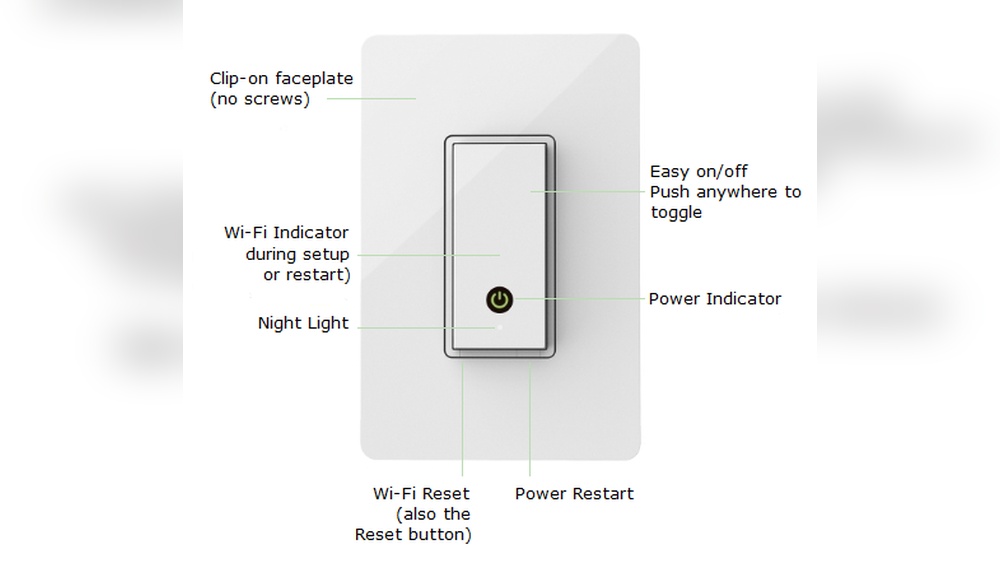
Credit: flameport.com
Troubleshooting Common Issues
Adding an extra light switch can sometimes cause problems. These issues are common and easy to fix. Knowing what to check helps you solve them fast. This section covers the most frequent problems and how to handle them.
Switch Not Working
Check if the power is off before starting. A loose wire can stop the switch from working. Tighten all wire connections in the switch box. Make sure the switch is the right type for your setup. Test the switch with a voltage tester to see if power flows through it.
Flickering Lights
Flickering usually means a bad connection. Look for loose wires or a poor connection in the switch or light fixture. Replace old or damaged bulbs with new ones. Sometimes, a dimmer switch causes flicker; try a standard switch instead. Tighten the wire connections to stop flickering.
Circuit Breaker Trips
A breaker trips when there is too much current. This can happen if wires touch or if there is a short circuit. Check for exposed wires or damaged insulation in the switch box. Make sure the switch and wires match the circuit’s power rating. If the breaker trips again, call an electrician for safety.
Frequently Asked Questions
How Do I Add An Extra Light Switch Safely?
Turn off power at the breaker before starting. Use a voltage tester to confirm no power. Follow wiring codes and connect wires properly. If unsure, consult a licensed electrician for safety and compliance.
What Tools Are Needed To Install An Extra Light Switch?
You will need a voltage tester, wire stripper, screwdriver, electrical tape, and a new light switch. Additionally, use wire nuts and a drill if mounting a new box. Proper tools ensure a safe and efficient installation.
Can I Add A Light Switch To An Existing Circuit?
Yes, you can add a switch to an existing circuit if it has enough capacity. Ensure the circuit is not overloaded. Use proper wiring methods and check local electrical codes for compliance.
How Do I Identify Wires For The New Switch?
Turn off power and remove the existing switch cover. Identify the live (hot), neutral, and ground wires using a tester. Label wires if necessary to avoid confusion during installation. Proper identification ensures safe wiring connections.
Conclusion
Adding an extra light switch can brighten your space and add convenience. Follow the steps carefully to stay safe and avoid mistakes. Use the right tools and double-check your work before finishing. You can control lights from different spots easily.
This simple upgrade improves your home’s function and comfort. Take your time and enjoy the benefits of better lighting control.