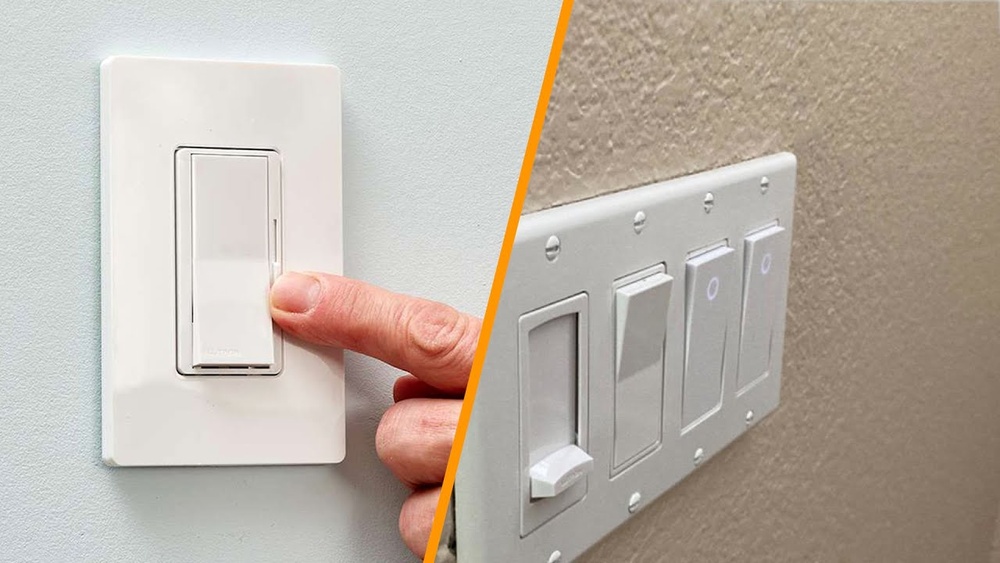
Are you tired of that old, flickering light switch in your home? Changing your light switch might seem tricky, but it’s easier than you think—and it can make a big difference in how your room feels.
Imagine flipping a switch that works smoothly every time or upgrading to a stylish design that matches your décor. In this guide, you’ll discover simple steps to replace your light switch safely and quickly. By the end, you’ll have the confidence to tackle this small project on your own and brighten up your space the way you want.
Let’s get started!

Credit: www.reddit.com
Tools And Materials Needed
Changing a light switch is a simple task with the right tools and materials. Preparing everything before you start makes the job easier and safer.
Gathering the correct items helps avoid delays and frustration. Here is a list of what you need to complete the job smoothly.
Essential Tools For Changing A Light Switch
First, a screwdriver is necessary. Most light switches use a flathead or a Phillips head screwdriver.
A voltage tester is important to check if the power is off. It keeps you safe from electric shocks.
Wire strippers help remove insulation from the wires. This tool makes connecting wires easier.
Materials Needed For The Job
You will need a new light switch that matches your old one. Choose the correct type for your home’s wiring.
Electrical tape is useful to cover exposed wires after connections. It adds an extra layer of safety.
Wire nuts or connectors secure wire connections. They keep wires tightly joined and prevent shorts.
Safety Gear To Use
Wear insulated gloves to protect your hands. They reduce the risk of electric shock.
Use safety glasses to guard your eyes. Dust or small wire pieces can cause injury.
Safety Precautions
Changing a light switch is a simple task but safety must come first. Electricity can be dangerous. Taking the right precautions protects you from shocks and injuries. Follow these safety steps carefully before starting any work.
Turn Off The Power
Switch off the power at the circuit breaker. Do not rely only on the wall switch. Test the switch with a voltage tester to confirm no electricity flows. This step is crucial to avoid electric shock.
Use Insulated Tools
Use tools with insulated handles to reduce shock risk. Regular tools can conduct electricity. Insulated tools keep you safe while working on wires and screws.
Wear Safety Gear
Wear rubber-soled shoes and avoid wet areas. Use safety goggles to protect your eyes from sparks or debris. These simple items add an extra layer of protection.
Work In A Well-lit Area
Good lighting helps you see clearly. It reduces mistakes and accidents. Use a flashlight or portable lamp if needed.
Double-check Your Work
Before restoring power, review all connections. Loose wires can cause shorts or fires. Make sure every screw is tight and wires are secure.
Turning Off The Power
Turning off the power is the first step before changing a light switch. It keeps you safe from electric shock. Never start work without cutting off electricity to the switch.
Electricity can cause serious injury. Always treat wires as if they are live. Safety is the top priority in any electrical task.
Locate The Circuit Breaker Panel
Find your home’s circuit breaker panel. It is usually in the basement, garage, or utility room. The panel holds switches that control power in different areas.
Turn Off The Correct Circuit Breaker
Identify the breaker for the light switch you want to change. Flip the switch to the OFF position. This stops electricity flow to the switch.
Double Check The Power Is Off
Use a voltage tester or a simple light bulb tester. Check the light switch to ensure no power runs through it. This step confirms your safety.

Credit: www.dummies.com
Removing The Old Switch
Removing the old light switch is the first step in changing it. This process helps you safely take out the switch before putting a new one in. It requires care and attention to avoid any electrical issues.
Start by making sure the power is off. Safety is the top priority in this task. Once the power is off, you can remove the faceplate and disconnect the wires from the switch. These steps prepare the switch for replacement.
Unscrewing The Faceplate
Locate the screws on the faceplate covering the switch. Use a screwdriver to turn the screws counterclockwise. Keep the screws safe; you will need them later. Gently pull the faceplate away from the wall. Do not force it to avoid damage.
Disconnecting The Wires
Look at the wires attached to the old switch. Use a screwdriver to loosen the screws holding the wires. Carefully pull the wires free from the switch. Remember their positions or take a photo for reference. This will help when connecting the new switch.
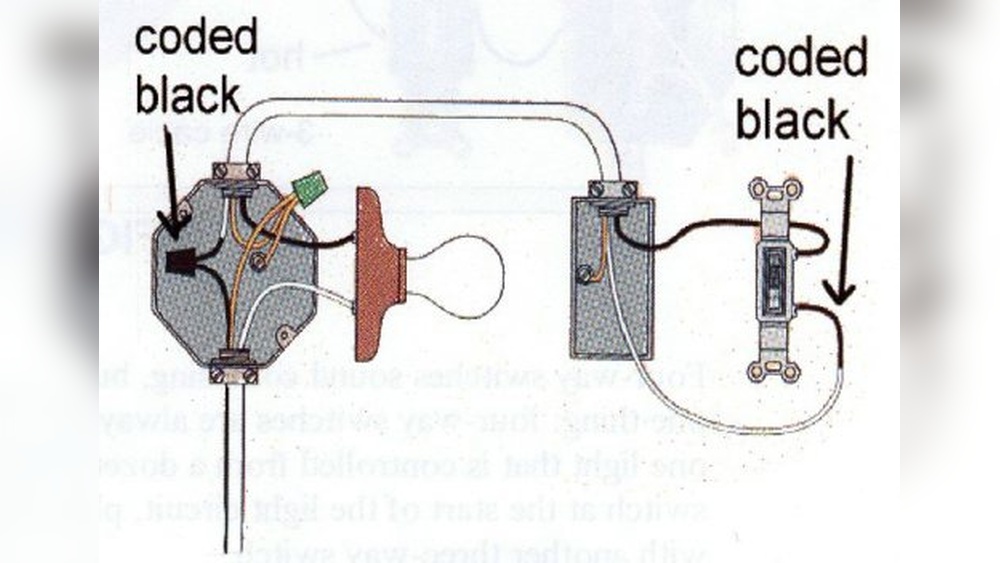
Identifying Wire Types
Wiring the new switch is the key step after removing the old one. This part ensures your switch works correctly and safely. Take your time to connect the wires properly. Double-check every connection before moving forward. Safety is important, so keep the power off while working.
Connecting Wires To Terminals
Identify the wires by color and function. Usually, black or red wires are live, white is neutral, and green or bare is ground. Attach each wire to its matching terminal on the switch. Tighten the screws firmly to avoid loose connections. Loose wires can cause sparks or switch failure. Use needle-nose pliers to bend wire ends around screws if needed.
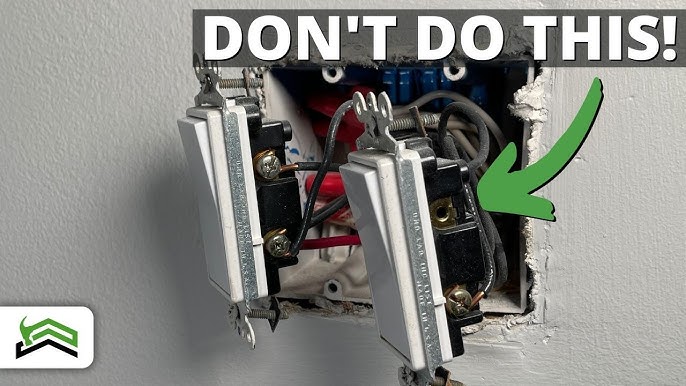
Securing The Switch In The Box
After wiring, gently push the switch back into the electrical box. Make sure wires do not get pinched or tangled. Align the switch with the screw holes in the box. Use a screwdriver to fasten the mounting screws. The switch should sit flush with the wall surface. Tighten the screws evenly to keep the switch stable and secure.
Credit: www.youtube.com
Wiring The New Switch
Testing the new switch is an important step after installation. It ensures the switch works safely and correctly. This process helps avoid electrical problems and confirms the light responds as expected.
Turn The Power Back On
First, turn the power back on at the circuit breaker. This restores electricity to the switch. Make sure the breaker is fully on to avoid power issues.
Check The Switch Operation
Flip the switch up and down several times. The light should turn on and off without flickering. If the light stays off, double-check the wiring or power source.
Test For Loose Connections
Gently wiggle the switch and wires. The light should not flicker or go out. Loose wires can cause sparks or damage. Tighten connections if needed before continuing.
Use A Voltage Tester
Use a voltage tester to verify power at the switch terminals. This tool confirms electricity flows properly. No voltage means a wiring mistake or breaker issue.
Ensure Safety Precautions
Always keep your hands dry and avoid touching metal parts. Use insulated tools if adjustments are necessary. Safety prevents shocks and keeps the work area safe.
Testing The New Switch
Upgrading to smart switches is a great way to modernize your home lighting. These switches let you control lights with your phone or voice. You can set schedules and save energy easily. Smart switches add convenience and improve home security. They fit well in almost any room.
Compatibility Considerations
Check if your home wiring supports smart switches. Most require a neutral wire for power. Older homes might lack this wire, needing extra work. Confirm your Wi-Fi strength near the switch location. Some smart switches only work on 2.4 GHz networks. Match the switch type to your light fixture. Some smart switches control only bulbs, others control fans too.
Installation Tips
Turn off the power before starting the installation. Use a voltage tester to confirm the power is off. Remove the old switch carefully. Connect the wires to the smart switch as per instructions. Secure the switch inside the wall box. Attach the faceplate and turn the power back on. Test the switch with the app or voice command. Follow setup steps to connect it to your home network.
Frequently Asked Questions
How Do I Safely Turn Off Power To Change A Light Switch?
Always switch off the circuit breaker connected to the light switch. Use a voltage tester to confirm power is off before starting work. This ensures safety and prevents electrical shocks during the switch replacement process.
What Tools Are Needed To Change A Light Switch?
You need a screwdriver, voltage tester, wire stripper, and new light switch. These tools help you safely remove the old switch and install the new one correctly. Having the right tools ensures a smooth and safe replacement.
Can I Replace A Light Switch Without Electrical Knowledge?
Basic electrical knowledge is helpful but not mandatory. Follow safety steps carefully, such as turning off power and testing wires. If unsure, it’s best to hire a professional electrician to avoid risks.
How Do I Identify Wires In A Light Switch Box?
Typically, black or red wires are hot, white is neutral, and green or bare is ground. Use a voltage tester to confirm. Proper identification is crucial for correct and safe light switch installation.
Conclusion
Changing a light switch can be simple with the right steps. Always turn off the power first for safety. Take your time to remove the old switch carefully. Connect the wires to the new switch correctly. Test the switch before putting the cover back.
This small task can save money and improve your home. With practice, you will feel more confident handling basic electrical jobs. Remember, safety is the most important part of the process. Now, you know how to change your light switch easily.