Are you tired of guessing when to turn your wall heater on or off? Imagine having full control over your room’s temperature right at your fingertips.
Connecting a thermostat to your wall heater can make this possible—giving you comfort, convenience, and even energy savings. If you’ve ever wondered how to hook up a thermostat to your wall heater but felt overwhelmed by the technical details, this guide is made just for you.
Keep reading, and you’ll discover simple, step-by-step instructions that anyone can follow to get your heater working smarter, not harder. Your cozy, perfectly heated space is just a few easy steps away.
Tools And Materials Needed
Connecting a thermostat to a wall heater needs some basic tools and materials. Having the right items makes the job safer and faster. This list helps prepare everything before starting the work.
Thermostat Unit
The main device to control the heater’s temperature. Choose a thermostat that fits your wall heater model. Digital or analog types both work well.
Screwdrivers
Use both flathead and Phillips screwdrivers. These help remove the heater’s cover and mount the thermostat securely.
Wire Strippers
Strip the insulation from wires cleanly. This tool prevents damage to the wires and ensures good connections.
Voltage Tester
Check if the power is off before handling wires. A voltage tester keeps you safe from electric shocks.
Electrical Tape
Insulate wire connections to avoid shorts or loose contacts. Good tape ensures long-lasting safety.
Wire Nuts
Connect wires firmly without soldering. Wire nuts hold wires together and protect connections.
Mounting Screws And Anchors
Attach the thermostat to the wall firmly. Use screws and anchors suited for your wall type.
Drill (optional)
Make holes for mounting screws if the wall is hard. A drill speeds up the installation process.

Credit: www.reddit.com
Safety Precautions
Safety is the top priority when hooking up a thermostat to a wall heater. This task involves electricity and heat sources. Taking the right safety steps protects you and your home. Follow these precautions closely to avoid accidents and damage.
Always switch off the main power before starting the installation. Use a circuit breaker or fuse box to cut the electricity. Double-check with a voltage tester to ensure no current flows. This prevents electric shocks and injuries.
Use Proper Tools And Equipment
Select tools designed for electrical work. Insulated screwdrivers and wire strippers are best. Avoid using damaged or makeshift tools. Proper equipment ensures safe and efficient installation.
Follow Manufacturer Instructions
Read the thermostat and heater manuals carefully. Each model has specific wiring and setup steps. Stick to the instructions to avoid mistakes. This keeps the system working safely and correctly.
Check For Wiring Compatibility
Match the thermostat wires with the heater terminals. Using wrong wires can cause short circuits or fires. Identify wires by color and labels. When unsure, consult an electrician for help.
Secure Connections Firmly
Loose wires can spark or cause the heater to malfunction. Tighten all connections firmly but avoid over-tightening. Inspect each joint to ensure stability. This reduces risks of electrical faults.
Avoid Water Exposure
Keep all electrical parts dry during installation. Water can cause short circuits and damage devices. Work in a dry area and wipe hands before handling wires. Protect the heater and thermostat from moisture.
Test The System Safely
After installation, restore power carefully. Watch the heater and thermostat for unusual sounds or smells. If something seems wrong, turn off power immediately. Check all connections again or get professional help.
Identify Wall Heater Wiring
Identifying the wiring of a wall heater is the first step to connect a thermostat safely. It helps to know which wires control power and heat. This knowledge prevents mistakes and keeps the installation smooth.
Wall heaters often have different wiring setups depending on the model. Some use two wires, others have three or more. Understanding these wires makes it easier to match them with the thermostat connections.
Locate The Power Wires
Power wires supply electricity to the heater. Usually, these are black or red. Use a voltage tester to confirm the live wires. Turn off the main power before checking wires to avoid shocks.
Find The Heater Wires
Heater wires connect directly to the heating element. They often appear as thick wires. These wires carry current to the heater when the thermostat signals heat. Mark them for easy identification.
Identify The Ground Wire
The ground wire offers safety by preventing electric shocks. It is usually green or bare copper. Make sure the ground wire is secure and connected properly. Do not skip this step.
Check For Neutral Wire
Some wall heaters have a neutral wire. It completes the electrical circuit. Neutral wires are usually white. Confirm its presence before proceeding with the thermostat hookup.
Choose The Right Thermostat
Choosing the right thermostat is key to controlling your wall heater efficiently. The thermostat controls the temperature and helps save energy. Picking the correct model means comfort and cost savings.
Thermostats come in many types. Each works differently with wall heaters. Understanding these types helps you pick the best one for your needs.
Mechanical Vs Digital Thermostats
Mechanical thermostats use a dial or lever to set the temperature. They are simple and easy to use. Digital thermostats show the temperature on a screen. They allow precise control and better settings.
Compatibility With Wall Heaters
Not all thermostats work with every wall heater. Check the heater’s power and voltage requirements. Match these with the thermostat’s specifications. This ensures safe and proper operation.
Programmable Thermostats For Energy Savings
Programmable thermostats let you set schedules for heating. They turn the heater on and off automatically. This saves energy and lowers bills. Ideal for people who are away during the day.
Smart Thermostats For Modern Control
Smart thermostats connect to Wi-Fi and apps. You can control your heater from anywhere. They learn your habits and adjust settings. These offer comfort and convenience.
Turn Off Power Supply
Turning off the power supply is the first and most important step before connecting a thermostat to a wall heater. This step keeps you safe from electric shock. It also protects the heater and thermostat from damage caused by sudden power surges.
Always treat electrical work with care. Even a small mistake can cause injury or fire. Make sure you stop the electric current before starting any wiring work.
Locate The Main Circuit Breaker
Find the main circuit breaker panel in your home. This panel controls power to all rooms. Look for the breaker labeled for the wall heater or the room it is in. If unsure, turn off the main breaker to cut power to the entire house.
Switch Off The Correct Breaker
Flip the breaker switch to the OFF position. This stops power flow to the heater and thermostat wires. Double-check that the switch stays firmly in the off position. Loose switches can still allow electricity through.
Use A Voltage Tester
Test the wires with a voltage tester to confirm power is off. Touch the tester to the heater wires. If the tester does not light up or beep, the power is safely off. Never skip this step even after turning off the breaker.

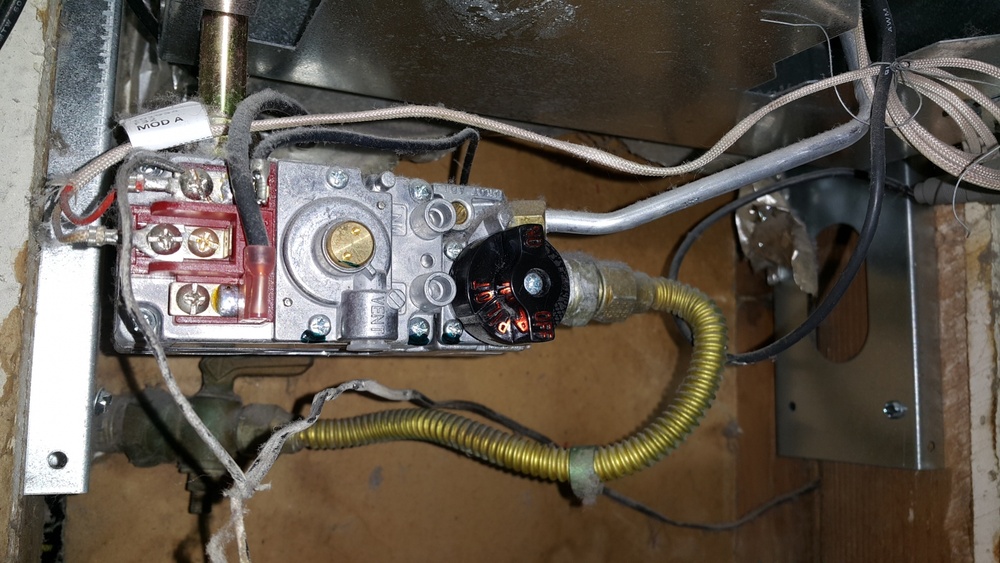
Credit: diy.stackexchange.com
Remove Existing Thermostat
Removing the existing thermostat is the first step to connect a new thermostat to your wall heater. This process clears the old setup and prepares the space for the new device. Proper removal also ensures safety and avoids damage to the wiring and wall.
Turn off the power to the heater at the circuit breaker. This stops any electricity flow and keeps you safe during removal. Never skip this step.
Locate The Thermostat
Find the thermostat on your wall. It usually sits near the heater or in a central room area. Check for screws or clips holding the thermostat cover.
Remove The Thermostat Cover
Gently pull or unscrew the cover. Some covers snap off, others need a screwdriver. Take care not to break the plastic or glass parts.
Disconnect The Wires
Note the wire colors and their connection points. Use a camera or draw a diagram. Unscrew the wire terminals carefully to free the wires.
Take Out The Old Thermostat
Remove the screws holding the thermostat base to the wall. Pull the base off gently. Keep the wires accessible for the new thermostat.
Connect Thermostat Wires
Connecting thermostat wires to a wall heater is a key step. It ensures your heater responds correctly to temperature changes. Proper wiring avoids damage and keeps your home comfortable. Follow clear steps to connect wires safely and correctly.
Turn Off Power Before Wiring
Safety comes first. Switch off power to the heater and thermostat. Use a circuit breaker or fuse box. Double-check power is off with a voltage tester. No power means no risk of shock.
Identify Thermostat Wire Colors
Thermostat wires come in different colors. Usually, red is power, white controls heat, and green handles the fan. Check your heater’s manual for exact wire colors. Correct identification prevents wiring mistakes.
Connect Wires To Thermostat Terminals
Match wires to thermostat terminals by color and function. Tighten screws to hold wires firmly. Loose wires cause poor connection and heater failure. Use needle-nose pliers for better grip if needed.
Secure Wire Connections And Cover
After wiring, tuck wires neatly into the wall box. Avoid pinching or bending wires too much. Attach the thermostat cover plate. This protects wires and keeps the setup clean.
Mount Thermostat To Wall
Mounting the thermostat on the wall is a key step for accurate temperature control. The thermostat needs to be placed where it can sense the room temperature well. Choose a spot away from direct sunlight, drafts, or heat sources. This helps the thermostat read the room temperature correctly and keep the heater running efficiently.
Follow simple steps to fix the thermostat securely and safely. Proper mounting ensures easy access and clear visibility for daily use.
Choose The Right Location
Select a wall space about 5 feet from the floor. Avoid placing the thermostat near windows or doors. Keep it away from kitchens and vents. These areas can give false temperature readings. A central wall in the main room is often best.
Mark And Drill Holes
Use the thermostat base as a template on the wall. Mark the screw holes with a pencil. Check that the base is level before drilling. Drill holes carefully to avoid wall damage. Use wall anchors if needed for a strong hold.
Attach The Thermostat Base
Align the base with the drilled holes. Insert screws and tighten them firmly. Make sure the base is flat and secure. Avoid over-tightening to prevent cracks. The base should not wobble or move.
Connect Wiring And Mount Thermostat
Follow the wiring instructions for your thermostat model. Connect wires to the correct terminals on the base. After wiring, snap the thermostat onto the base. Test the thermostat to confirm proper installation. Adjust settings as needed for comfort.
Restore Power And Test
Restoring power and testing your thermostat and wall heater is the final step in the installation process. This step confirms that your connections are correct and the system works safely. Careful testing prevents damage and ensures comfort.
Turn the power back on at the circuit breaker. Watch for any signs of electrical issues like sparks or unusual noises. If everything looks normal, proceed to test the thermostat functions.
Turn On The Circuit Breaker
Find the breaker that controls your heater. Flip it to the “On” position. This restores electricity to the wall heater and thermostat. Check that the thermostat display powers up. No display means a wiring or power issue.
Set The Thermostat Temperature
Adjust the thermostat to a higher temperature than the room. This triggers the heater to turn on. Listen for the heater starting. Feel the heater surface warming up after a few minutes. This confirms the heater responds to the thermostat.
Check For Proper Heater Operation
Watch the heater for at least 5 minutes. It should maintain heat steadily. No heat or intermittent heating signals a problem. Turn the thermostat down to stop the heater. The heater should turn off immediately.
Test Safety Features
Some heaters have built-in safety switches. Test these by simulating a fault if possible. The heater should shut down quickly during a fault. This protects your home and ensures safe use.

Credit: forums.wyze.com
Troubleshooting Common Issues
Troubleshooting common issues helps keep your thermostat and wall heater working well. Problems can stop heat from reaching your room. Fixing these quickly saves time and money. This guide covers easy steps to find and solve typical problems.
Simple checks often fix the issue. No need for special tools or skills. Just follow these steps carefully to get your heater running smoothly again.
Checking Power Supply And Connections
Start by making sure the heater and thermostat have power. Look for tripped breakers or blown fuses. Check all wires for loose or damaged spots. Tighten connections to ensure good contact. Without power, the thermostat cannot control the heater.
Verifying Thermostat Settings
Confirm the thermostat is set to heat mode. Adjust the temperature higher than the room temperature. Sometimes, the thermostat is off or in cool mode. Incorrect settings stop the heater from turning on. Resetting settings can solve this issue fast.
Inspecting Heater Components
Look at the wall heater’s parts for visible damage. Check the heating element for breaks or burns. Clean dust or debris from vents and fans. Blocked airflow reduces heating efficiency. Replace damaged parts to restore proper function.
Testing Thermostat Compatibility
Ensure the thermostat matches your wall heater’s type and voltage. Using the wrong thermostat can cause poor control or no heat. Review the product manuals for compatibility details. Correct pairing avoids many common problems.
Resetting The System
Turn off power to the heater and thermostat. Wait a few minutes before switching power back on. This reset can clear minor faults and glitches. Many issues resolve after a simple restart.
Frequently Asked Questions
How Do I Connect A Thermostat To A Wall Heater?
To connect a thermostat to a wall heater, turn off power first. Then, wire the thermostat to the heater’s control terminals following the manufacturer’s guide. Finally, restore power and test the setup to ensure proper operation and temperature control.
What Tools Are Needed To Hook Up A Thermostat?
You need a screwdriver, wire stripper, voltage tester, and electrical tape. These tools help safely connect and secure thermostat wires to the wall heater. Always follow safety guidelines and the thermostat’s installation instructions for best results.
Can Any Thermostat Work With A Wall Heater?
Not all thermostats work with wall heaters. Use thermostats designed for electric or baseboard heaters. Check compatibility with voltage and wiring types. Using the right thermostat ensures accurate temperature control and safe operation.
Is It Safe To Install A Thermostat On A Wall Heater Myself?
Yes, if you follow safety steps. Turn off power before starting. Use correct tools and wiring practices. If unsure, consult a professional electrician to avoid hazards or damage to the heater and thermostat.
Conclusion
Hooking up a thermostat to a wall heater is easier than it seems. Follow each step carefully and take safety first. A properly connected thermostat helps control your heater’s temperature well. This saves energy and keeps your room cozy. Check all wires and connections before turning the power back on.
Test the system to ensure it works smoothly. With patience and care, anyone can do this task. Enjoy a warm home with better control and comfort.