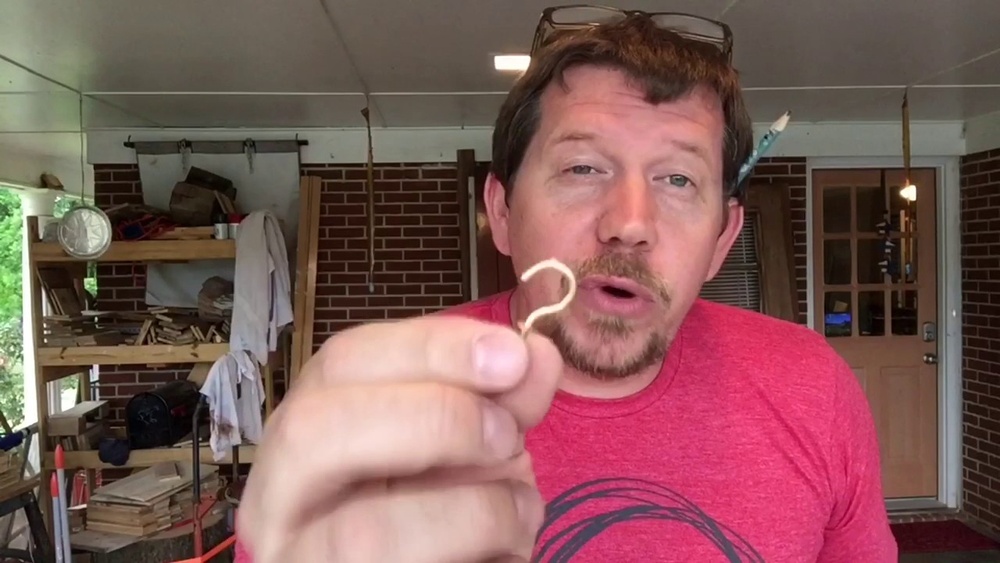
Are you looking for a simple way to hang your favorite cups or decorations without damaging your walls? Learning how to put cup hooks into your wall can be a game-changer.
It’s quick, easy, and doesn’t require expensive tools or professional help. In this guide, you’ll discover step-by-step instructions that make the process smooth and stress-free. By the end, you’ll have the confidence to add those perfect finishing touches to your space.
Keep reading—you’re just a few steps away from transforming your wall!
Choosing The Right Cup Hooks
Choosing the right cup hooks is important for a strong and safe hold. Different hooks fit different needs. Picking the correct type, size, and material helps avoid damage to your wall. It also keeps your items secure. This guide explains what to consider before buying cup hooks.
Types Of Cup Hooks
Cup hooks come in many shapes and designs. Some have a sharp point for wood walls. Others have a blunt tip for drywall or plaster. Some hooks are open-ended, while others form a closed loop. Choose a type that fits your wall and the object you want to hang.
Materials And Sizes
Cup hooks are made from metals like steel, brass, or zinc. Steel is strong and good for heavy items. Brass looks nice and resists rust. Zinc is lightweight and affordable. Sizes vary from small hooks for light items to large ones for heavy loads. Match the size to your hanging needs.
Weight Capacity Considerations
Each cup hook has a weight limit. Using a hook that can’t hold your item may cause it to fall. Check the weight of the object before choosing a hook. Use heavier-duty hooks for heavier items. Safety depends on matching the hook’s capacity to the load.
Credit: www.homedepot.com
Preparing The Wall
Preparing the wall is the first step before putting cup hooks. It helps ensure the hooks stay secure and the wall stays undamaged. Taking time to prepare saves effort later. Follow simple steps to get the wall ready.
Selecting The Location
Choose a spot that fits your needs. Think about what you want to hang. Make sure the area has enough space. Avoid places where hooks might get in the way. Check that the location looks good and is easy to reach.
Checking Wall Material
Know what type of wall you have. Walls can be drywall, plaster, wood, or brick. Each needs a different method for hooks. Drywall may need anchors for extra hold. Wood walls allow direct screwing. Plaster and brick require special drill bits. This step protects your wall and the hook.
Marking The Spot
Use a pencil to mark where the hook will go. Mark the exact point for better accuracy. Double-check the position before drilling or screwing. This helps avoid mistakes and holes in wrong spots. Keep marks light so they erase easily later.
Tools You Need
Putting cup hooks into the wall is simple with the right tools. Using proper tools saves time and effort. It also helps keep the wall safe from damage. Below is a list of tools to prepare before starting your project.
Essential Tools
- Cup Hooks: Choose the right size for your needs.
- Drill or Screwdriver: A drill makes the job faster. A screwdriver works well for small hooks.
- Drill Bit: Use a bit slightly smaller than the hook’s screw part.
- Measuring Tape: Measure the spot carefully for accurate placement.
- Pencil: Mark the spots on the wall before drilling or screwing.
Optional Accessories
- Wall Anchors: Needed for drywall or weak walls to hold hooks firmly.
- Stud Finder: Helps find wooden studs behind the wall for stronger support.
- Level: Ensures hooks are straight and aligned perfectly.
- Safety Glasses: Protect your eyes from dust and debris while drilling.
- Gloves: Protect your hands during installation.
Step-by-step Installation
Installing cup hooks into a wall is a simple task anyone can do. Follow these clear steps to ensure a secure fit. Taking your time with each step helps prevent damage to your wall and keeps the hooks strong.
Drilling A Pilot Hole
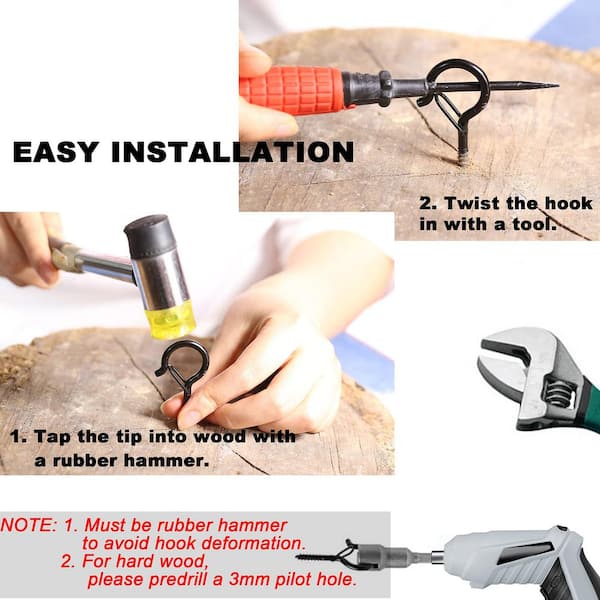
Start by marking the spot for the cup hook on the wall. Use a small drill bit to make a pilot hole. This hole guides the hook and stops the wall from cracking. Drill slowly and carefully to avoid making the hole too big.
Inserting The Cup Hook
Take the cup hook and place its pointed end into the pilot hole. Turn the hook clockwise using your fingers. Keep twisting until the hook feels tight. If it becomes hard to turn, stop to avoid breaking the hook or wall.
Securing And Adjusting
Once the hook is fully inserted, check its angle. Adjust it so the hook faces the right way. Make sure it is firm and does not wobble. This ensures your items will hang safely and securely on the hook.
Tips For Different Wall Types
Different walls need different care when putting cup hooks in. Knowing the wall type helps you avoid damage. It also makes the hook hold better. Below are tips for common wall types.
Drywall Walls
Drywall is soft and easy to drill into. Use a small drill bit to make a pilot hole. This helps the hook go in straight. Turn the cup hook slowly by hand. Avoid using too much force to stop breaking the drywall.
For heavier items, use a wall anchor. It spreads the weight and stops the drywall from cracking. Always check the hook is tight but not too tight.
Plaster Walls
Plaster walls are harder and can crack easily. Start by drilling a small hole with a masonry bit. Make the hole a little smaller than the hook’s thread. Screw the hook in carefully by hand.
Do not force the hook if it feels stuck. Use a plastic anchor for better support. This prevents the plaster from crumbling around the hook.
Concrete And Brick Walls
Concrete and brick are very hard surfaces. Use a hammer drill with a masonry bit to make a hole. The hole must match the size of a wall plug. Insert the wall plug before screwing in the cup hook.
This method gives strong support for heavy items. Avoid twisting the hook too fast to protect the wall plug. Check that the hook stays firm before hanging anything.
Troubleshooting Common Issues
Putting cup hooks into a wall can sometimes cause problems. These issues are common and easy to fix. Knowing how to handle them saves time and prevents damage.
Loose Hooks
Loose hooks happen when the hole is too big or the hook is not tight. Try twisting the hook in the opposite direction to remove it. Then, use a wooden toothpick or matchstick to fill the hole. Break it off inside and screw the hook back in. This gives the hook a firmer grip.
Damaged Walls
Walls can get damaged if the hook is forced or the wall is weak. Small holes can be fixed with wall putty or spackle. Let it dry and sand smooth before adding a new hook. For bigger damage, use a wall anchor or choose a stronger spot on the wall.
Hook Alignment Problems
Hooks must be straight and well placed. Use a level or a ruler to mark the spot before screwing. If a hook is crooked, remove it gently and try again. Correct alignment helps balance weight and keeps items from falling.
Maintaining Your Cup Hooks
Keeping your cup hooks in good shape helps them last longer and stay strong. Proper care prevents damage to the hooks and the wall. It also keeps your items safe and secure.
Regular Checks
Look at your cup hooks often. Check if they are loose or bent. Tighten hooks that feel wobbly. Replace hooks that show signs of rust or cracks. Early fixes stop bigger problems later.
Cleaning And Care
Clean your cup hooks with a soft cloth. Remove dust and dirt that build up over time. Use mild soap and water for tough spots. Dry hooks well to avoid rust. Keep hooks dry in humid places. This care keeps hooks looking good and working well.
Credit: www.amazon.com
Credit: www.hunker.com
Frequently Asked Questions
How Do I Install Cup Hooks Into Drywall?
Start by marking the spot where you want the hook. Drill a small pilot hole to guide the screw. Insert the cup hook by twisting it clockwise until tight. For heavier items, use wall anchors for extra support.
What Tools Are Needed To Put Cup Hooks In Walls?
You need a pencil for marking, a drill for pilot holes, and a screwdriver or your hand to twist the cup hook. A wall anchor may be necessary for heavier items, requiring a drill and anchor tool.
Can Cup Hooks Hold Heavy Items On Walls?
Cup hooks can hold moderate weights if installed correctly. For heavy items, use wall anchors or anchors designed for drywall. Always check the hook and wall strength before hanging heavy objects to prevent damage.
How To Prevent Wall Damage When Installing Cup Hooks?
Drill a small pilot hole before inserting the cup hook. Use wall anchors if needed to distribute weight evenly. Avoid overtightening the hook to prevent cracking or damaging the wall surface.
Conclusion
Putting cup hooks into a wall is simple and quick. Choose the right spot and mark it carefully. Use a small drill or screwdriver to start the hole. Then, twist the cup hook in by hand until it feels secure.
Avoid forcing it too hard to prevent damage. With these easy steps, you can hang items safely and neatly. Now, your wall looks organized and useful. Try it yourself and see how easy this small task can be!


