Are you looking for a simple way to add charm and greenery to your walls? Making your own wall planter hooks at home is easier than you think.
Not only will you save money, but you’ll also get the satisfaction of creating something unique for your space. Imagine your favorite plants hanging beautifully, brightening up any room or outdoor area. In this guide, you’ll discover step-by-step instructions that anyone can follow, even if you’ve never crafted before.
Ready to transform your walls and bring life into your home? Let’s get started!
Materials Needed
Gathering the right materials is the first step to making wall planter hooks at home. Using proper supplies ensures your hooks hold plants safely. This section covers what you need to start your project.
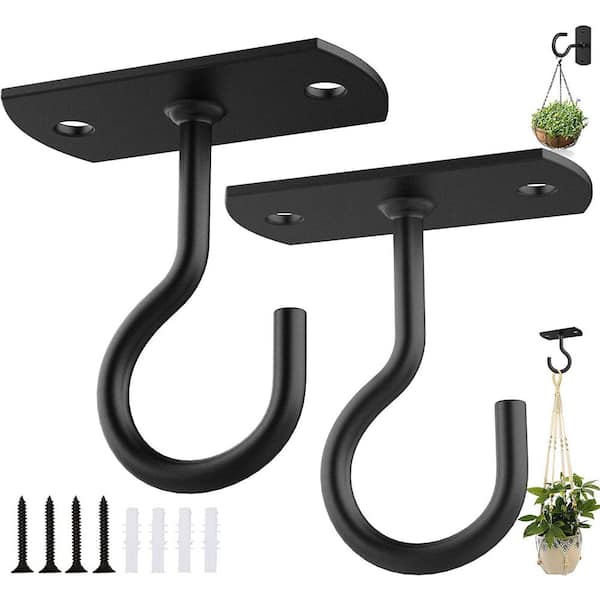
Types Of Hooks
Choose hooks based on the weight of your plants and wall type. Common types include screw hooks, S-hooks, and cup hooks. Screw hooks are strong and easy to install. S-hooks offer flexibility for hanging different items. Cup hooks provide a secure grip for pots with handles.
Tools Required
Prepare basic tools for making wall planter hooks. You will need a drill for making holes. A screwdriver helps secure screws tightly. A measuring tape ensures accurate spacing and alignment. Sandpaper smooths rough edges for safety. A pencil marks drilling spots on the wall or wood.
Choosing The Right Wood Or Metal
Select wood or metal that supports your plant’s weight well. Cedar and pine are good wood options; they resist moisture. For metal, steel or aluminum works best. Steel is strong but heavier. Aluminum is lighter and rust-resistant. Pick materials that match your wall and outdoor or indoor use.
Credit: www.homedepot.com
Preparing Your Workspace
Preparing your workspace is the first step to making wall planter hooks at home. A clean and well-organized area helps you work faster and safer. It also keeps your tools in reach and your materials ready. Taking time to prepare can save frustration and improve your results.
Safety Precautions
Safety is very important when working with tools. Wear gloves to protect your hands from sharp edges. Use safety glasses to shield your eyes from dust and small particles. Work in a well-ventilated place to avoid breathing in fumes. Keep children and pets away from your workspace. Always check that your tools are in good condition before use.
Organizing Tools And Materials
Gather all the tools and materials you need before you start. Arrange them neatly on a table or bench. Common tools include a drill, screws, hooks, a screwdriver, and a measuring tape. Keep small parts in containers to avoid losing them. Organize by size or type to find items quickly. This order helps you focus on the project without interruptions.
Step-by-step Hook Making
Making wall planter hooks at home is simple and fun. Follow these clear steps to create hooks that fit your style and needs. You only need a few tools and materials to get started. Let’s break down the process into easy parts.
Measuring And Cutting
Start by measuring the metal or wood piece for your hook. Decide the length based on the weight of your planter. Mark the cutting points with a pencil for accuracy. Use a saw or metal cutter to cut the piece carefully. Always wear safety glasses to protect your eyes.
Shaping The Hooks
Bend the cut piece into a hook shape. Use pliers or a bending tool for metal hooks. For wood, gently carve and shape with a file or sandpaper. Make sure the hook curves enough to hold the planter securely. Check the size and adjust the curve if needed.
Sanding And Smoothing
Smooth all rough edges with sandpaper. Focus on the parts that will hold the planter. This prevents scratches and improves the hook’s look. Use fine-grit sandpaper for a clean finish. Wipe away dust with a cloth before painting or sealing.

Credit: www.walmart.com
Finishing Touches
Finishing touches make your wall planter hooks look great and last longer. These steps protect the wood and improve the overall appearance. A smooth, finished look adds charm to your home garden. Take your time with these final details for the best results.
Painting Or Staining
Choose paint or stain based on your style and the wood type. Paint offers bright colors and covers imperfections well. Stain highlights the natural wood grain and gives a warm look. Apply thin, even coats to avoid drips and uneven spots. Let each coat dry fully before adding another. This ensures a smooth, attractive finish.
Sealing For Durability
Sealing protects your hooks from water and sun damage. Use a clear sealant like polyurethane or varnish for strong protection. Apply sealant with a clean brush, covering all surfaces evenly. Seal both the front and back to prevent moisture damage. Allow sealant to dry completely before hanging planters. This step keeps your hooks looking good for years.
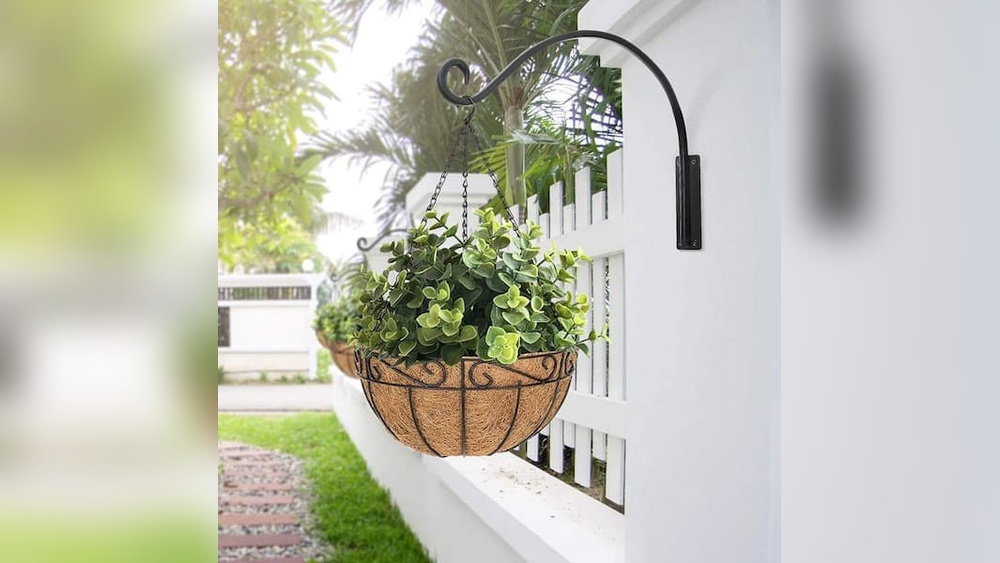
Installing Wall Planter Hooks
Installing wall planter hooks is a simple way to display your plants beautifully. It also saves floor space and brightens any room. Proper installation ensures your plants stay safe and secure on the wall.
Follow these steps carefully to install your hooks correctly. Choose the best wall, use the right mounting techniques, and test the hook’s strength. This helps avoid damage and keeps your plants healthy.
Choosing The Right Wall
Select a wall that can hold the weight of your planter. Drywall may need anchors or studs for support. Avoid walls with wiring or pipes behind. A solid wall like wood or brick works best.
Mounting Techniques
Use a drill to make a small hole for the hook. If mounting on drywall, insert a wall anchor first. Screw the hook into the anchor or directly into the stud. Make sure the hook is tight and secure.
Weight Testing
After mounting, gently hang your planter on the hook. Test the hook by adding a little extra weight slowly. Watch for any movement or signs of looseness. Tighten or adjust the hook if needed for safety.
Credit: www.sporthacking.com
Creative Design Ideas
Creative design ideas make wall planter hooks more than just functional items. They bring style and personality to your space. Simple changes can turn plain hooks into eye-catching accents. These ideas help blend your hooks with your home decor. You can create hooks that reflect your taste and the room’s vibe.
Using Natural Elements
Natural materials add warmth and charm to planter hooks. Use wood, bamboo, or stone for a rustic look. Twine or jute ropes work well for hanging hooks. Small branches or driftwood create unique bases. These elements bring nature indoors and match green plants perfectly.
Personalizing Hooks
Personal touches make hooks special and unique. Paint hooks in your favorite colors or patterns. Add initials or small designs with stencils. Use decorative knobs or beads for extra detail. Personalizing hooks lets you express your style simply.
Combining Multiple Hooks
Group several hooks for a functional and stylish display. Arrange hooks in rows or creative shapes on the wall. Mix different sizes and styles for an interesting look. Multiple hooks hold various plants and save space. This setup adds depth and character to your wall.
Troubleshooting Common Issues
Troubleshooting common issues helps keep your wall planter hooks safe and sturdy. Small problems can stop your planters from hanging properly. Fixing these issues early saves time and effort later. Here are simple tips to solve frequent problems with wall planter hooks.
Hooks Not Holding Weight
Hooks may fail if the wall or hook is weak. Use strong hooks made for heavy items. Check the wall type and use the right anchors. Avoid using small nails for heavy planters. Spread the weight by using multiple hooks if needed. Test the hook by gently pulling before hanging plants.
Wall Damage Prevention
Prevent wall damage by choosing the right drill and anchors. Use a stud finder to locate strong spots in the wall. Avoid drilling in plaster without anchors. Cover screw heads with caps to stop rust or marks. Fill holes with putty if you remove hooks later. Use hooks with a smooth finish to protect paint.
Fixing Uneven Hooks
Uneven hooks cause plants to tilt or fall. Measure carefully before drilling holes. Use a level tool to keep hooks straight. Mark the spots with a pencil for accuracy. Adjust hooks by loosening screws and repositioning. Replace bent hooks to keep planters balanced and neat.
Frequently Asked Questions
How Do I Make Wall Planter Hooks At Home?
To make wall planter hooks, use sturdy wire or metal strips. Bend them into hook shapes, drill holes for mounting, and secure with screws. Ensure hooks are strong enough to hold your planter’s weight safely and securely.
What Materials Are Best For Diy Wall Planter Hooks?
Strong metals like steel or aluminum work best for durability. You can also use thick wire or repurpose old coat hangers. Avoid weak materials that might bend or break under the planter’s weight.
Can I Install Wall Planter Hooks Without Drilling?
Yes, use heavy-duty adhesive hooks or wall-safe mounting strips. These work well for lightweight planters. However, for heavier plants, drilling provides the best stability and safety.
How Much Weight Can Homemade Wall Planter Hooks Hold?
Weight capacity depends on materials and mounting method. Metal hooks secured with screws can hold 10-20 pounds or more. Always test the hook’s strength before hanging heavy plants to avoid accidents.
Conclusion
Making wall planter hooks at home is simple and fun. You only need a few tools and materials. These hooks help save space and show off your plants nicely. Try different designs to match your style. Creating them yourself gives a personal touch to your home.
Plus, it costs less than buying ready-made hooks. Enjoy the process and watch your plants hang beautifully on the walls. Start your project today and add charm to any room.