Are you ready to hang shelves, pictures, or decorations but don’t have a drill handy? You might think putting up wall anchors without a drill is impossible, but it’s easier than you imagine.
In this post, you’ll discover simple, effective ways to secure wall anchors using tools you already have. Say goodbye to frustration and hello to quick, sturdy results that keep your walls safe and your items secure. Keep reading—you’re just a few easy steps away from mastering this skill without any special equipment.
Types Of Wall Anchors
Wall anchors help hold screws in walls securely. Different types of anchors suit various wall materials and weights. Choosing the right anchor ensures strong support without a drill.
Here are common types of wall anchors you can use without a drill.
Plastic Expansion Anchors
Plastic expansion anchors are simple and affordable. They fit into small holes made by a nail or screwdriver. When a screw goes in, the anchor expands. This creates a tight grip in drywall or plaster. These anchors work well for light items like picture frames.
Self-drilling Anchors
Self-drilling anchors look like screws with hollow centers. You twist them directly into drywall without pre-drilling. Their sharp threads cut into the wall easily. These anchors hold medium-weight objects securely. They save time and effort on small projects.
Toggle Bolts
Toggle bolts have spring-loaded wings that open behind the wall. You push the bolt through a hole, then the wings spread inside. This creates a strong hold on hollow walls or ceilings. Toggle bolts support heavy items like shelves or mirrors. They need a larger hole but no drill is needed if you use a nail or awl.
Molly Bolts
Molly bolts have metal sleeves that expand inside the wall. You insert the bolt into a small hole first. As you tighten the screw, the sleeve opens wide behind the wall. This creates a firm anchor for medium to heavy loads. Molly bolts work well for drywall and plaster walls.
Tools Needed Without A Drill
Putting a wall anchor in without a drill requires a few basic tools. These tools help you make a hole and secure the anchor firmly. You do not need complex or expensive equipment. Simple hand tools will do the job well.
Using the right tools makes the process easier and safer. Prepare them before starting. This way, you avoid interruptions and mistakes.
Screwdriver Options
A screwdriver helps turn screws by hand. Choose a flathead or Phillips screwdriver depending on the screw type. It gives you control to insert the anchor carefully. A screwdriver also tightens screws without power tools.
Hammer And Nail
A hammer and a nail create the first hole in the wall. Use a small nail to make a pilot hole. Tap gently to avoid damaging the wall. This hole guides the anchor and prevents cracking.
Awl Or Nail Punch
An awl or nail punch helps start the hole precisely. It makes a small dent in the wall surface. This tool keeps the anchor steady when you insert it. It works well with hard or drywall surfaces.
Measuring Tape And Pencil
Measuring tape and pencil mark the exact spot for the anchor. Measure twice to avoid mistakes. Mark the point clearly but lightly. These tools ensure your anchor goes in the right place.
Preparing The Wall Surface
Preparing the wall surface is the first important step to put a wall anchor in without a drill. A clean and well-marked wall ensures the anchor fits securely. Taking time here saves effort later. Follow these simple steps to get your wall ready for the anchor.
Marking The Spot
Start by deciding where the anchor will go. Use a pencil to mark the exact spot. This helps avoid mistakes and keeps the anchor in place. Double-check the position before moving forward.
Checking For Studs
Studs are wooden beams behind the wall. Anchors work differently with studs. Use a stud finder or tap the wall gently. A solid sound means a stud is nearby. Avoid these areas if your anchor needs drywall.
Clearing Dust And Debris
Clean the wall surface around the marked spot. Use a dry cloth or brush to remove dust and debris. A clean surface allows the anchor to hold better. This step also prevents slipping or weak fixing.
Credit: www.youtube.com
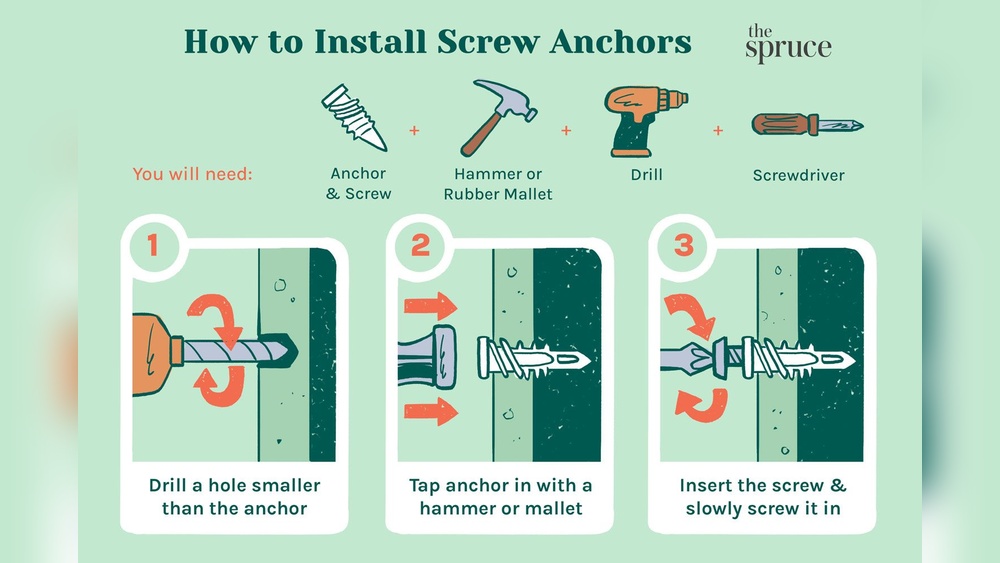
Inserting Plastic Expansion Anchors
Inserting plastic expansion anchors without a drill is simple and useful. These anchors help hold screws firmly in walls. They expand inside the wall, creating a strong grip. This method works well for drywall or plaster walls.
Follow easy steps to insert anchors safely and securely. You only need a few basic tools. No power tools required.
Creating A Pilot Hole Manually
First, mark the spot on the wall. Use a nail or a small screwdriver to make a hole. Press it firmly and twist to create space. Keep going until the hole is deep enough for the anchor. Make sure the hole is just the right size. Too big will make the anchor loose. Too small will make it hard to insert.
Tapping The Anchor With A Hammer
Place the plastic anchor into the hole carefully. Use a hammer to tap it gently. Tap until the anchor is flush with the wall. Do not hit too hard to avoid damage. The anchor should fit snugly and feel steady.
Securing The Screw
Insert the screw into the anchor slowly. Turn it by hand or use a screwdriver. Tighten the screw until it feels secure. Avoid over-tightening to prevent breaking the anchor. The screw will now hold firmly in place, ready for your project.
Using Self-drilling Anchors
Using self-drilling anchors is a smart way to hang items without a drill. These anchors have sharp tips that cut into the wall. They save time and effort for quick fixes. You only need a screwdriver or even just your hands to set them in place.
Aligning The Anchor
Hold the anchor against the wall where you want it. Make sure it is straight and flat. Proper alignment helps the anchor grip the wall better. Mark the spot lightly if needed for accuracy.
Screwing In By Hand
Start turning the anchor slowly with your fingers. Push gently while twisting to help it dig into the wall. Keep turning until the anchor feels tight. Avoid forcing it too hard to prevent damage.
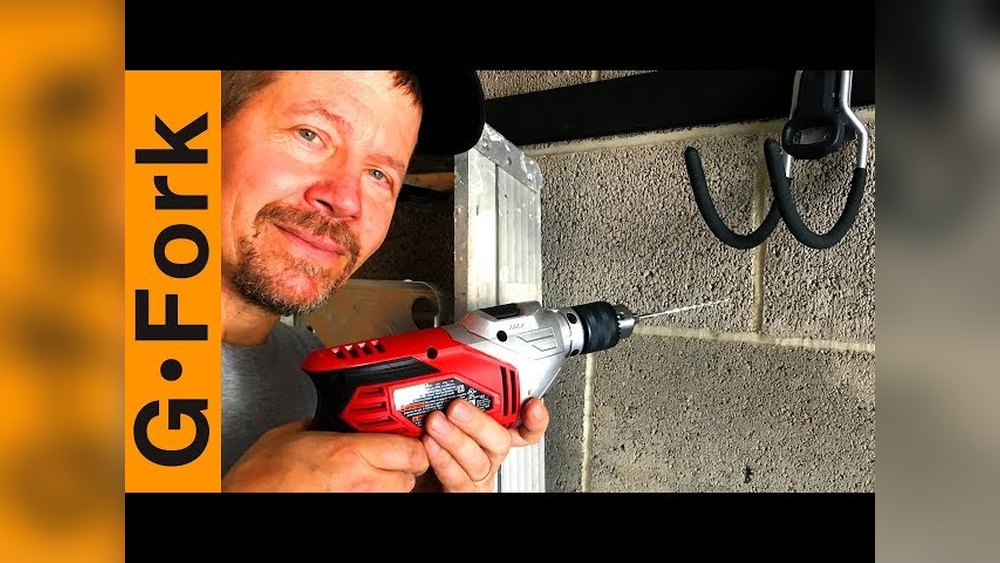
Ensuring Firm Grip
Check if the anchor is secure by giving it a slight pull. It should not move or wiggle. If loose, turn it a little more or adjust the position. A firm grip means your item will stay safe on the wall.

Credit: www.reddit.com
Installing Toggle Bolts Without A Drill
Installing toggle bolts without a drill is possible and effective. It helps when you don’t have power tools nearby. You only need a few simple tools and some patience. This method works well for hanging items on drywall or hollow walls.
Follow these easy steps to install toggle bolts without a drill. You will learn how to make a small hole, insert the toggle, and tighten the bolt securely.
Making A Small Hole Manually
Start by marking the spot on the wall. Use a sharp nail or an awl to pierce the drywall. Twist the nail gently while pushing to create a small hole. Make sure the hole is just big enough for the closed toggle to fit through. Avoid making the hole too large; this can weaken the hold.
Inserting The Toggle Bolt
Thread the bolt through the object you want to hang. Then screw the toggle wings onto the bolt, keeping them folded. Push the toggle wings through the hole in the wall. Once inside the hollow space, the wings will open up. Pull back gently to ensure the wings catch behind the wall.
Tightening The Bolt
Hold the object steady with one hand. Use a screwdriver to turn the bolt clockwise slowly. Tighten until the object feels secure against the wall. Be careful not to overtighten, which can damage the drywall. Check the firmness by gently pulling the object forward.
Placing Molly Bolts
Placing molly bolts without a drill is possible with simple tools and care. Molly bolts are strong wall anchors that hold heavy items securely. They work well in drywall and hollow walls. Follow these steps to place them correctly and safely.
Prepping The Hole
Start by marking the spot on the wall. Use a sharp nail or screwdriver to make a small hole. Push the nail or screwdriver gently through the wall. Wiggle it to create space for the molly bolt. Make sure the hole is big enough for the bolt sleeve.
Inserting The Molly Bolt
Take the molly bolt and push it into the hole. Use your fingers or a hammer to tap it gently. Make sure the bolt goes straight into the wall. Stop when the flange is flush with the wall surface. Do not force it too hard to avoid damage.
Expanding The Anchor
Use a screwdriver to turn the bolt inside the molly. Turn it clockwise to expand the anchor inside the wall. The metal legs will spread and lock behind the drywall. Tighten until the anchor feels firm and secure. Do not overtighten to prevent wall damage.
Tips For Secure Installation
Installing a wall anchor without a drill requires care and the right approach. Secure installation keeps your items safe and prevents wall damage. Follow these simple tips for a strong and lasting hold.
Avoiding Wall Damage
Start by marking the spot clearly. Use a nail or small screwdriver to make a pilot hole. This helps guide the anchor and reduces wall cracks. Push the anchor gently but firmly. Avoid forcing it, as this can break the wall surface.
Choosing The Right Anchor Size
Select an anchor size that matches your wall thickness. Bigger anchors hold more weight but need more space. Small anchors fit better in thin walls but support lighter items. Check the packaging for weight limits to pick the best size.
Testing Anchor Strength
After installing, give the anchor a gentle tug. This test shows if it’s secure. Hang a light object first to check stability. Increase weight gradually to avoid surprises. Secure anchors hold tight and keep your wall safe.
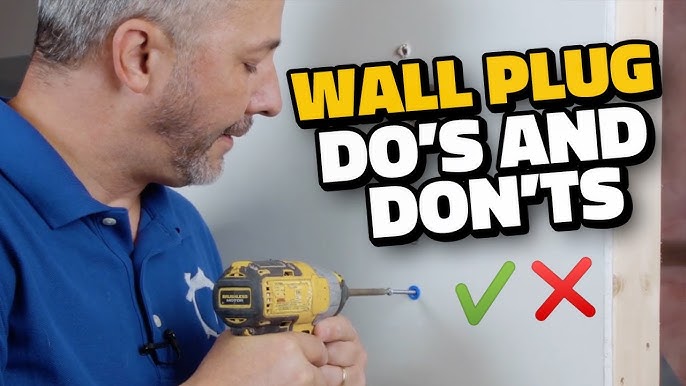
Common Mistakes To Avoid
Installing wall anchors without a drill can be simple. Avoiding common mistakes makes the process smoother. These errors can cause damage or weak support. Focus on these key points to improve your results.
Over-tightening Screws
Turning screws too tight can damage the wall anchor. The anchor might crack or lose grip inside the wall. Tighten screws just enough to hold the item firmly. Stop when you feel resistance to avoid breakage.
Ignoring Wall Material
Different walls need different anchors. Drywall, plaster, and brick all behave differently. Using the wrong method can cause anchors to fail. Check your wall type before starting the job. This step ensures better support and safety.
Using Incorrect Anchors
Choosing the wrong anchor size or type weakens the hold. Small anchors can fall out under heavy weight. Large anchors may not fit properly without drilling. Match the anchor to the screw and wall for best results.

Credit: www.youtube.com
Frequently Asked Questions
How Do I Insert A Wall Anchor Without A Drill?
You can insert a wall anchor without a drill by using a hammer to tap it into a pre-marked spot. First, mark the hole, then gently tap the anchor until flush with the wall. This method works well for lightweight anchors and drywall.
Can I Use A Screwdriver Instead Of A Drill?
Yes, a screwdriver can replace a drill for wall anchors if you create a pilot hole first. Use a nail or awl to make a small hole, then screw the anchor in manually. This is ideal for softer materials like drywall.
What Tools Are Needed To Install Anchors Without Drilling?
You need a hammer, a nail or awl, and a screwdriver to install anchors without drilling. The nail or awl helps make a pilot hole, the hammer inserts the anchor, and the screwdriver tightens it securely.
Are Wall Anchors Secure Without Drilling Holes?
Wall anchors can be secure without drilling if installed properly. Using a pilot hole and tapping the anchor in ensures a tight fit. However, heavier items may require drilled holes for maximum strength.
Conclusion
Putting a wall anchor without a drill is easier than you think. Simple tools and careful steps can get the job done. Take your time to mark the spot and use the right anchor type. This method works well for light to medium loads.
No drill needed means less noise and dust. You can fix things on your wall quickly and safely. Try this approach next time and see how smooth it goes. Small tasks become simple with a little patience.