Have you ever tried to remove wall anchors only to end up with ugly holes or damaged drywall? It’s frustrating, right?
You want your walls to look clean and smooth, but those stubborn anchors seem impossible to take out without leaving a mess. What if you could remove them quickly and safely, keeping your walls intact and ready for whatever comes next?
You’ll discover simple, effective ways to remove wall anchors without causing damage. Keep reading, and say goodbye to wall worries for good!
Types Of Wall Anchors
Wall anchors hold items securely on walls. They come in different types for various uses. Knowing the type helps in removing them without damage. Each type works differently and requires a specific removal method.
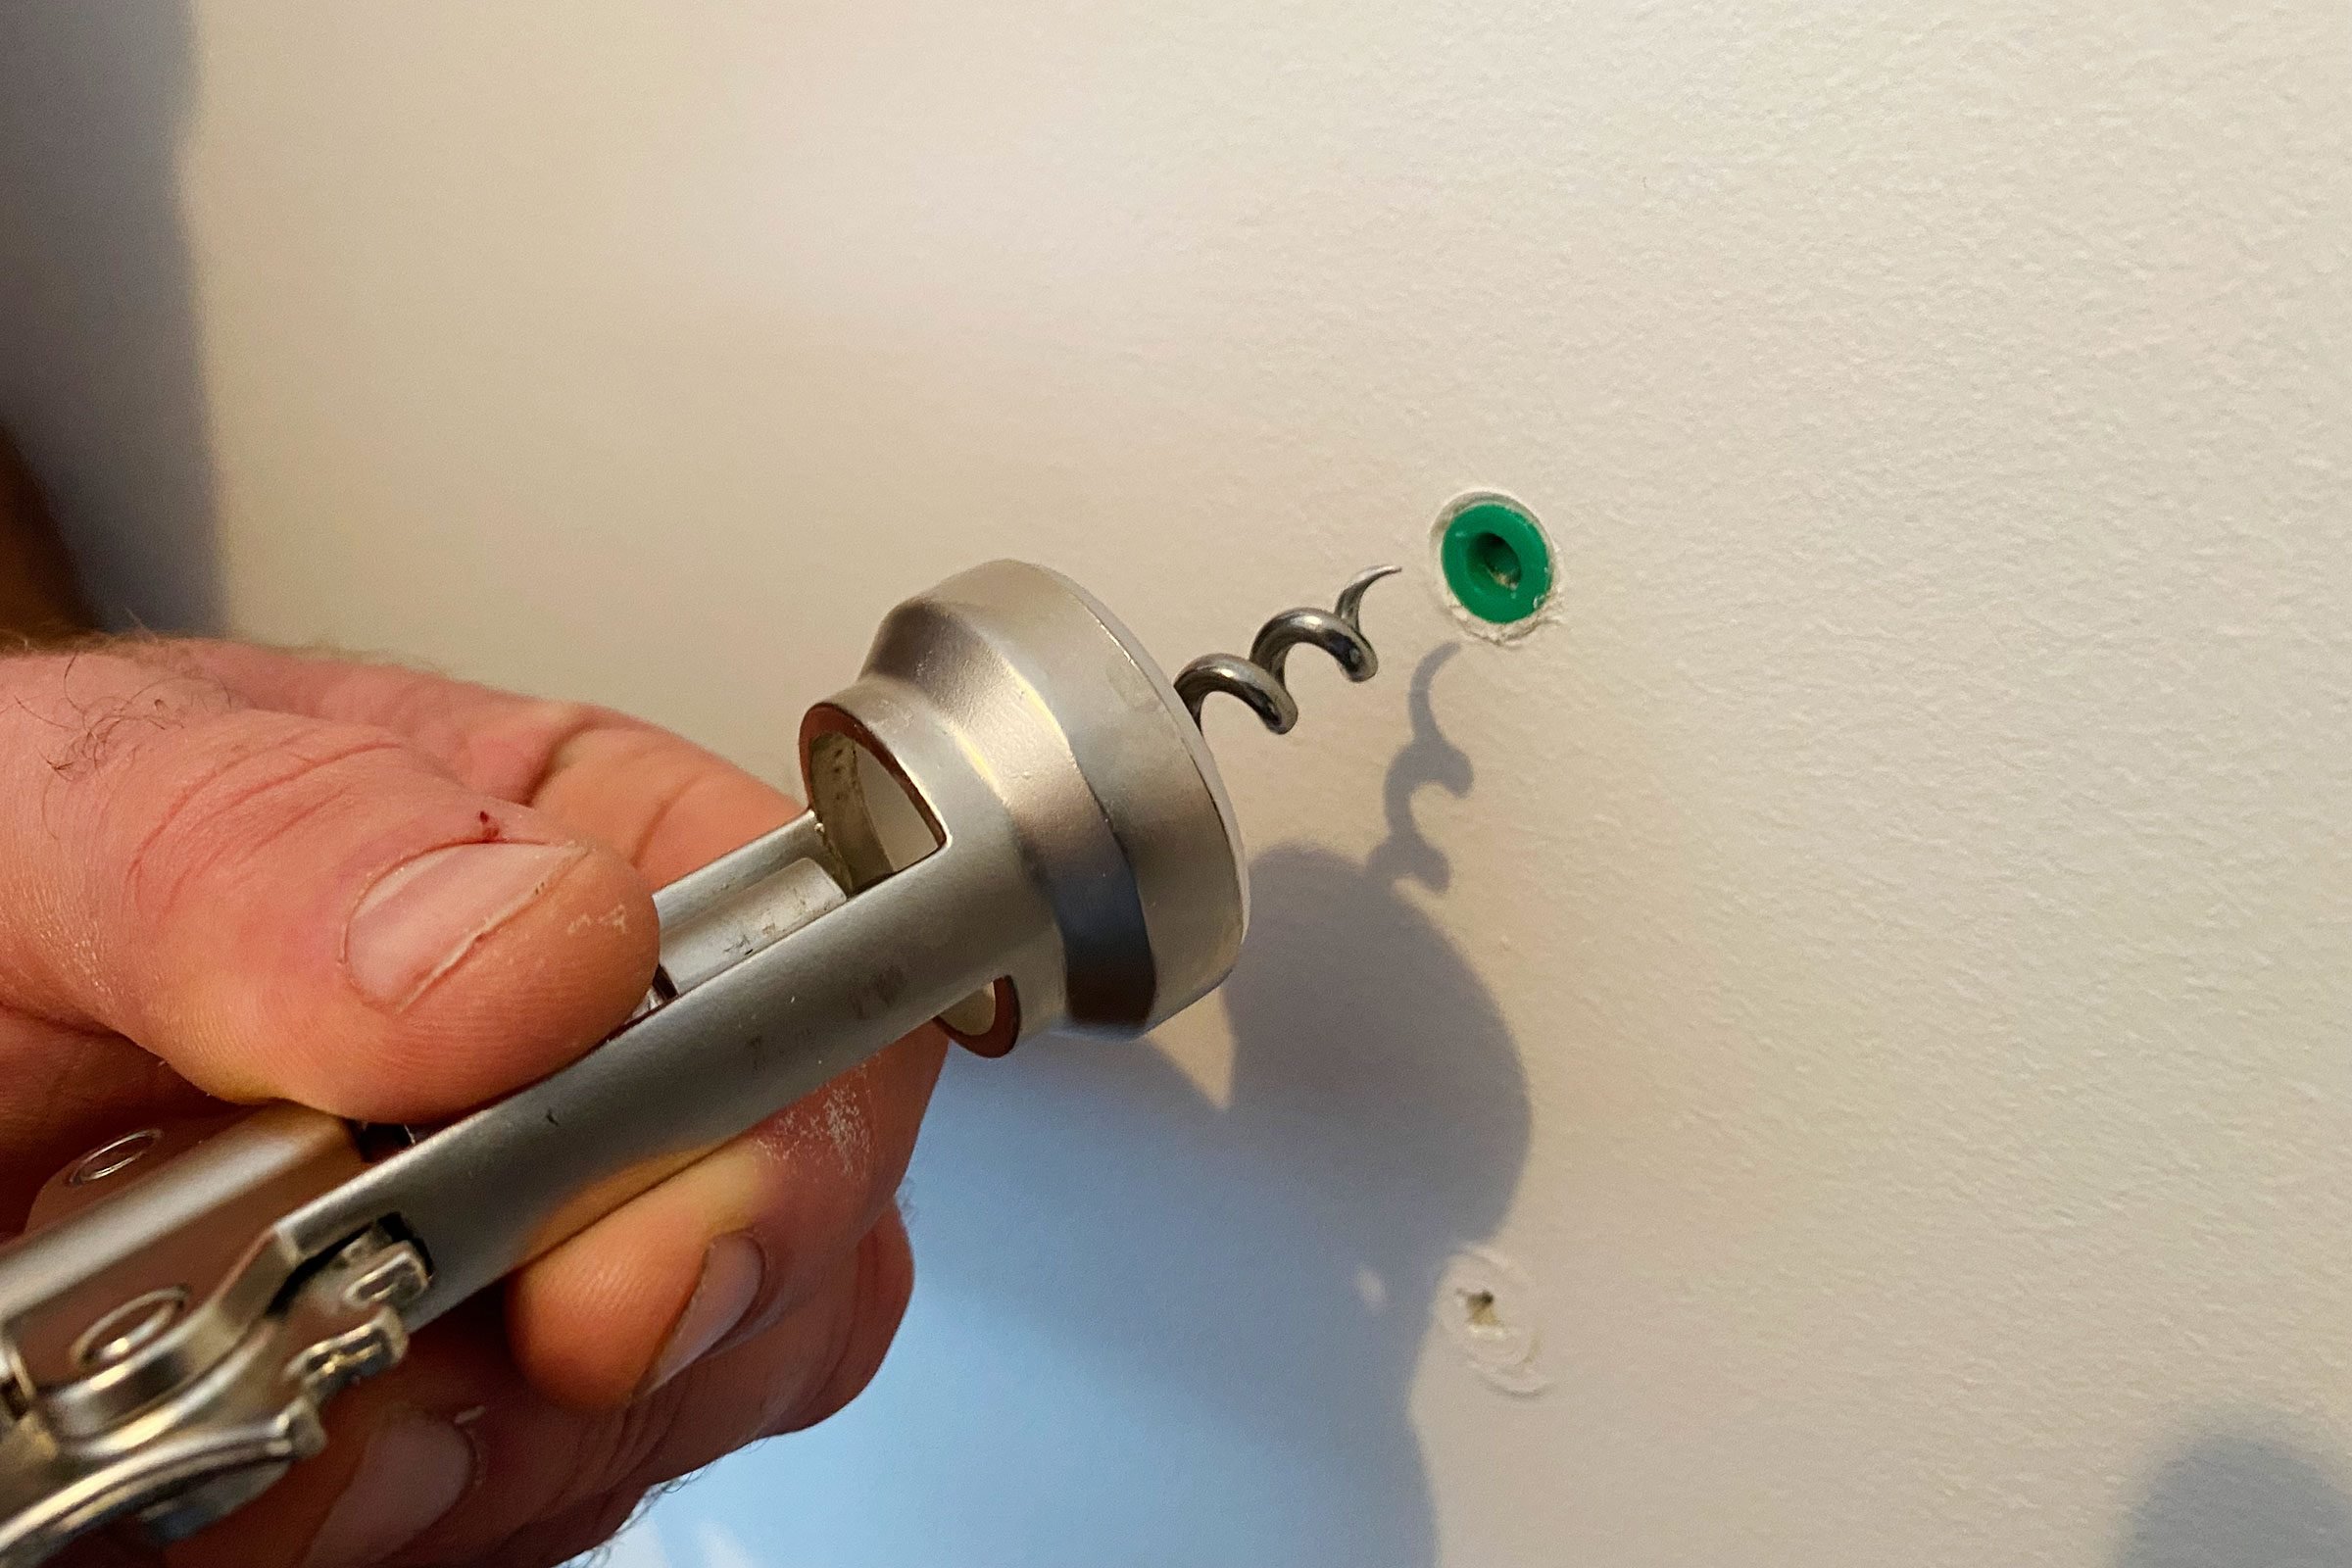
Plastic Expansion Anchors
Plastic expansion anchors are common and easy to use. They expand inside the wall when a screw is driven. To remove, unscrew the fastener first. Then gently pull the anchor out. Sometimes, pushing it inside the wall cavity is better.
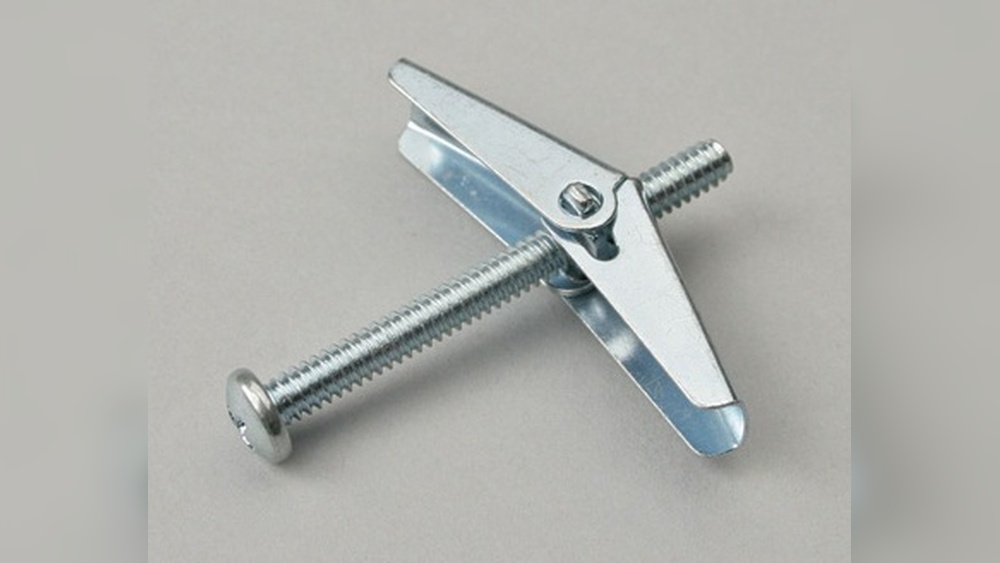
Toggle Bolts
Toggle bolts have wings that open inside the wall. They provide strong support for heavy items. To remove, unscrew the bolt until the wings drop inside. The wings cannot come back through the hole. You may need to patch the hole afterward.
Molly Bolts
Molly bolts expand behind the wall when installed. They create a firm hold in drywall. Remove by unscrewing the bolt slowly. The sleeve may stay inside the wall. Push the sleeve in carefully or use pliers to pull it out.
Self-drilling Anchors
Self-drilling anchors screw directly into drywall. They do not need a pre-drilled hole. Remove by unscrewing the screw. The anchor may turn and come out with the screw. If stuck, gently pull the anchor out with pliers.
Tools You Will Need
Removing wall anchors without harming your walls requires the right tools. Using proper tools makes the job easier and keeps your walls smooth. Prepare these tools before you start to avoid mistakes and damage.
Pliers And Screwdrivers
Pliers help grip and pull out wall anchors firmly. Needle-nose pliers work best for tight spaces. Screwdrivers can twist out anchors with screws inside. Flathead and Phillips screwdrivers cover most anchor types.
Putty Knife
A putty knife gently lifts anchors stuck in the wall. It helps pry out anchors without scraping the paint. Use it to loosen edges of the anchor carefully.
Drill And Bits
Drills remove anchors that do not come out easily. Use a drill bit slightly smaller than the anchor. Drill slowly to avoid making holes bigger than needed.
Spackle And Sandpaper
After anchor removal, walls need repair. Spackle fills small holes left behind. Sandpaper smooths the surface for painting. Use fine grit sandpaper for best results.
Preparing The Area
Preparing the area is an important first step before removing wall anchors. This step helps protect your walls and makes the removal process easier. Taking time to prepare can prevent damage and keep your space clean.
Clearing The Surrounding Wall
Remove any objects hanging near the anchor. Clear furniture away from the wall. This gives you enough space to work safely. Dust and dirt near the anchor should be wiped off. A clean surface helps you see the anchor clearly. It also stops dust from falling during removal.
Protecting The Surface
Cover the floor with a drop cloth or old sheet. This protects the floor from debris and scratches. Use painter’s tape around the anchor area. The tape guards the paint and wall surface. It also marks the spot to focus on. Protecting the wall surface reduces the risk of damage.
Credit: www.familyhandyman.com
Removing Plastic Expansion Anchors
Plastic expansion anchors hold screws firmly in drywall or plaster walls. Removing them without damage takes care and the right method. These anchors expand inside the wall, making simple pull removal tricky. Choose the best approach based on the anchor’s size and condition.
Pulling Out With Pliers
Grip the plastic anchor with needle-nose pliers. Pull gently but steadily. Avoid sudden force to stop wall damage. Wiggle the anchor slightly to loosen it. If it resists, try pushing it in instead.
Pushing Anchor Into Wall
Use a screwdriver or similar tool to push the anchor inside. This leaves a small hole, easier to patch. Press the anchor gently until it slides into the wall cavity. Fill the hole with spackle or wall filler afterward.
Removing Toggle Bolts
Removing toggle bolts from walls can be tricky. These anchors expand behind the wall, making them strong but hard to take out. Careful steps help avoid damage to your walls and keep them smooth.
Follow simple methods to remove toggle bolts safely. Use the right tools and patience for best results.
Unscrewing The Bolt
Start by turning the bolt counterclockwise. Use a screwdriver that fits well to avoid stripping the head. Keep turning until the bolt is loose and comes out. Sometimes the bolt may spin without coming out. Try to hold the toggle inside with pliers through the hole.
Retrieving The Toggle
The toggle stays inside the wall after the bolt is removed. It is usually too wide to pull out through the hole. Push the toggle gently into the wall cavity. Use a long, thin tool to push it back. The toggle will drop behind the drywall, out of sight. This method prevents wall damage and keeps things clean.

Credit: www.youtube.com
Removing Molly Bolts
Molly bolts are a common choice for hanging heavy items on walls. They expand inside the wall to hold tight. Removing them without hurting the wall takes care and the right method. This section explains two easy ways to remove molly bolts safely.
Unscrewing And Pulling Out
Start by turning the screw counterclockwise. Keep turning until the screw is loose or comes out. If the sleeve stays in the wall, try to pull it out gently. Use pliers for a better grip. Pull slowly to avoid wall damage. Sometimes, the sleeve comes out with the screw. If not, try the next method.
Collapsing The Sleeve
Push the sleeve into the wall cavity. Use a screwdriver to tap the sleeve’s edge inward. This collapses the metal wings behind the wall. Once collapsed, the sleeve will fall inside the wall. This method leaves a small hole but no big damage. Fill the hole with spackle later. This keeps your wall smooth and ready for repainting.
Handling Self-drilling Anchors
Removing self-drilling anchors from walls needs care to avoid damage. These anchors screw directly into drywall, creating a secure hold. Pulling them out roughly can cause big holes or cracks. Use the right tools and steps to keep your wall smooth. Follow simple methods to take out anchors safely and cleanly.
Unscrewing Carefully
Start by turning the anchor counterclockwise with a screwdriver. Use slow, steady pressure to loosen it. Stop if the anchor feels stuck or the wall starts to crack. Pull the anchor out gently once it is loose. Avoid forcing it to prevent wall damage.
Using Drill For Stubborn Anchors
For anchors that do not unscrew, use a drill with a small bit. Set the drill to low speed and reverse direction. Place the bit on the anchor’s head and turn slowly. This helps back the anchor out without pulling the wall. Stop if the wall shows signs of stress to avoid damage.
Fixing Wall Damage
Removing wall anchors can leave small holes or marks behind. Fixing these damages helps keep walls looking clean and fresh. You need a few simple steps to repair the wall properly. Each step makes the wall smooth and ready for painting. This way, the wall looks like new again.
Filling Holes With Spackle
Start by choosing a good spackle or wall filler. Use a putty knife to apply spackle into the hole. Press it gently to fill the space completely. Spread the spackle evenly over the hole’s surface. Let it dry for the time shown on the package. Dry spackle is hard and ready for the next step.
Sanding For Smooth Finish
Take fine-grit sandpaper and rub the dried spackle gently. Sand in small circles until the surface feels even. Remove any rough edges or bumps carefully. Wipe the dust away with a dry cloth. A smooth finish helps paint stick better and look nice.
Painting To Match Wall
Choose paint that matches your wall color exactly. Use a small brush to cover the patched area. Apply thin layers of paint and let each dry. Check if the patch blends well with the rest of the wall. Add more paint if the color looks different. This step hides the repair and restores the wall’s look.
Preventing Wall Damage In Future
Preventing wall damage in the future starts with smart choices and careful work. Walls can stay strong and clean if you plan ahead. Small steps make a big difference for your walls. Protecting your walls means less repair and better looks for years.
Choosing The Right Anchor
Select anchors based on the wall type and the item weight. Drywall needs different anchors than concrete or plaster. Use plastic anchors for light items and metal ones for heavier loads. Avoid using too large anchors that stretch the wall. Pick anchors that fit snugly to stop wobbling and damage.
Proper Installation Techniques
Mark the spot clearly before drilling a hole. Use the correct drill bit size for the anchor. Drill slowly to avoid cracking or breaking the wall. Insert the anchor gently without forcing it in. Tighten screws just enough to hold the item firmly, not tight enough to crack the wall. Check the wall’s condition after installation to catch any issues early.

Credit: www.hgtv.com
Frequently Asked Questions
How Do You Safely Remove Plastic Wall Anchors?
To remove plastic anchors, push them gently into the wall using a screwdriver. Then, fill the hole with spackle and sand smooth.
Can Metal Wall Anchors Be Removed Without Damage?
Yes, unscrew metal anchors slowly using pliers or a screwdriver. Patch any minor wall damage afterward with filler.
What Tools Do I Need To Remove Wall Anchors?
You typically need a screwdriver, pliers, putty knife, and spackle for removing anchors and repairing the wall.
How Do I Repair Holes After Anchor Removal?
Apply spackle or wall filler to holes, let dry, sand smooth, and repaint for a flawless finish.
Conclusion
Removing wall anchors can be simple with the right steps. Use tools carefully to avoid wall damage. Take your time and be gentle during removal. Small holes may remain but fix easily with filler. Clean walls look better and ready for new decor.
Practice patience to keep walls smooth and intact. Now, you can remove anchors without stress or mess. Try these tips next time for a neat result.