Have you ever tried to hang something on your wall, only to be left with stubborn wall anchors that won’t budge? Removing wall anchors can be frustrating, especially when you want to keep your walls looking clean and damage-free.
But don’t worry—whether it’s for redecorating or fixing a mistake, you can easily get rid of those pesky anchors with the right steps. You’ll discover simple and effective ways to remove wall anchors quickly, so your walls stay smooth and ready for whatever comes next.
Keep reading—you’ll wonder why you ever struggled with this before!
Types Of Wall Anchors
Wall anchors hold items on walls where nails or screws alone won’t work. Different anchors suit different wall types and weights. Knowing the types helps remove them safely. Each anchor has a unique design and removal method.
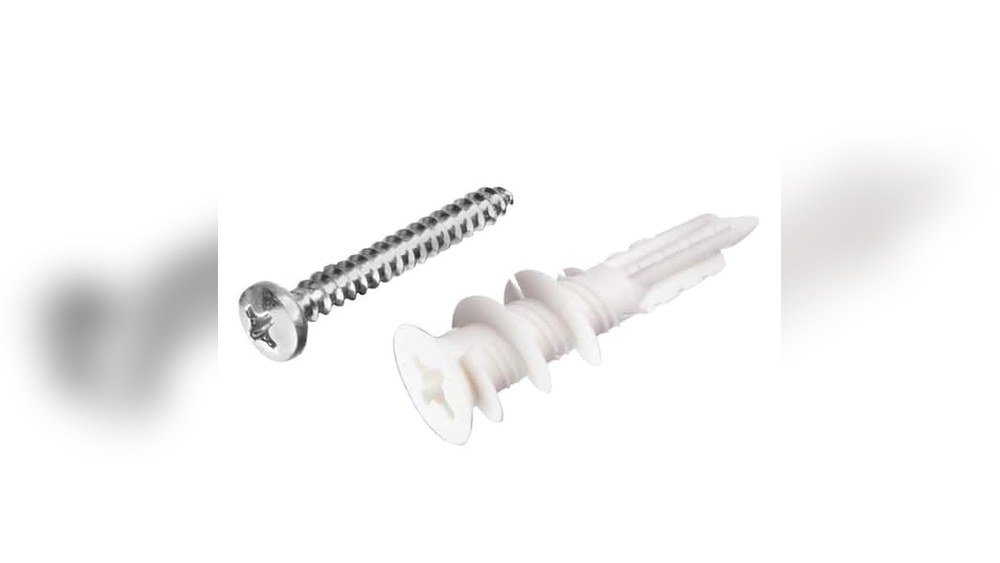
Plastic Expansion Anchors
Plastic expansion anchors are common and easy to use. Inserted into a drilled hole, they expand as a screw goes in. They hold light to medium weight items. To remove, pull the screw out first. Then, gently pull or push the plastic anchor out.
Toggle Bolts
Toggle bolts use a spring-loaded wing that opens inside the wall. This spreads the load over a larger area. They hold heavy items on drywall. To remove, unscrew the bolt until the wings fall inside the wall cavity. The wings cannot be pulled back through the hole.
Molly Bolts
Molly bolts have a metal sleeve that expands behind the wall. They secure medium to heavy items firmly. Unscrew the bolt to release the tension. Then, the sleeve may fall inside the wall or come out with the bolt. Sometimes, the sleeve must be pushed inside.
Self-drilling Anchors
Self-drilling anchors screw directly into drywall without a pre-drilled hole. They are made of metal or plastic. Remove by unscrewing the screw and then turning the anchor itself. These anchors may need pliers for grip during removal.

Credit: www.hgtv.com
Tools Needed For Removal
Removing wall anchors requires a few basic tools. These tools make the job easier and safer. You do not need complicated equipment.
Each tool has a specific role during the removal process. Knowing which tool to use helps avoid damage to your walls.
Screwdriver
A screwdriver is essential for loosening anchors. Use a flathead or Phillips head, depending on the screw type. It helps turn screws slowly without stripping them.
Pliers
Pliers grip the anchor tightly. They pull anchors out when they are loose. Needle-nose pliers work best for small or deep anchors.
Drill
A drill can remove stubborn anchors quickly. Use a drill bit slightly smaller than the anchor. Drill carefully to avoid wall damage.
Putty Knife
A putty knife helps pry out anchors gently. It also scrapes off any leftover debris. Use it to smooth the wall after anchor removal.
Preparation Before Removal
Preparation before removing wall anchors helps avoid damage and makes the job easier. Taking a few simple steps ensures safety and efficiency. A clean, organized space lets you focus on the task without distractions.
Clear The Area
Remove furniture and objects near the wall. This prevents accidents and gives you enough room to work. Clearing the area also helps you find dropped screws or tools quickly.
Protect Surrounding Surfaces
Use painter’s tape around the anchor to protect the wall paint. Place a cloth or cardboard below to catch debris. These steps keep your wall and floor clean during removal.
Gather Tools
Collect all tools before starting. Common tools include pliers, a screwdriver, and a utility knife. Having everything ready saves time and avoids interruptions.
Removing Plastic Expansion Anchors
Removing plastic expansion anchors from walls can be tricky. These anchors hold screws tightly and keep objects secure. Removing them carefully prevents damage to your wall. Several simple methods work well to take out these anchors. Choose the best way based on the anchor’s condition and wall type.
Unscrewing The Anchor
Start by trying to unscrew the plastic anchor. Use a screwdriver that fits the anchor head. Turn the screwdriver slowly and pull at the same time. Sometimes, the anchor will come out with the screw. This method works best if the anchor is loose or partially out.
Pulling Out With Pliers
Use needle-nose pliers to grab the anchor firmly. Pull straight out with steady force. Wiggle it gently if it feels stuck. Avoid squeezing too hard to prevent breaking the anchor. This method suits anchors that stick out from the wall slightly.
Tapping Gently With A Hammer
Tap the anchor inward with a hammer and a small nail or screwdriver. Push it deeper into the wall cavity. This hides the anchor and prepares the hole for patching. Use light taps to avoid cracking the wall surface. This method works well if removal is difficult.
Taking Out Toggle Bolts
Taking out toggle bolts from a wall needs careful steps. These anchors hold heavy items, so removing them needs patience. The toggle part opens behind the wall, making removal tricky. Follow simple steps to remove toggle bolts safely and cleanly.
Unscrewing The Bolt
Start by turning the screw counterclockwise. Use a screwdriver that fits well. Keep turning until the bolt loosens and comes out. If the bolt spins without moving, push it gently inward while turning. This helps the toggle collapse inside the wall.
Collapsing The Toggle
The toggle is spring-loaded and opens wide inside the wall. After unscrewing, push the bolt to fold the toggle wings. You might need a thin tool to press the toggle. This step makes the toggle small enough to pull back through the hole.
Removing From Wall
Once the toggle is folded, pull the bolt and toggle gently out of the wall. If it resists, wiggle it slowly to avoid wall damage. Use a pair of pliers for a better grip if needed. Fill the hole after removal to restore the wall surface.

Credit: theturquoisehome.com
Extracting Molly Bolts
Extracting molly bolts requires a few careful steps to avoid damaging the wall. Molly bolts, also called hollow wall anchors, expand behind the wall for a strong hold. Removing them means reversing this expansion safely.
Follow these simple steps to remove molly bolts without extra holes or damage.
Unscrewing The Fastener
Start by turning the screw counterclockwise. Use a screwdriver that fits well to avoid stripping the head. Unscrew it until it comes out completely. This step frees the bolt from the wall.
Collapsing The Sleeve
The metal sleeve behind the wall needs to collapse. Push the bolt gently inward while turning it. This action folds the sleeve flat inside the wall cavity. It reduces resistance and makes pulling easier.
Pulling Out
Grip the bolt firmly with pliers. Pull it straight out with steady force. Avoid twisting or bending to prevent wall damage. If it feels stuck, repeat collapsing the sleeve step.
Removing Self-drilling Anchors
Removing self-drilling anchors is a common task during home repairs or redecorating. These anchors are designed to screw directly into drywall or wood. They hold tightly and can be tricky to remove without damage. Knowing the right method makes the process easier and cleaner.
Unscrewing The Anchor
Start by trying to unscrew the anchor with a screwdriver. Use the same type of screwdriver that fits the anchor head. Turn it slowly counterclockwise. Sometimes the anchor will back out completely. If it moves freely, continue until it is fully removed. If the anchor spins without coming out, it may be stuck or stripped.
Using A Drill For Stubborn Anchors
For anchors that won’t unscrew, a drill can help. Use a drill bit slightly smaller than the anchor’s body. Set the drill to low speed. Gently drill into the center of the anchor. This breaks or loosens the anchor inside the wall. Be careful not to damage the wall surface. Once loose, try unscrewing again or pull it out with pliers.
Fixing Wall Damage
Removing wall anchors often leaves small holes or marks. Fixing these spots quickly keeps your walls looking neat. Simple tools and materials can restore the surface easily. Follow these steps to repair damage and prepare your wall for painting.
Filling Holes With Spackle
Start by cleaning the holes from dust and debris. Use a putty knife to apply spackle inside each hole. Press the spackle firmly to fill all gaps. Smooth the surface as much as possible. Let the spackle dry for several hours or as directed.
Sanding Smooth
After the spackle dries, sand the area lightly. Use fine-grit sandpaper for best results. Sand until the surface feels even and blends with the wall. Remove dust with a soft cloth or brush. This step ensures a smooth base for painting.
Painting For A Clean Finish
Choose paint that matches your wall color. Use a small brush or roller to apply paint over the patched area. Apply thin coats to avoid drips and uneven texture. Let each coat dry before adding the next. The final result will look clean and seamless.
Tips To Avoid Wall Damage
Removing wall anchors can cause damage if not done carefully. Taking steps to protect your wall helps keep it smooth and clean. Small holes and cracks may happen, but these tips reduce the risk.
Focus on gentle actions and the right tools. Avoid rushing. Patience is key to preserve your wall’s surface.
Remove Anchors Slowly
Pull the anchor out slowly. Quick yanks can tear the wall paint or drywall. Steady, gentle pressure works best. Take breaks if needed. This method lowers the chance of large holes or cracks.
Use Proper Tools
Choose tools that fit the anchor type. Needle-nose pliers work well for plastic anchors. A screwdriver may help loosen metal anchors. Avoid using sharp or heavy tools that can dig into the wall. Using the right tool protects the wall surface.
Know When To Call A Professional
Sometimes anchors are hard to remove. If the wall looks weak or the anchor is stuck, stop. Experts have the right tools and skills. Calling a professional saves time and prevents costly wall damage.
:max_bytes(150000):strip_icc()/how-to-remove-drywall-anchors-7562285-02-c01abbfe63374ad3a7bc1e52d0c15bb2.JPG)
Credit: www.thespruce.com
Frequently Asked Questions
How Do You Safely Remove Plastic Wall Anchors?
To remove plastic wall anchors, gently pry them out with pliers or a flathead screwdriver. If stuck, push the anchor deeper and patch the hole afterward.
Can Metal Wall Anchors Be Pulled Out Easily?
Metal anchors often require unscrewing first. Use pliers to grip and slowly pull them out, avoiding wall damage. Patch the hole after removal.
What Tools Are Best For Removing Wall Anchors?
Use pliers, a flathead screwdriver, or a drill for tough anchors. These tools help remove anchors cleanly without causing excessive wall damage.
How Do You Fix Holes After Removing Anchors?
Fill holes with spackle or wall filler. Let it dry, sand smooth, and repaint to restore the wall’s appearance.
Conclusion
Removing wall anchors does not have to be hard or messy. Use the right tools and take your time. Pull, twist, or push the anchors gently to avoid wall damage. Repair small holes quickly with putty or spackle. Clean walls look better and prepare well for new decorations.
Follow these simple steps to keep your walls smooth and neat. Now, you can handle wall anchors confidently and keep your space tidy.