Are you ready to bring your weaving projects to life with your jack floor loom? One of the most important steps before you start weaving is tying the warp onto your loom correctly.
If you don’t do this right, you might face uneven tension or even damage your threads. But don’t worry—this guide will walk you through the process step-by-step, making it simple and clear. By the end, you’ll feel confident setting up your loom like a pro, so you can focus on creating beautiful fabrics without frustration.
Keep reading to master this essential skill and unlock your loom’s full potential.
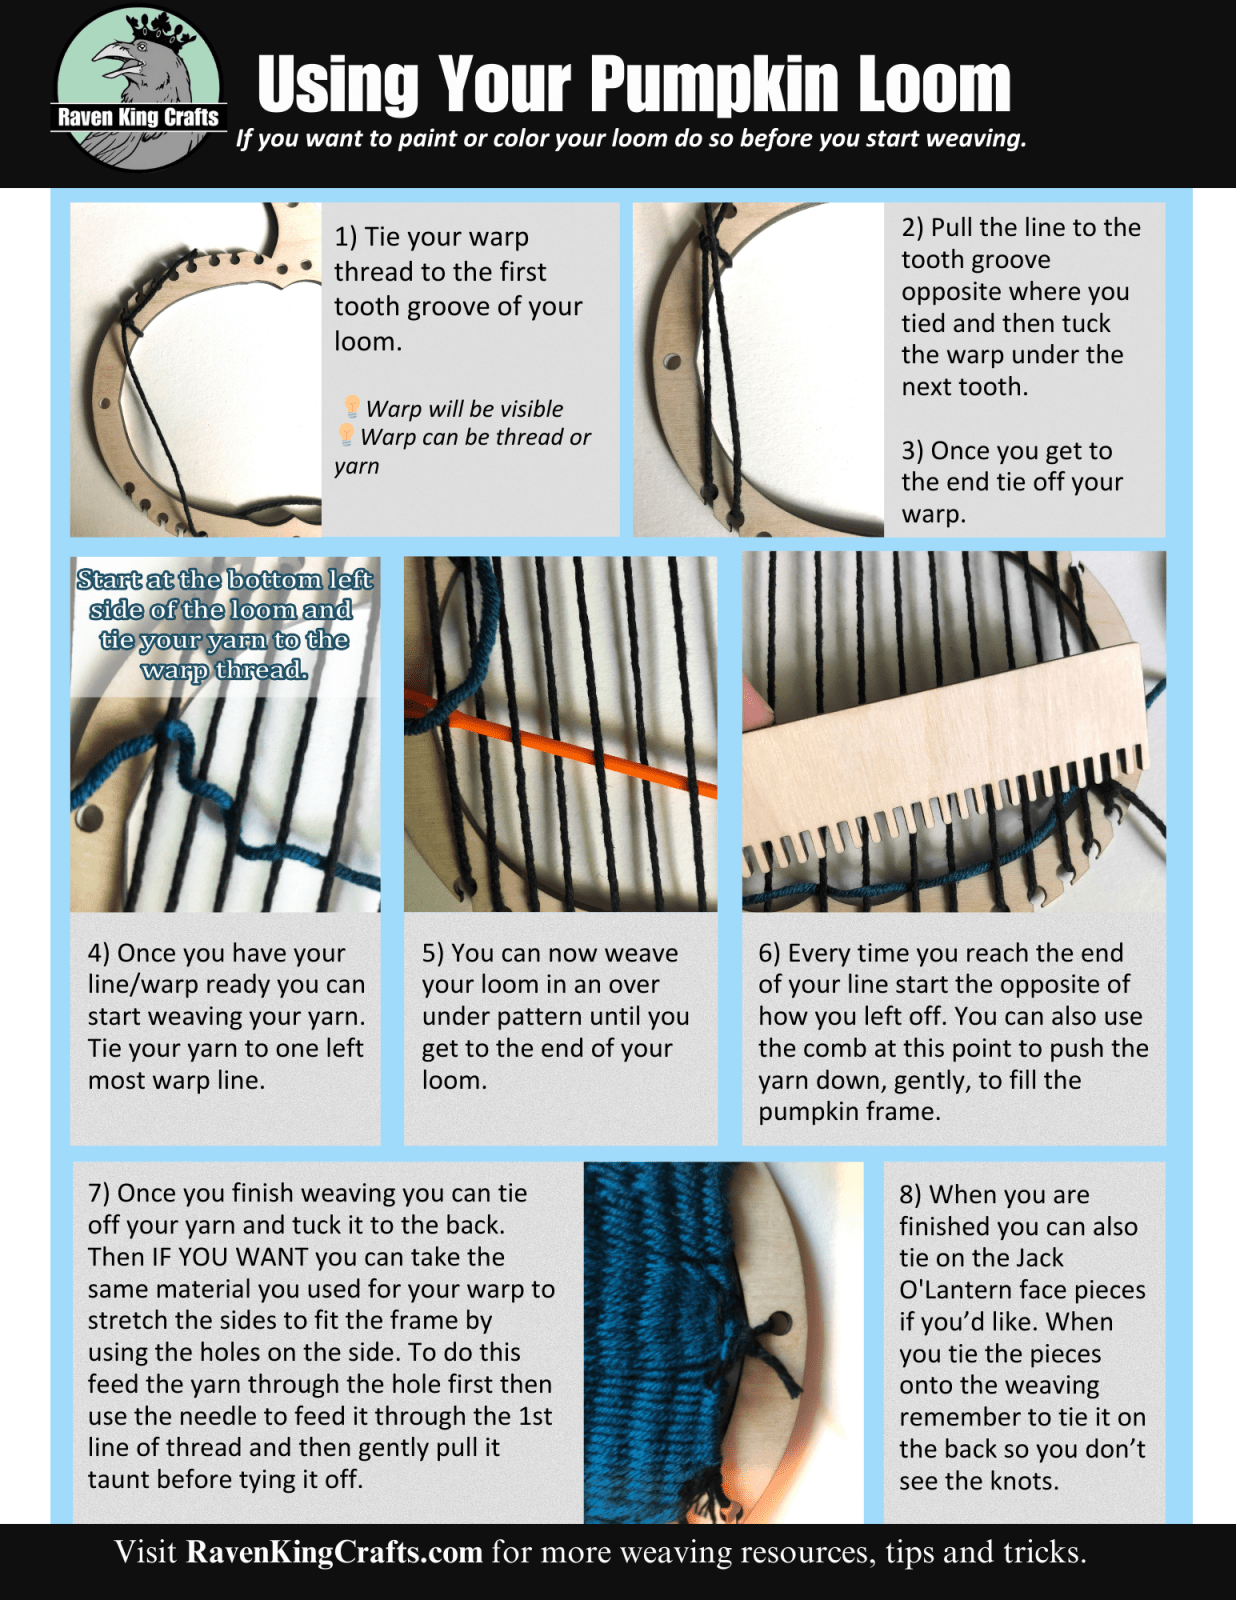
Credit: ravenkingcrafts.com
Preparing The Loom
Preparing the loom is the first step to start weaving on a jack floor loom. This process helps set everything in place for a smooth weaving experience. A well-prepared loom saves time and avoids mistakes later. Follow these steps carefully to get your loom ready.
Gathering Materials
Collect all the tools and supplies before starting. You need warp yarn, a warping board or reel, lease sticks, and a spool rack. Also, have scissors, a measuring tape, and a pencil ready. Having everything close by makes the work easier and faster.
Setting Up The Loom Frame
Place your loom on a stable surface with enough light. Check that all parts are clean and free of dust. Attach the warp beam and make sure it turns smoothly. Adjust the tension system to hold the warp yarn firmly. Tighten all screws and bolts to avoid movement during weaving.

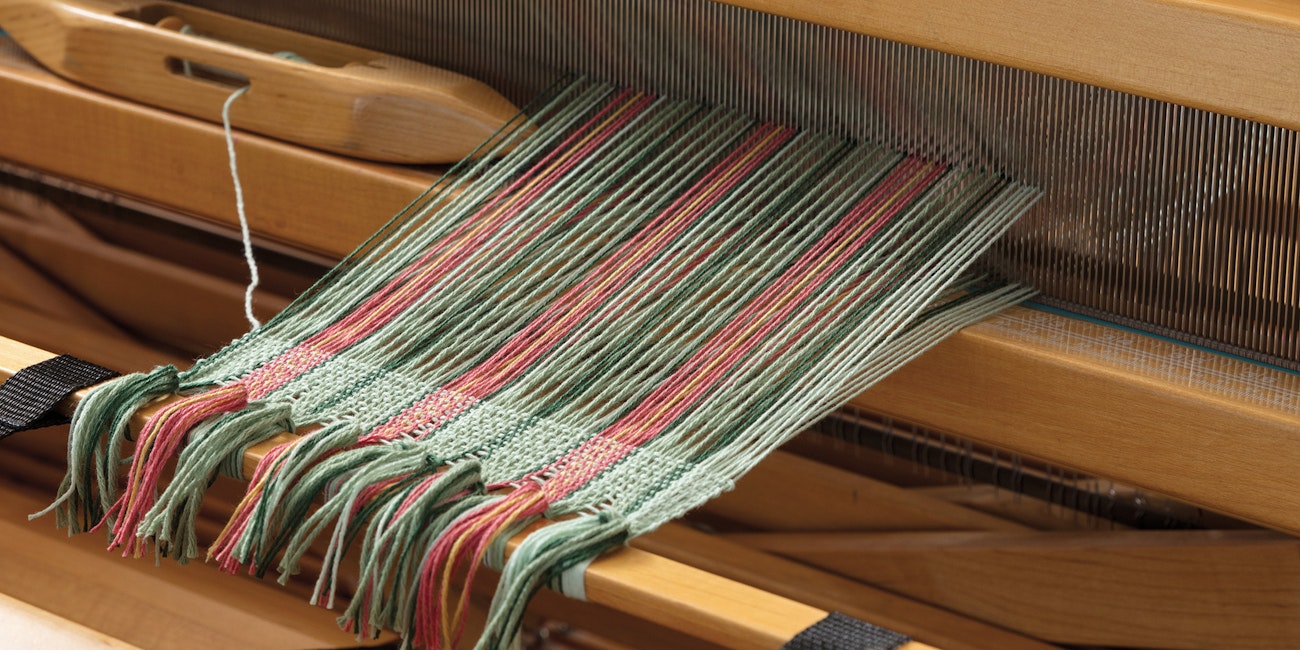
Credit: northhouse.org
Organizing The Warp Threads
Organizing the warp threads is a key step before tying them onto a jack floor loom. It helps keep the threads neat and ready for weaving. Proper organization prevents tangles and uneven tension during weaving. This step saves time and frustration later in the process.
Aligning Thread Ends
Start by lining up all the thread ends evenly. Make sure no thread is longer or shorter than the others. Use a smooth surface or a table to help keep threads straight. Check that each thread is in the correct order according to your pattern. This alignment makes tying easier and more accurate.
Checking Thread Tension
Keep the thread tension even across all warp threads. Pull each thread gently to feel its tightness. Threads should not be too tight or too loose. Uneven tension can cause problems in your weaving. Adjust any loose or tight threads before tying them to the loom.
Attaching Warp To The Front Beam
Attaching the warp to the front beam is a key step in preparing your jack floor loom for weaving. This process ensures the warp threads stay tight and even throughout your project. A secure attachment helps maintain consistent tension, which affects the quality of your fabric.
Properly tying the warp to the front beam prevents slack and keeps your weaving smooth. Taking time here saves effort later. The method is simple but requires attention to detail.
Identifying Tie-on Points
Look along the front beam for small metal or wooden pins. These pins are the tie-on points for the warp threads. They hold the threads securely in place. Make sure to use all available pins to spread the tension evenly.
Check that the pins are clean and firmly fixed. Loose or missing pins can cause uneven tension. Align the warp threads carefully along the beam. This alignment helps keep the fabric straight as you weave.
Securing Threads With Clove Hitches
Use clove hitch knots to tie the warp threads to the pins. This knot holds tight but can be adjusted if needed. Wrap the thread around the pin twice, crossing over before pulling tight.
Make sure each knot is snug but not too tight. Too much tension can break threads or warp the beam. Tie each thread individually for even control. Secure knots prevent slipping and keep your warp stable.
Credit: handwovenmagazine.com
Ensuring Even Tension
Ensuring even tension on your warp threads is key to a smooth weaving process. Uneven tension can cause problems like loose spots or broken threads. Keeping tension steady helps create a uniform fabric. This section covers simple steps to check and adjust your warp tension on a jack floor loom.
Adjusting Thread Tightness
Start by looking at your warp threads. They should all feel about the same tightness. If some threads are loose, gently pull them to tighten. Use the loom’s tensioning device to help balance the threads. Tighten slowly and check often. Avoid pulling too hard, or threads may break.
Testing Warp Stability
After adjusting, test the warp’s stability. Press down lightly on different warp sections. Threads should stay firm and not move much. Try weaving a few rows to see how tension holds up. If the warp loosens or tightens too much, adjust again. Repeat this step until the tension stays even.
Finishing The Tie-on Process
Finishing the tie-on process is a key step in preparing your warp for weaving on a jack floor loom. This stage ensures the warp threads stay secure and ready for smooth weaving. Taking time here prevents problems later during your weaving project.
Securing Loose Ends
After tying the warp threads onto the front apron rod, check for any loose ends. Loose threads can cause tangles or uneven tension while weaving. Use a small knot or a double tie to fasten these ends firmly. Trim extra thread length carefully to avoid snags. Keeping the warp neat helps maintain even tension across the loom.
Preparing For Weaving
Once all loose ends are secured, remove any temporary ties holding the warp in place. Roll the warp evenly onto the front apron rod. Check that the tension is consistent across the entire width. Adjust the tension by tightening or loosening the warp threads slightly. Finally, make sure the warp is smooth and flat, ready to weave without snags or unevenness.
Frequently Asked Questions
How Do I Start Tying Warp On A Jack Floor Loom?
Begin by securing the warp threads evenly on the back beam. Tie them to the front apron rod using a slip knot. Maintain consistent tension to ensure even weaving.
What Tools Are Needed For Tying Warp On A Jack Loom?
You need a warping board, lease sticks, a strong cord, and a tapestry needle. These tools help keep threads organized and tensioned properly.
How To Maintain Even Tension While Tying Warp?
Keep the warp threads taut but not too tight. Adjust knots regularly to prevent slack or uneven tension. Consistency ensures smooth weaving.
Can I Reuse Warp Threads On A Jack Floor Loom?
Yes, you can reuse warp threads if they remain strong and undamaged. Check for frays before retying to avoid weaving issues.
Conclusion
Tying warp onto a jack floor loom takes practice and patience. Follow each step slowly and carefully. Check your work often to avoid mistakes. Keep your warp threads even and tight for best results. Soon, you will enjoy weaving smoothly and easily.
Enjoy the process and learn from each try. This skill will help you create beautiful woven pieces. Keep practicing, and your confidence will grow with time.