If you’ve ever tried to hang something heavy on your wall, you know how frustrating it can be when screws just won’t hold. That’s where screw-in wall anchors come in—they’re the secret to a strong, secure grip every time.
But how do you use them correctly? You’ll learn simple, step-by-step tips to make sure your anchors hold firm, so your shelves, pictures, and decor stay exactly where you want them. Keep reading, and you’ll never worry about loose screws again.
Credit: www.bobvila.com
Types Of Wall Anchors
Wall anchors provide extra support for screws in drywall, plaster, or hollow walls. They prevent screws from pulling out and help hold heavy items securely. Different anchors work best for different wall types and weights. Knowing the types helps you choose the right one for your project.
Plastic Expansion Anchors
Plastic expansion anchors are common and easy to use. Insert the anchor into a drilled hole, then screw into it. The anchor expands inside the wall, holding the screw tightly. Best for light to medium loads on drywall or plaster.
Metal Anchors
Metal anchors are stronger than plastic ones. Made of steel or zinc, they provide extra grip. Use these for medium to heavy loads. They work well in drywall and masonry walls.
Toggle Bolts
Toggle bolts have spring-loaded wings that open inside the wall. They spread the load over a larger area. Ideal for very heavy items on hollow walls. Requires a larger hole for installation.
Molly Bolts
Molly bolts are metal anchors with expandable sleeves. Insert the bolt, then tighten it to expand the sleeve inside the wall. This creates a strong hold. Suitable for medium to heavy loads on drywall and plaster walls.
:max_bytes(150000):strip_icc()/how-to-use-and-discard-anchor-screws-1822671-002-04-4963da18c2674e6bbf07e5fc07d5b4f0.jpg)
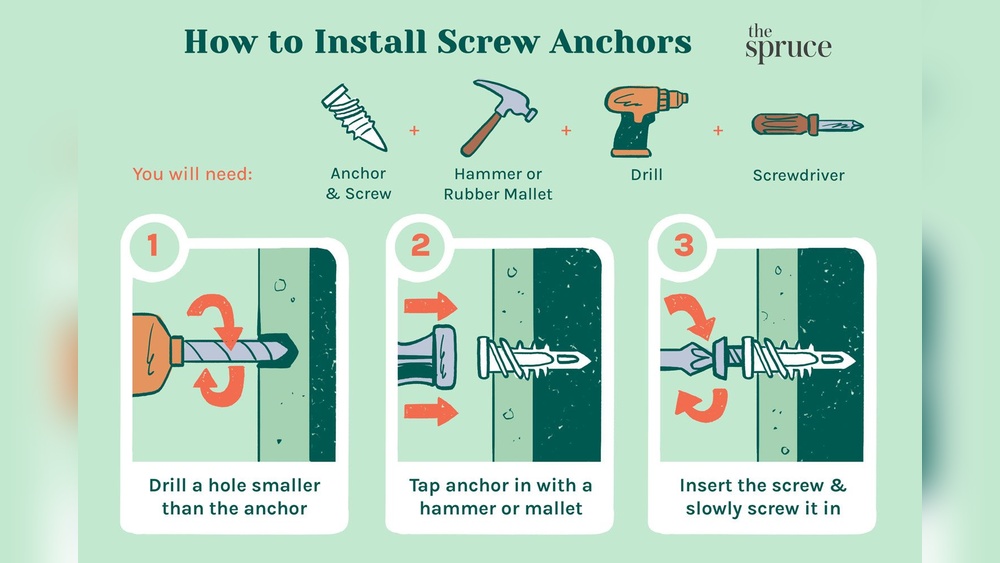
Credit: www.thespruce.com
Choosing The Right Anchor
Choosing the right screw-in wall anchor is important for a strong and secure hold. Different anchors suit different walls and weights. Picking the right one prevents damage and ensures safety. Understanding your wall type and the weight it will hold helps you choose the best anchor.
Assessing Wall Material
Check the wall before picking an anchor. Drywall needs different anchors than brick or concrete. Soft walls like drywall require plastic or metal anchors. Hard walls need anchors made for masonry. Knowing the wall material guides your choice.
Matching Anchor To Load
Think about how much weight the anchor must hold. Light loads like picture frames need smaller anchors. Heavy items like shelves require strong, heavy-duty anchors. Use anchors rated for the item’s weight. This keeps your items safe and the wall intact.
Tools Needed
Using screw-in wall anchors requires a few basic tools. These tools help make the job easier and ensure the anchors hold firmly. Having the right tools ready saves time and effort.
Drill And Drill Bits
A drill is essential for making holes in the wall. Choose a drill bit that matches the size of the anchor. This helps the anchor fit tightly and hold well.
Screwdriver
A screwdriver is needed to twist the screw into the anchor. Use the right type, either flathead or Phillips, depending on the screw head. A proper fit prevents damage to the screw.
Hammer
A hammer is useful to gently tap the anchor into the hole. This ensures the anchor sits flush with the wall. Tapping softly prevents wall damage.
Level
A level helps keep your work straight. It is important for hanging pictures or shelves evenly. Using a level prevents crooked installations and improves appearance.
Preparing The Wall
Preparing the wall is the first step to using screw-in wall anchors correctly. This stage ensures the anchor fits tightly and supports the weight you plan to hang. Taking time here prevents damage and keeps your wall strong.
Marking The Spot
Start by choosing the exact spot for your anchor. Use a pencil to mark the point clearly. Check the height and position carefully. Double-check the mark before drilling to avoid mistakes.
Drilling The Hole
Select a drill bit that matches the anchor size. Drill straight into the wall at the marked spot. Keep the drill steady for a clean hole. Remove any dust or debris from the hole before inserting the anchor.
Inserting The Anchor
Inserting the anchor is a crucial step for a strong hold in the wall. This step prepares the wall to carry the weight of the item you want to hang. The right technique ensures the anchor stays secure and the screw holds tight.
Pushing Or Tapping In
Start by aligning the anchor with the drilled hole. Use your fingers to push it gently into the wall. If it feels tight, tap it lightly with a hammer. Tap just enough to make the anchor flush with the wall surface. Avoid pushing too hard to prevent damage to the wall.
Ensuring Proper Fit
Check if the anchor fits snugly in the hole. It should not wobble or move when touched. The anchor’s collar should sit flush against the wall. A loose fit can cause the anchor to fail under weight. Adjust by tapping gently or selecting a different anchor size if needed.
Installing The Screw
Installing the screw is a key step when using wall anchors. It holds the item firmly to the wall. Proper screw installation ensures strong support and prevents damage. Follow clear steps to get the best results.
Selecting The Right Screw
Choose a screw that fits the anchor size. The screw should be long enough to go through the anchor and into the wall. Use screws made of strong metal to hold weight safely. Avoid screws that are too short or too thin. Check the package of the anchor for recommended screw sizes.
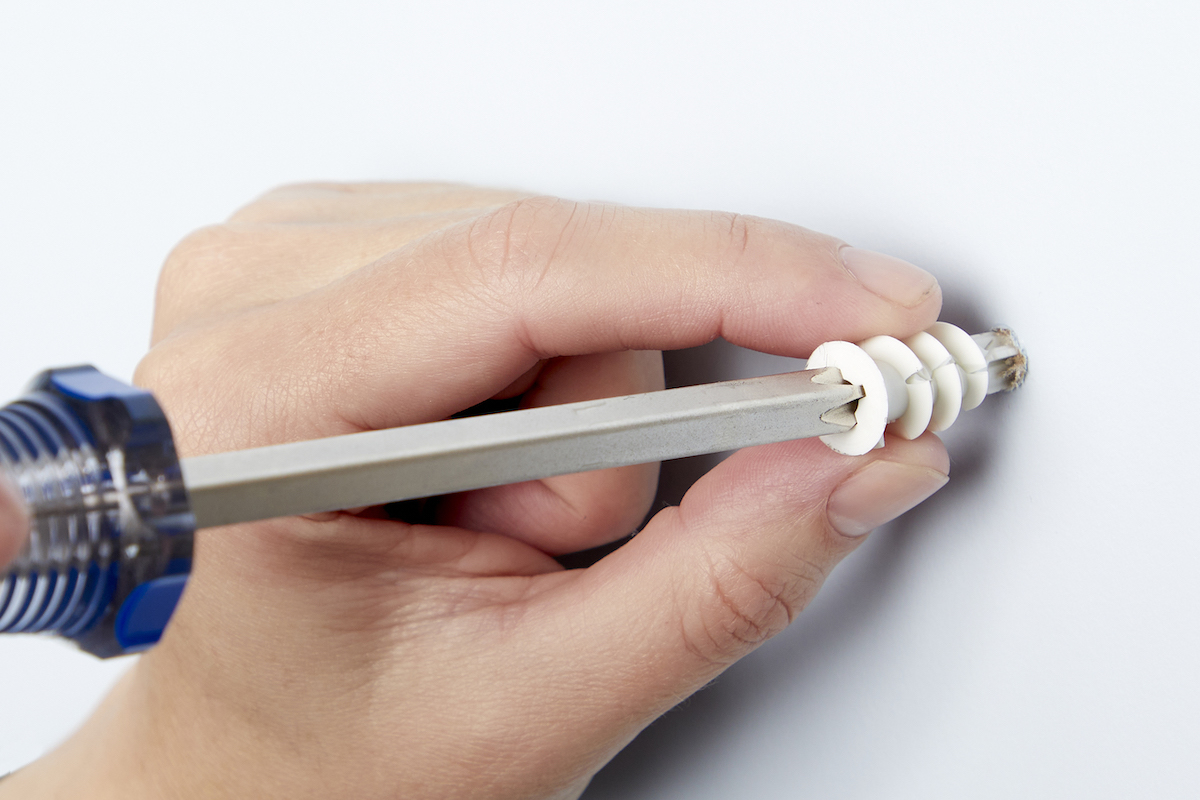
Driving The Screw
Start by placing the screw tip into the anchor opening. Use a screwdriver or drill with a proper bit. Turn the screw slowly to avoid slipping or stripping the anchor. Stop when the screw head is flush with the surface. Do not overtighten, or the anchor may lose grip. The screw should feel firm and secure without wobbling.
Testing The Hold
Testing the hold of screw-in wall anchors is important to ensure they support weight safely. This step checks if the anchor grips the wall firmly. A proper test avoids damage and keeps your items secure. Follow simple methods to confirm stability and make adjustments if needed.
Checking Stability
Start by gently pulling or pushing the anchor after installation. Feel for any movement or looseness. If the anchor shifts, it may not hold well. Try hanging a light object to test its strength. Notice if the anchor stays fixed without wobbling. This shows the anchor is stable and ready for use.
Adjusting If Needed
If the anchor feels loose, remove it carefully. Check the hole size; it should match the anchor size. Use a larger anchor or fill the hole if it is too big. Reinsert the anchor and tighten it firmly. Test the hold again until it feels solid and secure. Proper adjustment prevents future damage and keeps your wall safe.
Common Mistakes To Avoid
Using screw-in wall anchors might seem simple. Yet, many make mistakes that weaken the hold or damage the wall. Avoiding these errors saves time and frustration. Learn the common mistakes below to ensure your anchors work well and last long.
Using Incorrect Anchor Size
Choosing the right anchor size is key. Too small anchors cannot hold weight properly. Too large anchors may crack the wall or not fit the hole. Match the anchor size with your screw and wall thickness. Measure carefully before buying anchors.
Over-tightening Screws
Turning screws too tight causes problems. It can strip the anchor or break the wall. Tighten screws just enough to hold the object firmly. Stop when you feel resistance. Use a screwdriver, not a power drill, for better control.
Ignoring Wall Type
Different walls need different anchors. Drywall, plaster, brick, and concrete vary in strength. Using the wrong anchor type leads to poor support. Identify your wall material before selecting anchors. This ensures a secure and safe installation.
Tips For Stronger Holds
Getting a strong hold with screw-in wall anchors makes your fixtures safer. It stops items from falling or loosening over time. Follow these tips to improve the grip and keep things steady.
Pre-drilling Techniques
Drill a hole that matches the anchor size exactly. Avoid holes that are too wide or too narrow. A snug fit helps the anchor expand properly. Clean the hole from dust and debris. This lets the anchor grip the wall better.
Using Multiple Anchors
For heavy objects, use more than one anchor. Spread anchors evenly to share the load. This reduces pressure on each anchor point. It helps prevent the wall from cracking. Multiple anchors give a safer and stronger hold.

Credit: www.picturehangsolutions.com
Frequently Asked Questions
What Are Screw In Wall Anchors Used For?
Screw in wall anchors secure screws in drywall or hollow walls. They provide strong support for hanging pictures, shelves, or fixtures. Anchors prevent screws from loosening or damaging walls. They are ideal for lightweight to medium-weight items.
How Do You Install Screw In Wall Anchors Correctly?
First, drill a pilot hole matching the anchor size. Insert the anchor and twist it clockwise until flush with the wall. Then, drive the screw into the anchor, securing your item firmly without over-tightening.
Can Screw In Wall Anchors Support Heavy Objects?
Screw in anchors support moderate weight, typically up to 50 pounds. For heavier items, use specialized heavy-duty anchors or wall studs. Always check the anchor’s weight rating and wall type before installation.
Are Screw In Wall Anchors Reusable?
Screw in wall anchors are generally not reusable. Removing them often damages the anchor or wall. For reinstallation, use new anchors to ensure proper support and prevent wall damage.
Conclusion
Using screw in wall anchors makes hanging items easier and safer. Choose the right anchor for your wall type. Drill a hole, insert the anchor, then screw in firmly. This method keeps objects secure and prevents damage. Practice a few times to gain confidence.
Remember, correct installation ensures strong support. Keep tools handy and follow steps carefully. You can hang shelves, frames, or mirrors with ease. Simple and effective. Try it yourself and see the difference.