Are you ready to brighten up your space and take control of your lighting? Adding a light and a switch might sound tricky, but with the right steps, you can do it yourself and save money.
Imagine flipping a switch and instantly changing the mood of your room—how great would that feel? In this guide, you’ll learn exactly how to install a light and switch safely and easily, even if you’re new to electrical work. Keep reading, and by the end, you’ll have the confidence to light up your home just the way you want.

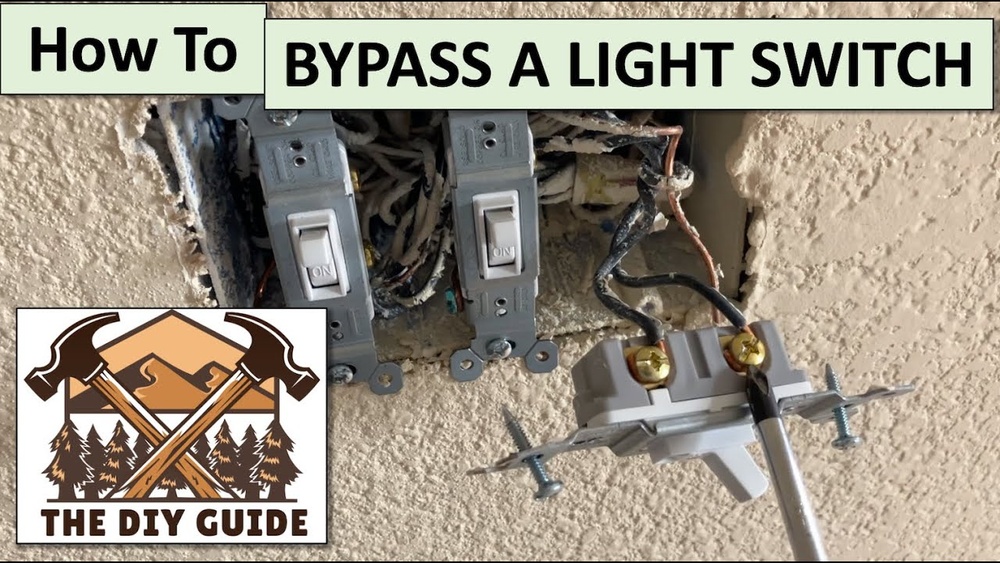
Credit: www.do-it-yourself-help.com
Tools And Materials Needed
Adding a light and switch requires specific tools and materials. These help you work safely and efficiently. Preparing the right items makes the project smoother. Below are the key tools and materials you will need.
Basic Tools List
- Screwdriver set (flat and Phillips head)
- Wire stripper
- Voltage tester
- Drill with bits
- Measuring tape
- Wire nuts
- Pliers
- Utility knife
- Electrical tape
Choosing The Right Light And Switch
Select a light that fits the room size and style. Pick LED bulbs for energy efficiency and brightness. Choose a switch type that suits your needs. Common options include toggle, dimmer, and rocker switches. Check the switch rating matches your light’s wattage.
Safety Equipment
Wear safety glasses to protect your eyes. Use insulated gloves to avoid electric shocks. Turn off power at the breaker before starting. Have a flashlight ready in case of power outage. Keep a fire extinguisher nearby as a precaution.

Credit: diy.stackexchange.com
Planning Your Installation
Planning your installation is the first step to add a light and switch safely. Careful planning helps avoid mistakes and extra work. It ensures the final setup works well and looks good. This section guides you through the key points to consider before starting.
Selecting The Location
Choose a spot where the light will be useful and bright. Think about the room’s purpose. Near a doorway is often best for switches. Avoid placing lights where they might get wet or damaged. Make sure the location allows easy access to wiring.
Checking Electrical Capacity
Confirm your home’s electrical system can handle the new light. Check the circuit breaker for available space. Avoid overloading circuits, which can cause trips or hazards. Use a voltage tester to ensure power is off before working. Safety first.
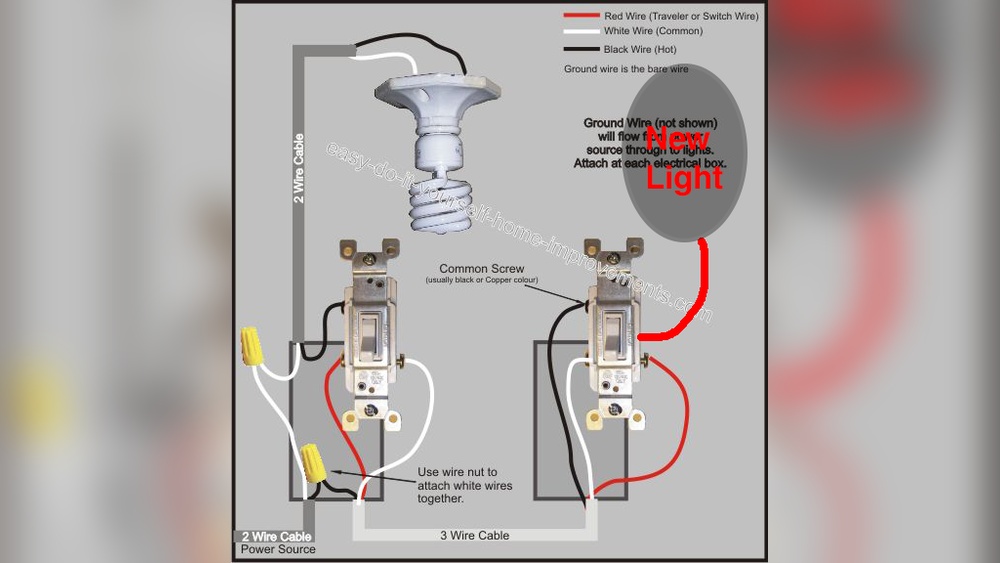
Understanding Wiring Basics
Learn the main wires: live, neutral, and ground. The live wire carries power to the light. The neutral wire completes the circuit back to the panel. The ground wire protects from electrical shocks. Use proper tools and follow wiring colors to connect safely.
Turning Off Power Safely
Safety is the top priority when working with electrical wiring. Always turn off the power before starting any electrical project. This step prevents electric shocks and injuries. Follow clear steps to ensure the power is completely off.
Locating The Circuit Breaker
Find the main electrical panel in your home. It is usually in the basement, garage, or utility room. Open the panel door carefully. Look for the circuit breaker that controls the area where you will work. The breakers are often labeled with room names or numbers.
If the breakers are not labeled, turn them off one by one. Ask someone to check if the power goes off in the working area. This helps identify the correct breaker to switch off.
Verifying Power Is Off
Use a voltage tester or a non-contact voltage detector. Touch the tester to wires or outlets in the work area. The tester will show if electricity is still flowing. If the tester shows no power, you are safe to proceed.
Double-check by flipping the light switch on and off. The light should not turn on. Always test twice before starting to work. This extra step protects you from accidents.
Installing The Light Fixture
Installing a light fixture is a key step in adding new lighting to a room. It gives the space brightness and style. The process involves securing the fixture and connecting the electrical wires safely. Careful attention is important to avoid damage or injury.
Mounting The Fixture
Start by turning off the power at the circuit breaker. This keeps you safe from electric shock. Next, remove the old fixture, if there is one. Check that the electrical box is strong enough to hold the new fixture.
Attach the mounting bracket to the electrical box using screws. Align the fixture base with the bracket. Secure the fixture by tightening the screws. Make sure the fixture sits flush against the ceiling or wall for a clean look.
Connecting The Wires
Identify the wires: usually black (hot), white (neutral), and green or bare (ground). Use wire strippers to remove about half an inch of insulation from each wire end. Connect the black wire from the fixture to the black house wire. Twist the wires together and secure with a wire nut.
Repeat the process for the white wires and the ground wires. Push the wires carefully into the electrical box. Avoid forcing them to prevent damage. Finally, attach the fixture cover or shade as directed.
Wiring The Switch
Wiring the switch is an important step in adding a new light and switch. It controls the flow of electricity to the light fixture. Proper wiring ensures the switch works safely and correctly. This part needs careful attention to avoid electrical problems or hazards.
Identifying Wires
First, turn off the power at the circuit breaker. Use a voltage tester to check wires. You will see three main wires: live (hot), neutral, and ground. The live wire carries electricity to the switch. The neutral wire completes the circuit back to the panel. The ground wire protects against electrical shocks. Usually, the live wire is black or red. The neutral wire is white. The ground wire is green or bare copper.
Connecting Switch Wires
Connect the live wire to one screw terminal on the switch. Connect the wire going to the light fixture to the other screw terminal. Do not connect the neutral wire to the switch. It stays in the electrical box and connects directly to the light fixture. Attach the ground wire to the green screw on the switch. Tighten all screws firmly to secure wires. Use wire nuts for any wire splices in the box.
Securing The Switch
Carefully push the wires back into the electrical box. Avoid bending or pinching the wires. Align the switch with the screw holes in the box. Use screws to fasten the switch tightly. Attach the switch cover plate to finish. Turn the power back on and test the switch. Make sure the light turns on and off smoothly.

Credit: www.finehomebuilding.com
Testing Your Work
Testing your work is a vital step after installing a light and switch. It ensures everything works safely and correctly. Skipping this step can cause electrical problems or safety risks. Take time to check all connections and functions before finishing.
Restoring Power
Before testing, restore power to the circuit. Turn the main breaker back on or switch the fuse. Make sure the power is fully on. Use a voltage tester to confirm electricity flows to the light and switch box. This step avoids surprises and ensures safety.
Checking Light And Switch Functionality
Flip the switch to test the light. The light should turn on and off smoothly. Try the switch a few times to confirm consistent operation. If the light does not turn on, check your wiring again. Look for loose connections or mistakes. Proper function means your work is done well.
Troubleshooting Common Issues
Troubleshooting common issues helps fix problems quickly. It saves time and effort. Understanding simple fixes makes your work easier.
Problems with lights and switches often happen during installation or use. Some issues are easy to spot and fix. Others need careful checking of parts and connections.
Light Not Turning On
Check if the light bulb is working. A burned-out bulb will not light up. Replace it with a new one.
Make sure the power is on. Check the circuit breaker or fuse box. Switch off and on to reset.
Look for any damage in the light fixture. Broken parts can stop the light from working.
Switch Problems
Test the switch by turning it on and off several times. Sometimes the switch gets stuck or worn out.
Use a voltage tester to see if the switch receives power. No power means a wiring problem.
Replace the switch if it feels loose or does not click properly. A faulty switch can cause issues.
Loose Connections
Turn off the power before checking connections. Loose wires can cause flickering or no power.
Look inside the switch box and light fixture. Tighten any loose screws or wire nuts.
Make sure all wires are connected to the correct terminals. Wrong connections can cause failure.
Safety Tips For Future Projects
Working with electricity requires care and attention. Safety is the top priority for every project. Following basic safety tips protects you and your home from accidents. These tips help you handle future electrical tasks with confidence.
Avoiding Electrical Hazards
Turn off the power at the breaker before starting any work. Use a voltage tester to check wires. Wear insulated gloves to reduce the risk of shock. Keep tools dry and avoid working in wet places. Do not touch wires with bare hands. Use proper tools designed for electrical work. Always follow the wiring diagram carefully. Never overload circuits with too many devices.
When To Call A Professional
Complex wiring or old electrical systems need expert help. If you feel unsure about any step, stop and call an electrician. Problems like flickering lights or burnt smells require immediate attention. Professionals have tools and knowledge to fix issues safely. Hiring an expert saves time and prevents costly damage. Trust experts for permits and code compliance. Safety comes first, so don’t take risks beyond your skill.
Frequently Asked Questions
How Do I Safely Add A New Light And Switch?
Turn off power at the breaker before starting. Use a voltage tester to confirm no electricity flows. Follow wiring diagrams carefully. Connect wires matching colors: black to black, white to white, and ground to ground. Secure connections and mount the switch and light properly.
What Tools Are Needed To Install A Light And Switch?
You need a voltage tester, wire strippers, screwdrivers, electrical tape, and a drill. Also, have wire nuts and a flashlight ready. These tools help ensure safe and efficient installation of your light and switch.
Can I Add A Light And Switch Without An Electrician?
Yes, if you understand basic electrical work and follow safety rules. Always turn off power and use proper tools. If unsure, consult a professional to avoid hazards or code violations.
How Do I Connect Wires For A Light And Switch?
Connect the black wire from power to the switch’s input terminal. Attach the black wire from the light to the switch’s output terminal. Connect all white (neutral) wires together. Attach ground wires to the switch and box grounding points.
Conclusion
Adding a light and switch can brighten any room quickly. Follow safety steps and use the right tools. Double-check all connections before turning the power back on. Take your time and work carefully to avoid mistakes. This simple project saves money and adds comfort to your home.
You can do it yourself with clear instructions. Enjoy the new light and control it easily with the switch.