Have you ever removed mounting tape, only to find that it has damaged your paint? It’s frustrating to see your walls or furniture looking ruined after a simple task.
But don’t worry—fixing mounting tape paint problems is easier than you think. You’ll discover simple, effective steps that will restore your paint and make your surfaces look as good as new. Keep reading, and you’ll learn how to handle this common issue quickly and confidently.

Credit: www.reddit.com
Causes Of Mounting Tape Paint Issues
Mounting tape paint issues can be frustrating. They often happen due to common mistakes or poor material choices. Understanding the causes helps prevent damage and saves time. This section breaks down the main reasons for these problems.
Common Tape Residue Problems
Tape residue can stick hard to painted surfaces. It leaves sticky marks that are tough to clean. Some tapes have strong adhesives that damage paint. Residue buildup attracts dirt and dust, making walls look dirty. Using the wrong tape type worsens these issues.
Paint Peeling And Lifting
Peeling happens when tape pulls paint off the surface. Strong adhesive or long tape application causes lifting. Paint that is old or weak peels more easily. Removing tape too fast also tears paint layers. Peeling ruins the finish and needs repair.
Surface Preparation Mistakes
Skipping surface cleaning leads to poor tape adhesion. Dust and grease create gaps under the tape. Painting over dirty surfaces causes uneven paint layers. Not waiting for paint to dry fully weakens tape grip. Proper prep is key for smooth tape removal.
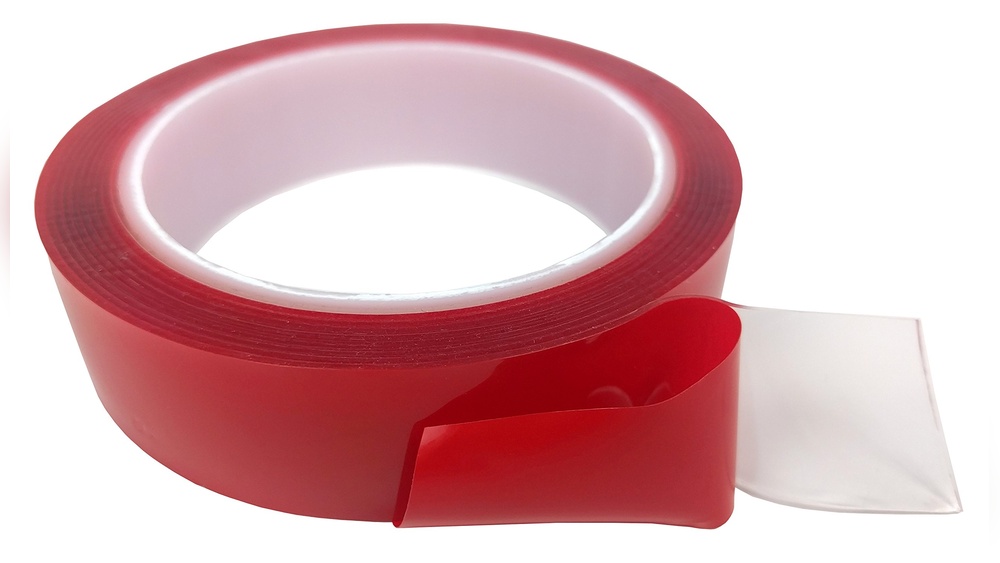
Choosing The Right Tape
Choosing the right mounting tape is key to protecting painted walls. The wrong tape can peel paint or leave sticky marks. Picking a tape that holds well but also removes cleanly helps keep walls safe. Knowing the types of tapes and which ones work best on painted surfaces makes the job easier.
Types Of Mounting Tape
Mounting tapes come in many forms. Double-sided foam tape offers strong grip and cushions items. Clear acrylic tape is less visible and holds firmly. Washi tape is decorative but not very strong. Each tape suits different surfaces and weights.
Tapes Suitable For Painted Walls
Soft, low-residue tapes work best on painted walls. Painter’s tape and low-tack double-sided tapes stick well but peel off easily. These tapes do not harm paint or leave stains. Avoid heavy-duty tapes that pull paint off when removed.
Avoiding Damage With Low-tack Options
Low-tack tapes have gentle adhesives. They hold decorations without hurting paint. Use low-tack tape for light pictures and posters. Test a small area first to see if the paint stays intact. This prevents costly wall repairs later.
Preparing Walls Before Application
Preparing walls before applying mounting tape paint is key to a lasting finish. Clean and smooth surfaces help the tape stick well. This step avoids peeling and uneven edges. Proper preparation saves time and effort later.
Cleaning And Drying Surfaces
Start by removing dirt, dust, and grease from the walls. Use a mild soap and water solution. Wipe the surface with a clean cloth. Let the wall dry completely before moving forward. Damp walls cause poor tape adhesion and bubbles.
Sanding For Better Adhesion
Lightly sand painted walls with fine-grit sandpaper. Sanding creates a rough texture for the tape to grip. Do not sand too hard to avoid damage. After sanding, wipe away dust with a dry cloth. This step improves tape hold and smooths the surface.
Priming Painted Walls
Apply a primer to painted walls that are glossy or old. Primer helps the mounting tape stick better. Choose a primer made for your wall type. Let the primer dry fully before applying tape. Priming ensures strong and even adhesion.

Credit: www.3m.com
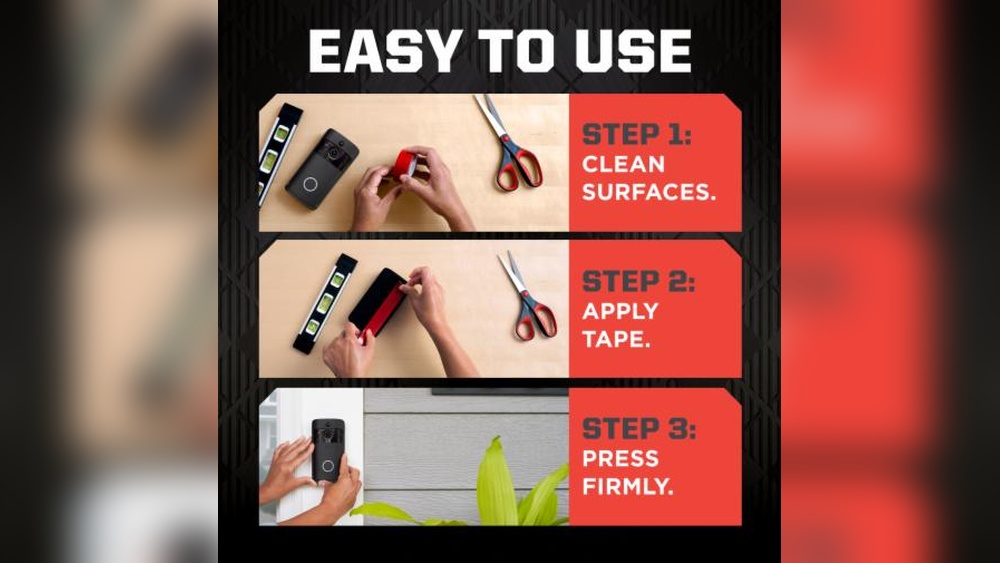
Proper Mounting Tape Application
Proper mounting tape application is key to avoid paint damage. Correct steps help the tape stick well and peel off cleanly. This prevents paint from lifting or tearing.
Follow simple methods for better results. Small care during application saves time and effort later.
Cutting And Positioning Tape
Cut tape slightly longer than the needed length. This gives room to adjust placement. Position tape carefully along the edge or surface. Make sure it aligns straight to avoid crooked lines.
Applying Tape Without Bubbles
Place one end of the tape first. Slowly press the tape down while unrolling. Use a flat tool or finger to smooth out air bubbles. Check the tape surface for any gaps or bubbles. Smooth tape firmly to ensure full contact.
Pressing And Securing Tape
Press tape edges firmly to stick well. Use a clean cloth or roller for even pressure. Avoid stretching the tape while pressing. Secure tape edges tightly to prevent paint bleed. Let tape sit for a few minutes before painting.
Removing Tape Without Paint Damage
Removing mounting tape without harming the paint takes care and patience. The right approach stops paint from peeling or lifting off the wall. Follow simple steps to keep your paint job safe and clean while removing tape.
Timing For Safe Removal
Remove the tape at the right moment. Let the paint dry fully before peeling the tape off. Waiting 24 hours is a good rule for most paints. Dry paint holds better and reduces damage risk.
Techniques To Avoid Peeling
Pull the tape slowly and at a sharp angle. Keep the tape close to the wall as you peel. Avoid pulling straight out or too fast. Stretching the tape can pull paint with it. Use a steady hand and gentle touch.
Using Heat Or Solvents Carefully
Heat softens the tape adhesive and helps easy removal. Use a hairdryer on low heat, moving it back and forth. Do not hold heat in one spot too long. Solvents like rubbing alcohol can loosen sticky residue. Test a small hidden area first to avoid damage.
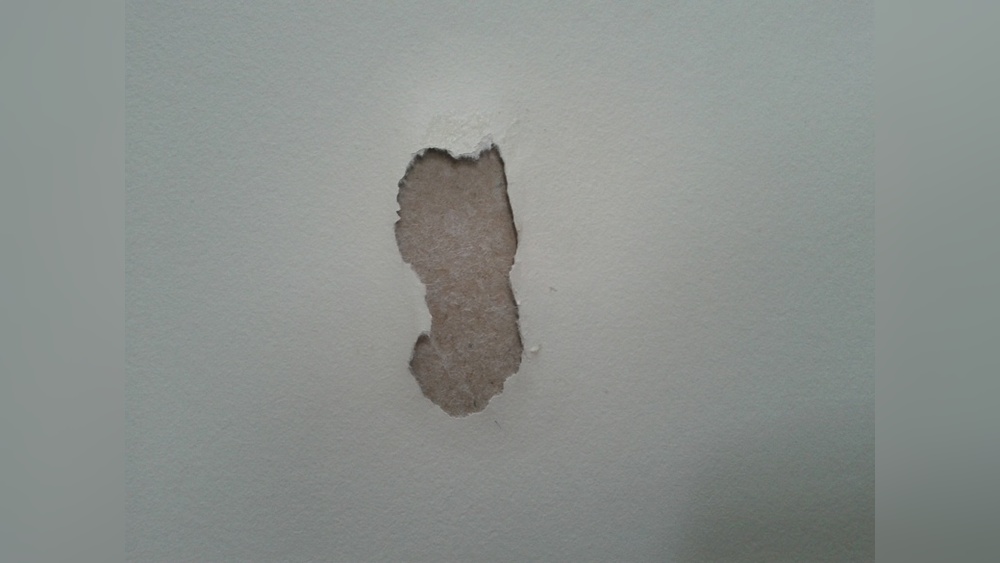
Fixing Paint Damage Caused By Tape
Paint damage from mounting tape can be frustrating. The tape may pull off paint or leave sticky residue behind. Fixing these problems requires care and patience. Small steps can restore your walls without needing a full repaint.
Cleaning Residue And Stains
Start by removing any sticky tape residue. Use warm water with mild soap and a soft cloth. Gently rub the area to lift the residue. For tougher stains, try rubbing alcohol or a commercial adhesive remover. Test these on a small spot first. Avoid scrubbing hard to prevent more paint damage.
Touching Up Peeling Paint
Peeling paint needs careful repair. Use a putty knife to scrape off loose paint gently. Sand the edges smooth with fine-grit sandpaper. Wipe away dust with a damp cloth. Apply a primer to the bare spots. Let it dry completely before adding new paint. This helps the paint stick and look even.
Repainting Tips For Seamless Finish
Match the paint color closely for best results. Use a small brush or roller to apply paint thinly. Blend new paint into the old with light, even strokes. Avoid thick layers to prevent noticeable lines. Allow each coat to dry fully before adding another. This creates a smooth, natural finish that hides past damage.
Alternative Solutions To Mounting Tape
Mounting tape can sometimes cause paint damage or fail to hold items securely. Finding other options helps protect your walls and keeps things in place. These alternatives offer easy, clean solutions for hanging items without worries.
Command Strips And Hooks
Command strips and hooks stick well without harming paint. They come in many sizes and hold different weights. Removing them leaves no marks or holes. Perfect for pictures, decorations, and small shelves.
Adhesive Putty Options
Adhesive putty is a soft, reusable option for light objects. It sticks to walls and surfaces gently. Great for posters, papers, and lightweight decorations. You can remove and reuse it with no damage.
Magnetic And Velcro Alternatives
Magnets and Velcro strips provide flexible, strong mounting choices. Magnets work well on metal surfaces. Velcro attaches two sides, holding items firmly. Both options allow easy removal and repositioning.

Credit: diy.stackexchange.com
Frequently Asked Questions
What Causes Mounting Tape Paint To Peel Off?
Mounting tape paint peels due to poor surface prep or low-quality tape. Moisture and heat also weaken adhesion. Proper cleaning and choosing the right tape prevent peeling.
How To Remove Paint From Mounting Tape Safely?
Use warm, soapy water and a soft cloth to clean paint off tape. Avoid harsh chemicals that damage tape. Gentle scrubbing helps remove paint without reducing tape stickiness.
Can Mounting Tape Damage Painted Surfaces?
Yes, some mounting tapes can peel or damage paint when removed. Use low-adhesive or painter’s tape for delicate surfaces to minimize damage. Always test tape on a small area first.
How To Fix Paint Peeling Caused By Mounting Tape?
Carefully remove tape and clean residue. Sand the area lightly, then repaint with primer. Use painter’s tape next time to avoid peeling. Proper surface prep ensures better paint adhesion.
Conclusion
Fixing mounting tape paint is easier than it seems. Start by cleaning the surface well. Use gentle tools to avoid damage. Apply fresh paint carefully for best results. Let the paint dry completely before using the tape again. Small steps can save your walls and frames.
Keep patience and work slowly for neat repairs. This way, your mounting tape and paint will look good again. Simple fixes can make a big difference in your space.