Removing the tap mount from a keg might sound tricky, but with the right steps, you can do it quickly and safely. Whether you’re cleaning, replacing parts, or just curious about how it works, knowing how to remove the tap mount is a skill every beer lover should have.
In this guide, you’ll find simple, clear instructions that make the process easy to follow. Stick with me, and by the end, you’ll feel confident handling your keg like a pro. Ready to get started? Let’s dive in!
Tools Needed
Removing the tap mount from a keg requires the right tools. Having proper equipment makes the job easier and faster. This section covers what tools you will need.
Essential Equipment
A wrench is crucial for loosening bolts or nuts on the tap mount. Use an adjustable wrench to fit different sizes. A flathead screwdriver helps pry off parts gently. Gloves protect your hands from sharp edges and cold surfaces. A towel or rag cleans spills and keeps the area tidy.
Optional Accessories
A rubber mallet can tap parts loose without damage. A pair of pliers helps grip small or tight fittings. Lubricant spray can loosen stuck screws or bolts. A flashlight improves visibility in dim places. Having a small container nearby keeps screws safe and organized.
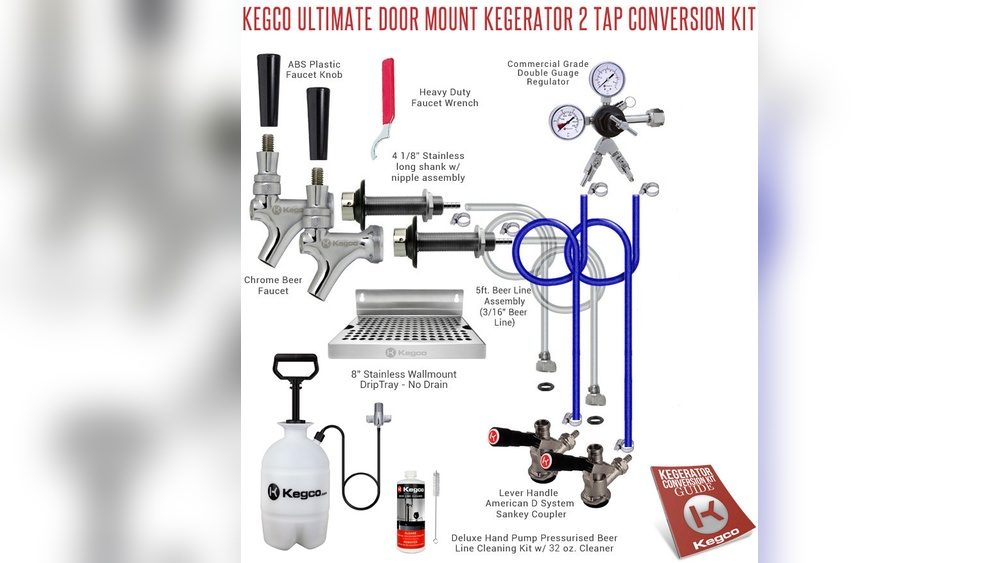
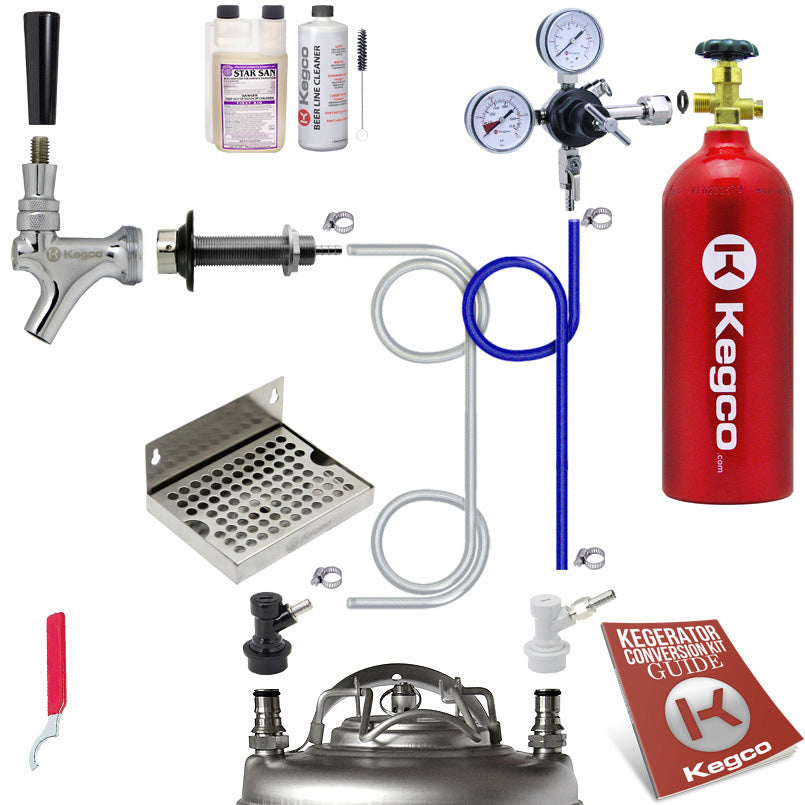
Credit: kegco.com
Safety Precautions
Removing the tap mount from a keg requires careful attention to safety. Kegs hold pressurized liquid, which can cause injury if not handled properly. Taking simple safety steps protects you and others around.
Handling Pressurized Kegs
Always release the pressure before starting any work on the keg. Use the pressure relief valve to let out gas slowly. Never remove the tap mount while the keg is still pressurized. Sudden release can cause the tap or parts to shoot out. Keep the keg on a stable surface to avoid tipping. Handle the keg gently to prevent damage or leaks.
Protective Gear Recommendations
Wear safety goggles to protect your eyes from splashes or debris. Gloves can prevent cuts and provide better grip on tools. Choose gloves made from sturdy material, like rubber or leather. Long sleeves help protect your arms from spills and sharp edges. Closed-toe shoes keep your feet safe in case the keg or tools drop.
Preparing The Keg
Preparing the keg is a key step before removing the tap mount. This step ensures safety and helps avoid mess. It also makes the removal process easier and cleaner. Take your time and follow the steps carefully.
Depressurizing The Keg
First, release the pressure inside the keg. Press down on the pressure relief valve slowly. You will hear gas escaping. Wait until no more gas comes out. This step prevents accidents and spills.
Cleaning The Area
Next, clean the area around the tap mount. Use a clean cloth to wipe off dirt and sticky residue. This keeps the work area tidy. It also stops dirt from entering the keg during removal.
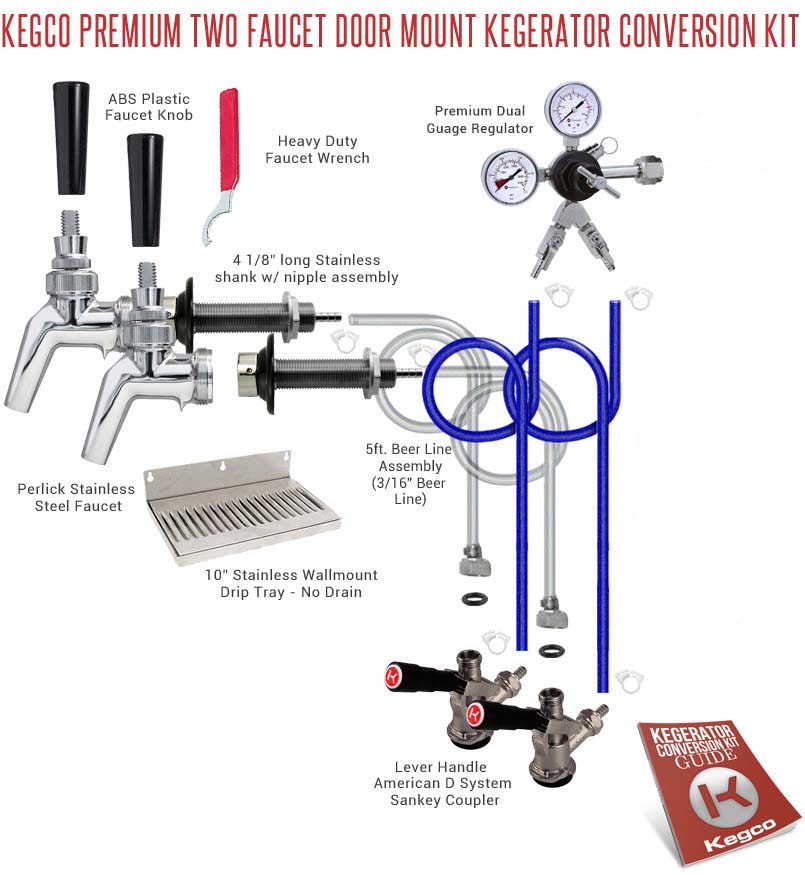
Credit: kegco.com
Removing The Tap Mount
Removing the tap mount from a keg is an important step for cleaning or replacing parts. It helps keep your equipment in good shape and prevents leaks. This process is simple with the right steps and tools. Follow these instructions carefully to avoid damage and ensure safety.
Loosening The Locking Ring
Start by locating the locking ring at the base of the tap mount. This ring holds the tap firmly to the keg. Use a wrench or your hands to turn the ring counterclockwise. It may be tight, so apply steady pressure without forcing it. Once loose, the ring will slide off easily. Keep the ring safe for reassembly later.
Detaching The Tap Assembly
After removing the locking ring, gently pull the tap assembly upward. It should come off without much force. If it feels stuck, wiggle it slightly while pulling. Be careful not to bend or damage the tap parts. Set the tap assembly aside on a clean surface. This allows you to clean or replace the tap mount properly.
Inspecting The Components
Before removing the tap mount from a keg, carefully inspect its parts. This step helps keep your equipment safe and working well. A close look can show small problems before they get worse.
Inspecting the components also improves the taste of your beer. Dirty or broken parts can spoil the flavor. Clean, good condition parts make every pour smooth and fresh.
Checking For Wear And Damage
Look closely at the tap mount for cracks or breaks. Check the seals and gaskets for wear or tears. These parts stop leaks and keep pressure steady. Replace any damaged pieces before using the keg again. Worn parts can cause spills or bad beer quality.
Examine metal surfaces for rust or corrosion. Rust weakens the mount and can mix with your drink. Use a flashlight to see hidden spots. Careful checks save time and money on repairs.
Cleaning The Tap Mount
Remove dirt and old beer from the tap mount. Use warm water and mild soap to wash all parts. Avoid harsh chemicals that can harm seals and metal. Rinse well to remove all soap residue.
Dry the parts completely before reassembling or storing. Clean mounts work better and last longer. Regular cleaning stops bacteria and mold from growing inside the keg system.
Reinstalling Or Storing The Tap Mount
After removing the tap mount from a keg, proper care is essential. Knowing how to reinstall or store the tap mount helps keep it in good shape. Clean and dry parts ensure smooth use next time. Store the tap mount correctly to avoid damage or dirt.
Proper Reassembly Tips
Check all parts for damage before putting the tap mount back. Replace any worn seals or washers. Align the tap mount carefully with the keg opening. Tighten screws or clamps evenly to avoid leaks. Test the tap mount by running water through it. This confirms correct assembly and no blockages. Handle parts gently to avoid bending or breaking.
Storage Recommendations
Clean the tap mount thoroughly after each use. Use warm water and mild soap to remove residue. Dry all parts completely to stop rust or mold. Store the tap mount in a cool, dry place away from sunlight. Use a sealed container or bag to keep dust out. Avoid stacking heavy items on top of the tap mount. Label the storage container to find it easily later.
Troubleshooting Common Issues
Removing the tap mount from a keg can sometimes cause problems. These issues slow down the process and cause frustration. Knowing how to fix common problems helps save time and protects your equipment. Here are some tips for handling typical troubles during tap mount removal.
Dealing With Stuck Components
Tap mounts often get stuck due to dirt or rust. Use a soft cloth to clean the area first. Apply a small amount of food-safe lubricant around the connection. Wait a few minutes for it to work. Gently twist and pull the mount to loosen it. Avoid using too much force to prevent damage. If it still won’t budge, try warming the metal slightly. Heat expands metal and can free the stuck parts.
Handling Leaks And Damage
Leaks may appear after removing the tap mount. Check the rubber seals for cracks or wear. Replace any damaged seals to stop leaks. Inspect the keg’s neck and tap mount for dents or scratches. Small damage can cause poor sealing and leaks. Use a clean cloth to dry all parts before reassembling. Tighten connections firmly but carefully. Loose fittings cause leaks, but overtightening can break parts.

Credit: www.amazon.com
Frequently Asked Questions
How Do I Safely Remove A Tap Mount From A Keg?
To safely remove a tap mount, first release all pressure from the keg. Then, use the correct wrench to unscrew the mount carefully. Avoid using excessive force to prevent damage to the keg or tap.
What Tools Are Needed To Remove A Keg Tap Mount?
You typically need a keg wrench or adjustable wrench to remove the tap mount. Some mounts may require a screwdriver. Always check your specific keg model for the appropriate tool to avoid damage.
Can I Remove The Tap Mount Without Emptying The Keg?
No, it’s important to empty or release all pressure from the keg before removing the tap mount. Removing the mount under pressure can cause injury or damage to the equipment.
How Long Does It Take To Remove A Tap Mount From A Keg?
Removing a tap mount usually takes 5 to 10 minutes. This depends on your experience and if the keg is properly depressurized and tools are ready.
Conclusion
Removing the tap mount from a keg is simple with the right steps. Always use the correct tools to avoid damage. Take your time and work carefully to keep everything safe. Clean the parts after removal for better use later.
Now, you can easily replace or fix your keg tap. Enjoy smooth pouring every time you use your keg. Practice makes the process quicker and easier each time. Keep this guide handy for future reference.