Have you ever wished you could set the perfect mood in any room with just a simple flick? Changing your regular light switch to a dimmer switch lets you do exactly that.
Imagine adjusting your lighting to suit every moment—whether it’s a cozy movie night or a bright, energetic morning. The best part? You don’t need to be an expert electrician to make this easy upgrade yourself. In this guide, you’ll discover step-by-step how to change your light switch to a dimmer, saving money and instantly improving your space.
Keep reading, and you’ll be controlling your lighting like a pro in no time.
Tools And Materials Needed
Changing a light switch to a dimmer requires a few basic tools and materials. Having the right items makes the job easier and safer. This section lists everything needed to complete the task smoothly.
Tools Required
- Screwdriver (flathead and Phillips)
- Voltage tester
- Wire stripper
- Needle-nose pliers
- Electrical tape
- Flashlight or portable light source
Materials Needed
- Dimmer switch compatible with your lighting
- Wire connectors (wire nuts)
- Wall plate for the dimmer switch
Safety Gear
- Insulated gloves
- Safety glasses
Using these tools and materials ensures a safe and effective installation. Double-check that the dimmer switch matches your light type.
Choosing The Right Dimmer Switch
Choosing the right dimmer switch is important for a smooth lighting experience. Not all dimmers work with every bulb or fixture. Picking the correct type avoids flickering and damage. This section helps you understand the options and what fits best for your home.
Types Of Dimmer Switches
There are several dimmer switch types. The most common are rotary, slide, and touch dimmers. Rotary dimmers turn like a knob to adjust light. Slide dimmers use a small lever to set brightness. Touch dimmers work with a tap or touch. Some dimmers support smart home control for remote use. Choose one that matches your needs and style.
Compatibility With Bulbs
Dimmers must match your bulb type to work well. Incandescent and halogen bulbs work with most dimmers. LED and CFL bulbs need special dimmers made for them. Using the wrong dimmer can cause flickering or buzzing. Check the dimmer label to see which bulbs it supports. This ensures smooth dimming and longer bulb life.
Safety Precautions
Changing a light switch to a dimmer can improve your room’s lighting. Safety is the most important part of this task. Taking the right precautions prevents accidents and injuries. Follow these safety tips carefully before you start.
Turn Off The Power
Always switch off the power at the circuit breaker. Do not rely on the wall switch alone. Use a voltage tester to check if the wires are dead. This step stops electric shocks while working.
Use The Right Tools
Select insulated tools designed for electrical work. Avoid using damaged or worn-out tools. Proper tools make the job safer and easier. Keep everything organized to prevent mistakes.
Wear Safety Gear
Wear rubber-soled shoes to reduce shock risk. Use safety goggles to protect your eyes. Gloves can protect your hands from sharp edges. Safety gear helps avoid injuries during the work.
Read The Instructions
Check the dimmer switch manual before starting. Follow the manufacturer’s wiring diagrams exactly. Do not guess or skip steps. Clear understanding reduces errors and hazards.
Work In Good Lighting
Ensure the workspace is bright enough to see clearly. Use a flashlight if the main light is off. Good lighting helps avoid wrong connections and accidents.
Turning Off The Power
Before starting any electrical work, safety is the top priority. Turning off the power stops electricity from flowing. This prevents shocks and accidents while changing the switch.
Always treat electricity with respect. Even a small mistake can cause injury or damage. Take the time to cut the power carefully. This step sets a safe foundation for the rest of the job.
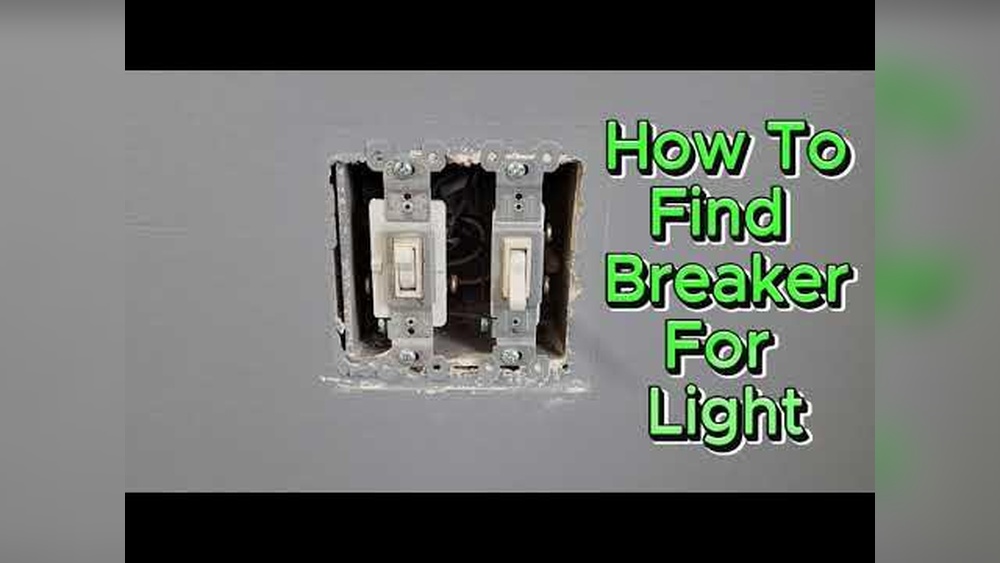
Locate The Circuit Breaker
Find the main electrical panel in your home. This box controls all power to your rooms. Look for the breaker that controls the room with the light switch.
Each breaker has a label. It shows the area or room it powers. Flip the correct breaker to the OFF position. This cuts power to the switch you want to replace.
Test The Power Is Off
Use a voltage tester or a simple screwdriver tester. Touch the tester to the switch wires. No light or beep means the power is off.
Test more than once to be sure. Check the light switch and the light itself. This confirms no electricity is flowing.
Double-check For Safety
Even after switching off the breaker, be cautious. Turn the light switch on and off. The light should not turn on.
If the light still works, turn off the main breaker. Call an electrician if unsure. Do not continue without power off.
Removing The Existing Switch
Removing the existing switch is the first step to installing a dimmer. It is important to do this safely and carefully. This process lets you access the wiring behind the switch. Knowing how to remove the switch properly helps avoid damage and makes installation easier.
Turn Off The Power
Safety comes first. Find the breaker that controls the switch. Switch it off to stop electricity. Use a tester to check the switch. Make sure no power is running through.
Remove The Switch Cover Plate
Use a screwdriver to take off the cover plate. This plate hides the screws holding the switch. Keep the screws in a safe place. You will need them later.
Unscrew The Switch
Loosen the screws holding the switch to the wall box. Pull the switch out gently. Do not pull too hard. Wires are still attached behind.
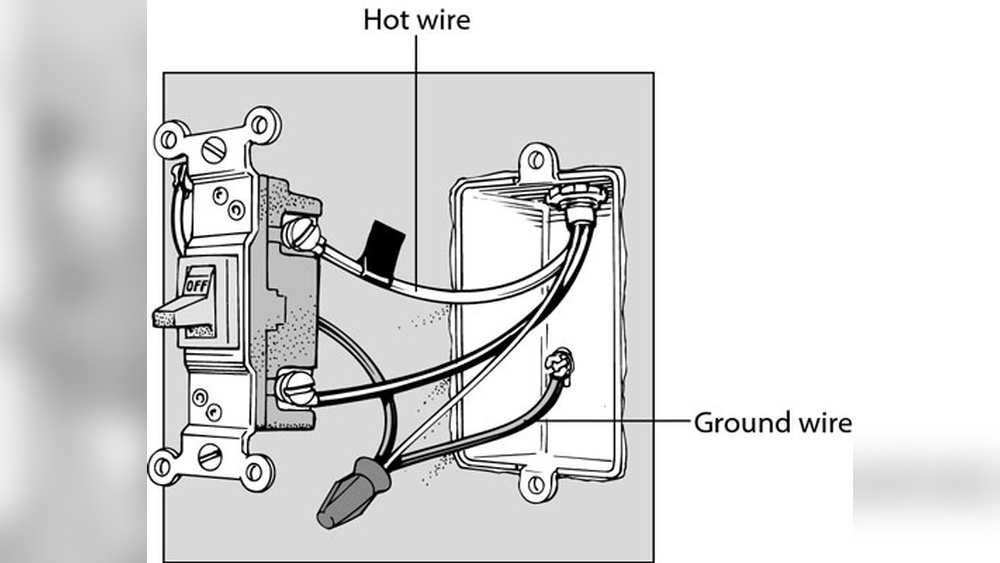
Note The Wiring
Look closely at how wires connect to the switch. Take a photo or write notes. This helps when connecting the new dimmer. Knowing wire positions avoids mistakes.
Disconnect The Wires
Use a screwdriver to loosen screws on the switch terminals. Carefully detach the wires from the switch. Do not let wires touch each other. Keep wire ends separate and safe.
Wiring The Dimmer Switch
Wiring a dimmer switch is a key step in changing your regular light switch. This process controls light brightness and creates a cozy room mood. Understanding the wires and connecting them correctly ensures safety and proper function.
Identifying Wires
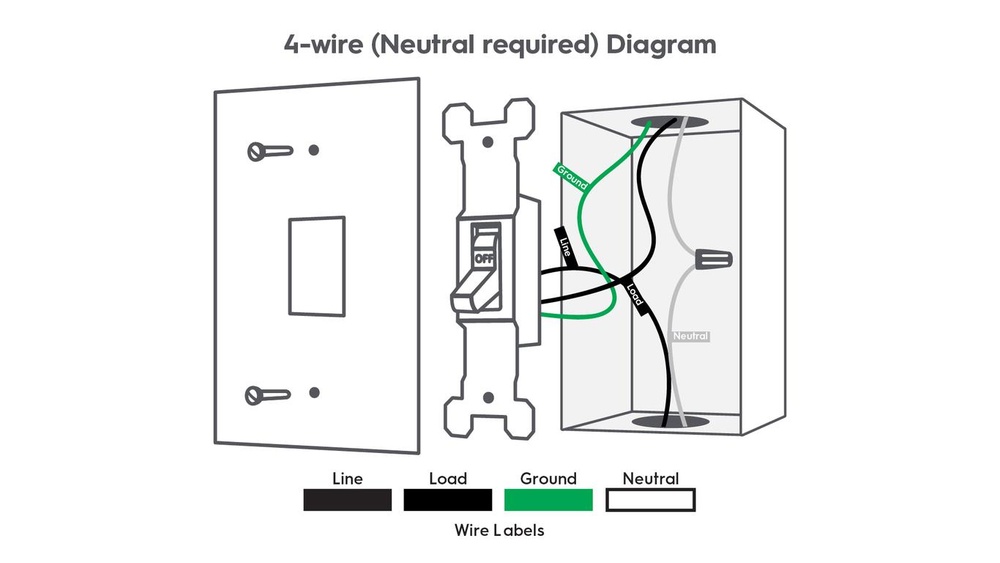
First, turn off the power at the circuit breaker. Safety is important. Remove the old switch cover and pull out the switch. Look for three main wires: black (hot), white (neutral), and green or bare copper (ground). Some switches may not have a neutral wire. Use a voltage tester to confirm which wire carries power. Mark each wire with tape to avoid confusion later.
Connecting Wires To Dimmer
Match the dimmer wires to the house wires. Connect black wires together using a wire connector. Attach the green or bare copper wire to the dimmer’s ground wire. If your dimmer has a white wire, connect it to the neutral wire. Twist wires tightly and secure with wire nuts. Push the wires back into the electrical box carefully. Screw the dimmer switch into place and reattach the cover plate.
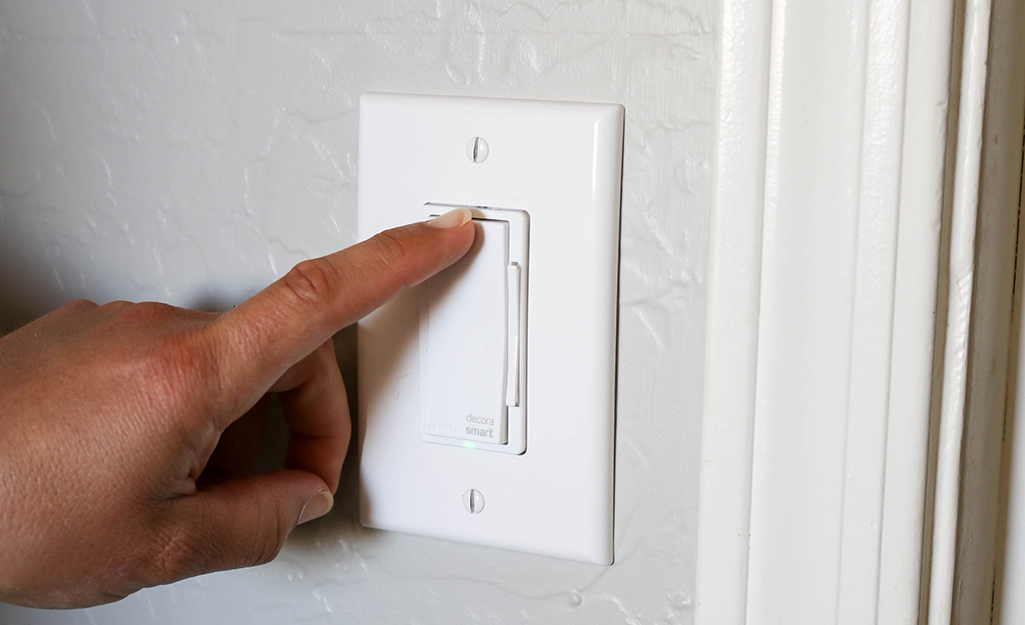
Mounting The Dimmer Switch
Mounting the dimmer switch is the final step to complete your lighting upgrade. This part ensures your new dimmer fits securely and works smoothly. A proper mount keeps the switch stable and safe.
Follow these steps carefully to avoid loose connections or damage. Take your time and check each detail before moving on.
Prepare The Wall Box
Start by cleaning the wall box. Remove any debris or old paint that may block the dimmer. Check the box for damage or loose wires. Tighten any screws if needed.
Attach The Dimmer Switch
Place the dimmer switch into the wall box carefully. Line up the mounting holes with the box screws. Use a screwdriver to secure the dimmer firmly. Do not overtighten, as this can crack the switch.
Install The Wall Plate
Once the dimmer is mounted, attach the wall plate. Align it with the switch and press gently. Screw the plate into place with the provided screws. Make sure it sits flat against the wall.

Credit: www.youtube.com
Testing The Dimmer
Testing the dimmer switch is a key step after installation. It confirms the switch works correctly and safely. Proper testing helps avoid flickering lights or damage.
Follow clear steps to check the dimmer’s function. Watch how the lights respond to the control. This process ensures smooth dimming and no electrical issues.
Turn On The Power
First, restore power at the circuit breaker. This allows the dimmer to receive electricity. Avoid turning on the switch before power is back. Safety comes first.
Check The Light Response
Slowly move the dimmer knob or slide. Observe the light as it dims and brightens. The light should change smoothly without flicker. Any sudden changes mean adjustment is needed.
Listen For Unusual Sounds
Pay attention to buzzing or humming noises. Dimmer switches sometimes make sounds when faulty. A quiet dimmer indicates proper function. No strange sounds mean a good install.
Test Multiple Settings
Try different brightness levels across the dimmer range. Lights should stay steady at all points. Avoid levels that cause flicker or shut off. Full range testing ensures reliability.
Confirm Compatibility
Ensure the dimmer matches the light bulb type. Some dimmers work only with LEDs or incandescent bulbs. Wrong pairing can cause poor dimming or damage. Check the packaging for compatibility details.
Troubleshooting Common Issues
Changing a light switch to a dimmer can improve your room’s lighting. Sometimes, issues can arise during or after installation. Troubleshooting helps fix these problems quickly. This section covers common issues and how to solve them.
Incorrect Wiring
Incorrect wiring is a common problem. Double-check the wires connected to the dimmer. Make sure the hot wire goes to the correct terminal. The ground wire must be connected safely. Turn off power before touching wires to avoid shock.
Dimmer Not Controlling Lights
The dimmer might not control the lights properly. Check if the dimmer is compatible with your bulbs. Some dimmers work only with certain bulb types. LED bulbs often need specific dimmers. Replace bulbs or dimmer if they do not match.
Lights Flicker Or Buzz
Flickering or buzzing lights can be annoying. Loose wiring or incompatible bulbs often cause this. Tighten all wire connections carefully. Use dimmers designed for LED or CFL bulbs. Changing bulbs or dimmer can stop the noise.
Dimmer Feels Hot
A warm dimmer switch is normal but should not be hot. If it feels very hot, switch off the power. Check for wiring issues or overload. Using a dimmer with too high wattage bulbs can cause heat. Replace the dimmer with the correct type and rating.
Dimmer Switch Not Responding
If the dimmer does not respond, check the breaker. Reset the circuit breaker if it tripped. Test the dimmer switch with a voltage tester. Replace the dimmer if it shows no power. Faulty dimmers need replacement for safe use.

Credit: www.gelighting.com
Credit: www.homedepot.com
Frequently Asked Questions
What Tools Do I Need To Change A Light Switch To A Dimmer?
You need a screwdriver, wire stripper, voltage tester, and a compatible dimmer switch. Safety gear like gloves is recommended. Always turn off power before starting.
Can I Replace Any Light Switch With A Dimmer?
No, ensure your bulbs support dimming. LED and CFL bulbs need dimmable types. Check compatibility before replacing the switch.
How Do I Safely Install A Dimmer Switch?
Turn off power at the breaker. Remove the old switch, connect wires to the dimmer, and secure it. Test functionality before finishing.
Will A Dimmer Switch Save Energy?
Yes, dimmers reduce light intensity, lowering electricity use. They extend bulb life and decrease energy bills effectively.
Conclusion
Changing a light switch to a dimmer brings better control over your room’s lighting. It makes your space feel cozy or bright, as you want. The steps are simple and safe when you follow the instructions carefully. Take your time and double-check your work.
Enjoy the new mood and comfort a dimmer switch provides. Small changes can make a big difference in your home’s atmosphere. Give it a try and see how lighting can change your space.