Are you dealing with a sagging or uneven floor that’s driving you crazy? Knowing how to jack your floor up can save you time, money, and a lot of frustration.
Whether you want to fix a dip, create more headroom, or prepare for new flooring, lifting your floor the right way is key. You’ll discover simple steps and expert tips that make the job easier and safer. Keep reading, and you’ll gain the confidence to tackle this project yourself and see impressive results.
Preparing The Space
Preparing the space is a key step before jacking up a floor. It sets the stage for safe and smooth work. Clear and organize the area. Gather all needed tools and materials. Inspect the floor structure closely. These tasks make the job easier and reduce risks.
Clearing The Area
Remove furniture, rugs, and any loose items. Keep the space free from obstacles. This helps avoid accidents during the process. A clear area also gives you more room to work comfortably. Check for nails or screws sticking out. These can cause injuries or damage tools.
Gathering Tools And Materials
Collect all necessary equipment before starting. Common tools include floor jacks, wooden blocks, a level, and a hammer. Use a tape measure to check distances. Have safety gear ready, such as gloves and goggles. Organize everything close to the work zone. This saves time and effort.
Checking Floor Structure
Examine the floor joists and beams carefully. Look for cracks, rot, or water damage. Mark any weak spots to avoid placing jacks there. Confirm the floor is strong enough to hold the weight. Identify solid points to position the jacks safely. Understanding the floor’s condition prevents accidents and damage.

Credit: oldhousecrazy.com
Selecting The Right Jack
Selecting the right jack is essential for safely lifting a floor. The right tool ensures stability and prevents damage. It makes the job easier and protects your home.
Choosing a jack involves understanding different types, load capacities, and safety features. This helps you pick the best option for your project.
Types Of Jacks
There are several types of jacks used for lifting floors. Hydraulic jacks use fluid pressure for strong lifting power. Screw jacks turn a threaded rod to raise the load slowly. Bottle jacks are compact and use hydraulic pressure. Floor jacks have a wide base for stability and smooth lifting. Each type suits different tasks and spaces.
Load Capacity Considerations
Check the jack’s load capacity before buying. It must support the weight of the floor and any extra load. Choose a jack with a capacity higher than your estimate. This prevents accidents and ensures safety. Overloading a jack can cause failure and injury.
Safety Features To Look For
Safety features are crucial in a jack. Look for a wide, stable base to prevent tipping. A locking mechanism holds the jack in place. Non-slip feet improve grip on floors. Some jacks have pressure release valves to avoid sudden drops. These features keep you safe during the lift.
Locating Support Points
Locating support points is the first step to jack a floor up safely. You need to find strong spots under the floor. These spots carry the weight of the floor above. Jacks must sit on these points to lift the floor properly.
Knowing where to place the jacks helps avoid damage. It also keeps the lift stable. Take your time to find the best spots before starting.
Finding Joists And Beams
Joists and beams are the main supports under a floor. Joists are small, closely spaced boards. Beams are larger and carry more weight. Use a stud finder or tap the floor to find joists. Look in the basement or crawl space to locate beams.
Avoiding Weak Spots
Weak spots can cause the jack to slip or the floor to crack. Avoid areas with cracks, rot, or water damage. Do not place jacks on drywall or thin plywood. Look for solid wood or metal beams for the best support.
Marking Lift Locations
Mark the places where you will put the jacks. Use a pencil or chalk to make clear marks. Check that marks are on strong beams or joists. Double-check measurements to keep jacks evenly spaced. This helps lift the floor evenly and safely.
Setting Up The Jack
Setting up the jack is a crucial step before lifting the floor. Proper setup ensures safety and effectiveness. Take time to prepare the area and tools carefully. A stable setup prevents accidents and damage during the lifting process.
Positioning The Jack
Place the jack directly under the floor beam or joist. Check the beam is strong enough to bear weight. Avoid placing the jack on weak or cracked wood. Center the jack’s lifting pad under the beam for balance. Position the jack so it can lift straight up without slipping.
Using Support Blocks
Use wooden blocks to raise the jack to the needed height. Cut blocks to fit tightly between the floor and the jack. Stack blocks evenly to avoid tilting. The blocks should be solid and dry. Support blocks help spread the load and protect the floor surface.
Ensuring Stability
Check that the jack and blocks sit on a flat, firm surface. Avoid soft or uneven ground that may shift under pressure. Use a level to confirm the jack is vertical. Secure the jack so it does not move during lifting. Stability keeps the floor and workers safe throughout the job.
Lifting The Floor Safely
Lifting a floor requires care to keep the process safe and effective. Safety ensures no damage happens to the structure or injury to anyone nearby. Taking small steps helps control the lift and avoid accidents. Attention to detail makes the job smoother and safer.
Slow And Steady Lifting
Lift the floor slowly. Quick moves can cause sudden shifts or breaks. Use small turns on the jack handle to raise the floor bit by bit. Pause often to check the floor’s response. Slow lifting helps avoid cracks and keeps the floor stable.
Monitoring Floor Movement
Watch the floor as you lift. Look for any cracks or unusual bends. Use a level tool to check if the floor stays even. Stop if the floor moves oddly. Careful monitoring helps catch problems early and reduces risk.
Adjusting Jack Position
Move the jack if the floor lifts unevenly. Place it under strong support points like beams or joists. Shifting the jack keeps the pressure balanced. Proper jack placement protects the floor and helps lift it evenly.
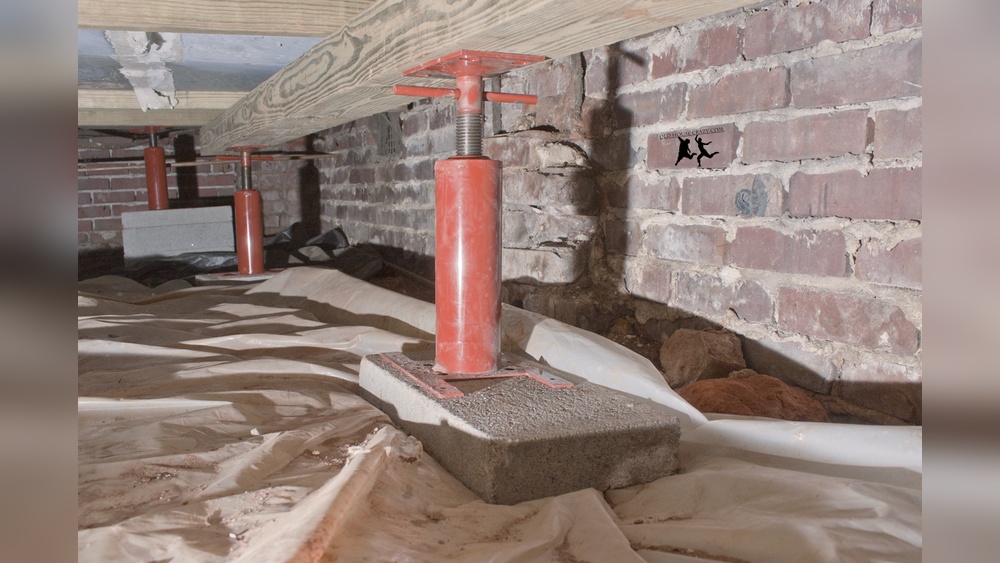
Credit: mason-ind.com
Securing The Lifted Floor
Securing the lifted floor is a critical step in the jacking process. It keeps the floor stable and safe while you work underneath. Proper support prevents accidents and damage to your home. Follow these simple steps to secure the floor after lifting it.
Installing Temporary Supports
Place sturdy supports under the raised floor immediately. Use strong wooden beams or metal jack posts. Position them close to the jacks to share the load. Make sure the supports sit on a solid base. Check that they fit tightly and do not wobble.
Checking For Shifts Or Settling
After installing supports, watch the floor for movement. Look for any signs of shifting or settling. Small changes can cause big problems later. Use a level to check the floor’s position. Adjust the supports if you notice any tilt or drop.
Maintaining Safety Throughout
Keep the work area clear and organized. Do not remove jacks until supports are secure. Wear safety gear, including gloves and goggles. Avoid rushing; take your time with each step. Safety protects you and ensures a smooth project.
Lowering And Finishing Up
Lowering the floor after jacking it up is a key step. It needs care and attention. This part ensures the floor sits properly and safely. Follow the steps below for a smooth finish.
Releasing The Jack Carefully
Slowly turn the jack’s release valve. Let the pressure drop in small steps. Watch the floor as it lowers. Stop if you see any sudden moves. This avoids damage or accidents.
Removing Equipment
Once the floor is down, remove the jack and supports. Clear all tools from the area. Check that the floor is stable before removing anything. Safety is the priority at all times.
Inspecting The Floor Post-lift
Look over the floor for cracks or gaps. Check joints and corners for any shifts. Make sure the floor is level and firm. Fix small problems right away to avoid bigger issues later.
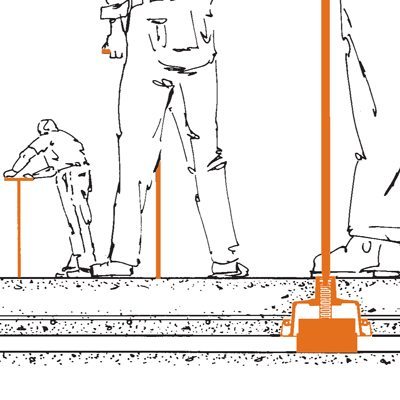
Credit: www.mason-uk.co.uk
Common Mistakes To Avoid
Jacking a floor up is a tricky task. Many people make common mistakes that cause problems. These errors can lead to safety risks and damage to your home. Avoid these mistakes to keep your project safe and successful.
Overloading The Jack
Jacks have weight limits. Using a jack beyond its capacity is dangerous. It can break or fail suddenly. Always check the jack’s maximum load before use. Use multiple jacks if the floor is heavy. Never guess the weight. Be safe and precise.
Ignoring Structural Issues
Look for cracks or damage before jacking the floor. Weak beams or supports can worsen under pressure. Fix any structural problems first. Ignoring these issues may cause the floor to collapse. Check all wood and metal parts carefully. Strengthen weak spots before lifting.
Skipping Safety Checks
Safety checks are essential before starting work. Inspect the jack, tools, and the area around the floor. Clear clutter and secure loose items. Wear protective gear like gloves and goggles. Test the jack slowly to ensure it works well. Skipping these steps can lead to accidents.
Frequently Asked Questions
What Tools Are Needed To Jack A Floor Up Safely?
You need a hydraulic jack, wooden blocks, a pry bar, and a level. Always wear safety gear. These tools ensure stability and control when lifting the floor.
How Do I Prepare The Area Before Jacking Up A Floor?
Clear the space and remove furniture. Check for electrical wires or plumbing under the floor. Secure a stable base for the jack to prevent slipping.
How Much Can A Floor Jack Lift Safely?
Most floor jacks lift between 1 to 3 tons. Always check your jack’s weight limit. Do not exceed this limit to avoid accidents or damage.
How Long Does It Take To Jack A Floor Up?
It usually takes 30 minutes to 1 hour. Time varies by floor size and condition. Take your time to ensure safety and accuracy.
Conclusion
Jacking a floor up takes care and patience. Follow safety steps to avoid accidents. Use the right tools for best results. Check the floor regularly during the process. Small adjustments work better than big moves. Keep the area clear and well-lit.
With practice, the task becomes easier. Stay calm and work slowly. Your floor will be stable and even again.


