Are you struggling to hang shelves, pictures, or hooks securely on your wall? Using plastic anchors can make all the difference, giving your fixtures the support they need to stay put.
But if you’ve never installed them before, the process might seem tricky. Don’t worry—this guide will walk you through every step clearly and simply. By the end, you’ll feel confident handling plastic anchors like a pro and know exactly how to keep your walls strong and safe.
Ready to get started? Let’s dive in!
Credit: www.youtube.com
Choosing The Right Plastic Anchors
Choosing the right plastic anchors is key to a strong hold. The right anchor keeps your items safe on the wall. It fits the wall type and the weight it must hold. Picking the wrong anchor can cause damage or make things fall. Learn how to select anchors that work well for your needs.
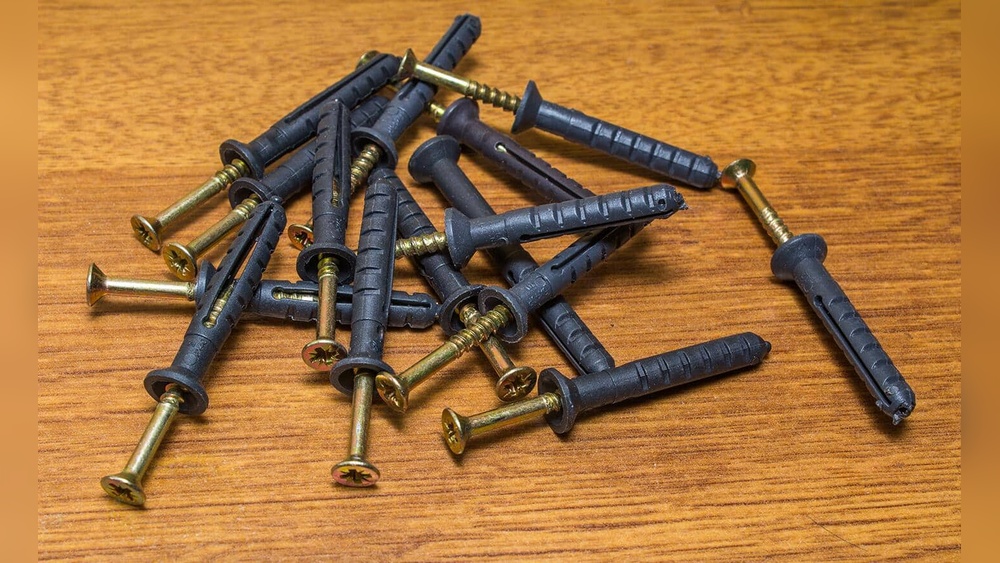
Types Of Plastic Anchors
Plastic anchors come in different styles. Some common types include expansion anchors, toggle anchors, and self-drilling anchors. Expansion anchors spread inside the wall to hold tight. Toggle anchors have wings that open behind the wall for extra support. Self-drilling anchors screw directly into drywall without pre-drilling. Each type fits certain wall conditions and uses.
Selecting Based On Wall Material
Not all anchors suit every wall material. Drywall, plaster, and concrete need different anchors. Use expansion anchors for drywall and plaster walls. Concrete or brick walls require heavy-duty anchors designed for masonry. Check the wall type before buying anchors. This ensures a secure and lasting installation.
Weight Capacity Considerations
Weight matters when choosing anchors. Light objects need small anchors. Heavy items like shelves or mirrors need stronger anchors. Check the package for weight limits. Choose anchors that handle more weight than your item. This prevents accidents and wall damage. Always plan for safety and strength.

Credit: www.youtube.com
Tools And Materials Needed
Before you start installing plastic anchors in the wall, gather the right tools and materials. Having everything ready makes the process smooth and quick. The right tools help you drill holes, insert anchors, and screw in fasteners easily.
Drill And Drill Bits
A drill is essential for making holes in the wall. Use a drill bit that matches the size of your plastic anchor. Too small or too large a hole will cause the anchor to fail. A cordless drill is easy to handle and good for most wall types.
Screwdriver Options
Choose a screwdriver that fits your screws well. A Phillips head screwdriver is common for many plastic anchors. A flathead screwdriver works for some screws too. A power screwdriver or drill with a screwdriver bit saves time and effort.
Measuring And Marking Tools
Accurate measurement ensures proper anchor placement. Use a tape measure or ruler to mark spots on the wall. A pencil or marker leaves clear, visible marks. Level tools help keep your items straight and balanced on the wall.
Preparing The Wall
Preparing the wall is a key step before installing plastic anchors. It ensures a strong hold and prevents damage. Proper preparation saves time and effort during the installation.
Start by finding the exact spot on the wall. This helps keep your project accurate and neat. Next, mark where you will drill. Clear marks guide your drill and avoid mistakes. Finally, check for any hidden pipes or wires. This keeps you safe and protects your home.
Locating The Spot
Choose the right place for your plastic anchor. Look for a solid wall section that can hold weight. Avoid areas near corners or edges. They might crack or break easily. Use a tape measure to find the spot. Double-check the height and alignment. This makes sure your item hangs straight and secure.
Marking Drill Points
Mark the drill points clearly with a pencil. Small dots work best for accuracy. Use a level tool to keep marks straight. Mark each hole exactly where the anchor fits. This prevents mistakes and uneven holes. Stay steady while marking to avoid slips. Clean marks help guide the drill bit well.
Checking For Obstructions
Scan the wall for hidden pipes or wires. Use a stud finder or wire detector tool. Avoid drilling near electrical cables or plumbing. Drilling into these can cause damage or injury. If you find wires or pipes, move the spot. Safety is important before any wall work. Careful checks protect both you and your home.
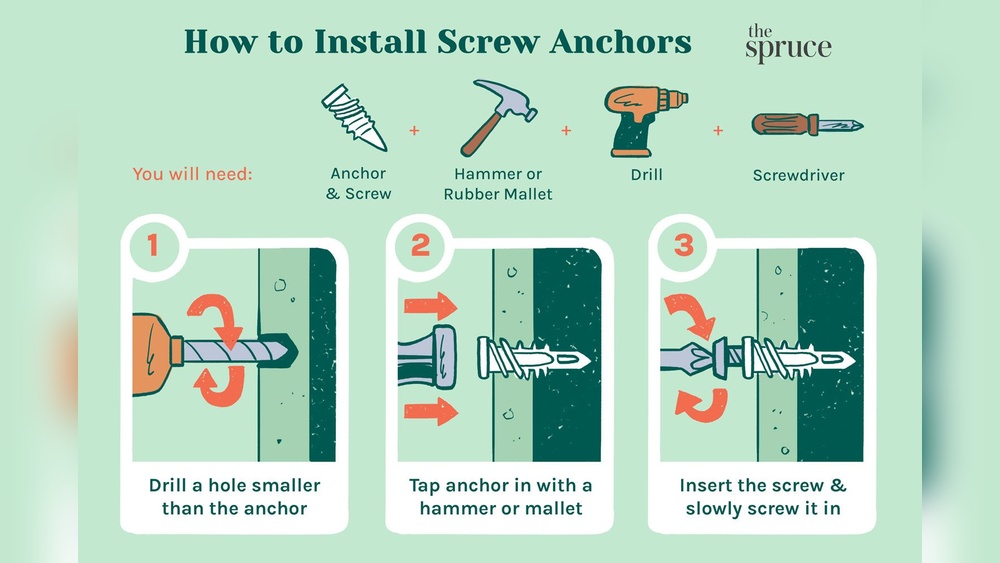
Drilling The Hole
Drilling the hole is the first step to install plastic anchors properly. A clean, correctly sized hole ensures the anchor fits tight and holds strong. Take your time and follow the right steps for best results.
Choosing The Right Drill Bit Size
Select a drill bit that matches the anchor size. The hole must be just big enough for the anchor to fit snugly. Too small a hole makes it hard to insert the anchor. Too big makes the anchor loose and weak.
Drilling At The Correct Angle
Hold the drill straight against the wall. The hole should be perpendicular to the surface. Drilling at an angle can cause the anchor to sit unevenly. This lowers the anchor’s grip and strength.
Cleaning The Hole
Remove dust and debris from the hole after drilling. Use a brush or blow air inside. A clean hole helps the anchor stick better. Dust can prevent proper grip and cause the anchor to slip.
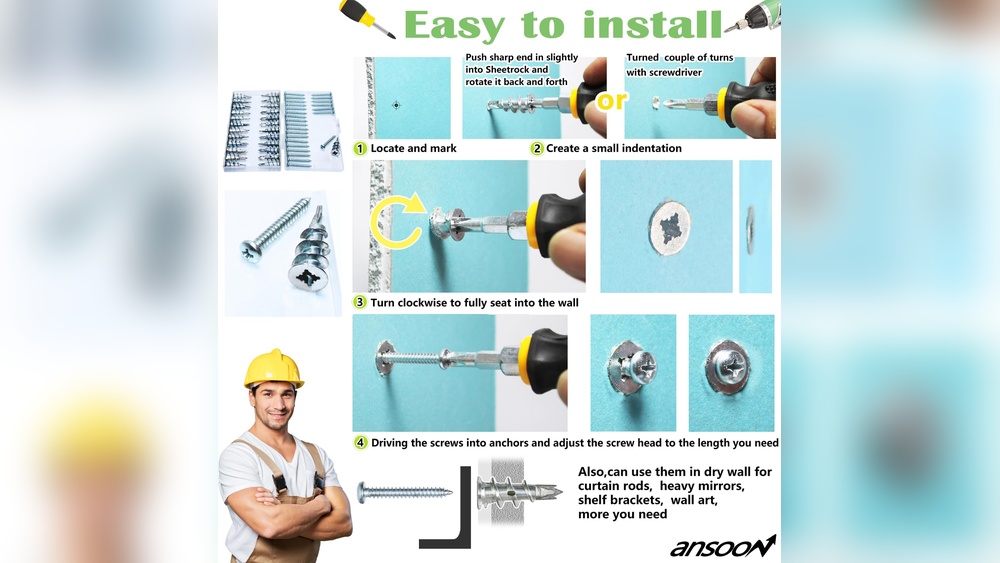
Inserting The Plastic Anchor
Inserting the plastic anchor is a key step in securing items to your wall. This process helps hold screws tightly in drywall or masonry. Proper insertion ensures strong support and prevents damage. Follow these simple steps to place the anchor correctly.
Aligning The Anchor
Start by holding the plastic anchor next to the hole. Make sure the anchor’s tip lines up with the hole’s center. This helps the anchor go in straight. A straight fit prevents wall cracks or anchor damage.
Pushing Or Tapping Into Place
Push the anchor gently into the hole. If it feels tight, tap it lightly with a hammer. Use soft, controlled taps to avoid breaking the anchor. The anchor should slide in until it stops at the wall surface.
Ensuring A Flush Fit
Check that the anchor is flush with the wall. The anchor’s rim should sit evenly against the surface. A flush fit keeps screws secure and prevents wobbling. Adjust the anchor slightly if it sticks out or sinks in too far.
Securing The Screw
Securing the screw is the key step after placing plastic anchors in the wall. It holds your items safely and firmly. This part needs care to avoid damage to the wall or the anchor. Follow simple tips to get the best hold and keep your fixtures stable.
Selecting The Correct Screw
Choose a screw that fits the plastic anchor tightly. The screw should be long enough to go deep into the anchor. Avoid screws that are too thin or too thick. The right screw size ensures strong support and prevents the anchor from breaking.
Driving The Screw Into Anchor
Use a screwdriver or drill to drive the screw slowly into the anchor. Turn the screw steadily to avoid slipping or stripping the anchor. Stop when the screw feels firm but not too tight. This gives a secure hold without damaging the wall.
Avoiding Over-tightening
Over-tightening can break the anchor or crack the wall. Stop turning the screw once it resists firmly. Tighten just enough to hold the item without forcing the screw further. This keeps the anchor and wall safe, ensuring a long-lasting hold.
Tips For Different Wall Types
Plastic anchors work well in many wall types. Each wall needs a different approach for best results. Using the right method keeps anchors strong and safe. Follow these tips to install plastic anchors properly in various walls.
Drywall Installation
Choose anchors made for drywall. Drill a small pilot hole first. Push the anchor gently into the hole. Tap lightly with a hammer if needed. Avoid making the hole too big. Tighten the screw slowly to prevent damage.
Concrete And Brick Walls
Use a masonry drill bit to make the hole. Drill deep enough for the anchor to fit fully. Clean dust from the hole before inserting the anchor. Tap the anchor firmly with a hammer. Tighten the screw carefully to avoid breaking the anchor.
Tile Surfaces
Drill slowly using a carbide-tipped bit for tiles. Use masking tape over the drill spot to prevent slipping. Drill gently to avoid cracking the tile. Insert the plastic anchor after drilling. Tighten the screw slowly to protect the tile surface.
Common Mistakes To Avoid
Installing plastic anchors seems easy but many make simple errors. These mistakes can cause anchors to fail and damage walls. Avoid these common problems for a strong, lasting hold.
Wrong Anchor Size
Choosing the wrong anchor size weakens the hold. Too small anchors slip out easily. Too large anchors can crack the wall. Match the anchor size to your screw and wall type. Check package instructions for the best fit.
Improper Hole Depth
Drilling holes too shallow stops the anchor from fitting fully. Anchors need enough space to expand inside the wall. Drill holes slightly deeper than the anchor length. This ensures the anchor fits snugly and holds tight.
Ignoring Weight Limits
Every anchor has a weight limit. Exceeding it risks the anchor pulling out. Use anchors rated for the weight of your item. For heavy objects, pick heavy-duty anchors or use multiple anchors.
Maintenance And Removal
Maintaining and removing plastic anchors is important for wall safety and appearance. Proper care helps avoid damage and keeps anchors secure. Knowing how to check, remove, and repair the wall makes the task easier.
Checking Anchor Stability
Check anchors regularly to ensure they hold firmly. Gently wiggle the item attached to the anchor. If it feels loose, the anchor may need tightening or replacement. Loose anchors can cause damage or accidents.
Removing Plastic Anchors Safely
Remove anchors carefully to avoid wall damage. Use pliers to grip the anchor firmly. Pull slowly and steadily to pull it out. For stubborn anchors, twist gently while pulling. Avoid forcing the anchor out quickly.
Repairing Wall After Removal
Fill holes left by anchors with spackle or wall filler. Smooth the surface with a putty knife. Let the filler dry completely before sanding it smooth. Paint over the repaired spot to match the wall color. This restores the wall’s look and strength.

Credit: www.picturehangsolutions.com
Frequently Asked Questions
What Tools Do I Need To Install Plastic Anchors?
You need a drill, appropriate drill bit, hammer, and screwdriver. These tools ensure proper hole size and anchor placement for secure mounting.
How Deep Should I Drill For Plastic Anchors?
Drill a hole slightly deeper than the anchor length. This prevents damage and allows the anchor to fit securely in the wall.
Can I Use Plastic Anchors On Drywall?
Yes, plastic anchors work well on drywall. They provide strong support for hanging lightweight to medium-weight items without damaging the wall.
How Do I Choose The Right Plastic Anchor Size?
Match the anchor size to your screw and load weight. Larger anchors hold heavier items, while smaller ones suit lighter fixtures.
Conclusion
Installing plastic anchors in the wall is simple and effective. Start with the right tools and follow the steps carefully. Drill a hole, insert the anchor, and then secure your item. This method holds items firmly without damaging walls. Practice makes the process easier and faster.
Use anchors that match your wall type for best results. Now, you can hang pictures, shelves, or decorations with confidence. Keep these tips in mind for a smooth installation every time. Ready to try it yourself?