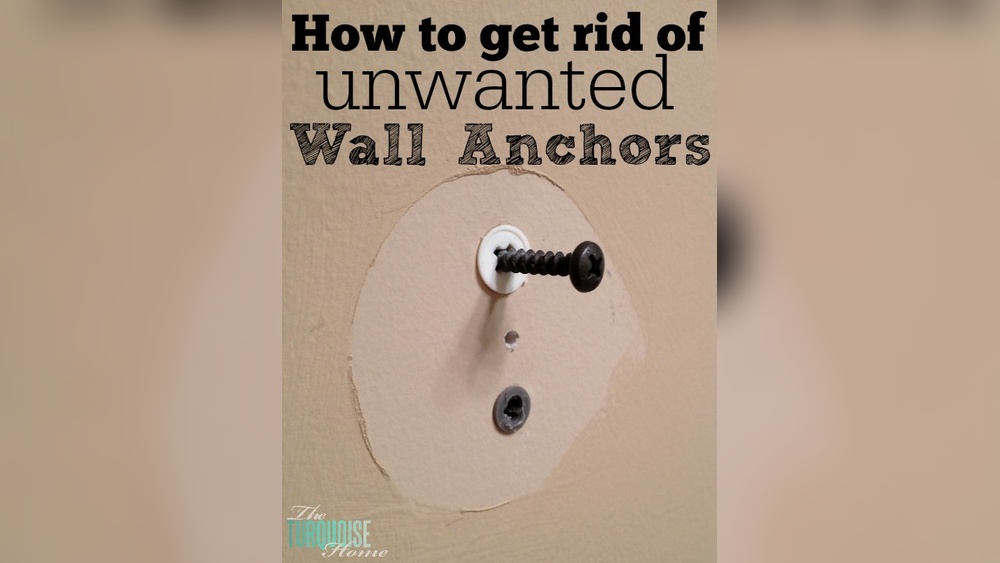
Have you ever struggled to remove a wall anchor stuck deep in your block wall? It can feel frustrating when a simple task turns into a stubborn problem.
But don’t worry—getting that wall anchor out doesn’t have to be a headache. In this guide, you’ll discover easy, effective steps to free your block wall from anchors without causing damage. Keep reading, and you’ll soon have the confidence to tackle this task quickly and smoothly.
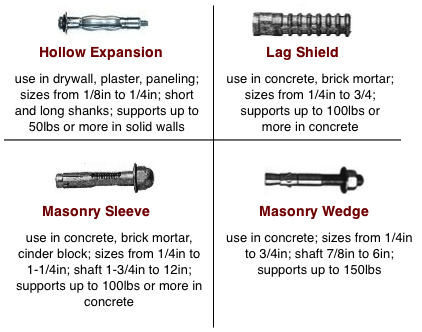
Types Of Wall Anchors In Block Walls
Block walls need strong anchors to hold items firmly. Different types of wall anchors suit different tasks and wall conditions. Knowing these types helps you remove them properly without damage. Here are common wall anchors used in block walls.
Plastic Expansion Anchors
Plastic expansion anchors are common and easy to use. They expand inside the hole when a screw goes in. This holds the screw tightly in the block wall. These anchors work well for light to medium loads. They are simple to remove but may break inside the hole.
Metal Sleeve Anchors
Metal sleeve anchors offer strong support in block walls. The metal sleeve expands when tightened, gripping the wall firmly. They are good for medium to heavy loads. Removing them can be tricky because the sleeve stays tight inside the hole.
Toggle Bolts
Toggle bolts have wings that open inside the wall. These wings spread the load over a larger area. They are strong and hold heavy objects securely. Removing toggle bolts requires pushing the wings through the wall cavity. This can leave a larger hole.
Concrete Screws
Concrete screws are designed to drill directly into block walls. They do not need a separate anchor. These screws grip the block tightly and hold heavy weight. Removing concrete screws is simple; just unscrew them. The hole remains ready for reuse or patching.
Tools Needed For Removal
Removing a wall anchor from a block wall needs the right tools. These tools make the task easier and safer. Having the correct items helps you avoid damage to the wall.
Each tool has a specific role in the removal process. Knowing which tool to use saves time and effort.
Pliers And Wrenches
Pliers and wrenches grip the anchor tightly. They help twist or pull the anchor out. Use locking pliers for a stronger hold. Adjustable wrenches fit different sizes of anchors.
Drill And Drill Bits
A drill helps remove stubborn anchors stuck deep inside. Choose drill bits slightly smaller than the anchor. Drilling around the anchor loosens it from the block wall. Use low speed to avoid wall damage.
Screwdrivers
Screwdrivers fit inside anchors with a screw head. Turn the screwdriver to unscrew the anchor. Flathead screwdrivers work well for wide anchor slots. Phillips screwdrivers fit cross-shaped slots better.
Hammer And Chisel
A hammer and chisel remove anchors that are flush or broken. Place the chisel edge near the anchor base. Tap gently with a hammer to pry it out. This method prevents cracking the block wall.
Preparing The Area
Preparing the area is an important first step before removing a wall anchor from a block wall. Taking time to organize the space helps avoid damage and keeps the work safe and smooth. This section covers clearing the work space, protecting surfaces, and safety measures.
Clearing The Work Space
Remove any furniture or objects near the wall. This gives you enough room to move and work comfortably. Clear away dust and dirt from the wall surface. A clean space makes the job easier and prevents debris from causing problems.
Protecting Surrounding Surfaces
Cover floors and nearby surfaces with drop cloths or plastic sheets. This protects them from dust, chips, and scratches. Use painter’s tape to secure covers and prevent slipping. Protect electrical outlets and switches with plastic covers to avoid damage.
Safety Precautions
Wear safety goggles to shield your eyes from dust and debris. Put on gloves to protect your hands from sharp edges. Use a dust mask to avoid breathing in fine particles. Ensure good lighting to see clearly during the removal process.

Credit: www.youtube.com
Removing Plastic Expansion Anchors
Removing plastic expansion anchors from a block wall can be tricky. These anchors grip tightly to hold items firmly. Removing them without damaging the wall takes care and the right steps. This section shows simple ways to get plastic anchors out safely and quickly.
Loosening With Pliers
Start by gripping the anchor’s outer edge with pliers. Twist gently while pulling outward. The anchor may loosen and slide out bit by bit. Avoid too much force to prevent wall damage. If the anchor does not budge, try another method.
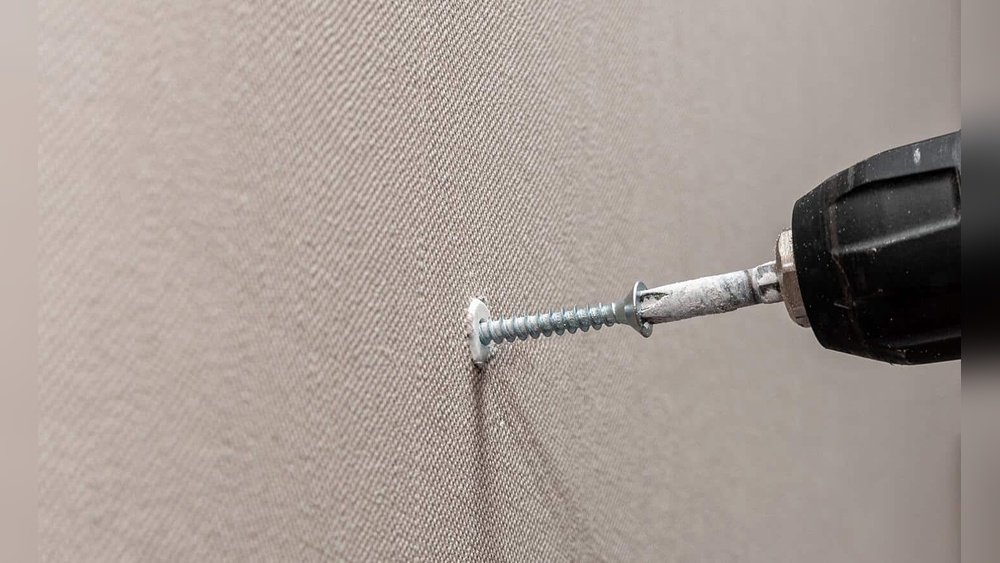
Using A Screw For Extraction
Insert a screw into the anchor’s center hole. Turn the screw until it catches firmly inside. Pull the screw and anchor out together slowly. This method uses the screw as a handle. It works well for anchors that resist pliers.
Drilling Out Stubborn Anchors
For anchors that refuse to move, use a drill carefully. Choose a drill bit slightly smaller than the anchor. Drill into the anchor slowly to break it apart. Clear out the broken pieces with a screwdriver or pliers. This method clears the space for a new anchor or repair.
Removing Metal Sleeve Anchors
Removing metal sleeve anchors from a block wall can be tricky. These anchors hold tightly, so patience and the right steps matter. This guide helps you take out metal sleeve anchors safely and efficiently. Follow these simple steps to avoid damage to your wall.
Unscrewing The Bolt
Start by unscrewing the bolt inside the metal sleeve. Use a wrench or screwdriver to turn it counterclockwise. This loosens the bolt and reduces pressure on the anchor. Sometimes the bolt comes out easily. Other times, it may be stuck and need extra force.
Tapping Out The Sleeve
After removing the bolt, tap the metal sleeve out. Use a hammer and a wooden block to protect the wall. Gently tap the sleeve from behind or the front. The sleeve should slide out of the hole with light taps. Avoid hard hits to prevent wall damage.
Drilling For Stuck Anchors
If the sleeve won’t come out, drilling helps. Use a drill bit slightly smaller than the sleeve. Drill into the center to break the anchor’s hold. Drill slowly and carefully to avoid cracking the block. Clear dust and try tapping again after drilling.
Credit: clinicadentalrociomontero.com
Extracting Toggle Bolts
Extracting toggle bolts from a block wall can be tricky. Toggle bolts have two main parts: the bolt and the toggle mechanism. The toggle opens inside the wall to hold the bolt in place. Removing them requires patience and the right steps. Follow this guide to take them out safely without damaging the wall.
Unscrewing The Bolt
Start by unscrewing the bolt from the toggle. Use a screwdriver that fits well. Turn the bolt counterclockwise. Sometimes the bolt spins without coming out. This means the toggle is stuck behind the wall. If this happens, try to hold the bolt steady while turning it.
Removing The Toggle Mechanism
The toggle stays inside the wall after the bolt is removed. It usually folds flat against the wall. Push the toggle gently through the hole. Use a wire hook or pliers to pull it out. Be careful not to widen the hole. If the toggle is too tight, tap it lightly with a hammer to loosen.
Handling Difficult Cases
Some toggle bolts are hard to remove. The toggle may get stuck or break inside. Drill a small hole near the toggle to weaken it. Use a hook or needle-nose pliers to pull out the broken parts. If the toggle cannot be removed, fill the hole with patching material. Let it dry before repainting or drilling again.
Dealing With Concrete Screws
Removing concrete screws from a block wall can be tricky. These screws grip tightly and need the right tools and methods to come out easily. Handling them carefully prevents damage to the wall and makes the task faster. Follow these steps to deal with concrete screws safely and effectively.
Using The Correct Screwdriver
Choose a screwdriver that fits the screw head perfectly. A loose fit can strip the screw and make removal harder. Use a screwdriver with a strong handle for better control. Turn the screw slowly and steadily to avoid slipping.
Drilling Out If Stripped
If the screw head is stripped, use a drill with a bit slightly smaller than the screw. Drill carefully into the center of the screw head. This loosens the grip and helps remove the screw. Wear safety glasses to protect your eyes from debris.
Cleaning The Hole Post-removal
After removing the screw, clean the hole to remove dust and debris. Use a brush or compressed air to clear the hole fully. This prepares the hole for a new anchor or patching material. A clean hole ensures better hold for new fasteners.
Fixing The Hole After Removal
After removing a wall anchor from a block wall, a hole remains. Fixing this hole is important for a clean, smooth wall surface. Proper repair keeps walls strong and looks good. The process involves filling, sanding, and painting to blend the patch with the rest of the wall.
Filling With Mortar Or Patch
Choose mortar or a patching compound made for block walls. Mix the mortar as the instructions say. Use a putty knife to fill the hole completely. Press the mortar in tightly to avoid air pockets. Level the surface with the knife for a neat finish. Let the mortar dry fully before moving on.
Sanding For Smooth Finish
Once dry, sand the patched area gently. Use fine-grit sandpaper for best results. Sand until the surface feels even with the wall. Remove dust with a soft brush or cloth. This step makes the patch ready for painting. Smooth walls hide the repair better.
Painting And Blending
Pick paint that matches your wall color. Apply a thin coat over the patched area. Use a small brush or roller for control. Let the paint dry and add more coats if needed. Blend edges carefully to avoid visible lines. The repair will look natural and neat.
Tips To Prevent Damage
Removing a wall anchor from a block wall can be tricky. Damage to the wall often happens during this process. Taking steps to prevent damage saves time and repairs later. Follow these tips to keep your wall intact and strong.
Avoiding Over-tightening
Over-tightening anchors can crack the block surface. Stop turning the screw as soon as it feels tight. Use a screwdriver with good grip to control pressure. Tighten slowly and carefully to avoid stress on the wall. Less force means less chance of damage.
Choosing The Right Anchor Type
Select anchors made for block walls. Plastic anchors may not hold well and cause damage. Metal anchors designed for masonry work best. Pick the size that fits your screw and wall thickness. Proper anchors reduce wall cracking and make removal easier.
Regular Maintenance Checks
Check anchors regularly for looseness or wear. Tighten gently if they become loose over time. Replace anchors that show signs of damage. Early care keeps walls safe and prevents major repairs. Regular checks help you spot problems fast.

Credit: www.reddit.com
Frequently Asked Questions
How Do I Remove A Wall Anchor From A Block Wall?
Use pliers to grip the anchor firmly. Twist it gently while pulling outward. For stubborn anchors, drill around the anchor to loosen it before pulling.
What Tools Are Needed To Extract Wall Anchors?
You will need needle-nose pliers, a drill with a masonry bit, and a hammer. These tools help loosen and safely remove anchors from block walls.
Can I Patch The Hole After Removing The Anchor?
Yes, fill the hole with masonry patch or concrete filler. Smooth the surface and let it dry. This restores the block wall’s appearance effectively.
Is It Safe To Pull Anchors From Block Walls?
Yes, if done carefully. Pull slowly to avoid damaging the wall. Use proper tools and techniques to prevent cracks or chips.
Conclusion
Removing a wall anchor from a block wall can be simple with the right steps. Use basic tools like pliers or a drill carefully. Take your time to avoid damage to the wall. Small holes can be filled easily after removal.
Keep safety in mind while working. With patience and care, your wall will look clean again. Practice these tips to handle wall anchors confidently next time.