Are you looking to brighten up your space without rewiring your entire home? Adding extra lights to your existing switch can be a simple and cost-effective way to get the perfect lighting you need.
Imagine controlling multiple lights with just one flick of your switch—more convenience, better ambiance, and improved safety. In this guide, you’ll discover easy steps to make this upgrade yourself, even if you’re not an expert. Keep reading to learn how you can transform your lighting setup quickly and confidently.
Tools And Materials Needed
Adding extra lights to an existing switch needs the right tools and materials. Using the correct items helps keep the work safe and efficient. Prepare all before starting to save time and avoid problems.
Essential Tools
- Screwdrivers: Both flathead and Phillips types.
- Wire stripper: To remove insulation from wires.
- Voltage tester: To check if wires carry current.
- Needle-nose pliers: For bending and holding wires.
- Electrical tape: To cover wire connections.
- Drill: To make holes if needed for wiring.
Required Materials
- Additional light fixtures: Choose types matching existing lights.
- Wire nuts: To connect wires securely.
- Electrical wires: Same gauge as existing wiring.
- Switch box (optional): If space in current box is limited.
- Cable clamps: To hold wires firmly in place.
Safety Equipment
- Insulated gloves: Protect hands from electric shocks.
- Safety glasses: Guard eyes from debris.
- Flashlight: Helps see in dark areas during work.
Safety Precautions
Adding extra lights to an existing switch can improve your home’s lighting. Safety is the most important part of this task. Follow strict rules to avoid accidents and damage. Take time to prepare and protect yourself before starting.
Turn Off The Power
Always switch off the power at the breaker box. Do not rely only on the wall switch. Use a tester to check that the wires are not live. This step prevents electric shocks and serious injuries.
Use Proper Tools
Choose tools designed for electrical work. Insulated screwdrivers and wire strippers protect you. Avoid using damaged or worn-out tools. Safe tools make the job easier and safer.
Wear Safety Gear
Wear gloves and safety glasses. Gloves protect your hands from cuts and shocks. Glasses protect your eyes from sparks or debris. Safety gear reduces the risk of injuries.
Check Wire Ratings
Use wires that match the current load. Wrong wire size can cause overheating or fire. Check the existing wire gauge before adding more lights. Follow local electrical codes for safety.
Secure All Connections
Tighten all wire connections firmly. Loose wires can cause sparks or shorts. Use wire nuts or connectors made for electrical wiring. Proper connections ensure a safe and stable circuit.
Test The Installation
After wiring, turn the power back on carefully. Test the new lights with the switch. Watch for flickering or unusual sounds. If something seems wrong, turn off power and check again.
Locate The Existing Switch
Locating the existing switch is the first step in adding extra lights. It helps you understand where the current wiring ends. You need to find the switch that controls the lights you want to extend. This makes the installation safer and easier.
Knowing the exact location of the switch saves time and effort. It allows you to plan the wiring path correctly. You also avoid unnecessary damage to walls or ceilings.
Check The Wall Near The Lights
Look for a switch on the wall closest to the lights. Most switches are near the room entrance. Sometimes, switches can be behind furniture or decorations. Move objects gently to reveal the switch.
Use A Stud Finder Or Voltage Tester
A stud finder helps locate the switch box inside the wall. Voltage testers check if the switch has power. This tool ensures the switch is live and working. Test carefully to avoid electric shock.
Turn Off Power Before Inspection
Switch off the circuit breaker before touching wires. This prevents accidents and electric shocks. Safety is very important when working with electricity. Double-check that the power is off before proceeding.
Remove The Switch Cover Plate
Unscrew the cover plate to see the switch inside. This reveals the wiring and connections. Use a screwdriver and work slowly. Keep screws safe for reassembly.
Identify The Switch Type
Notice if the switch is single-pole or three-way. Single-pole controls one light or group of lights. Three-way switches control lights from two locations. This knowledge helps in proper wiring.

Credit: www.finehomebuilding.com
Turn Off Power Supply
Turning off the power supply is the first and most important step before adding extra lights to an existing switch. It keeps you safe from electric shocks. Working with live wires can cause serious injuries or damage to your home’s electrical system.
Always double-check that the power is off before you start any work. This simple step prevents accidents and ensures a smooth installation process.
Locate The Circuit Breaker
Find your home’s main circuit breaker panel. It is usually in the basement, garage, or utility room. Look for the switch that controls the lights you want to work on. It may be labeled or you might need to test a few switches.
Switch Off The Correct Breaker
Turn off the breaker that powers the light switch. This stops electricity from flowing to the switch and lights. Do not guess; ensure you switch off the right breaker to avoid hazards.
Use A Voltage Tester
Use a voltage tester on the wires connected to the switch. This tool tells you if electricity is still present. If the tester shows no voltage, the power is off and safe to work on.
Inform Others In The House
Let everyone in your home know you turned off the power. This helps avoid anyone turning it back on by mistake. Put a note on the breaker if needed.
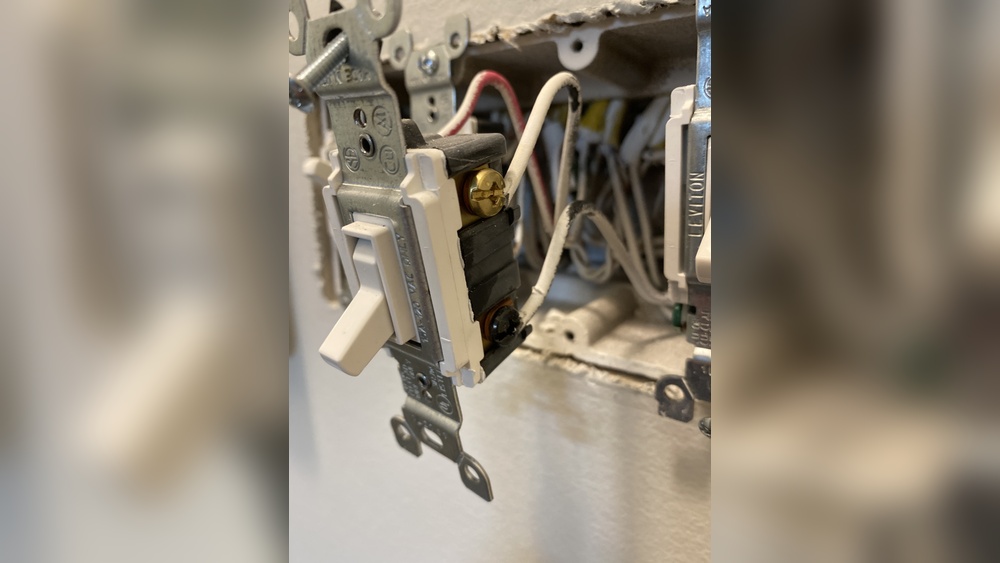
Remove Switch Cover And Inspect Wiring
Removing the switch cover and checking the wiring is the first step in adding extra lights to a switch. This step helps you see what wires are connected and if there is space for new wires. Safety is very important here. Make sure the power is off before touching anything.
Carefully remove the screws holding the switch cover. Take off the cover plate to expose the switch and wires inside. Look closely at how the wires are arranged. Notice the colors and where each wire connects on the switch.
Understanding the wiring layout helps you plan how to add the new lights. It also shows if the existing wires can support extra lights or if new wires are needed. Take a photo or make a note of the current wiring to avoid confusion later.
Turn Off Power At The Circuit Breaker
Before removing the switch cover, switch off power at the breaker box. This prevents electric shock while working. Use a voltage tester to confirm no power is flowing to the switch.
Remove The Switch Cover Plate
Use a screwdriver to unscrew the cover plate. Keep the screws safe for later. Gently pull the plate away from the wall to reveal the switch and wires.
Inspect The Wiring Inside The Switch Box
Look for wire colors: black, white, and green or bare copper. Black wires usually carry power. White wires are neutral. Green or bare wires ground the circuit. Check if wires are tight and in good condition.
Document The Existing Wire Connections
Take a photo or draw a diagram of the wire placement. This helps when adding new wires. It also helps you reconnect everything correctly after work is done.

Credit: diy.stackexchange.com
Choose The Right Additional Light
Choosing the right additional light is key when expanding your lighting setup. The right light makes your space brighter and more comfortable. It also matches the style and function of your existing setup.
Consider the size, brightness, and type of light before buying. The light should fit the room and the switch’s capacity. This helps avoid electrical issues and keeps your home safe.
Match The Light Type To Your Room
Different rooms need different lights. For example, soft lights suit bedrooms. Bright, clear lights work well in kitchens and work areas. Choose a light type that fits the room’s use.
Check The Light’s Wattage And Voltage
Check the light’s wattage to avoid overloading the switch. Use lights that match the voltage of your home’s wiring. This prevents damage to your electrical system and keeps things safe.
Pick A Style That Complements Your Decor
Choose a light style that fits your room’s design. A modern light may look odd in a classic room. Select a light that blends well with your current fixtures and furniture.
Consider Energy Efficiency
Energy-efficient lights save money on electricity bills. LED lights are a good choice. They last long and use less power. This helps the environment and your wallet.
Plan The Wiring Route
Start by choosing a clear path for the wires from the switch to the new lights. Avoid obstacles and keep wires neat and safe. Planning this route helps prevent damage and makes installation easier.
Planning the wiring route is the first step before adding lights to a switch. A clear path helps avoid mistakes and saves time. It also ensures safety and neat installation.
Think about the locations of the new lights and the existing switch. Decide how the wires will run from the switch to the lights. Look for the shortest and safest path.
Check for obstacles like walls, floors, or furniture that might block the wiring. Plan to run wires through easy-to-access areas like attics or basements. Avoid running wires near water pipes or heat sources.
Identify Power Source And Connection Points
Locate the power source for the new lights. It usually comes from the existing switch box or the main electrical panel. Mark where you will connect the new wires to the current circuit.
Make sure the existing circuit can handle the extra load. Use a circuit tester to verify power at the switch box. Plan connections to keep the circuit safe and efficient.
Measure And Mark The Route
Measure the distance from the switch to each new light location. Use a pencil to mark the route on walls or ceilings. This helps visualize the wiring path clearly.
Mark spots for drilling holes or attaching wire clips. Keep the markings neat and easy to follow during installation. Avoid sharp bends or twists in the wiring path.
Choose The Right Wiring Materials
Use wires that match the current electrical system. Check wire gauge and type for compatibility and safety. Get enough wire length to cover the entire route with some extra.
Pick suitable wire clips, conduits, or raceways to protect and secure the wires. Proper materials prevent damage and keep the wiring organized.

Credit: www.do-it-yourself-help.com
Connect Additional Light To Switch
Connecting an additional light to an existing switch is a practical way to brighten up any room. It requires careful handling of wires and proper connections to ensure safety and functionality. This section explains how to connect an extra light to your current switch step by step.
Identify Live And Neutral Wires
First, turn off the power at the circuit breaker to stay safe. Remove the switch cover and look inside the electrical box. The live wire usually has black or red insulation. The neutral wire is often white. Use a voltage tester to confirm which wire is live. Label the wires if needed. Knowing these wires helps connect the new light correctly.
Use Wire Connectors
Strip about half an inch of insulation from each wire end. Twist the wires from the new light with the matching wires in the box. Use wire connectors, also called wire nuts, to secure the twisted wires. Make sure the connectors are tight and hold the wires firmly. This prevents loose connections and ensures good electrical contact.
Secure The Connections
Push the connected wires gently back into the electrical box. Avoid bending or damaging them. Replace the switch cover and tighten the screws. Turn the power back on and test the new light. If it works, the connection is secure. Proper securing keeps the wires safe and prevents electrical hazards.
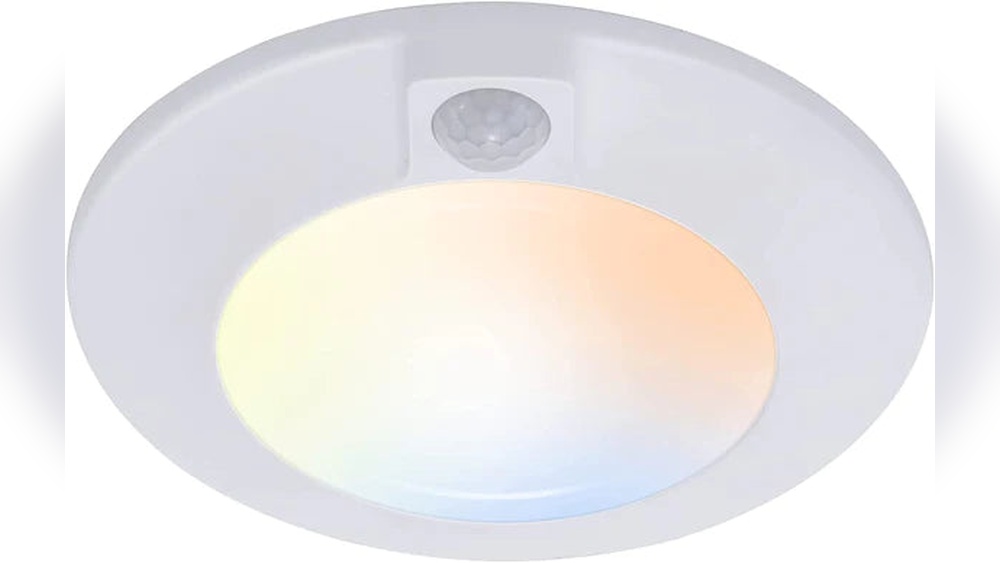
Install The Additional Light Fixture
Installing an additional light fixture is the key step to brighten your space. It connects the new light to the existing switch. This step needs care to ensure safety and proper function. Follow simple directions to get it right.
Choose The Right Location For The Fixture
Pick a spot with easy access to power wires. Check the ceiling or wall for a strong surface. Avoid places with moisture or heat. This helps the light work well and last long.
Turn Off Power Before Starting
Switch off power at the circuit breaker. Use a voltage tester to confirm no electricity flows. This prevents shocks and keeps you safe while working.
Mount The Fixture Bracket
Attach the bracket to the electrical box. Use screws to fix it tightly. The bracket holds the light fixture securely in place.
Connect The Wires
Match the wires by color: black to black, white to white. Twist the ends together and secure with wire nuts. Connect the ground wire to the green or copper wire for safety.
Attach The Light Fixture
Fix the light fixture onto the bracket. Tighten screws so it stays stable. Make sure no wires are pinched or exposed.
Test The New Light
Turn the power back on at the breaker. Flip the switch to check if the light works. If it does not, recheck the wire connections carefully.
Test The New Setup
Testing the new setup is an important step after adding lights to an existing switch. It ensures everything works safely and correctly. This step helps catch wiring errors or faulty connections early. You avoid risks like short circuits or flickering lights.
Follow a clear process to check the wiring and light operation. This approach saves time and protects your home’s electrical system.
Turn Off The Power Before Testing
Always switch off the circuit breaker before touching wires. This prevents electric shock or damage. Use a voltage tester to confirm no current flows. Safety first.
Switch On The Circuit Breaker
Turn on the breaker that controls the switch. This powers the new lights and the existing ones. Stand clear and be ready to observe the lights closely.
Operate The Switch
Flip the switch to the ON position. Watch all the lights connected to it. Check if every bulb lights up steadily without flickering or dimming.
Look For Any Issues
Notice any blinking or lights that stay off. Listen for unusual sounds from the switch or wiring. These signs could mean loose connections or wiring mistakes.
Test The Switch Multiple Times
Turn the switch ON and OFF several times. Confirm consistent operation of all lights. This step ensures reliability and durability.
Use A Multimeter For Final Checks
Measure voltage at the light sockets and switch terminals. Proper voltage confirms correct wiring and power flow. It also helps find hidden problems.
Troubleshooting Common Issues
Adding extra lights to a switch can improve your room’s lighting. Sometimes, problems may happen during or after installation. Knowing common issues helps you fix them quickly. This section guides you through simple troubleshooting steps for three common problems.
Light Not Turning On
Check if the bulb is properly screwed in. A loose bulb will not light up. Make sure the bulb is not burnt out. Test with a new bulb if unsure. Verify the switch is in the “on” position. Confirm power is reaching the switch. Use a voltage tester for safety. Inspect wiring connections for loose or disconnected wires. Tighten any loose connections carefully. Always turn off power before touching wires.
Flickering Light
Flickering often means a poor connection. Check the bulb to see if it is loose. Tighten the bulb gently to fix the flicker. Look at the wiring connections behind the switch. Loose wires cause flickering and need tightening. A bad switch can also cause flicker. Replace the switch if wiring is secure. Make sure the bulb matches the fixture’s requirements. Using the wrong bulb type may cause flicker.
Tripped Circuit Breaker
A breaker trips to prevent overload or short circuit. Check if you added too many lights to one circuit. Overloading the circuit can trip the breaker. Spread lights across different circuits if possible. Inspect wiring for any exposed or damaged wires. Damaged wires can cause short circuits. Replace or repair damaged wiring immediately. Reset the breaker only after fixing the problem. Keep breaker panels dry and clean to avoid issues.
Frequently Asked Questions
How Do I Add More Lights To One Switch?
To add more lights to one switch, connect the new light’s wiring in parallel with the existing light’s wiring. Ensure power is off, then extend the hot, neutral, and ground wires properly. Use wire nuts to secure connections and test after installation.
Can I Control Multiple Lights With A Single Switch?
Yes, a single switch can control multiple lights. Connect all lights’ hot wires to the switch’s output. This allows simultaneous control, making it easy to manage multiple fixtures from one location.
What Tools Do I Need To Add Lights To A Switch?
You need a voltage tester, wire stripper, screwdriver, wire nuts, electrical tape, and a drill if mounting new fixtures. Safety gear like gloves and goggles is also recommended for safe installation.
Is It Safe To Add Extra Lights To An Existing Switch?
Yes, it is safe if done correctly. Always turn off power at the breaker, use proper wiring techniques, and follow local electrical codes. If unsure, consult a licensed electrician.
Conclusion
Adding extra lights to an existing switch can brighten any room easily. Follow safety steps and use the right tools for success. Double-check your wiring to avoid mistakes or hazards. Take your time and work carefully to get good results.
Now, you can enjoy better lighting and control with one switch. This simple upgrade makes your space more comfortable and useful. Keep learning and trying new projects to improve your home step by step.