Are you ready to take control of your home lighting and save money by doing it yourself? Learning how to wire a light switch is easier than you might think, even if you’ve never worked with electricity before.
In this guide, you’ll discover simple, step-by-step instructions that anyone can follow safely. Imagine the satisfaction of flipping a switch you installed yourself, knowing you did it right. Keep reading, and by the end, you’ll have the confidence to handle this essential home project with ease.
Credit: www.homedepot.com
Tools And Materials Needed
Before you start wiring a light switch, gather all needed tools and materials. Having the right items makes the job easier and safer. Each tool plays a key role in completing the task correctly.
Use proper tools to avoid damage and ensure a secure connection. Quality materials help the switch last longer and work well. Prepare everything first to work smoothly and confidently.
Tools Required For Wiring A Light Switch
- Screwdriver (flathead and Phillips)
- Wire stripper
- Voltage tester
- Needle-nose pliers
- Electrical tape
- Flashlight or work light
Materials Needed For The Switch Installation
- Light switch (single pole or three-way)
- Electrical wires (14 or 12 gauge, depending on circuit)
- Wire connectors (wire nuts)
- Switch wall plate
- Wire labels (optional but helpful)
Safety Gear To Use
- Insulated gloves
- Safety goggles
- Non-conductive footwear
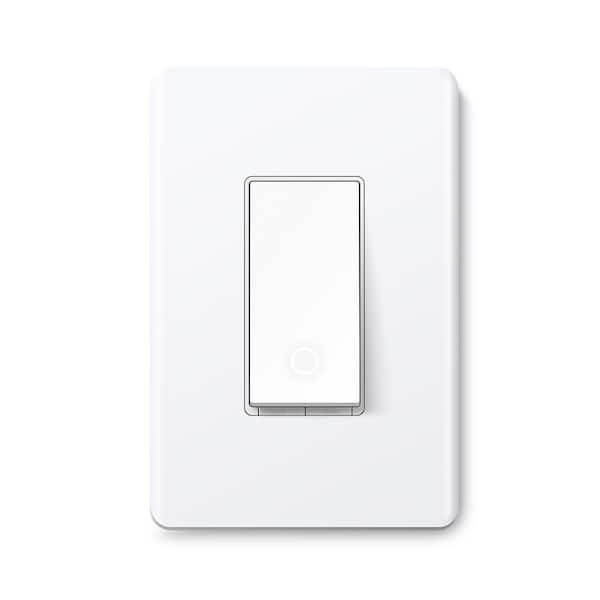
Credit: www.homedepot.com
Turn Off Power Safely
Turning off power safely is the first step in wiring a light switch. It protects you from electric shock. It also prevents damage to your tools and devices.
Electricity is dangerous. Even a small mistake can cause serious injury. Always take safety seriously before starting any electrical work.
Locate The Circuit Breaker
Find your home’s circuit breaker panel. It is usually in the basement or utility room. Open the panel door carefully.
Look for the breaker that controls the light switch. It might be labeled. If not, you may need to test each breaker.
Switch Off The Correct Breaker
Flip the breaker switch to the OFF position. This stops electricity flow to the switch. Confirm that the power is off before touching wires.
Use A Voltage Tester
A voltage tester checks if wires still carry power. Touch the tester to the wires in the switch box. No light or sound means power is off.
Never skip this step. It ensures your safety before handling wires.
Inform Others In Your Home
Tell family members about the power shutdown. This avoids accidental switch-on during your work. Place a note on the breaker panel as a reminder.
Remove The Old Switch
Removing the old light switch is the first step in replacing it safely. It requires care and attention to avoid electric shocks or damage. Follow simple steps to take out the old switch and prepare for the new one.
Always turn off the power at the circuit breaker before touching the switch. Use a voltage tester to make sure the wires are not live. Safety first.
Turn Off The Power
Find the circuit breaker that controls the switch. Flip it off to cut the electricity supply. Double-check by using a voltage tester on the switch wires. This step prevents electric shocks.
Remove The Switch Cover Plate
Use a screwdriver to take out the screws holding the cover plate. Gently pull the plate away from the wall. Keep the screws safe for later use.
Unscrew The Old Switch
Locate the screws holding the switch to the electrical box. Remove them carefully. Pull the switch out slowly, exposing the wires connected to it.
Disconnect The Wires
Note how the wires connect to the switch. Use a screwdriver to loosen the screws or release the wire clamps. Carefully pull the wires free from the old switch.
Identify Wiring Types
Identifying wiring types is the first step in wiring a light switch. It helps you know which wire does what. This knowledge keeps you safe and ensures the switch works correctly.
Wires come in different colors and sizes. Each color shows a different function. Understanding these colors is important before starting any electrical work.
Understanding Black, White, And Green Wires
Black wires carry electricity to the switch. They are called “hot” wires. White wires return electricity to the panel. These are “neutral” wires. Green or bare wires connect to the ground. They protect you from electric shocks.
Recognizing Single-pole And Three-way Switch Wires
Single-pole switches control one light or group of lights. They usually have two black wires. Three-way switches control lights from two places. They have three wires: two traveler wires and one common wire.
Identifying Cable Types: Nm And Conduit
NM cables are common in homes. They have multiple wires inside a plastic sheath. Conduit wiring uses metal or plastic tubes. Wires run inside the tubes for extra protection.
Connect The New Switch
Connecting the new light switch is a key step in the wiring process. It involves attaching the right wires to the correct terminals. Doing this safely ensures the switch works properly and prevents electrical hazards. Follow these simple steps to connect the new switch with confidence.
Attach Ground Wire
The ground wire is usually green or bare copper. It protects you from electric shock by directing electricity safely to the ground. Find the ground screw on the switch. Wrap the ground wire around this screw clockwise. Tighten the screw firmly to hold the wire in place. Make sure the wire is secure and not loose.
Connect Hot Wire
The hot wire carries electricity to the switch. It is often black or red. Identify the hot wire coming from the power source. Attach this wire to the brass or black screw on the switch. Wrap the wire tightly around the screw in a clockwise direction. Tighten the screw to ensure a strong connection. Loose wires can cause sparks or failure.
Secure Neutral Wire
The neutral wire usually has white insulation. Some switches do not require a neutral wire connection. Check your switch instructions first. If needed, connect the neutral wire to the silver screw. Wrap it securely and tighten the screw. Confirm all wires are connected firmly before closing the switch box.

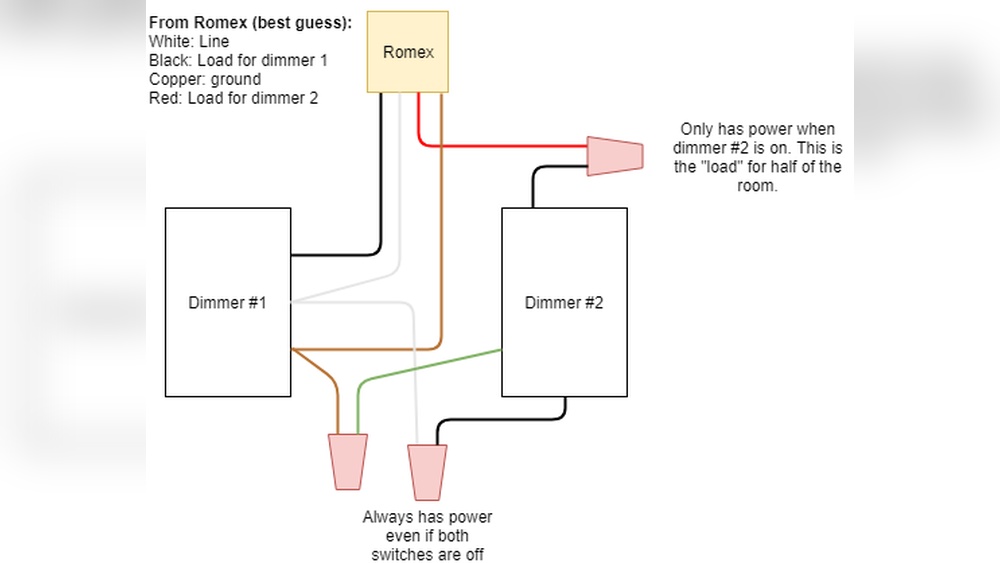
Credit: community.smartthings.com
Mount The Switch And Cover Plate
Mounting the switch and cover plate is a key step in installing a light switch. It secures the switch safely in place. It also gives a clean look to your wall. This step needs care and precision for safety and style.
Prepare The Wall Box
Check the electrical box in the wall. Make sure it is clean and free of debris. The box should be firmly attached to the wall studs. Loose boxes can cause problems later. Tighten any loose screws or nails.
Position The Switch
Place the switch inside the wall box. Align the screw holes on the switch with those on the box. Hold the switch steady to avoid damage. Make sure the switch toggle moves freely.
Screw The Switch In Place
Use the screws that came with the switch. Insert them into the holes and tighten gently. Do not overtighten; this can crack the switch or wall box. The switch should sit flush with the wall surface.
Attach The Cover Plate
Position the cover plate over the switch. Align the screw holes on the plate with those on the switch. Insert the screws and tighten them carefully. The plate should lie flat and cover the box edges.
Restore Power And Test
Restoring power and testing your new light switch is the final step in the installation process. It confirms the switch works properly and keeps you safe. Follow each step carefully to avoid problems or accidents.
Turn The Circuit Breaker Back On
Go to your circuit breaker panel. Find the switch you turned off earlier. Flip it back to the ON position. This restores electricity to the light switch.
Test The Light Switch
Go to the light switch you installed. Flip it up or down to turn the light on and off. The light should respond immediately. If it does not, double-check your wiring.
Check For Any Issues
Look for flickering lights or unusual sounds. These can signal wiring problems. If you notice anything strange, turn off the breaker again. Inspect your work or call a professional.
Troubleshooting Common Issues
Troubleshooting common issues helps fix light switch problems fast. Many problems happen during or after installation. Knowing simple fixes saves time and avoids damage.
Check each step carefully and follow safety rules. Turn off power before touching wires or parts. Use a tester to make sure no electricity flows.
Checking The Power Supply
First, verify the circuit breaker is not tripped. A flipped breaker stops power to the switch. Reset it by moving it fully off and on. If it trips again, call an electrician.
Use a voltage tester to check for current at the switch. No voltage means a wiring or breaker problem. Confirm wires connect tightly at the switch and panel.
Inspecting Loose Or Damaged Wires
Loose wires cause flickering or no light. Turn off power and remove the switch cover. Look for wires that are loose, disconnected, or broken. Tighten screws or reattach wires securely.
Replace any damaged wires to avoid hazards. Use wire strippers to expose fresh wire ends for connection. Ensure wires match the original color coding.
Testing The Switch Itself
Faulty switches can stop lights from working. Remove the switch and test it with a multimeter. Set the meter to continuity mode. Press the switch; the meter should beep or show zero resistance.
No beep means the switch is bad. Replace it with the same type and rating. Install the new switch following wiring instructions carefully.
Safety Tips And Precautions
Working with electrical wiring needs care and attention. Safety is the most important part of writing a light switch. Following clear safety steps prevents accidents and injury. This section shares key safety tips and precautions.
These tips help protect you and your home. Always respect electricity and take no risks. Use the right tools and follow rules carefully.
Turn Off Power At The Circuit Breaker
Switch off the power before starting work. Do not trust the wall switch alone. Confirm power is off by testing with a voltage tester. This prevents electric shocks and injuries.
Use Insulated Tools
Choose tools with insulated handles. They protect you from electric current. Avoid metal tools without insulation. Always check tools for damage before use.
Wear Safety Gear
Wear rubber-soled shoes to avoid shocks. Use safety goggles to protect your eyes. Gloves add extra protection when handling wires. Keep your work area dry and clean.
Double Check Wiring Instructions
Read wiring guides carefully before starting. Match wire colors exactly as instructed. Incorrect wiring can cause short circuits or fire. Take time to understand each step.
Keep Children And Pets Away
Clear the work area of children and pets. They can distract or get hurt. Keep tools and wires out of reach. Focus fully on the task for safety.
Frequently Asked Questions
What Tools Are Needed To Write A Light Switch?
You need a screwdriver, wire stripper, voltage tester, electrical tape, and a new light switch. Safety gear is also essential.
How Do I Safely Turn Off Power Before Installation?
Switch off the circuit breaker for the switch’s circuit. Use a voltage tester to confirm no power flows.
What Are The Basic Steps To Wire A Light Switch?
Turn off power, remove the old switch, connect wires to the new switch, secure it, and turn power back on.
How Can I Identify The Correct Wires For The Switch?
Look for the black (hot) wire for power, white (neutral), and green or bare for ground.
Conclusion
Wiring a light switch can be simple with the right steps. Always turn off power before starting. Use the correct tools to avoid mistakes. Connect wires carefully and secure them tightly. Test the switch after wiring to ensure it works.
Taking your time helps prevent accidents. Practice makes the process easier over time. You can handle basic electrical tasks safely at home. Keep learning and stay cautious for best results.